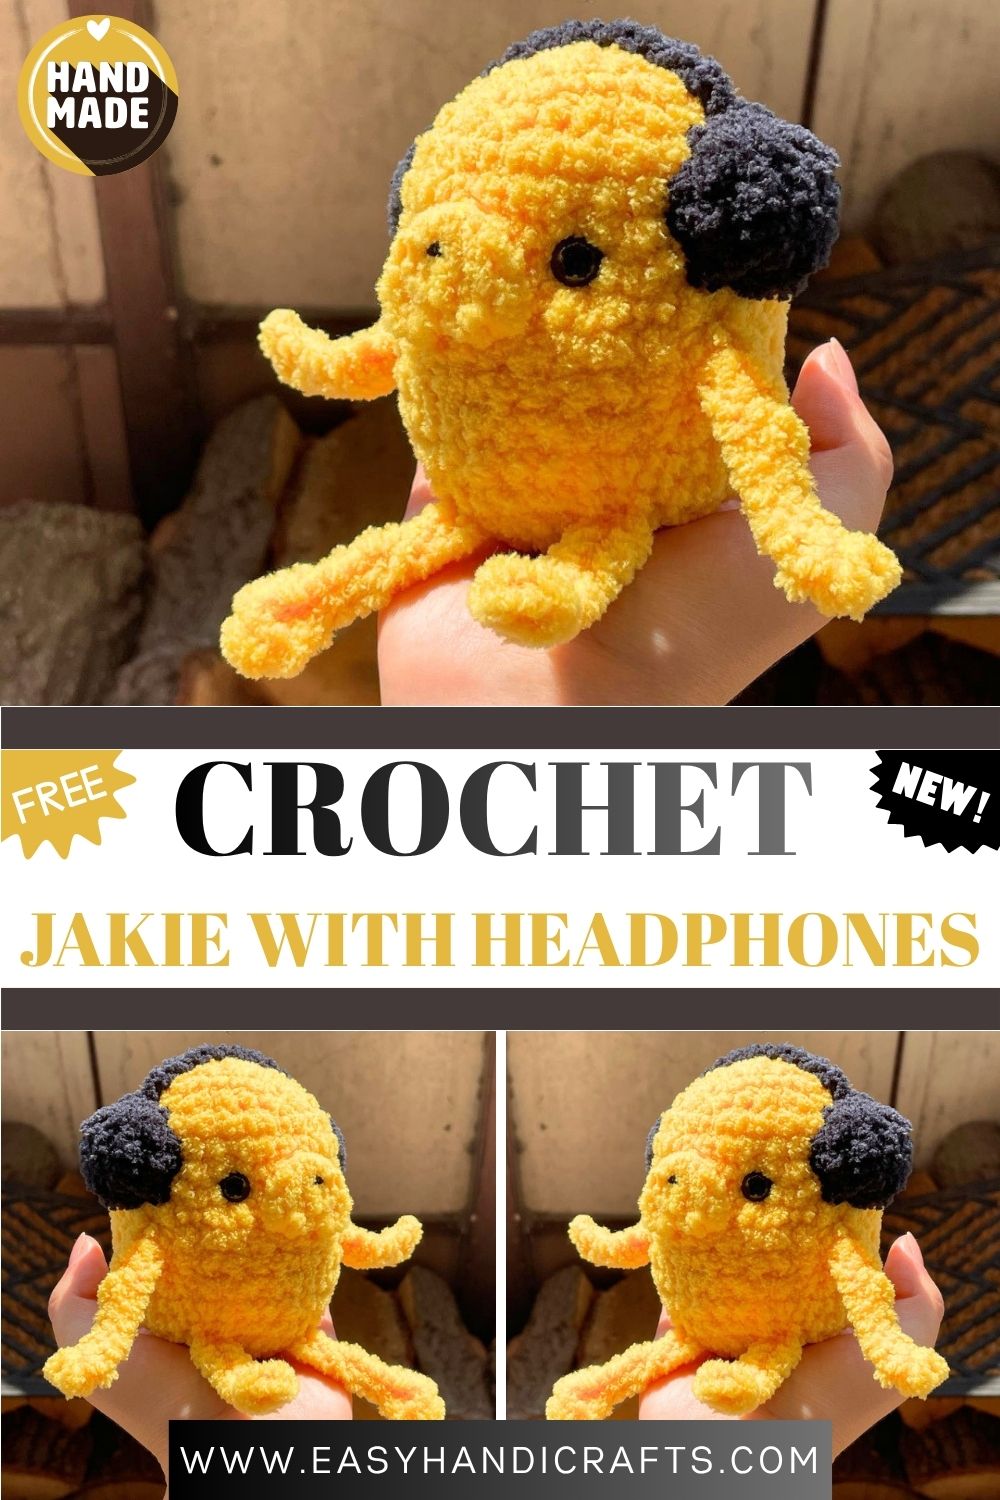
Kawaii Jake the Dog Inspired Crochet Plush | Handmade Amigurumi Fan Gift
A chunky, squishy Jake the Dog plush you can crochet in one sitting, this kawaii amigurumi captures every bit of that goofy, loveable charm in the most adorable way possible.
If you have ever wanted to crochet your own Jake the Dog from Adventure Time, this pattern is exactly what you have been waiting for. Not only does it combine bold yellow and crisp black into an instantly recognisable character, but it also works up surprisingly fast for such a detailed result. Furthermore, the built-in arms, legs, headphones, and nose give this plush a level of personality that makes it stand out from any other amigurumi you have made before. Because the steps are clear and beginner-friendly, even newer crocheters can confidently pick this up and finish it in a single afternoon. So grab your Alize Softy Plus yarn, set up your 5mm hook, and let’s bring Jake to life.
Skill Level
This pattern works well for beginners and intermediate crafters alike. As long as you can single crochet, increase, decrease, work a magic ring, and manage a simple chain, you already have every skill this cheerful Jake the Dog plush requires from start to finish.
Materials
- Chunky yarn in Yellow and Black (Alize Softy Plus recommended)
- 5mm crochet hook
- 10mm safety eyes
- Yarn needle
- Scissors
- Polyester fiberfill for stuffing
Abbreviations
- CH: chain
- MR: magic ring
- SC: single crochet
- HDC: half double crochet
- INC: increase — 2 SC in the same stitch
- DEC: decrease — 2 SC together
- SLST: slip stitch
- [ ]: stitch count at end of round
- X: repeat everything before this symbol
Pattern Notes
- This pattern draws inspiration from Jake the Dog from the animated series Adventure Time and suits personal use and handmade sales.
- All instructions follow US crochet terminology.
- Work in a continuous spiral throughout and avoid joining rounds unless stated otherwise.
- Always place a stitch marker to track the beginning of each round.
- Arms and legs are made by chaining directly from the last worked SC and going back along the chain.
- Original pattern by ig: shine. crafts — always credit the designer when sharing your finished work.
Pattern: Body, Arms & Legs (in Yellow)
- R1: 6SC in MR [6]
- R2: 6 INC [12]
- R3: (1SC, INC) x6 [18]
- R4: (2SC, INC) x6 [24]
- R5: (3SC, INC) x6 [30]
- R6–9: 30SC, 4 rounds [30]
- Insert safety eyes between rows 9 and 10, roughly 6 stitches apart.
- R10: 8SC, attach ARM, 12SC, attach ARM, 10SC [30]
- R11–14: 30SC, 4 rounds [30]
- R15: (3SC, DEC) x2, SC, attach LEG, 2SC, DEC, 2SC, attach LEG, SC, DEC, (3SC, DEC) x2 [24] Note: Row 15 alternates the (3SC, DEC) combination with the leg attachments and single decreases.
- Begin stuffing at this point.
- R16: (2SC, DEC) x6 [18]
- R17: (1SC, DEC) x6 [12]
- R18: 6 DEC [6]
- Fasten off and sew the hole closed.
Arms (make 2)
CH11. Starting in the 2nd chain from the hook: SC INC, then 9 SLST back along the chain. Make arms by chaining directly from the last worked SC on the body, then work back. Leave a tail for sewing if made separately.
Legs (make 2)
CH11. Starting in the 2nd chain from the hook: HDC INC, then 9 SLST back along the chain. Like the arms, the legs attach directly from the body row. Leave a tail for sewing if made separately.
Pattern: Nose (in Yellow)
Work loosely throughout this piece.
- In MR: CH1, 6HDC, SLST.
- Tighten the ring and leave a long tail for sewing onto the body.
Pattern: Headphones (in Black)
Speakers — make 2:
- R1: 6SC in MR [6]
- R2: 6 INC [12]
- R3: 12SC — Add one more round of SC here if extra thickness is needed.
- Stuff lightly before sewing. Leave a long tail for sewing onto the head.
Headband:
- Make a chain of approximately 10 stitches, leaving long tails at both the beginning and the end so you can sew it to each speaker later.
Assembly
First, sew the nose between rows 9 and 11, positioning it centrally on the front of the face. Next, sew the headphone speakers onto rows 7 to 10, placing one on each side of the head at an even height. After that, sew the headband across the top of the head, connecting both speakers neatly. Finally, embroider a tiny black nose detail using black yarn and your darning needle to complete Jake’s signature expression.
Common Mistakes to Avoid
- Misreading R10 and R15 — These are the rows where arms and legs attach directly into the body. Therefore, read both rows slowly and count every stitch before moving forward to avoid misplacement.
- Inserting eyes at the wrong time — Always place the safety eyes between rows 9 and 10 before the body closes further. Otherwise, repositioning them later becomes nearly impossible.
- Crocheting the nose too tightly — The pattern specifically says to work loosely on the nose piece. In contrast, a tight tension here makes the nose look small and flat instead of round and full.
- Skipping the stitch marker — Without a marker, tracking rounds in a continuous spiral gets confusing quickly. As a result, always mark the first stitch of every single round.
- Uneven headphone placement — If the speakers sit at different heights, the finished plush looks lopsided. Instead, count the rows carefully and pin both speakers in place before sewing them down.
- Under-stuffing before closing — Begin stuffing at row 15 and keep adding fiberfill as you decrease. Waiting until the end makes it very difficult to reach the upper body with enough filling.
Finishing Tips
- First, weave in all yarn ends securely with your yarn needle, especially around the arm and leg attachment points where the yarn can loosen with handling.
- Next, shape the body gently with both hands after stuffing. Jake’s body should look evenly round and full rather than lumpy or lopsided.
- Additionally, when embroidering the tiny black nose, use a doubled strand of black yarn for a bolder, cleaner result that shows up clearly against the yellow body.
- After attaching the headphones, check that the headband sits centred on top of the head. If it shifts to one side, simply remove it and resew it with the tension evenly distributed.
- As a final check, tug each arm and leg gently to confirm they are secured firmly. Because these pieces carry the most stress during play, reinforcing their attachment points is always worth the extra effort.
Customization & Variations
- Try different colour combinations — While yellow and black is the classic Jake palette, this same construction looks brilliant in orange and white for a Halloween version or grey and black for a more realistic dog look.
- Add a stretchy effect — Jake is famously known for his stretching powers. Consider making extra-long arms and legs using a longer chain to give your plush that signature rubbery, elongated look.
- Make a mini keychain version — Use fine weight yarn with a 2.5mm hook to crochet a tiny Jake. Then attach keychain hardware to the top for a charming Adventure Time bag charm.
- Crochet Finn to go alongside — Use white and blue yarn to make a matching Finn the Human plush using a similar base. Together, they make an incredible display and an unforgettable gift set.
- Personalise the headphones — Use a contrasting colour for the headband, such as white or silver, to give the headphones a more modern and detailed look.
- Seasonal accessories — Add a tiny crocheted crown for a Birthday Jake version, or stitch a small cape onto the back for a superhero edition that Adventure Time fans will immediately recognise.
- Create expression variations — Embroider different mouth shapes to give each Jake a unique expression. A wide grin, a sleepy smile, or a surprised open mouth each give the same plush a completely different personality.
Gifting Ideas
- Adventure Time fan gift — For anyone who grew up watching the show or still loves it today, a handmade Jake the Dog plush is a deeply nostalgic and personal gift they will genuinely cherish.
- Children’s birthday — This soft, chunky plush makes a wonderful birthday gift for kids. It is safe, squeezable, and built to handle enthusiastic play without falling apart.
- Cartoon lover’s gift — Even for people who have never watched Adventure Time, a kawaii yellow dog plush with headphones is charming enough to win anyone over immediately.
- Desk or shelf decoration — For students, gamers, or anyone who loves cute things on their workspace, a handmade Jake plush adds a playful, personalised touch that mass-produced figures simply cannot replicate.
- Craft fair item — Character-inspired amigurumi consistently attracts attention and sells well. Because this pattern comes together quickly, producing several pieces for a fair is entirely manageable.
- Get well soon gift — A soft, cheerful plush brings real comfort to someone feeling unwell. Above all, it shows that you put genuine time and care into making something just for them.
- Treat yourself — Not every handmade creation needs to be a gift. Keep this Jake for your own shelf, enjoy the process of making him, and celebrate the satisfaction of finishing a project you are truly proud of.
Conclusion
This kawaii Jake the Dog-inspired crochet plush is far more than just an amigurumi pattern; it is a love letter to one of the most beloved animated characters of a generation. From the round yellow body to the black headphones and that perfectly embroidered little nose, every detail of this plush brings Jake’s goofy, warm personality to life in a way that is genuinely hard not to smile at.
Whether you are making it for a devoted Adventure Time fan, a child who loves soft toys, or simply yourself, this pattern delivers a result that feels polished, characterful, and completely handmade in the best possible way. Not only is the construction approachable for beginners, but the finished piece also holds enough detail to impress even experienced crocheters.
So pick up your yellow Alize Softy Plus, queue up some Adventure Time in the background, and get started. Your very own handmade Jake the Dog is just a few rounds away. Mathematical! Happy crocheting!