Playfu Crochet Flat Shell Turtle Amigurumi Pattern
Dive into adorable stitches with this playful Crochet Flat Shell Turtle Amigurumi Pattern, quick, beginner-friendly, stash-busting, and irresistibly cute for gifts, markets, or pocket-sized joy.
Make a splash with the Playful Crochet Flat Shell Turtle Amigurumi Pattern, a speedy, beginner-friendly make that turns scraps into instant cuteness. Worked flat with minimal sewing, it’s travel-ready, relaxing, and perfect for batch crafting. Clear, step-by-step guidance, simple stitches, and easy shaping let you customize colors, size, and expressions for any vibe from pastel sweet to neon bold.

The slim profile sits neatly on bags, desks, and nursery shelves, while still feeling plush and huggable. Ideal for last-minute gifts, market inventory, or just a joyful mini project between bigger makes.
Uses:
- Keychains, bag charms, and zipper pulls
- Baby shower favors or nursery decor
- Craft fair bestsellers and gift toppers
Playful Crochet Flat Shell Turtle Amigurumi Pattern
Here’s a polished, transition-rich, and beginner-friendly guide to the Playfu Crochet Flat Shell Turtle Amigurumi Pattern, crafted for clear readability and smooth flow. To begin, you’ll enjoy a quick, relaxing make that’s perfect for gifts, craft fairs, or a cheerful desk buddy. Moreover, because the turtle’s body is worked flat and the shell is softly stuffed, the result is cute, neat, and travel-friendly.
Materials
- Yarn: Medium (4) weight cotton or acrylic in two colors (Body + Shell). Approximately 25–30 g for the body and 15–20 g for the shell (total: 40–50 g).
- Crochet hook: 3.5 mm (E-4). Alternatively, use 3.0 mm if you crochet loosely.
- Safety eyes: 6 mm pair (or googly eyes with non-toxic craft glue).
- Fiberfill: Approximately 8–12 g.
- Tapestry needle: Size 16–18 (blunt tip).
- Stitch markers: 1–2 for tracking rounds.
- Scissors and straight pins/clips for assembly.
Difficulty Level
Overall, this pattern is Beginner. You will use single crochet (sc), increases (inc), decreases (dec), magic circle, and light seaming. Therefore, if you can keep even tension and count stitches, you’re all set.
Special Features
- Minimal sewing; consequently, assembly is fast.
- Flat body with a plush shell; as a result, the shape stays tidy and cute.
- Clear eye placement; hence, no struggling in tight spaces.
- Customizable size and color; additionally, it’s stash-friendly.
Sizing Tips
With Medium (4) yarn and a 3.5 mm hook, your turtle typically measures 9–11 cm long (3.5–4.25 in). To size up, use bulky yarn and a 4–5 mm hook; to size down, use fine yarn and a 2.5–3.0 mm hook. Importantly, keep your stitches firm so stuffing does not peek through.
Legs (Make 4) 35–40 minutes total
Time per leg: 8–10 minutes.
- First, make a magic circle and place 6 sc into the ring (Round 1).
- Next, for Rounds 2–7, sc in each stitch to keep a slim tube (6 sts throughout).
- Then, fasten off and leave a long tail for sewing. Repeat until you have four legs.
Tutor suggestion: Immediately after tightening the magic circle, tie a tiny knot; consequently, it will never loosen.
Step-by-Step: Tail 8–10 minutes
- First, make a magic circle; work 4 sc into the ring.
- Then, Rounds 2–4: sc around (4 sts).
- Afterward, fold the tail and seam it flat by working 2 sc through both layers (Row 5).
- Finally, fasten off and leave a sewing tail.
Tip: Because Row 5 is worked flat, insert your hook cleanly through both layers; thus, the seam looks crisp.
Step-by-Step: Head, Neck, and Flat Body 60–75 minutes
- To start, Round 1: Magic circle; 4 sc.
- Next, Round 2: (sc, inc) x2 = 6.
- Then, Round 3: (2 sc, inc) x2 = 8.
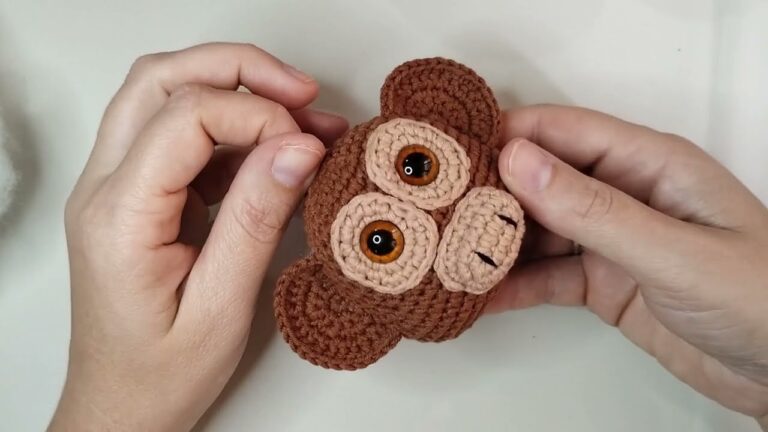
- Rounds 4–9: sc around (8). At this point, insert safety eyes between Rounds 3–4, roughly 4 stitches apart. Because the neck narrows later, this timing is essential.
- Now, lightly stuff the head and neck; as a result, shaping remains smooth.
- Round 10: (sc, inc) x4 = 12.
- Round 11: (2 sc, inc) x4 = 16.
- Rounds 12–13: sc around (16).
- Round 14: sc 5, inc, sc 7, inc, sc 2 = 18. Notably, these increases should sit on the body’s side edges.
- Rounds 15–19: sc around (18).
- Round 20: sc 4, dec, sc 7, dec, sc 3 = 16; therefore, the edges are subtly tapered.
- Rounds 21–22: sc around (16).
- Round 23: (2 sc, dec) x4 = 12.
- Round 24: (sc, dec) x4 = 8.
- Finally, fasten off and close the starting ring if any gap remains. Do not stuff the body section; hence, it stays flat.
Common mistakes (and fixes):
- Placing eyes too late. Instead, add eyes after Round 4; consequently, you avoid tight spaces.
- Misaligned edge shaping. If your increases/decreases drift, shift by 1 stitch; as a result, the silhouette stays balanced.
- Overstuffing the neck. Instead, use just enough filling; thus, the flat body won’t bulge.
Step-by-Step: Shell 45–60 minutes
- First, Round 1: Magic circle; 8 sc.
- Round 2: (sc, inc) x4 = 12.
- Rounds 3–4: sc around (12).
- Next, Round 5: (2 sc, inc) x4 = 16.
- Rounds 6–11: sc around (16) to build height.
- Then, Round 12: (2 sc, dec) x4 = 12.
- Rounds 13–14: sc around (12).
- At this stage, firmly stuff the shell. Because the body is flat, a plush shell creates contrast.
- Finally, Round 15: (sc, dec) x4 = 8; slip stitch, fasten off, and leave a long tail. If needed, add a touch more stuffing before closing.
Tutor suggestion: Stuff slightly more than you think; consequently, the shell sits round and cute rather than saggy.
Assembly 25–35 minutes
- First, position the tail at the back of the flat body (near Round 24). Then, stitch it on with small, even passes; as a result, it stays centered.
- Next, pin the front legs at approximately Rounds 12–13 on both sides; sew securely. Meanwhile, keep both legs aligned by counting rows.
- Then, pin the back legs at approximately Rounds 21–22 on both sides; sew to match the front spacing.
- Finally, place the shell centered on the body and sew it to the top layer only. Consequently, the underside remains flat and tidy. Bury the tail, and trim.
Avoid these pitfalls:
- Sewing the shell through both body layers. Instead, catch only the top layer; thus, the turtle remains flat.
- Skipping pins. By pinning, you ensure symmetry; therefore, the legs won’t drift.
Optional Embroidery 15–25 minutes
- First, thread a contrasting yarn (e.g., black) on a tapestry needle.
- Next, work small clusters of three short vertical lines, two stitches tall and one stitch apart, spaced evenly around the shell. Consequently, you create a simple, graphic texture.
- Finally, secure with a tiny knot, pull tails inside, and trim. Alternatively, try angled lines for a playful look.
Variations and Customizations
- Eyes: Use 6 mm safety eyes for a classic finish; alternatively, glue-on googly eyes add whimsy.
- Colors: Go classic green/brown, pastel rainbow, or bold neon-on-neutral. Furthermore, coordinating shell embroidery elevates the look.
- Size: For a mini keychain, switch to DK (3) yarn and a 3.0 mm hook; conversely, for a plushier toy, try bulky (5) yarn with a 4.5–5.0 mm hook.
- Uses: Add a jump ring for bag charms; moreover, stitch to a nursery garland or gift as party favors.
Tutor Suggestions and Pro Tips
- Consequently, reduce gaps: Use a smaller hook if you see stuffing peeking.
- Because small parts are easy to miscount, place a stitch marker at the first stitch of every round.
- If your magic circle loosens, immediately knot and weave; therefore, parts stay secure.
- For market prep, batch-make legs and tails first; as a result, assembly becomes ultra-fast.
Finishing Tips
- First, massage the shell gently to settle stuffing; then, smooth the edges with your fingers so stitches relax.
- Next, steam-block lightly with a handheld steamer held at a safe distance; consequently, fibers bloom and stitches even out. However, avoid direct heat on acrylic.
- Finally, weave in all ends neatly on the underside; thus, the top view remains clean.
Estimated Total Time
- Beginner: 2.5–3.5 hours, including assembly and embroidery.
- Intermediate: 1.5–2.5 hours.
Because the steps are modular, you can, for instance, finish legs and tail in under an hour, then complete the body and shell later. Consequently, this pattern fits perfectly into busy schedules.
In conclusion, the Playfu Crochet Flat Shell Turtle Amigurumi Pattern combines beginner-safe stitches, smart shaping, and minimal sewing for a fast, adorable make. Moreover, with exact materials, clear timing, and step-by-step flow, you’ll move confidently from magic circle to final stitch. Finally, customize colors, scale the size, and add simple embroidery so your turtle feels uniquely yours, whether it’s a gift, a market best-seller, or your new pocket pal. Happy crocheting!