Cute Crochet Crocodile Plush Amigurumi Pattern
This cute crochet crocodile plush pattern is a simple, beginner-friendly amigurumi tutorial using soft plush yarn. You’ll make a cuddly green croc with yellow back spikes, big cartoon eyes, and a sweet snout.
If you love soft, squishy amigurumi that looks adorable from every angle, this cute crochet crocodile plush pattern is for you. Inspired by a soft green plush crocodile with cheerful yellow back spikes and big cartoon-style safety eyes, this project is designed to be approachable for beginners while still looking polished and professional.
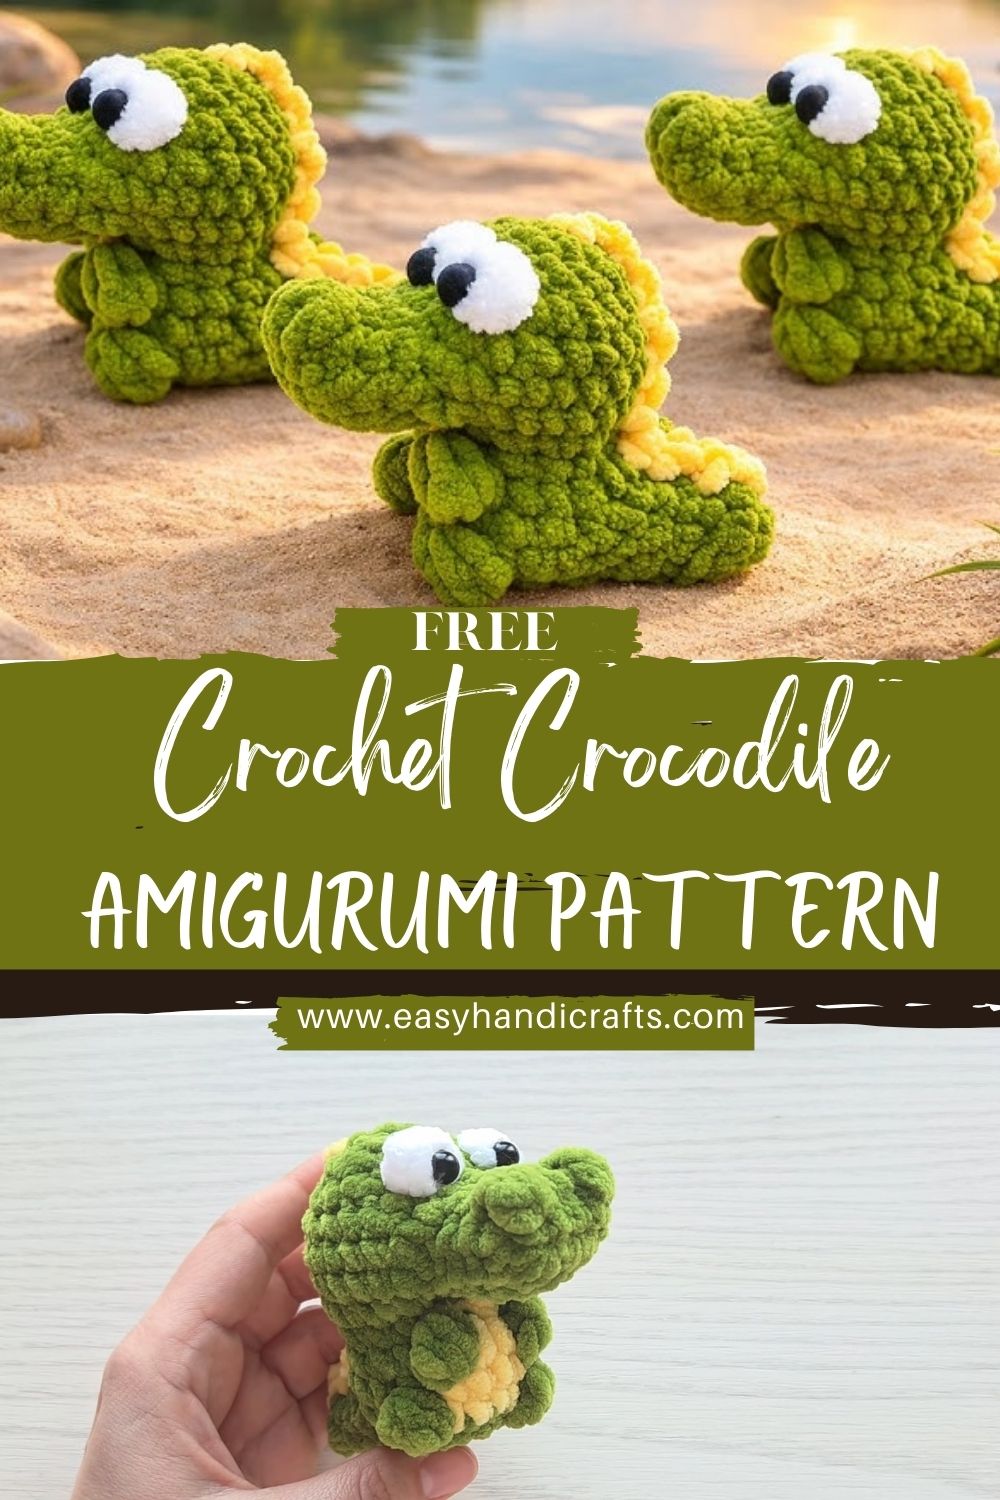
You’ll learn how to shape the head and snout, add tiny legs, crochet a curved tail, and finish with those signature back spikes that give your croc its playful “dino-croc” vibe. Best of all, plush/chenille yarn creates a velvety texture that’s perfect for a kid-friendly crochet plushie (or a gift that will absolutely steal the spotlight).
Note: This is an estimated instructional pattern inspired by the design, not an exact original pattern.
Disclaimer: Final stitch counts and shaping may vary slightly from the original creator’s pattern.
Visual Description: What Your Crochet Crocodile Will Look Like
This plush crocodile is designed to be round, cuddly, and cartoon-cute, with soft curves and simple shapes that sew together cleanly.
Overall appearance
- A small-to-medium plush with a chubby body and a slightly oversized head for extra cuteness.
- A friendly look that sits nicely on a shelf but is also huggable.
Body shape
- The body is an oval tube (stuffed firmly) with a slightly flatter belly so it can sit.
Snout/mouth
- A short, rounded snout that’s stitched onto the head.
- Optional simple mouth line (embroidered) for extra expression.
Large expressive eyes
- Big safety eyes placed wide apart for a gentle, cartoon feel.
- Slightly above the snout so the face looks “awake” and friendly.
Small legs
- Four stubby little legs—simple cylinders that keep the style beginner-friendly.
Tail
- A tapered tail that curves slightly and adds balance when sitting.
Back spikes/scales
- A row of soft, rounded spikes/scales running from the top of the head down the back and onto the tail.
- Made in yellow for a bright, playful contrast.
Colour combination + yarn texture
- Green plush/chenille yarn for the body and head.
- Yellow plush yarn for back spikes (and optional belly accent).
- Plush yarn gives a soft, velvety texture that looks extra “store-bought” when finished.
Materials Needed
- Plush/chenille yarn (super bulky #6 recommended)
- Main colour: soft green
- Accencolouror: yellow (spikes/scales)
- Crochet hook: 4.5–6.0 mm (use the size that gives tight stitches with your yarn)
- Stuffing: polyester fiberfill
- Safety eyes: 14–18 mm (or size that suits your plush)
- Yarn needle (tapestry needle)
- Stitch marker
- Scissors
Skill Level
Beginner to intermediate
You should know (or be ready to practice) these basics:
- Magic ring (MR)
- Single crochet (sc)
- Increase (inc)
- Decrease (dec)
- Slip stitch (sl st)
- Chain (ch)
- Simple seaming (sewing parts together)
Abbreviations
- MR = magic ring
- sc = single crochet
- inc = increase (2 sc in the same stitch)
- dec = decrease (single crochet 2 together)
- sl st = slip stitch
- ch = chain
- rep = repeat
Pattern note: Work in continuous rounds unless stated. Use a stitch marker to track rounds.
Crochet Crocodile Plush Pattern (Step-by-Step)
Finished Size (Approx.)
With super bulky plush yarn and a 5.0 mm hook: 8–11 in (20–28 cm) depending on tension and stuffing.
General Tips Before You Start
- Plush yarn hides stitches—count carefully and feel the stitch tops with your fingers.
- For a neater plushie, aim for tight, even tension so stuffing won’t show.
Head (Green)
R1: MR, 6 sc (6)
R2: inc x6 (12)
R3: (sc, inc) rep x6 (18)
R4: (2 sc, inc) rep x6 (24)
R5: (3 sc, inc) rep x6 (30)
R6: (4 sc, inc) rep x6 (36)
R7–R10: sc around (36)
Shape the face slightly (gentle taper):
R11: (4 sc, dec) rep x6 (30)
R12: (3 sc, dec) rep x6 (24)
R13: (2 sc, dec) rep x6 (18)
Start stuffing the head firmly now (keep adding stuffing as you go).
R14: (sc, dec) rep x6 (12)
R15: dec x6 (6)
Fasten off, close the opening.
If you prefer a slightly bigger head, add 1–2 extra plain rounds at 36 stitches (R7–R10 area).
Snout (Green)
The snout is a small oval “muzzle” piece that you sew on.
R1: MR, 6 sc (6)
R2: inc x6 (12)
R3: (sc, inc) rep x6 (18)
R4: sc around (18)
Fasten off with a long tail for sewing. Lightly stuff (just enough to puff it).
Placement tip: Centre the snout low on the face, leaving space above for the eyes.
Body (Green)
R1: MR, 6 sc (6)
R2: inc x6 (12)
R3: (sc, inc) rep x6 (18)
R4: (2 sc, inc) rep x6 (24)
R5: (3 sc, inc) rep x6 (30)
R6: (4 sc, inc) rep x6 (36)
R7–R11: sc around (36)
To make a slightly flatter belly/sitting shape, do a gentle decrease:
R12: (4 sc, dec) rep x6 (30)
R13–R14: sc around (30)
R15: (3 sc, dec) rep x6 (24)
Stuff firmly, especially the lower half.
R16: (2 sc, dec) rep x6 (18)
R17: (sc, dec) rep x6 (12)
R18: dec x6 (6)
Fasten off, close.
Legs (Make 4, Green)
Small, simple legs keep the look cute and beginner-friendly.
R1: MR, 6 sc (6)
R2: (sc, inc) rep x3 (9)
R3–R5: sc around (9)
Lightly stuff the bottom only (optional).
Fasten off with a long tail for sewing.
For chunkier legs: add one more round at 9 sts, or increase to 12 sts in R2.
Tail (Green)
R1: MR, 6 sc (6)
R2: (sc, inc) rep x3 (9)
R3: sc around (9)
R4: (2 sc, inc) rep x3 (12)
R5–R7: sc around (12)
R8: (2 sc, dec) rep x3 (9)
R9–R10: sc around (9)
Lightly stuff (tail looks best a bit softer than the body).
Fasten off with a long tail for sewing.
Back Spikes/Scales (Yellow)
You can choose a simple, plush-friendly spike strip that’s easy for beginners.
Option A: Simple spike strip (recommended for plush yarn)
Ch 16–22 (length depends on how long you want from head to tail).
Starting in the 2nd ch from the hook:
- sl st, sc, hdc, dc, hdc, sc, sl st (this makes one “bump/spike”)
Repeat the bump sequence across the chain until you reach the end.
Fasten off with a long tail.
How it looks: rounded, soft spikes—perfect for a cartoon croc.
Option B: Individual sewn bumps
Make 6–10 tiny bumps:
MR 5 sc, sl st to join, fasten off. Sew in a line.
Eye Placement (Big Cartoon Eyes)
- Place safety eyes on the head between R7–R9, about 6–8 stitches apart (adjust as needed for head size).
- Always test placement before locking washers:
- Hold the snout in place.
- Make sure the eyes sit above the snout for a friendly expression.
Safety note: Safety eyes are not recommended for children under 3. Use embroidered eyes instead (see Customisation Ideas).
8) Final Assembly (Putting It All Together)
- Sew the head to the body
- Align the head so that the face points slightly upward (a cute posture).
- Stitch around securely with tight, even seams.
- Attach the snout
- Centre it on the lower front of the head.
- Stitch around the edge, adding a touch more stuffing if needed.
- Sew on the legs (4)
- Front legs: attach to the lower sides near the front of the body.
- Back legs: attach symmetrically near the back.
- Keep them slightly forward-facing for a cuddly look.
- Attach the tail
- Sew the tail to the back of the body, slightly angled upward or sideways for personality.
- Add the yellow back spikes.
- Pin the spike strip from the top of the head down the centre of the back and onto the tail.
- Sew with small stitches, so it lies neatly and doesn’t twist.
- Final shaping
- Add a bit more stuffing if the neck or belly feels soft.
- Massage the plush to smooth lumps (plush yarn hides seams beautifully).
Customization Ideas
- Different colours: mint + cream belly, teal + orange spikes, or pastel rainbow spikes.
- Size variations:
- Use thinner yarn (worsted) for a smaller croc.
- Use thicker plush yarn and a larger hook for a jumbo plush.
- Embroidered eyes option: stitch sleepy eyes or happy curved eyes with black yarn (great for baby-safe toys).
- Keychain version: make with DK/cotton yarn, reduce rounds, and add a small keyring loop (ch 10, sl st back).
Tips for Beginners (Especially with Plush Yarn)
- Maintain tension: keep stitches tight so stuffing won’t peek through.
- Count rounds carefully: use a stitch marker every round; plush texture can hide stitch tops.
- Stuffing tips:
- Stuff in small pieces for an even shape.
- Avoid overstuffing the snout and tail—slightly so it looks cuter.
- Sewing parts neatly: pin pieces first (or use stitch markers as pins), then sew slowly around edges.
- Handling plush yarn:
- If you lose your place, feel for the “V” tops of stitches with your fingers.
- Consider using a slightly smaller hook than the yarn label suggests.
Why You’ll Love This Pattern
- Beginner-friendly shapes (mostly spheres and tubes)
- Fast results with plush yarn and simple stitches
- Adorable character design with big eyes and bright back spikes
- Great gift idea for kids, baby showers (embroidered eyes), or crochet plush collectors
- Easy to customize into different crocodiles, alligators, or even tiny dinos
Conclusion
This cute crocodile plush is the kind of amigurumi that makes people smile instantly, with a soft green body, bright yellow spikes, and lovable cartoon eyes. Take your time, count your stitches, and enjoy the process. Once you finish one, you may want to make a whole crocodile family in different colours.