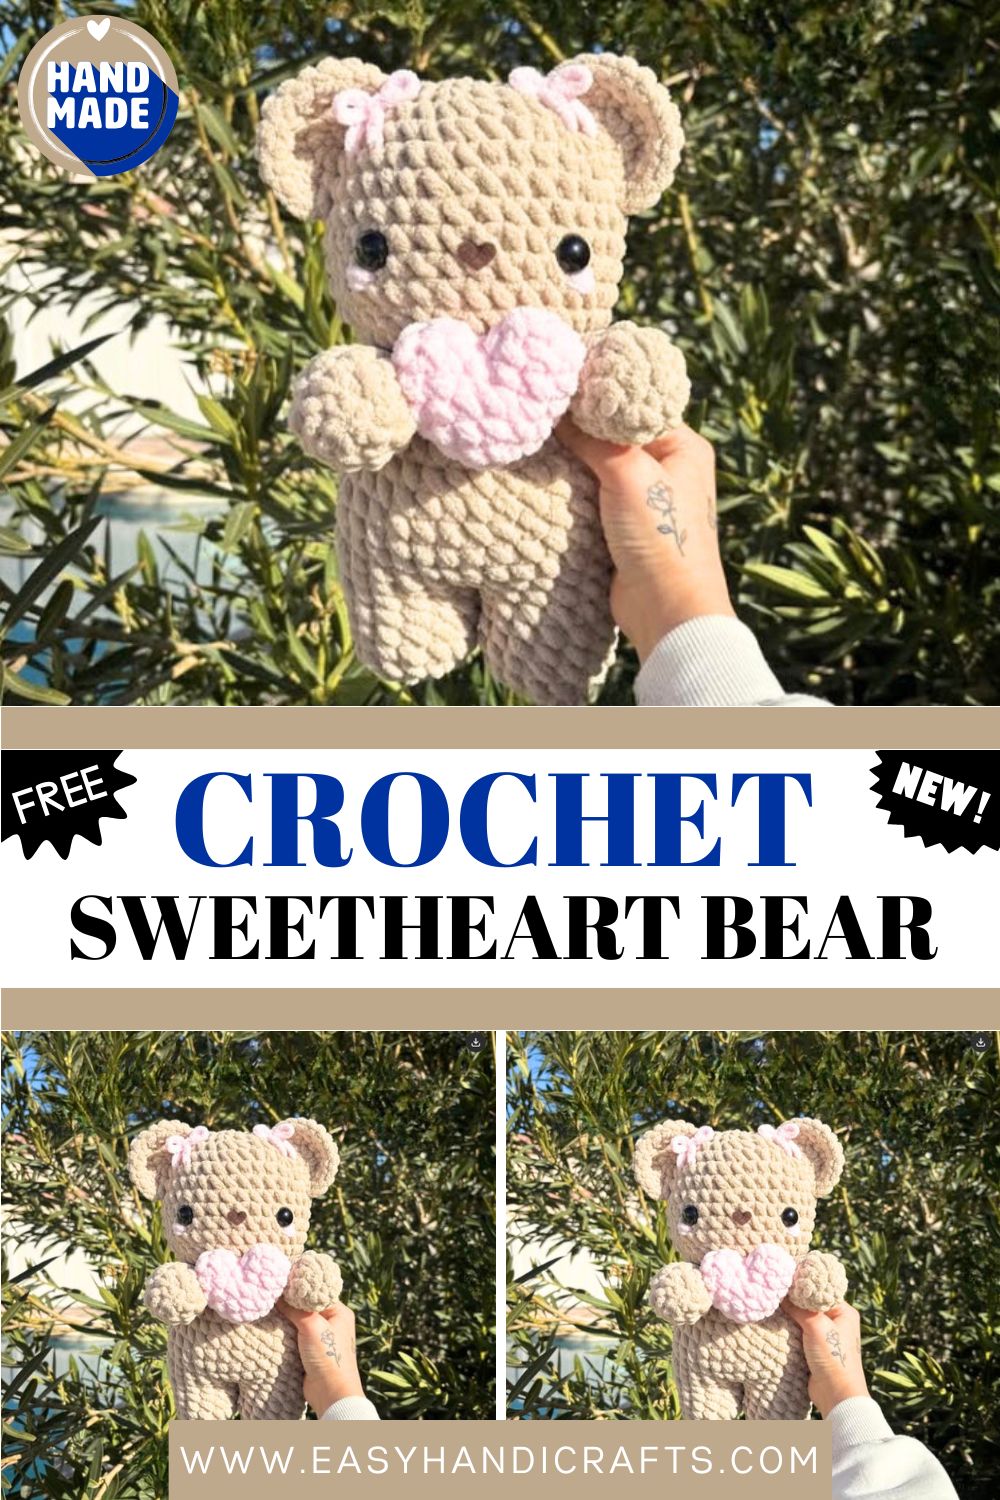
Cute Crochet Baby Sweetheart Bear Pattern Perfect for Gift
I finished the last stitch, picked up that Crochet Baby Sweetheart Bear, and my heart genuinely melted. There’s just something different about seeing a handmade creation held in those tiny arms. If you’re looking for your next favorite make, I promise this is the one.
This Crochet Baby Sweetheart Bear started as a one-time project for a friend’s birthday gift. I picked up my hook, chose the softest Bernat Blanket yarn I had in my stash, and honestly did not expect much. What came out of that session was this chubby little bear holding a perfectly shaped crocheted heart between its arms. The blush cheeks, the tiny ear bows, the squishy body every single detail just came together in the best way. Three people asked me to make one for them before I had even finished weaving in my ends. So naturally, I wrote the pattern down and now here we are. Welcome I am so glad you stopped by.
Skill Level
Honestly? If you can single crochet, increase, decrease, and work in the round without completely losing your mind, you can make this bear. I would call it beginner-friendly with just a tiny bit of patience needed for the heart shape.
What You Will Need
- Crochet hook — I used a 5.5mm and it worked out perfectly
- Yarn — Bernat Blanket for both the bear body and the heart (so soft, so worth it)
- 18mm safety eyes — do not go smaller, bigger eyes give so much more personality
- Scissors and a darning needle
- A stitch marker — trust me, do not skip this one
- Felt for the nose, or just grab some acrylic yarn and embroider it on
- Polyester stuffing — stuff it well, a floppy bear is a sad bear
Quick Abbreviations
- sc — single crochet
- inc — increase
- dec — decrease
- ch — chain
- FLO — front loops only
- FO — fasten off
- SL ST — slip stitch
- MR — magic ring
Let’s Make This Bear
Head
R1. 6 sc in a MR (6) R2. inc x 6 (12) R3. (sc, inc) x 6 (18) R4. (2sc, inc) x 6 (24) R5. (3sc, inc) x 6 (30) R6. (4sc, inc) x 6 (36) R7–13. sc around for 7 rounds (36) R14. (4sc, dec) x 6 (30) R15. (3sc, dec) x 6 (24) R16. (2sc, dec) x 6 (18)
SL ST and fasten off with a short tail. Pop your safety eyes in between R10 and R11, about 6 stitches apart. Stuff the head nicely and firmly before closing. Cut a tiny nose from felt and stitch it on, or if felt is not your thing, just embroider it both look adorable.
Ears — Make Two
Fasten off and leave a nice long tail. Sew the ears right on top of the head, somewhere between R5 and R9. I like to pin them first and step back to check the placement before committing.
Body — Starting With the Legs
R1. sc 7 in a MR (7) R2. inc x 7 (14) R3. inc, sc 13 (15) R4. FLO sc around (15) R5–7. sc around for 3 rounds (15)
Fasten off the first leg only leave a good long tail, you will need it later. Make the second leg the same but do not fasten off.
R8. Still on your second leg, connect it to the first with a single crochet. That stitch counts as your first stitch of the round. Sc 14 around the first leg, then 15 around the second leg (30) R9–15. sc around for 7 rounds (30)
If there is a little gap between the legs where you joined them, just use that tail from the first leg to sew it closed neatly from the inside.
R16. (3sc, dec) x 6 (24) R17. (2sc, dec) x 6 (18)
SL ST, fasten off with a long tail. Stuff the body well and sew the head right on top.
Arms — Make Two
R1. sc 5 in a MR (5) R2. inc x 5 (10) R3–10. sc around for 8 rounds (10)
Fasten off and leave a long tail. Give the arms a little stuffing not too much and sew them vertically below the neck. The vertical placement is the key detail here because it means the arms naturally curve forward to hold the heart. Super cute, very intentional.
Tail
R1. 8 sc in a MR (8) R2. sc around (8)
Fasten off. A little stuffing, a little sewing, right between R10 and R11 on the back. Done.
Heart
R1. 6 sc in a MR (6) R2. inc x 6 (12) R3. sc around (12) R4. (sc, inc) x 6 (18) R5. sc around (18)
First Hump: Skip 9 stitches and make your first sc there. Work 8 more sc around that hump. Then (sc, dec) x 4 to bring it down to 6 stitches. Fasten off, stuff it, and close the hole.
Second Hump: Slip knot your yarn and join into any stitch on the second hump with a sc. Work 7 more sc, and for that very last stitch, decrease together with the stitch sitting right in the center of the heart. This pulls both humps together with no gap between them. That little trick is what makes the heart actually look like a heart. (sc, dec) x 4 down to 6 stitches. Fasten off, stuff, and close.
Now sew or glue that heart right into your bear’s arms. Embroider some little rosy cheeks, tie tiny yarn bows onto the ears, and take a moment to appreciate what you just made.
Customization Ideas
- Swap the yarn color completely a dusty rose bear with a cream heart is genuinely dreamy
- Make a mini version using fingering weight yarn and a 2.5mm hook for a keychain or bag charm
- Skip the felt nose and try a small button instead for a slightly different look
- Use contrasting yarn colors for the heart a bright red heart on a neutral bear never gets old
- Add a tiny crochet scarf or bow tie if you want to give your bear a little extra personality
- Make a whole set in seasonal colors cream and gold for Christmas, lavender and white for Easter
Mistakes I Made So You Do Not Have To
- I completely forgot to attach my safety eyes before stuffing the head on my very first attempt. Learn from my pain eyes go in before stuffing, always
- Skipping the stitch marker during the long body rounds is how you end up with a mysteriously lopsided bear and no idea where things went wrong
- The gap between the legs looks alarming at first but it is totally fixable with the yarn tail do not stress about it
- Over-stuffing the arms makes them stick straight out instead of hanging natural light stuffing only for the arms
- On the heart, do not skip that center decrease on the second hump it is a small stitch with a big impact on the final shape
- Rushing the sewing-on stage after spending so long on the crochet itself is a very real temptation but take your time, it shows in the finished piece
Finishing Like You Mean It
- Use a ladder stitch to attach the head it gives you an invisible seam that looks really clean and professional
- Pin everything before sewing, seriously, just pin it. Five minutes of pinning saves you from a very crooked-looking bear
- Weave in your ends properly and trim them short so nothing pokes out later
- For the blush, a little embroidery floss in soft pink works beautifully, or even actual cosmetic blush dabbed on with a cotton swab if you want a softer effect
- If the body looks a little uneven after assembly, a very light steam from an iron held a few inches away can smooth things out surprisingly well
- Tuck the heart gently between the arms and add a few hidden stitches to keep it sitting right where it belongs
Who Would Love This as a Gift?
- A best friend going through a hard time – because sometimes a small handmade thing says more than any words could
- A new baby – soft yarn, no small parts if you embroider the nose, and genuinely the sweetest nursery decor
- Your person on Valentine’s Day – handmade beats store-bought every single time
- Someone who collects cute things – this bear absolutely belongs on a shelf
- A market or craft fair customer – these sell out fast, make extras
- You made it, you deserve to keep one
To Wrap It Up
If you make it all the way to the end of this Crochet Baby Sweetheart Bear pattern and hold up your finished Crochet Baby Sweetheart Bear, I genuinely hope it makes you smile. These little projects are so much more than just yarn and a hook they are time and care stitched into something that lasts. Share your finished bear, tag me so I can see it, and most importantly, enjoy every single round of making it. You did a great thing today.