Peaceful Crochet Simple Monkey Keychain Amigurumi Pattern & Instructions
This adorable, Crochet Simple Monkey Keychain Amigurumi is the perfect beginner-friendly crochet project! Follow this easy pattern with clear instructions and bring your little monkey to life with this cute crochet keychain!
Amigurumi is a delightful and relaxing hobby, and this peaceful crochet monkey keychain is an excellent way to begin your journey into creating tiny, cuddly crocheted creatures.
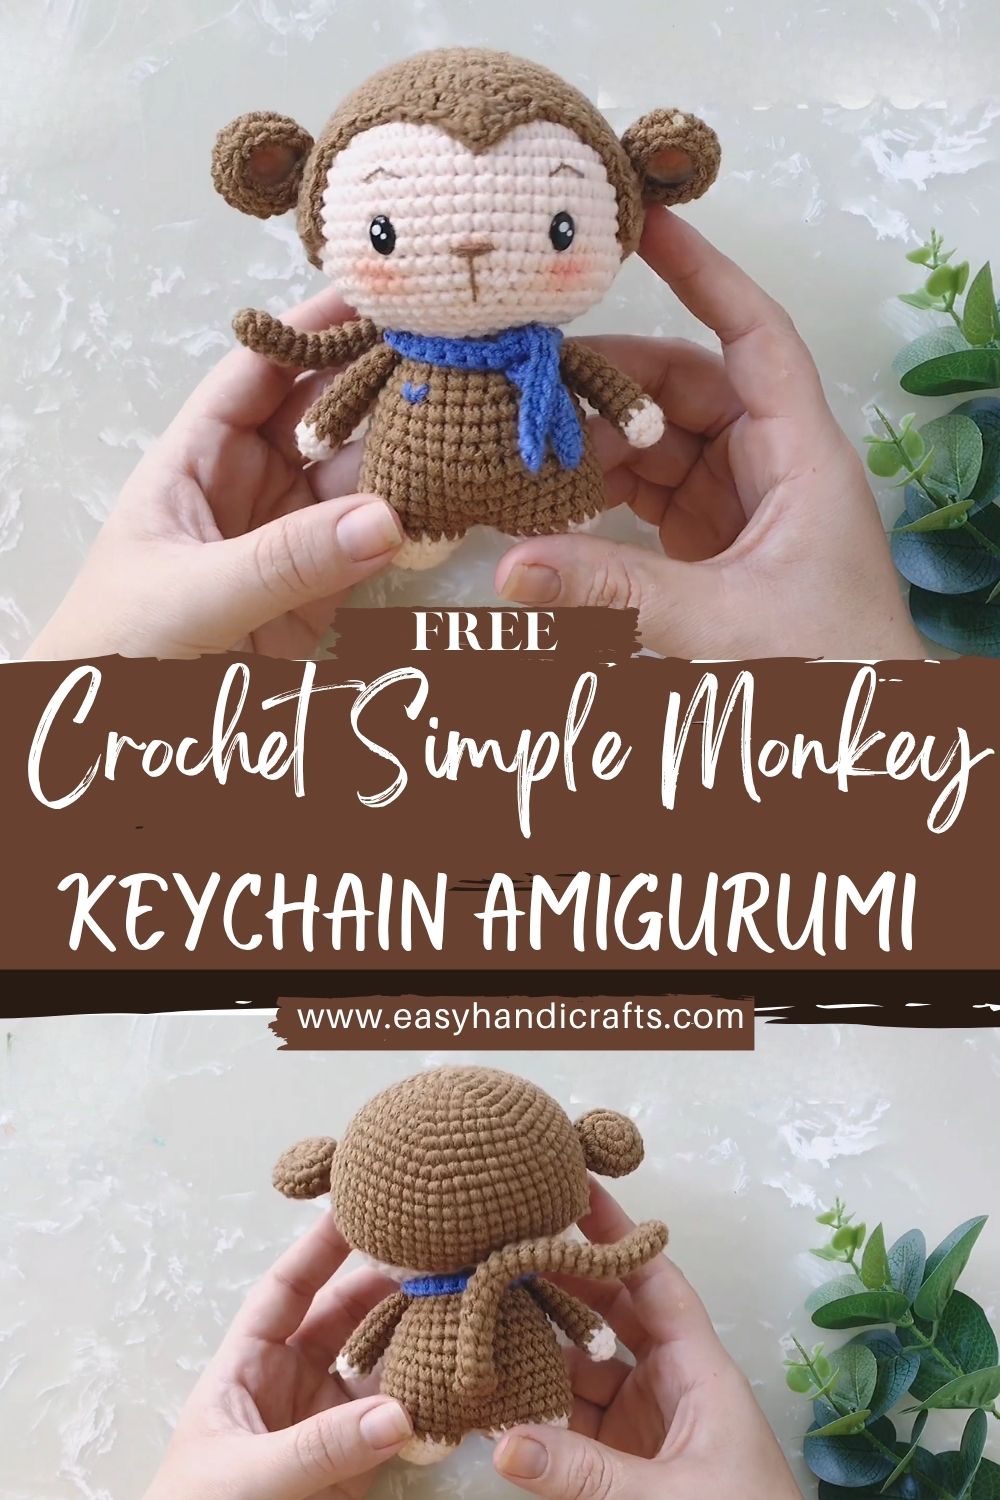
The pattern is designed for beginners, with clear steps to guide you through creating the monkey’s head, body, and other parts. The result will be an adorable little friend that you can carry with you everywhere! This is an ideal, easy amigurumi pattern for those who want to practice their skills and create a simple monkey amigurumi keychain.
Materials Required for Your Crochet Monkey Keychain
Before we dive into the crochet pattern, let’s gather all the materials you’ll need to complete your simple crochet monkey keychain:
- Yarn – You’ll need a couple of different colors. For the body and head, use brown yarn; for the scarf, use blue yarn (or a color of your choice). Any yarn with a medium weight (such as worsted weight) will work best.
- Crochet Hook – A 2.5mm crochet hook should work well with the yarn mentioned above.
- Stitch Markers – These are useful to keep track of your rounds.
- Fiberfill Stuffing – This is used to give the monkey its soft, cuddly shape.
- Keychain Ring – To turn your completed crochet monkey into a keychain.
- Embroidery Thread – For the eyes, nose, and other small facial details.
- Yarn Needle – This will be used for sewing the different parts of the monkey together.
- Scissors – For cutting yarn and finishing off your crochet pieces.
Abbreviations:
- SC – Single Crochet
- INC – Increase
- DEC – Decrease
- CH – Chain
- SL ST – Slip Stitch
- FO – Fasten Off
Step-by-Step Guide to Crocheting the Simple Monkey Keychain
1. Crocheting the Monkey’s Head
Start with a magic ring (also known as an adjustable ring) to begin the head. The magic ring will ensure that the first round is tightly closed. This is important for amigurumi because we want a seamless appearance.
Round 1:
In the magic ring, crochet 6 single crochets (SC).
Pull the yarn tail to tighten the ring.
Use a stitch marker to mark the beginning of your round.
Round 2:
Make 2 single crochets (SC) in each stitch (12 stitches in total).
You’ll increase the number of stitches in the second round to shape the head’s base.
Round 3:
1 SC in the first stitch, 2 SC in the next stitch. Repeat this around (18 stitches in total).
Round 4-6:
1 SC in each stitch around for three rounds (18 stitches in total).
Continue crocheting until the head is the desired size. It should be a small, round ball.
Finish the head by adding the embroidery thread to create eyes, a small nose, and a mouth. You can also add little rosy cheeks for a cute touch!
2. Crocheting the Body of the Monkey
For the body, you’ll start with a technique similar to the head, but with more stitches to create a slightly larger shape.
Round 1:
Start with a magic ring, and crochet 6 single crochets (SC).
Tighten the ring and place a stitch marker to mark your round.
Round 2:
Increase by making 2 single crochets (SC) in each stitch (12 stitches in total).
Round 3:
1 SC in the first stitch, 2 SC in the next stitch. Repeat this around (18 stitches in total).
Round 4-7:
1 SC in each stitch around (18 stitches in total).
At this point, you’ll notice the body taking shape.
You’ll want to stop increasing after a few rounds and simply crochet around for the remaining rounds until you’ve reached the desired body length.
3. Making the Arms and Legs
The arms and legs of your amigurumi monkey are small, cylindrical shapes.
Arms:
Start with a magic ring and crochet 6 single crochets.
Increase to 12 stitches, then continue crocheting until the arms are about 2 inches long.
Stuff lightly and attach them to the body’s sides.
Legs:
Start similarly to the arms, making small tubes.
After a few rounds, stuff the legs lightly and sew them to the body, ensuring they are evenly positioned.
4. Creating the Ears and Tail
The ears are small and round. Using brown yarn, create two small circles for the ears. Attach them to the top of the head.
For the tail, crochet a small, spiral-shaped piece that tapers to a point. The monkey’s tail can be curled or left straight. Once done, sew the tail onto the back of the body.
Conclusion:
This peaceful Crochet Simple Monkey Keychain Amigurumi is an ideal project for a beginner looking to practice their amigurumi skills. With a cute, fun design, you’ll have a charming little monkey to show off or give as a gift to someone special. Enjoy the process and have fun crocheting!