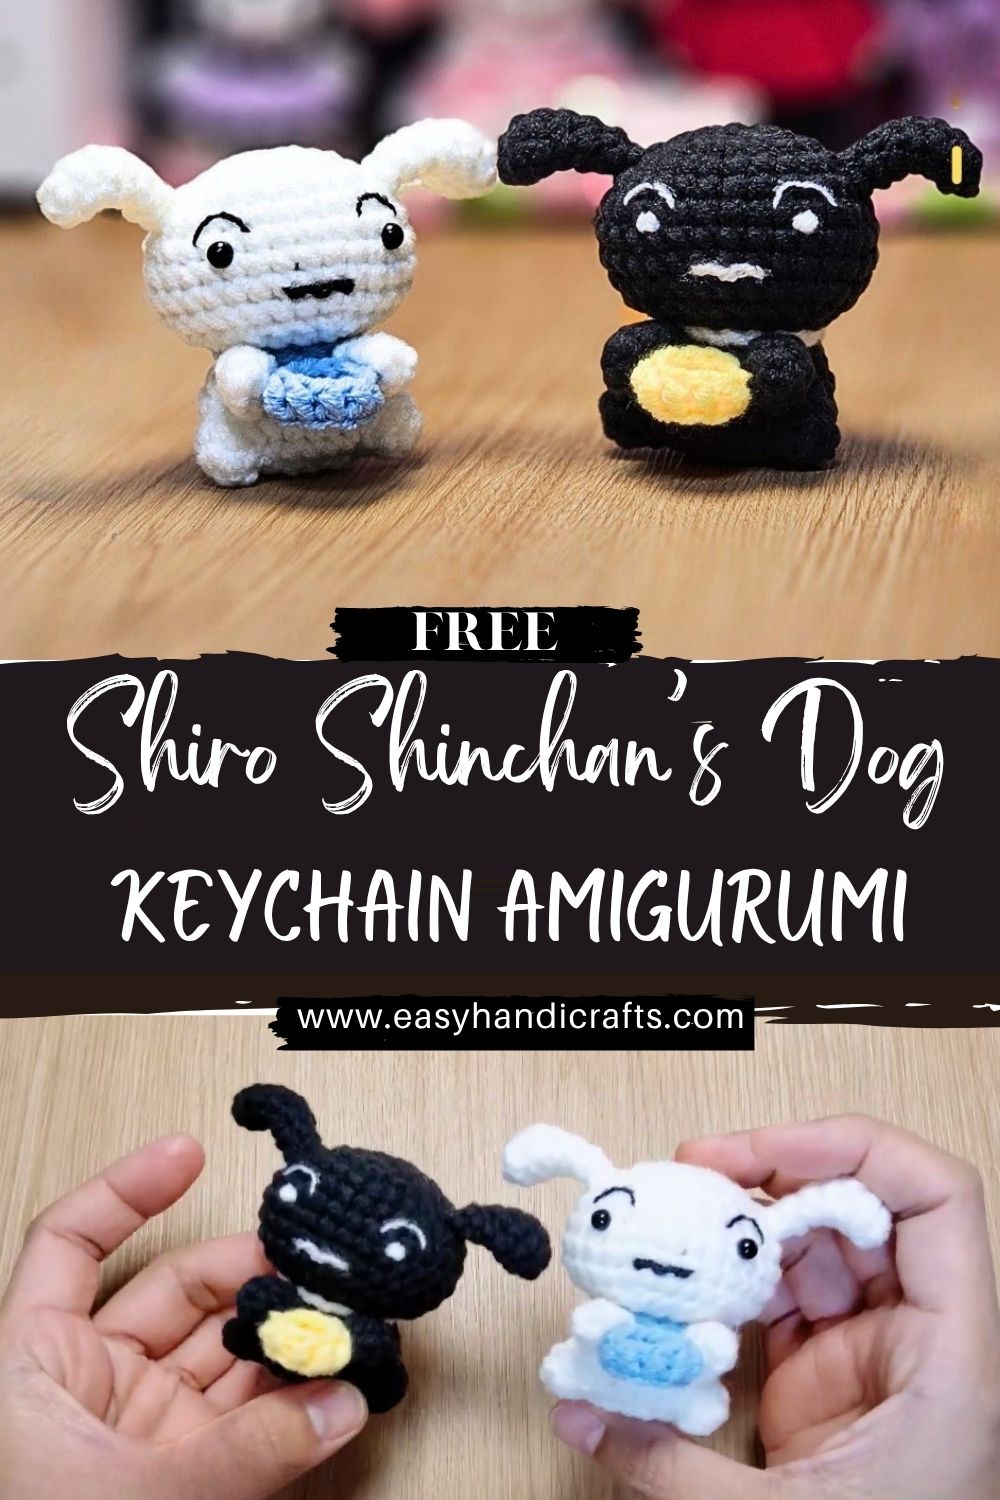
Crochet Shiro Shinchan’s Dog Black and White Keychain Amigurumi Pattern
If you’ve ever wanted a small amigurumi project you can finish in an afternoon, this Shiro Shinchan’s Dog Keychain is such a fun place to start. It’s quick, cute, and doesn’t require complicated shaping—just simple rounds and a bit of sewing at the end.
What makes this pattern extra special is that it’s designed to look like Shiro in a clean black-and-white crochet keychain style, so even beginners can achieve a polished result. If you’re searching for a Shiro keychain pattern, a Shinchan dog amigurumi, or an easy crochet dog keychain idea, you’re in the right spot.
Amigurumi is the art of crocheting small stuffed items—usually animals or characters—by working in continuous rounds. The magic is that you can create a full character using only a handful of basic stitches: single crochet, increases, and decreases.
This Shiro Shinchan’s Dog Keychain is a great beginner amigurumi because the pieces are small, the shaping is gentle, and the details are simple. Plus, it makes a sweet little gift, a backpack charm, or a personal accessory for your keys. Even if you’re new to crocheting characters, this Shinchan dog keychain comes together in a friendly, forgiving way.
Materials Needed
- Yarn (medium/worsted or DK works too)
- White yarn (main color)
- Black yarn (for ears/details)
- Crochet hook: 2.5–3.5 mm (choose a smaller hook than your yarn label suggests for tight stitches)
- Fiberfill stuffing
- Safety eyes (6–8 mm) or black embroidery thread to stitch eyes
- Embroidery thread (black for nose/mouth; optional pink for tiny blush)
- Tapestry needle (for sewing pieces)
- Scissors
- Stitch marker (or a scrap of yarn)
- Keychain hardware (split ring + small chain or lobster clasp)
- Optional: a tiny bit of felt for the nose, fabric glue (if you prefer), and strong thread for attaching the keychain
Abbreviations (US terms):
- MR = magic ring
- sc = single crochet
- inc = increase (2 sc in one stitch)
- dec = decrease (single crochet 2 stitches together)
- sl st = slip stitch
- ch = chain
- st(s) = stitch(es)
Notes before you start:
- Work in continuous rounds (don’t join unless stated).
- Use a stitch marker to track the first stitch of each round.
- Stuff firmly but gently—especially for a keychain, you want it to keep its shape.
Step-by-Step Instructions
1) Head (white)
Round 1: MR, 6 sc (6)
Round 2: inc in each st (12)
Round 3: (sc, inc) x6 (18)
Round 4: (2 sc, inc) x6 (24)
Round 5: (3 sc, inc) x6 (30)
Rounds 6–9: sc around (30) for 4 rounds
Round 10: (3 sc, dec) x6 (24)
Round 11: (2 sc, dec) x6 (18)
- Add eyes now (if using safety eyes): place between Rounds 7–8, about 5–6 stitches apart.
Round 12: (sc, dec) x6 (12) - Start stuffing the head.
Round 13: dec x6 (6)
Fasten off, close the opening.
Nose/Mouth (embroidery):
Using black thread, stitch a small oval nose and a tiny line for a mouth. Keep it simple—small details read best on mini keychains.
2) Body (white)
Round 1: MR, 6 sc (6)
Round 2: inc in each st (12)
Round 3: (sc, inc) x6 (18)
Round 4: sc around (18)
Round 5: (2 sc, inc) x6 (24)
Rounds 6–8: sc around (24) for 3 rounds
Round 9: (2 sc, dec) x6 (18)
Round 10: sc around (18)
Round 11: (sc, dec) x6 (12)
Stuff firmly.
Round 12: dec x6 (6)
Fasten off, close.
3) Arms (make 2, white)
Round 1: MR, 6 sc (6)
Round 2: sc around (6)
Round 3: sc around (6)
Round 4: sc around (6)
Lightly stuff (or leave unstuffed for a flatter look).
Fasten off, leave a long tail for sewing.
4) Legs (make 2, white)
Round 1: MR, 6 sc (6)
Round 2: (sc, inc) x3 (9)
Rounds 3–4: sc around (9)
Lightly stuff.
Fasten off, leave a tail.
5) Ears (make 2, black)
Round 1: MR, 6 sc (6)
Round 2: (sc, inc) x3 (9)
Round 3: sc around (9)
Flatten the ear (don’t stuff), then sl st through both layers across the top to close for a neat edge—or simply leave it open and stitch flat.
Fasten off, leave a tail.
6) Tail (white)
Round 1: MR, 5 sc (5)
Rounds 2–5: sc around (5)
Don’t stuff (or add a tiny pinch if you like).
Fasten off, leave a tail for sewing.
Assembly Instructions
Take your time here—assembly is where Shiro’s personality really appears.
- Attach the head to the body
- Center the head on top of the body.
- Sew around the neck opening securely.
- Tip: add a little extra stuffing right before fully closing the seam if the neck looks soft.
- Sew on the ears (black)
- Place them on the upper sides of the head.
- Angle them slightly outward for a cute, alert look.
- Stitch firmly since keychains get handled a lot.
- Attach arms
- Sew arms to the sides of the body just under the head seam.
- Keep them slightly forward for a “hugging” pose.
- Attach legs
- Sew legs to the lower front of the body.
- Make sure Shiro looks balanced from the front view (this matters even for a keychain).
- Attach tail
- Sew the tail to the lower back of the body.
- Add the keychain hardware.
- Best option: thread strong yarn or sewing thread through the top of the head (or the back of the head/neck area), knot securely, and attach to the chain/ring.
- If you want extra strength, stitch through a few times in the same spot and hide the knot inside the head.
- Final touches
- Weave in all ends.
- Optional: add tiny blush dots with pink thread, or a small white highlight stitch on the eyes if you embroidered them.
Tips for Beginners
- Use a stitch marker every round. It’s the easiest way to avoid “mystery increases” and uneven shapes.
- Keep stitches tight. If you see stuffing through the fabric, go down a hook size.
- Count your stitches, especially after increase/decrease rounds—one missed stitch can change the shape fast on small projects.
- Pin pieces before sewing. A couple of pins (or spare yarn scraps) can save you from crooked ears.
- Don’t overstuff tiny parts. Arms and ears usually look best lightly stuffed or left flat.
Conclusion
That’s it—your Shiro Shinchan’s Dog Keychain is ready to hang out on your keys, bag, or pencil pouch. Small amigurumi projects like this are honestly the best confidence boosters because you get a finished, adorable result without a huge time commitment.