Make This Whimsical Crochet Fairy Top Pattern
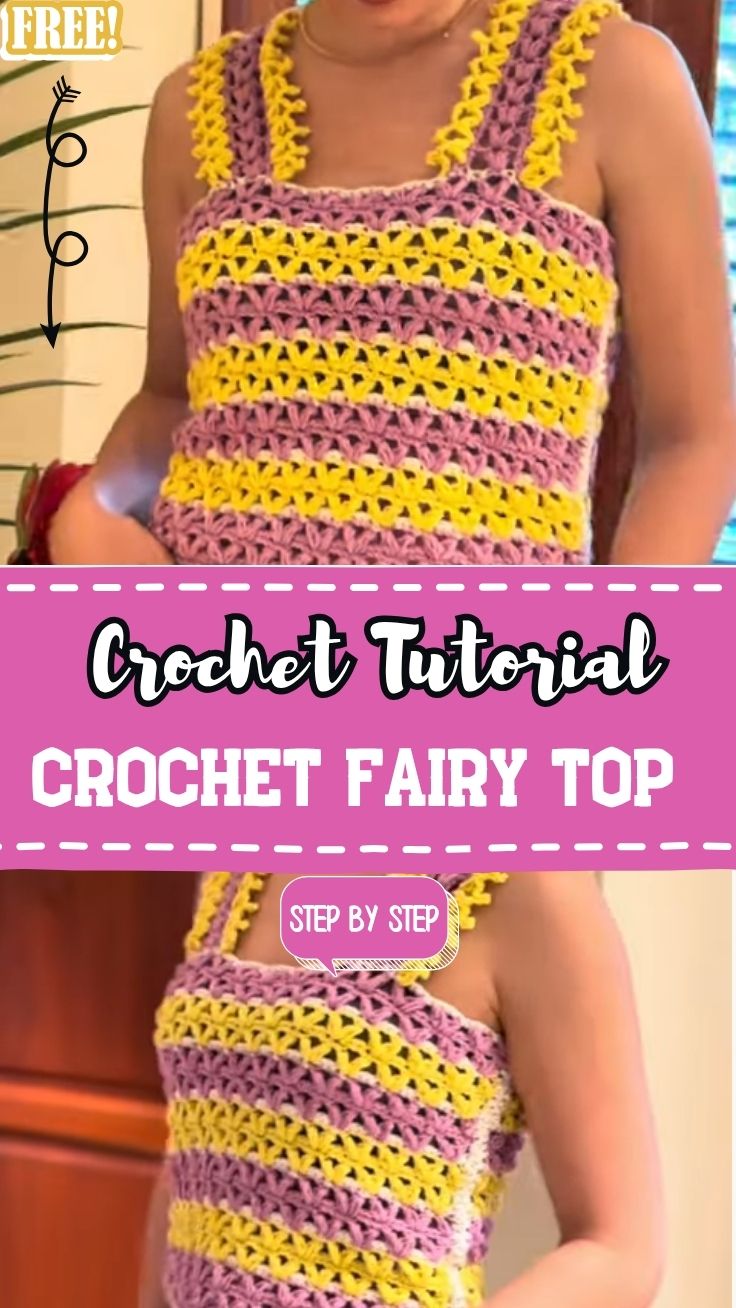
Soft yellow and lilac yarn spill across the table like petals catching afternoon light, and that’s exactly the mood behind this Whimsical Crochet Fairy Top Pattern a breezy, lace-textured piece that turns a few simple stitches into something that looks pulled straight from a woodland storybook.
What makes this project genuinely fun is how it pairs two techniques that don’t usually sit side by side: a tight magic ring foundation and an airy, open shell mesh that grows outward like wings unfolding. The crochet pattern below walks through every round shown in the photos, so even a first-timer can follow along stitch by stitch without guessing what comes next.
Pattern Overview
This fairy top starts small and stays small on purpose a magic ring anchors the very first stitches, and from there the hook builds outward in a lacy shell mesh that expands one round at a time. Two colorways, a soft yellow and a dusty lilac, are worked separately and then joined, giving the finished piece a two-tone, wing-like effect that feels handmade rather than mass-produced.
Each round only adds a handful of stitches, so the shape stays light, stretchy, and quick to memorize.
Skill Level
Beginner to confident beginner. Anyone comfortable with chains, single crochet, and a basic increase can manage this beginner crochet project — the shell mesh looks intricate but actually repeats the same small cluster over and over.
Materials and Supplies
- Yarn: worsted weight (4) cotton-blend yarn in two colors — soft yellow and dusty lilac (2 small skeins, roughly 50g each, cover a child-size top)
- Hook: 4.0mm (G/6) crochet hook
- Notions: yarn needle for weaving ends and joining pieces
- Scissors: small, sharp fabric scissors
- Stitch marker: one, to track the start of each round
- Optional accessories: narrow satin ribbon or small pearl buttons for the straps, and a tiny decorative flower appliqué for the neckline
Crochet Techniques Used
- Magic ring (adjustable ring start)
- Chain stitch and single crochet
- Shell stitch / mesh clusters for the open, lacy texture
- Increase and decrease for shaping the bodice curve
- Color joining and seaming for the two-tone motif
- Sewing pieces together with a whipstitch or mattress stitch
Step-by-Step Fairy Top Pattern
Step 1 – Starting the Foundation Ring
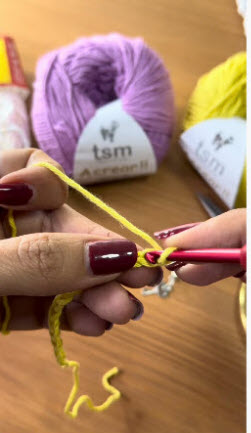
Begin with the yellow yarn and form a magic ring, leaving a short tail to tighten later. Chain 3 to act as the first stitch of the round, exactly as pictured in the opening step the loop stays loose enough to slide the hook through freely but snug enough that it won’t unravel while you work the first few stitches.
Pro Tip: Keep the magic ring’s tail pinched between two fingers while you make the first round; it stops the whole ring from twisting before it’s tightened.
Step 2 – Building the First Cluster Round
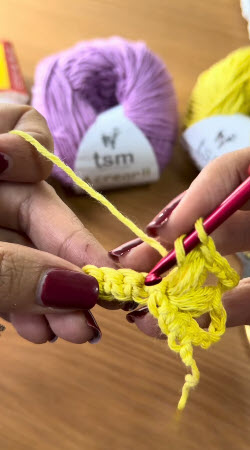
Work the first shell cluster directly into the ring: 2 double crochet, chain 1, 2 double crochet into the same loop, then close with a slip stitch. Stitch check: count six double crochet stitches sitting around the ring before pulling the tail tight this keeps the very center of the fairy top flat instead of cupped.
Step 3 – Growing the Shell Mesh
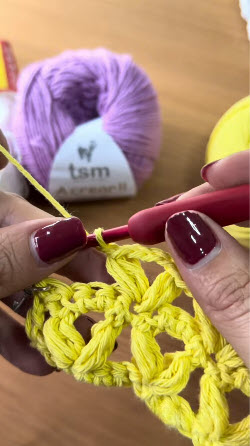
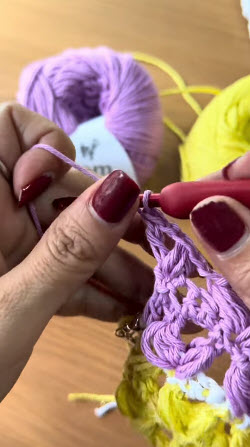
Round two onward is where the lace pattern really shows, matching the open mesh seen taking shape in the yellow sample. Chain 2, skip the first stitch, then work a shell (2 double crochet, chain 1, 2 double crochet) into the chain-1 space of the round below. Repeat around, joining with a slip stitch to the top of the starting chain.
- Round 2: 8 shells total
- Round 3: 10 shells total
- Round 4: 12 shells total
Measure now: lay the piece flat after round 4 – it should sit roughly 10–11 cm across. If it’s cupping instead of lying flat, add one extra shell evenly around the next round.
Step 4 – Switching to the Lilac Motif
Set the yellow piece aside and repeat Steps 1–3 with the lilac yarn to create a matching second motif, following the same shell-mesh growth shown in the lilac sample. This second piece becomes the opposite side of the bodice, so the top reads as a two-tone fairy silhouette once both motifs are joined.
Fit check: hold both motifs side by side before joining they should match in round count and diameter within half a centimeter.
Step 5 – Joining the Two Motifs
With the yarn needle, whipstitch the yellow and lilac motifs together along one straight edge, leaving the top open for the neckline and the bottom open to flow freely as the hemline. Weave in the joining tail securely so the seam doesn’t pull apart with wear.
Step 6 – Shaping the Neckline and Straps
Along the top edge, work a round of single crochet to smooth the neckline, then chain 30–35 stitches on each shoulder point to form the straps. Single crochet back down each chain, fasten off, and weave in ends.
Step 7 – Finishing Touches
Add a round of picot edging (chain 3, slip stitch into the first chain) around the hem and neckline for a delicate, fairy-wing finish. Tie on the ribbon straps or stitch the small buttons in place if using them instead of crocheted straps.
Beginner Tips for a Neater Fairy Top
- Keep every stitch tight and even loose tension makes the shell mesh sag instead of holding its lacy shape
- Use a stitch marker at the start of each round so you never lose track of where a round begins
- Block the finished piece lightly with a damp cloth to open up the shell pattern and even out the edges
- Count stitches after every round for the first four rounds small mistakes compound quickly in mesh patterns
Design Customization Ideas
Playing With Colors
Swap the yellow and lilac for mint and blush, or work the whole top in a single ombré-dyed yarn for a softer, blended fairy look.
Cute Accessories
Add tiny crocheted flowers along the neckline, a ribbon tie at the back, or a scattering of small pom-poms along the hem for extra whimsy.
Mini Size Variations
Scale the pattern down using a 3.5mm hook and fewer rounds for a doll-sized version, or size up with bulkier yarn and an extra round or two for a toddler fit.
Bonus Section: Caring for Your Fairy Top
Hand wash the finished piece in cool water with a gentle detergent, then lay it flat on a towel to dry the open shell mesh can stretch out of shape in a dryer or when hung wet. Reshape the picot edging by hand while damp so it dries crisp and even.
Frequently Asked Questions
What is the best yarn for amigurumi and light garments like this?
A worsted weight cotton-acrylic blend holds stitch definition well and keeps the shell mesh crisp without going stiff, which makes it a strong pick for both amigurumi and airy pieces like this fairy top.
How do I make a crochet piece firm and well-shaped?
Work with a hook one size smaller than the yarn label suggests and keep tension consistent tighter stitches hold their shape and stop mesh patterns from sagging over time.
How long does this project take?
Most makers finish both motifs, the joining, and the edging in three to four relaxed evenings, faster with practice once the shell repeat becomes familiar.
Wrap Up and Try It Yourself
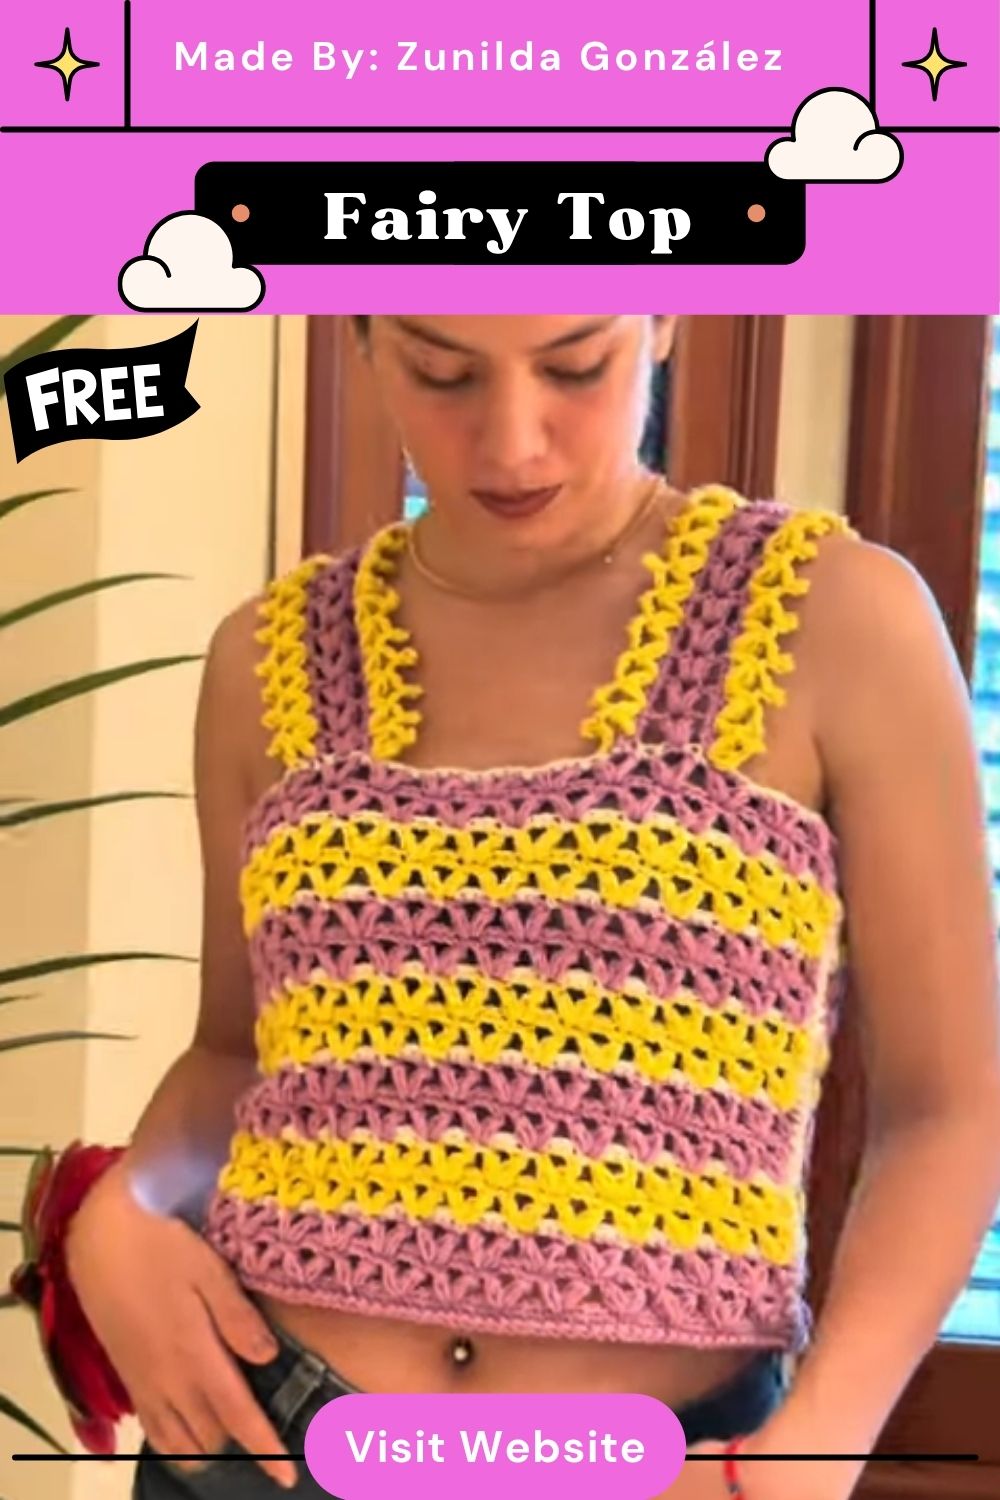
From a single magic ring to a two-tone lace bodice, this fairy top proves that a handful of repeated shells can turn into something genuinely enchanting. Grab the yarn, cue up the tutorial, and let the mesh grow round by round share a photo once it’s off the hook, because every fairy top turns out a little different in the best way.