Crochet Flip Flop Sandals Pattern for Beach Outfits
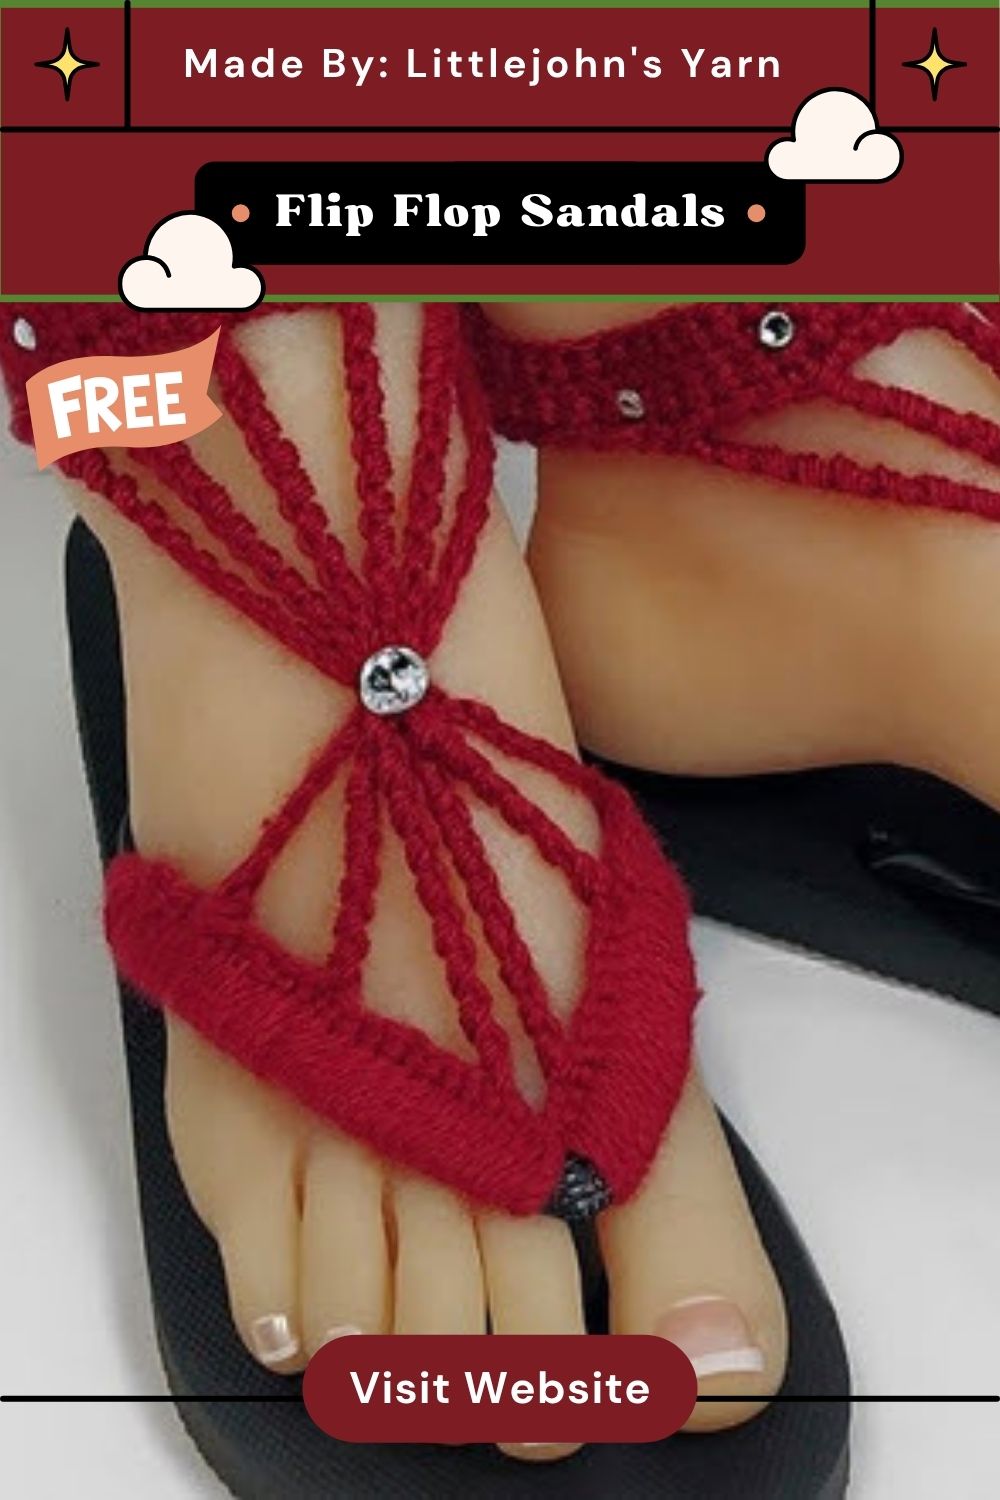
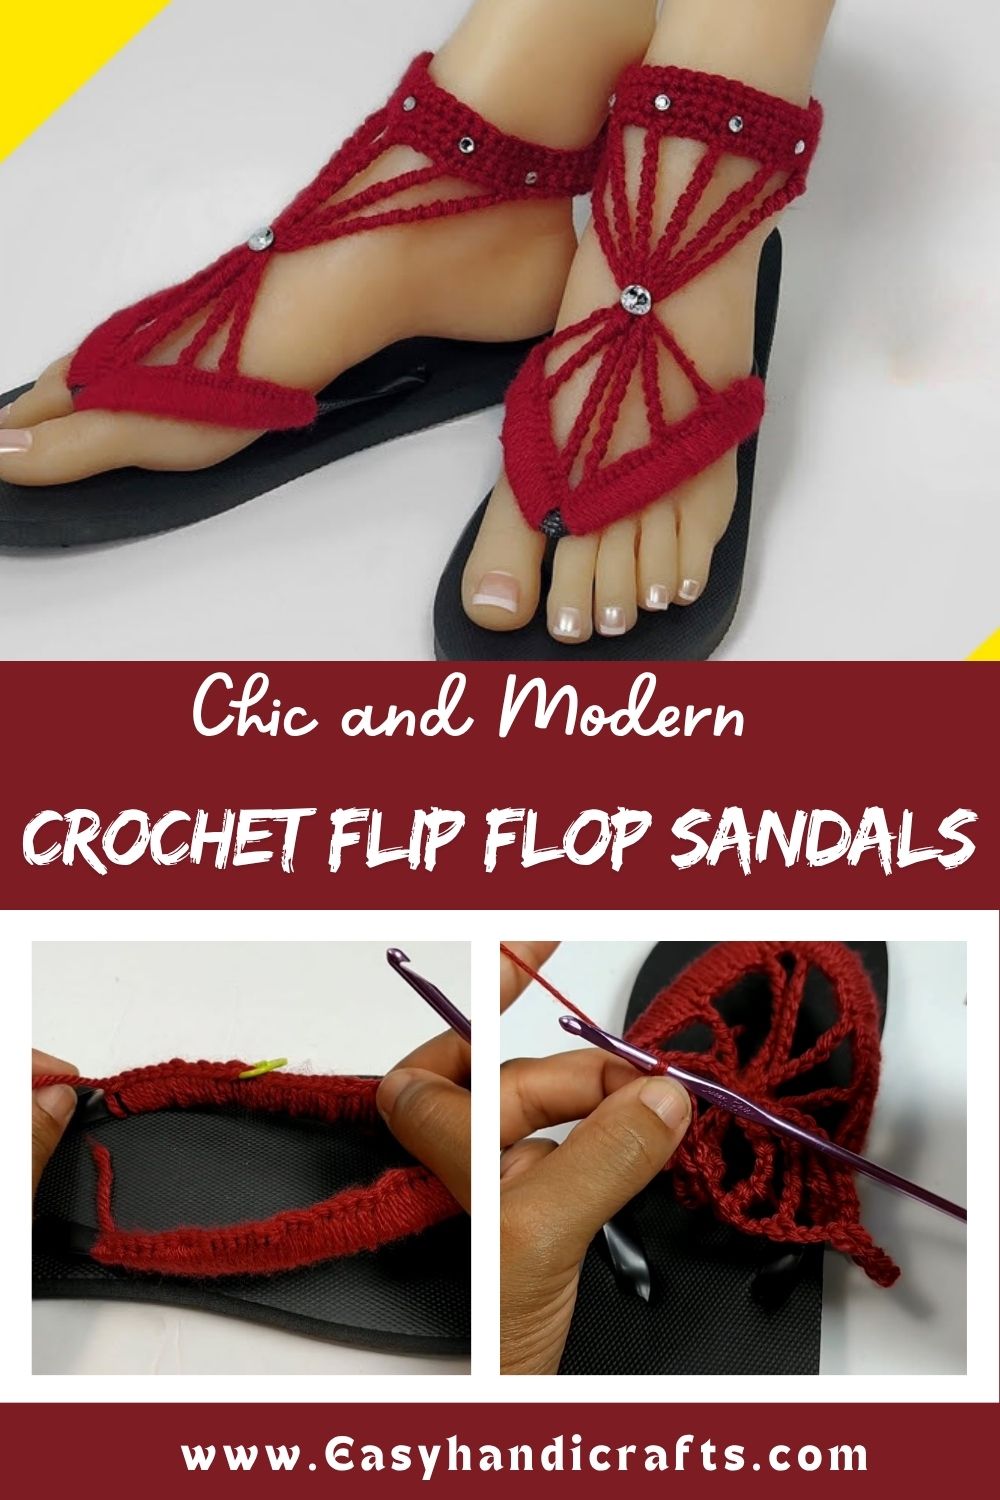
Plain rubber flip-flops rarely get much attention, but wrap them in colorful crochet stitches, and they instantly turn into something worth showing off. This Crochet Flip Flop Sandals pattern takes an ordinary pair of sandals and transforms them into a woven, beach-ready accessory that pairs beautifully with summer outfits.
This project starts with a basic pair of flip-flops as the base, then builds outward using crochet stitches wrapped directly around the straps and sole edge. From there, a decorative front section is added, often shaped into a spiral or fan-like motif that gives the sandal its eye-catching finish.
Because the base is already formed, this is more about surface design than building a shoe from scratch, which keeps the project approachable.
Skill Level
Beginner to Intermediate. Wrapping stitches around the sole is simple and repetitive, while the decorative front motif takes a bit more focus to keep the spokes even and symmetrical.
What You’ll Need
- A plain pair of flip flops or slide sandals as your base
- Cotton or acrylic yarn in your chosen color
- A crochet hook sized to your yarn weight
- A yarn needle for weaving in ends
- Scissors
- Clips or pins to hold the yarn in place while starting
Techniques Used to Build This Design
- Base wrapping: Covers the sole edge and straps with stitches directly on the existing flip flop.
- Surface single crochet: Anchors the yarn firmly to rubber or fabric strapping.
- Spoke or fan shaping: Forms the decorative front section using spaced-out stitch lines.
- Spiral motif work: Builds a circular, woven design at the toe area.
- Strap reinforcement: Strengthens the connection points so the sandal holds up to regular wear.
Why This Project Works So Well for Summer Style
Handmade sandals like these sit at a nice middle ground between practical footwear and a statement accessory. They’re light enough for hot weather, sturdy enough for casual outings, and colorful enough to match sundresses, shorts, or beach cover-ups without looking overdone. Since the base is already broken in, comfort isn’t sacrificed for style, which is often the biggest complaint with other handmade footwear projects.
Step-by-Step Guide
Here’s how the whole design comes together, starting from the very first stitch anchored onto the flip-flop base.
Step 1: Anchor Your Yarn to the Base
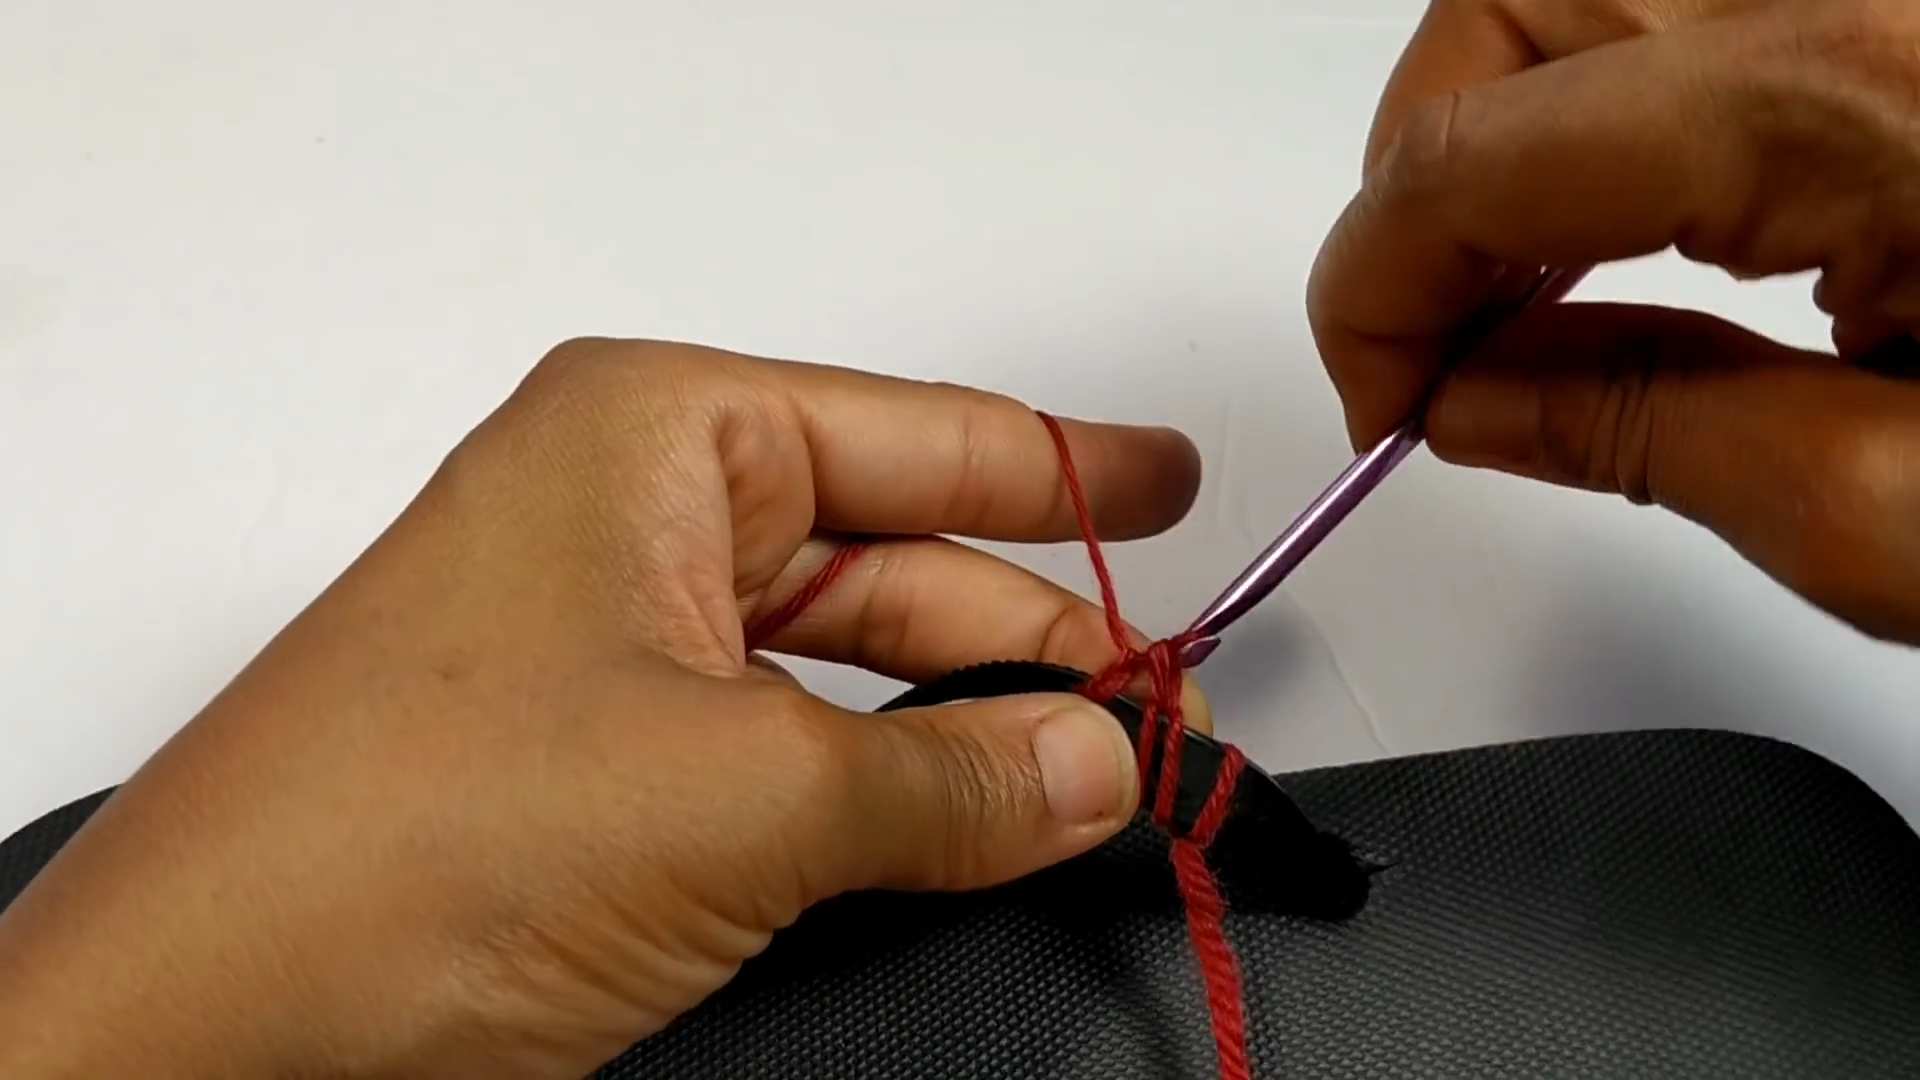
Attach your yarn to the edge of the flip-flop strap using your hook, pulling the first loop through securely. This starting point sets the tone for the rest of the wrap, so make sure the yarn is tightly secured before moving forward.
Step 2: Wrap the Sole Edge
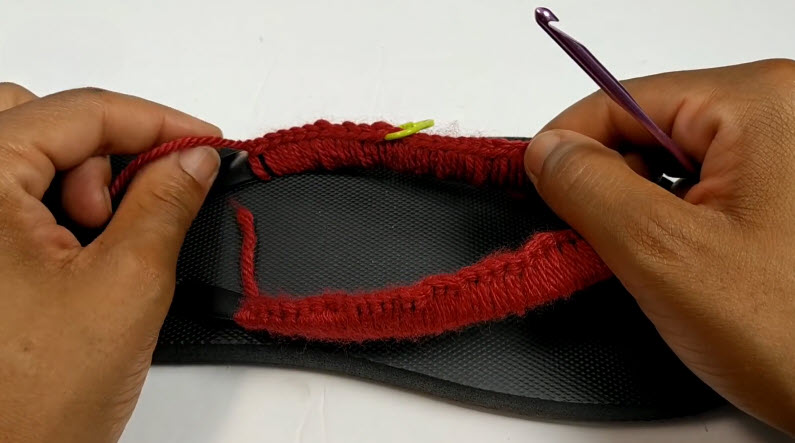
Work single crochet stitches steadily around the outer edge of the sole, covering the existing strap material completely as you go. Keep your stitches close together and consistent in tension so the wrapped edge looks neat and fully covers the original flip-flop strap.
Step 3: Start the Front Strap Design
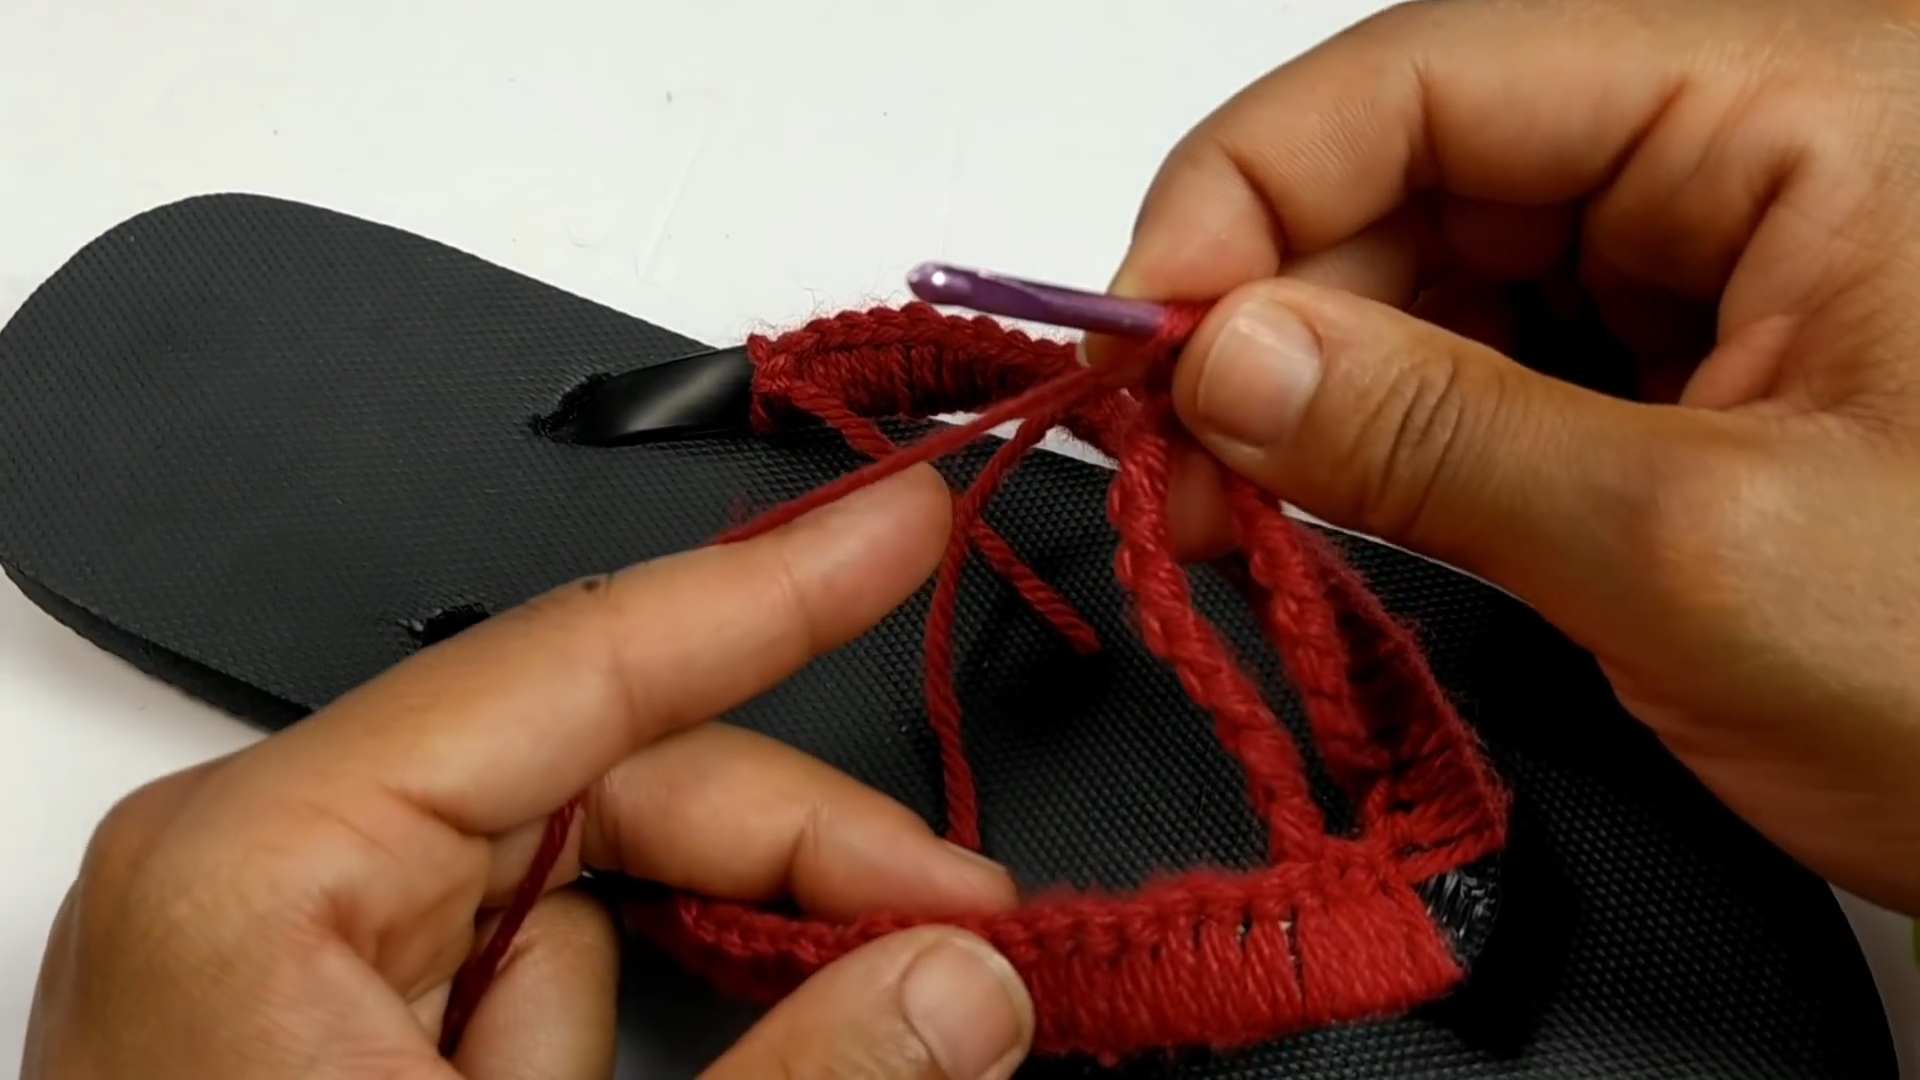
Begin building the front section by working stitches that fan outward from the strap base, forming the first few lines of your decorative pattern. This is where the sandal starts to take shape beyond a simple wrap, so take your time positioning each strand evenly.
Step 4: Build Out the Woven Pattern
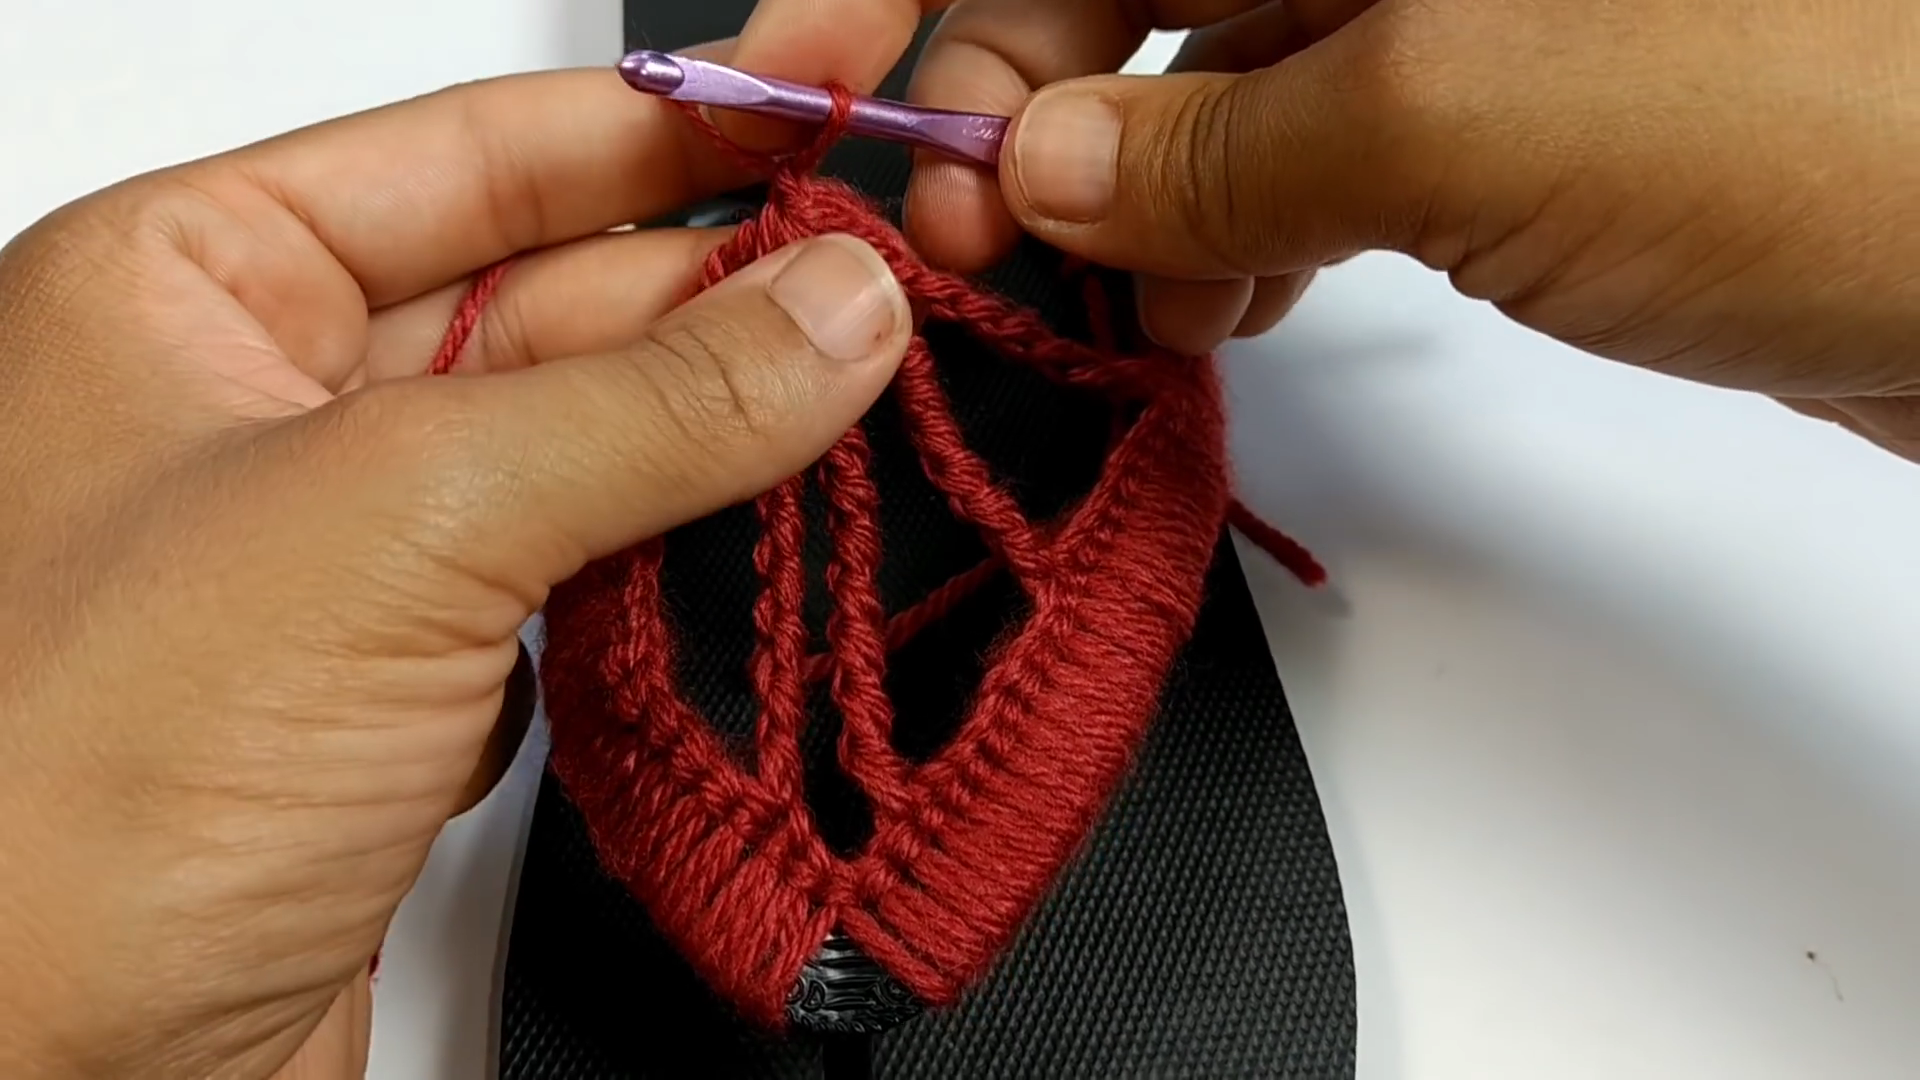
Step 5: Finish the Spiral Motif and Straps
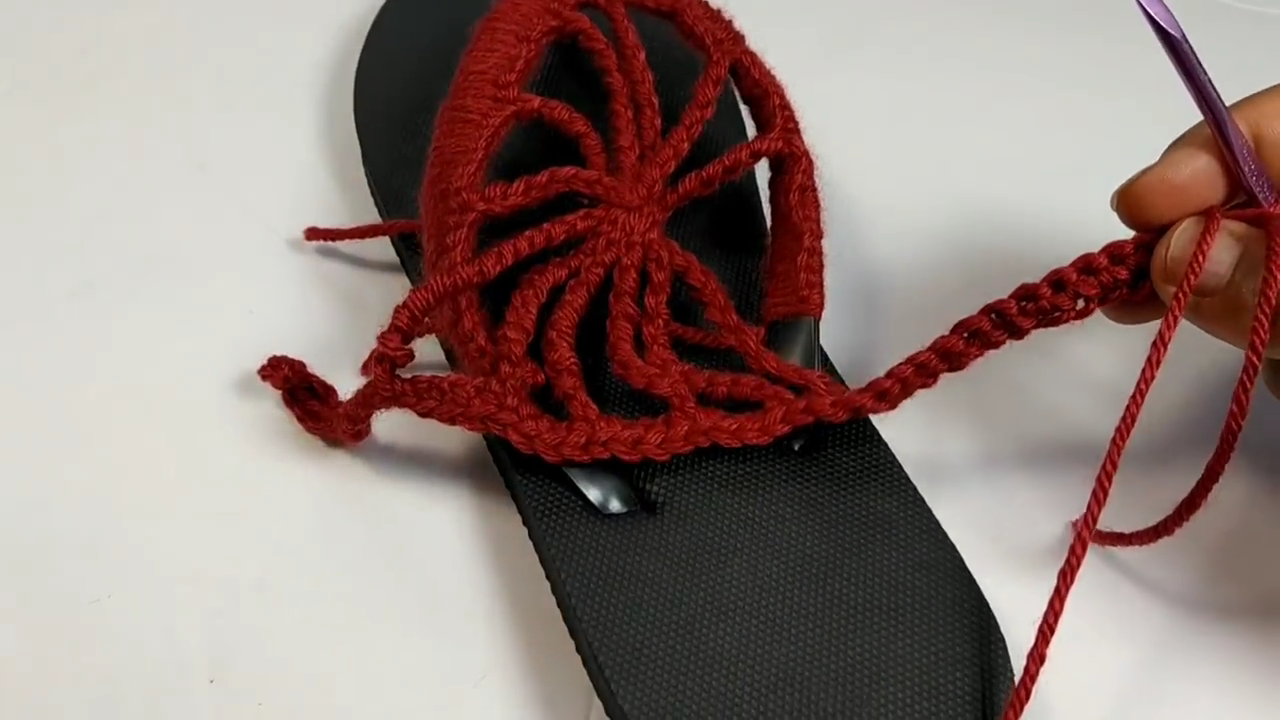
Complete the design by working a circular spiral pattern at the toe area, then reinforce the side straps with a few extra rounds of stitching for durability. Weave in all loose ends securely, and your sandals are ready to wear.
Tips for Getting a Clean Result
- Test your first few stitches on a small section before wrapping the entire sole.
- Keep consistent tension throughout so the wrap doesn’t look loose in some areas and tight in others.
- Use a stitch marker to keep track of where each spoke or fan section begins.
- Choose a yarn blend with some durability, since sandals see more wear than most crochet accessories.
- Try the sandals on partway through to check comfort before finishing the front design.
Mistakes to Watch Out For
- Leaving gaps in the sole wrap where the original strap material peeks through.
- Making the front motif too tight, which can pull uncomfortably against the top of the foot.
- Skipping reinforcement stitches at the strap base, leading to the yarn slipping loose over time.
- Using a yarn that’s too thin, resulting in a design that wears out quickly with regular use.
- Rushing the spiral motif, which often causes it to sit off-center on the sandal.
Ideas to Customize Your Sandals
- Mix two or three colors for a striped or ombre wrap instead of a single solid shade.
- Add small beads or charms along the front strap for extra detail.
- Try a different front motif, like a simple fan or lattice pattern, instead of a spiral.
- Use metallic thread accents for a dressier version suited to evening wear.
- Match your yarn color to a specific outfit or accessory set for a coordinated look.
Frequently Asked Questions
Q: Will crocheting over flip flops make them less comfortable?
A: Not if the wrap is done with even tension. Overly tight stitching is usually the cause of discomfort, so keep your stitches snug but not restrictive.
Q: How durable are these sandals compared to store-bought ones?
A: With sturdy yarn and strong strap points, they hold up reasonably well for casual and beach wear, though they don’t work well for heavy daily use like hiking.
Q: Can this Crochet Flip Flop Sandals pattern be adjusted for different sandal sizes?
A: Yes, the wrap simply follows the shape of whatever flip flop base you’re using, so it naturally adjusts to any size.
Q: What yarn type works best for outdoor or beach wear?
A: Cotton yarn is a popular choice since it holds its shape well and dries faster than some other fibers if it gets wet.
Q: Is this a good project for using up leftover yarn scraps?
A: Definitely, since the sole wrap and front motif don’t require large amounts of yarn, making it a great stash-buster project.