Small Mini Crochet Bag Pattern with textured stitch design
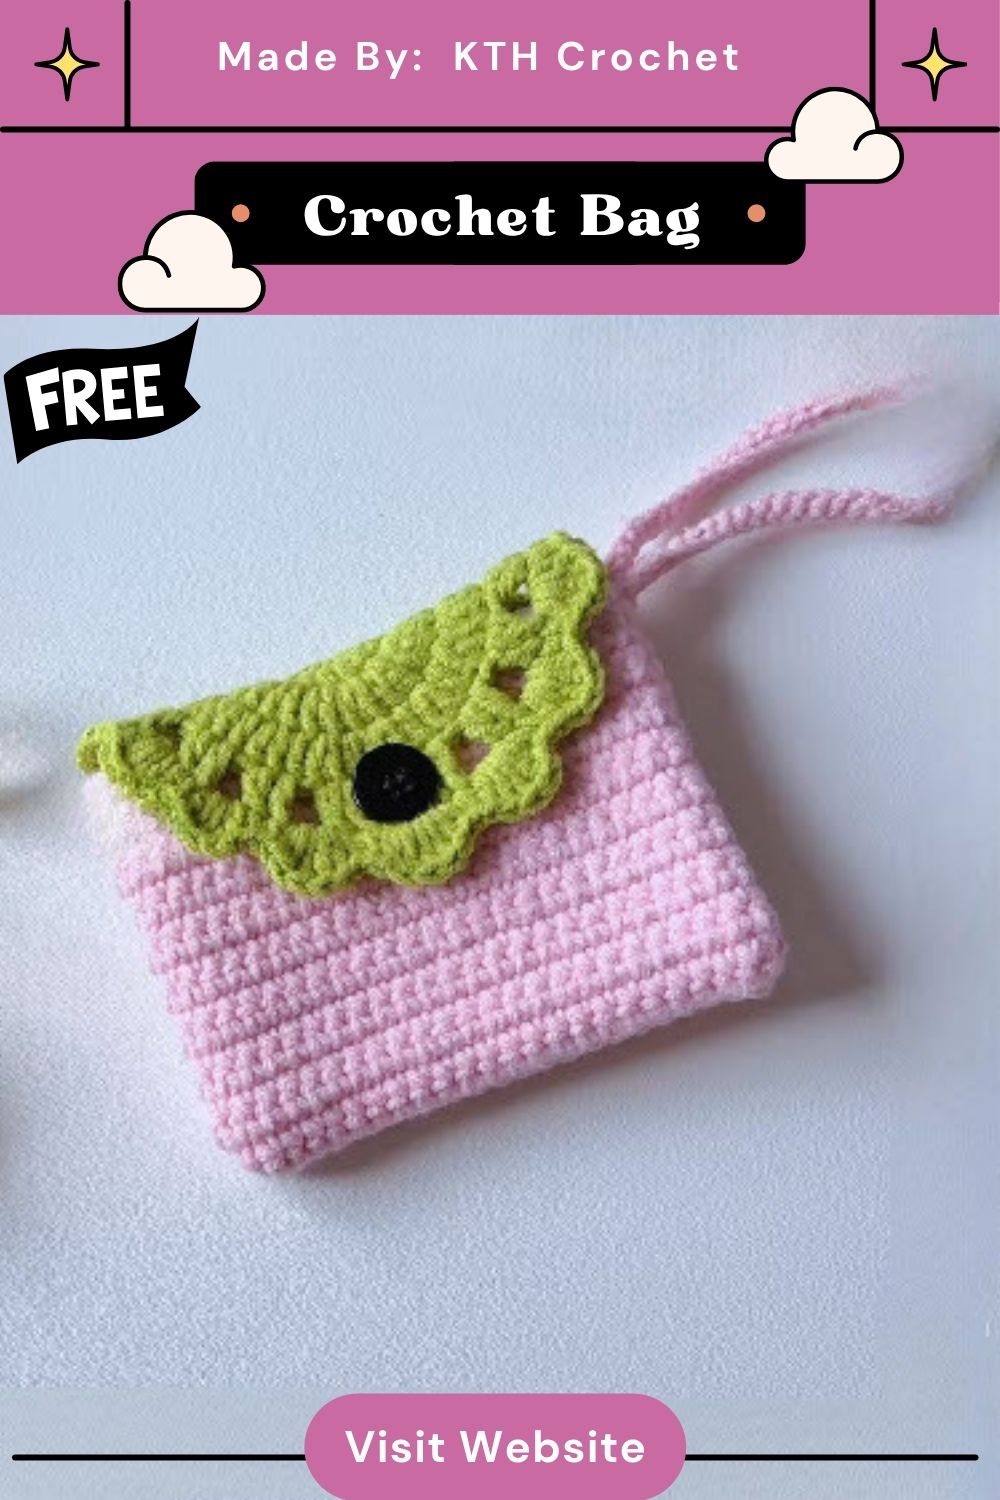
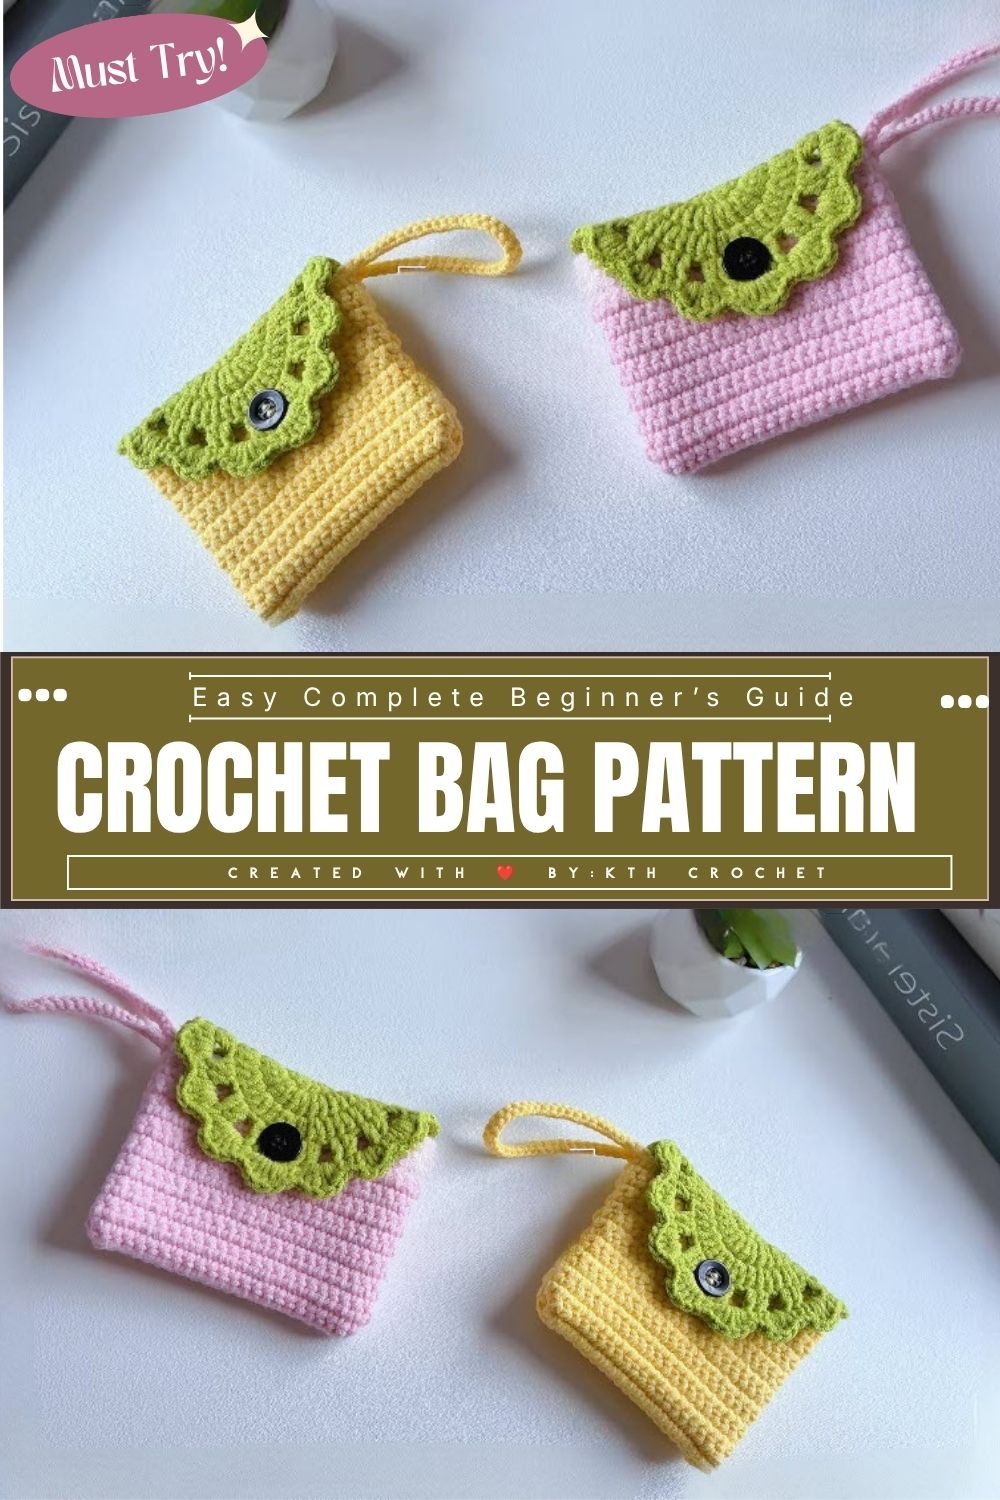
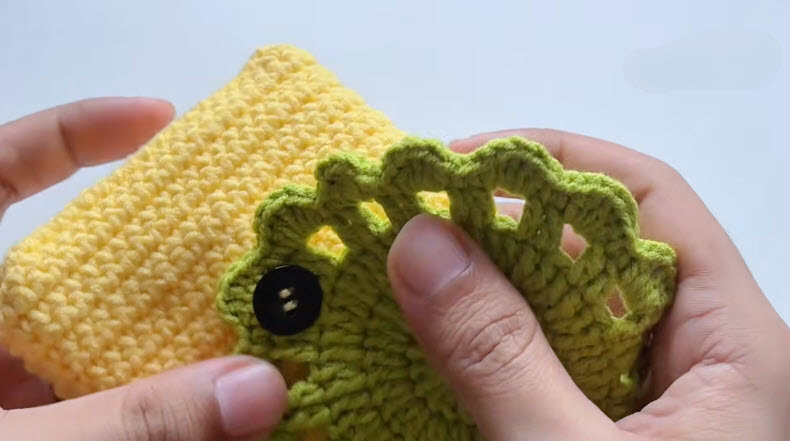
Sunny yellow meets fresh green in the Small Mini Crochet Bag Pattern with textured stitch design. Ribbed-looking rows form the body, and a scalloped circle folds over as the flap. Meanwhile, a single black button finishes the look. Beginners and skilled crocheters alike will find every step approachable.
Few small projects pair contrast and texture as neatly as this one. A sunny yellow body carries a dense, ribbed-looking surface, while a green scalloped flap adds a playful lid. The finished mini crochet purse holds earbuds, lip balm, and spare keys for daily errands. Because the textured crochet pouch uses basic stitches, confident beginners can finish it comfortably. Meanwhile, the button closure keeps every small essential secure.
What You’ll Need
Gather these supplies before starting the small mini crochet bag pattern. Each item affects texture and shape.
- Body yarn: one small ball of yellow DK or light worsted cotton blend.
- Flap yarn: a smaller ball of green in a matching weight.
- Hook: steel-tipped, around 3.5–4 mm, matched to the yarn label.
- Closure: one black sew-through button, roughly 20 mm wide.
- Tools: yarn needle, scissors, stitch marker, and measuring tape.
Materials Substitution Ideas
Cotton gives the crispest stitch definition. However, soft acrylic works well when a drapier fabric is preferred. Wood, pearl, or toggle buttons can replace the black one. Also, a hook one size smaller tightens the fabric, so the pouch stands firmer. Meanwhile, a thin fabric lining adds structure when the yarn feels too floppy.
Time Needed
Most crocheters finish this project in two to three hours. The flap circle takes about 45 minutes, and the body panel takes roughly an hour. Finishing and button work fill the remaining time. Beginners may want extra minutes for the edging round.
Step-by-Step Process
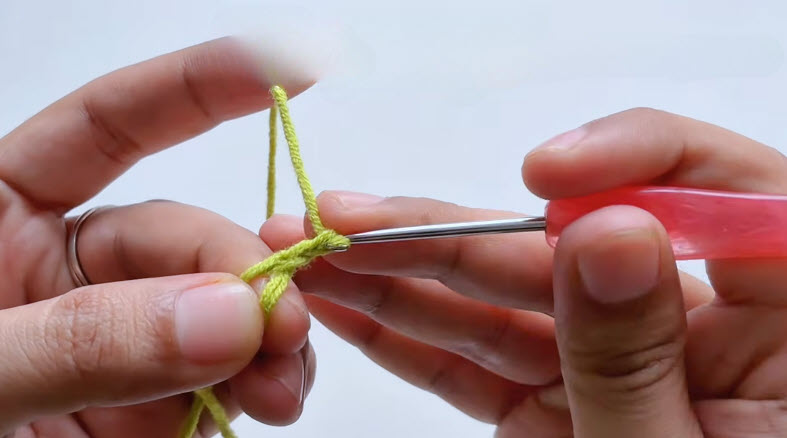
Step 1: Form the starting ring. Wrap the green yarn around two fingers, cross it, and slide the hook through the loop to anchor the flap’s center.
Step 2: Work the first round. Stitch the opening round into the ring, then tug the tail to close the center hole.
Shape check: The tiny disc should sit flat, with no gap at the middle.
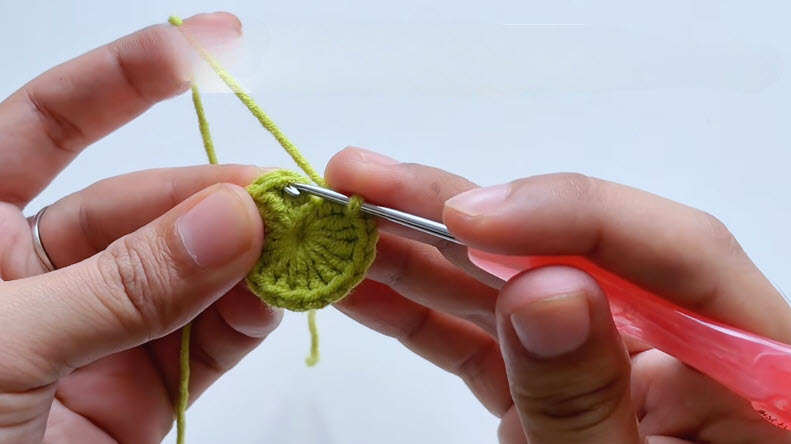
Step 3: Grow the circle. Add evenly spaced increases every round until the disc widens into a smooth, flat circle.
Why it matters: Even spacing keeps the circle flat, while uneven increases push it into a bowl or a ruffle.
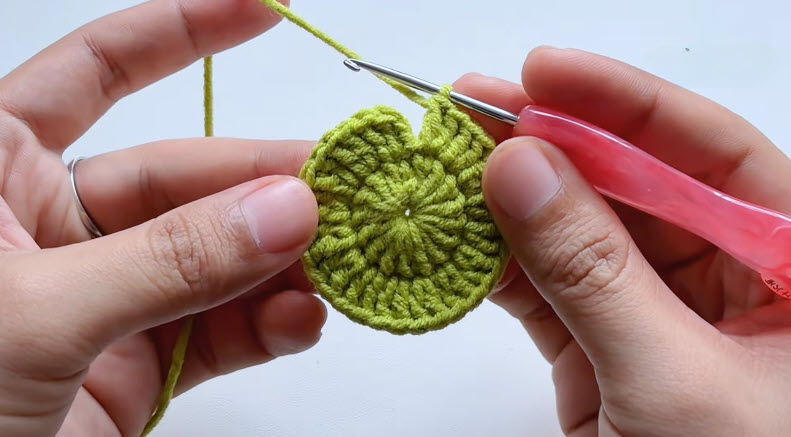
Step 4: Begin the scalloped edging. Switch to the border round, chain small gaps between anchored stitches, and let the openings form the scallops.
Count now: Tally every scallop and compare the chain spaces. Each gap should match in size
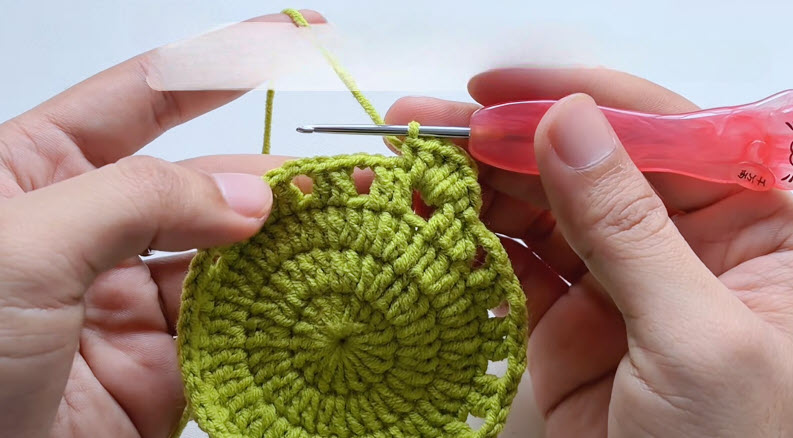
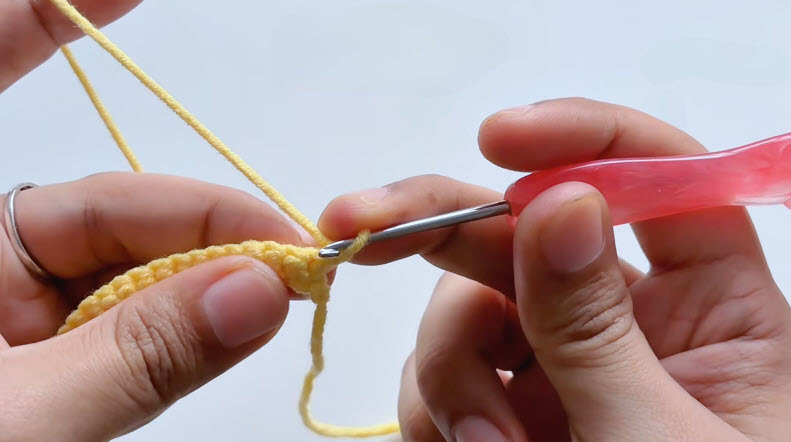
tep 5: Start the yellow body. Join the yellow yarn, chain the foundation, and work the first rows of the textured stitch along it.
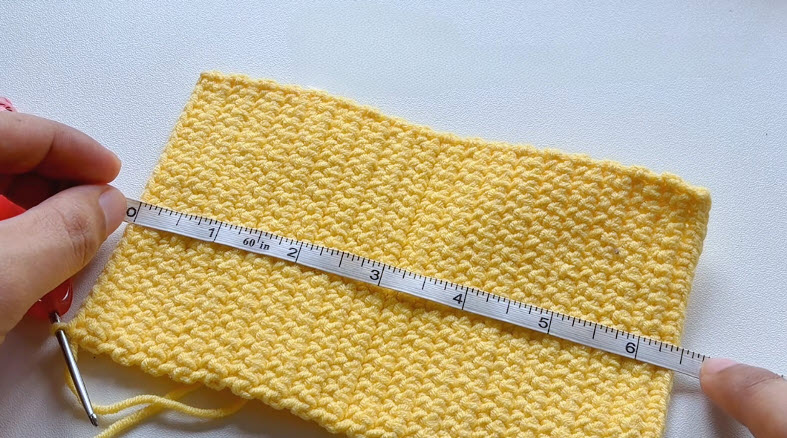
Step 6: Measure the panel. Lay the panel flat and stretch the tape across its width until it reads close to 6 inches.
Stitch check: Rows should look like tiny ribbed ridges, and both side edges should run straight.
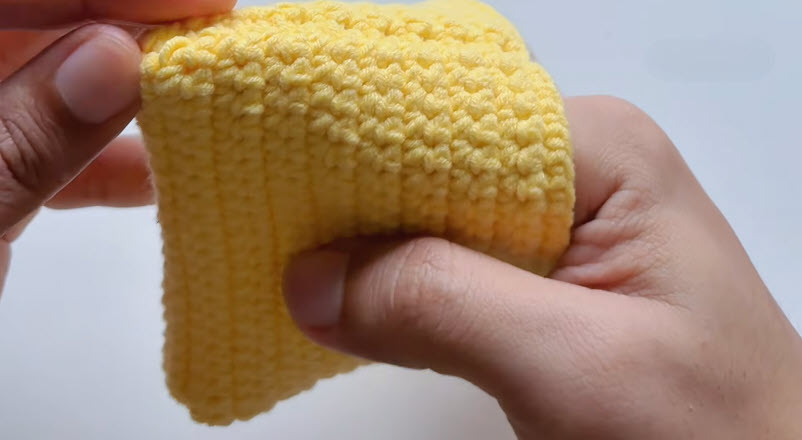
Step 7: Fold into a pouch. Bring the bottom edge upward, keep the textured face outward, and press the side ridges together.
Why it matters: Folding before sewing shows exactly where the flap and button will land.
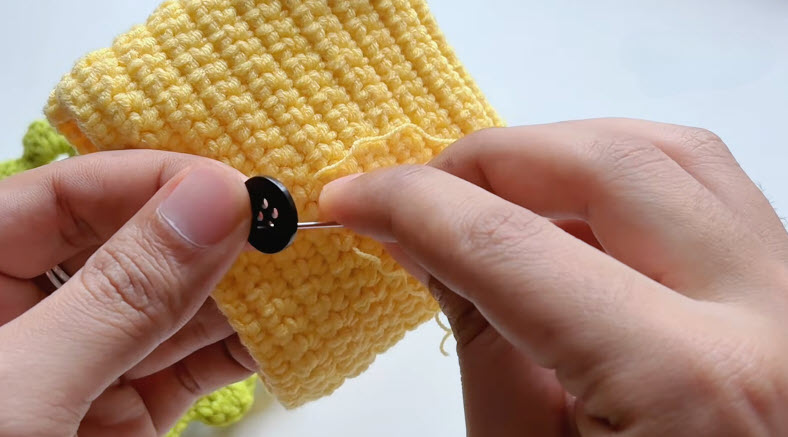
Step 8: Sew on the button. Thread a yarn needle with yellow yarn and stitch the black button firmly onto the pouch.
Step 9: Set the flap. Fold the scalloped green flap over the pouch and confirm the button sits at the circle’s center.
Shape check: The scallops should lie evenly, with no curling edges.
Signs You Did It Right
- The flap’s center closes without a visible hole.
- The green circle rests flat on a table.
- Every scallop opening looks the same size.
- The yellow panel has straight edges and uniform ridges.
- The button sits centered and never wobbles.
Common Mistakes and Their Fixes
- Problem: The flap cups upward like a bowl. → Fix: Too few increases caused it. Rip back one round and add increases evenly.
- Problem: The center hole stays open. → Fix: Pull the tail firmly after the first round, then weave it in twice.
- Problem: The panel edges wave. → Fix: Count stitches at each row end, and drop a hook size if tension runs loose.
- Problem: Scallops vary in size. → Fix: Chain the same count every time, and mark each gap with a stitch marker.
Troubleshooting Extra
Some flaws appear only after finishing. Each one has a quick remedy.
- Flap flips upward after sewing: Steam it lightly, then rest a flat book on top overnight.
- Button sags over time: Re-sew with doubled yarn, and add a tiny backing stitch inside.
- Pouch bows outward: Block the panel before folding, or add a thin fabric lining.
- Yarn tails creep out: Weave each end in three directions, then trim close.