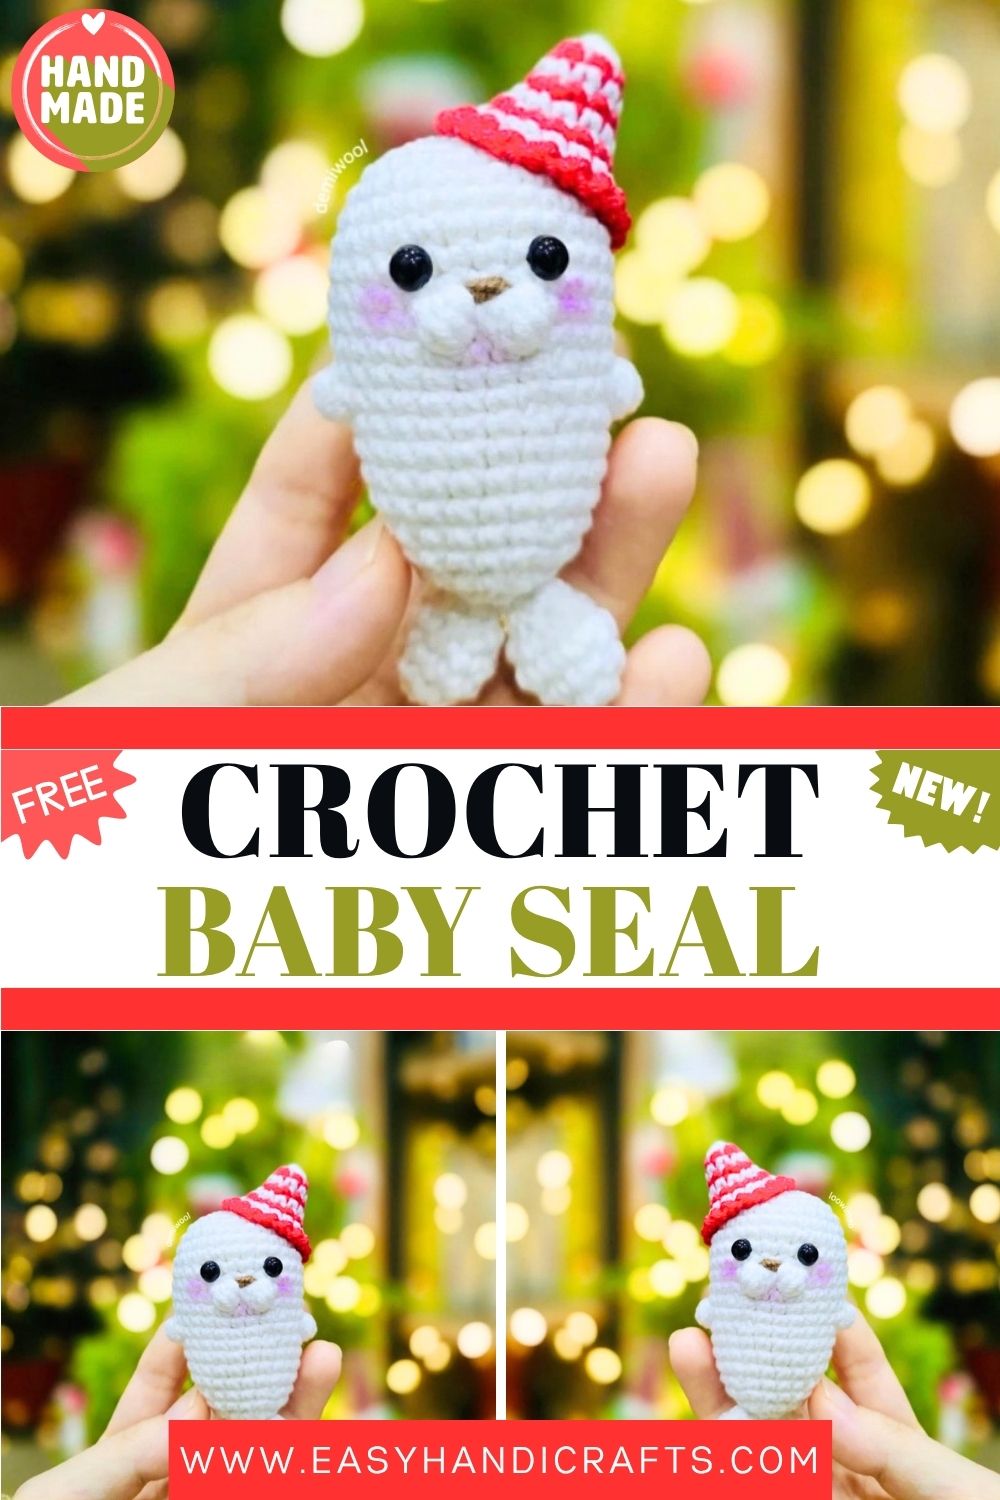
Crochet Baby Seal with Party Hat Amigurumi Pattern
Do you want to crochet something small, cute, and party-ready? This tiny Crochet Baby Seal with Party Hat amigurumi instantly wins hearts with its party hat. Soft, squishy, and quick to finish, this project instantly brightens up celebrations, gifts, or any little shelf.
There’s something truly irresistible about a chubby little Crochet Baby Seal, and adding a party hat on top of its head simply makes it perfect. This little character gradually takes shape with every stitch, featuring bubble-stitch arms and a sweet round nose, finally becoming a completely heart-winning amigurumi.
Stitched in cotton yarn on a small hook, he ends up around three inches long and the whole thing stays nicely beginner-friendly throughout.
Pattern Overview
- The seal’s head and body are crocheted as one continuous piece, so there’s no neck seam to join just a smooth, rounded shape.
- Bobble stitches pull double duty: one pair in round 9 forms the snout, and another pair in round 12 becomes the little arms.
- Two small tails are made separately and sewn to the bottom, giving him that classic flippered look.
- A tiny embroidered nose sits right between the snout bobbles for the finishing touch.
- The whole seal works up small about three inches in cotton yarn on a 2 mm hook so it’s a great quick make.
- A little party hat tops him off, which you’ll add on based on your chosen hat piece.
Skill Level
This pattern is beginner-friendly through and through. If you can handle a magic ring, single crochet, and basic increases and decreases, the bobble stitches are the only new trick.
Materials
- Yarn: YarnArt Jeans cotton yarn in white and red
- Hook: 2.0 mm
- Safety eyes: 6.0 mm
- Black or dark brown yarn for the nose
- Stitch markers
- Yarn needle
- Scissors
- Pins (optional)
Abbreviations
- R: round
- MR: magic ring
- st: stitch
- ch: chain
- sc: single crochet
- inc: increase
- dec: decrease
- slst: slip stitch
- BO: bobble stitch (5 dc worked together)
Size note: With the same yarn, the finished seal is around 7.6 cm / 3.0 in long, not counting the hat.
Special Techniques
A couple of small techniques give this Crochet Baby Seal all his charm, so here’s the quick rundown:
- Bobble stitch (BO): Here a bobble is 5 dc worked together into one stitch. You’ll use it twice — for the snout and the arms so it’s worth a quick practice first.
- Bobble placement: Round 12’s arm bobbles may need nudging left or right depending on your tension, so they line up evenly on each side with the snout centered.
- Continuous rounds: The head and body never break, so a stitch marker in the first stitch of each round keeps you from losing your place.
- Unstuffed tails: The two tail pieces stay flat and empty, which makes them easy to fold and sew onto the base.
- Embroidered nose: A single-stitch-wide nose between rounds 8 and 9 gives the face its definition with no extra pieces.
The Pattern
Head and Body
Use white yarn, working in continuous rounds.
- R1: MR, 8sc (8)
- R2: 88 in(16)
- R3: (sc, inc) x8 (24)
- R4: (3sc, inc) x6 (30)
- R5–8 (4 rounds): 30sc (30)
- R9: 14sc, BO, 1sc, BO, 13sc (30)
- R10: 30sc (30)
- R11: (8sc, dec) x3 (27)
- R12: 8sc, BO, 12sc, BO, 5sc (27)
Note: The BOs in R9 form the seal’s snout, and the BOs in R12 form the arms. Depending on your tension, adjust the R12 bobble placement so the arms line up evenly on both sides with the snout centered (pic 1).
- R13: (7sc, dec) x3 (24)
- R14–17 (4 rounds): 24sc (24)
Insert the eyes between R7 and R8, right above the snout, 3–4 stitches apart. Stuff the head and body, and continue to stuff as you go.
- R18: (4sc, dec) x4 (20)
- R19: 20sc (20)
- R20: (3sc, dec) x4 (16)
- R21: 8dec (8)
Stuff the body firmly. Fasten off, cut the yarn, close the remaining gap, and weave the yarn in (pic 2).
Tail (make 2)
Use white yarn, working in continuous rounds.
- R1: MR, 6sc (6)
- R2: (2sc, inc) x2 (8)
- R3–4 (2 rounds): 8sc (8)
- R5: (2sc, dec) x2 (6)
Do not stuff the tail. Fasten off, cut the yarn, close the remaining gap, and leave a long tail for sewing (pic 3).
Party Hat
Note: The party hat instructions weren’t included in this pattern. Use your favorite small cone-hat pattern (in red, to match the materials) and follow the assembly steps below to attach it.
Assembly
Here’s how to bring your little seal together:
- Once the body is stuffed firmly and closed at round 21, weave in the tail to seal the gap.
- Embroider the nose between rounds 8 and 9, one stitch wide, right between the two snout bobbles, using black or dark brown yarn (pic 5).
- Make the two tail pieces, leaving long tails, and sew them to the bottom of the body (pic 6).
- Set the 6 mm safety eyes between rounds 7 and 8, about 3–4 stitches apart, before the body closes up.
- Pop the party hat onto the head and sew it in place (pic 6).
- Use pins to hold the tails and hat where you want them before sewing, if that helps.
Common Mistakes
A handful of spots tend to trip people up, so keep these in mind:
- Placing the eyes too high or too low. They go between rounds 7 and 8, right above the snout, and 3–4 stitches apart, so check against the bobble before setting them.
- Misaligning the arm bobbles. If round 12’s bobbles drift, the arms look lopsided. Adjust their placement until they’re even.
- Pulling the bobbles too tight. A 5-dc bobble needs room to pop, so keep your tension relaxed.
- Stuffing too late. Start filling around round 17 and keep going as you decrease, before the opening gets too small.
- Stuffing the tails. They’re meant to stay flat, so leave them empty.
- Skipping the stitch marker. In continuous rounds it’s easy to lose count, so mark the first stitch of every round.
- Embroidering the nose in the wrong spot. It belongs right between the two snout bobbles, just one stitch wide.
Important Remarks
- The yarn used here is YarnArt Jeans cotton in white and red, worked on a 2.0 mm hook.
- With this yarn and hook, the finished seal measures about 7.6 cm (3 inches) long, not counting the hat.
- Going up a yarn weight and hook size gives you a bigger seal. Just keep your stitches tight so no stuffing shows.
- Safety eyes are 6 mm. Swap the size if you like, but keep them between rounds 7 and 8.
- Because of the safety eyes, this one is best as decor or a gift for older kids or embroider the eyes for little ones.
- Heads up: the party hat steps weren’t part of this pattern, so you’ll need a separate small cone-hat pattern for that piece.
Conclusion
And just like that, you’ve got a party-ready Crochet Baby Seal. Round of applause, right? He’s quick, he’s tiny, and those bobble arms and snout give him so much personality for so little effort. Whip one up in white, add a bright red hat, and he’s ready to celebrate. Make a few in different hat colors for a whole party crew. So grab your cotton yarn and that little hook, and let’s get this party started.