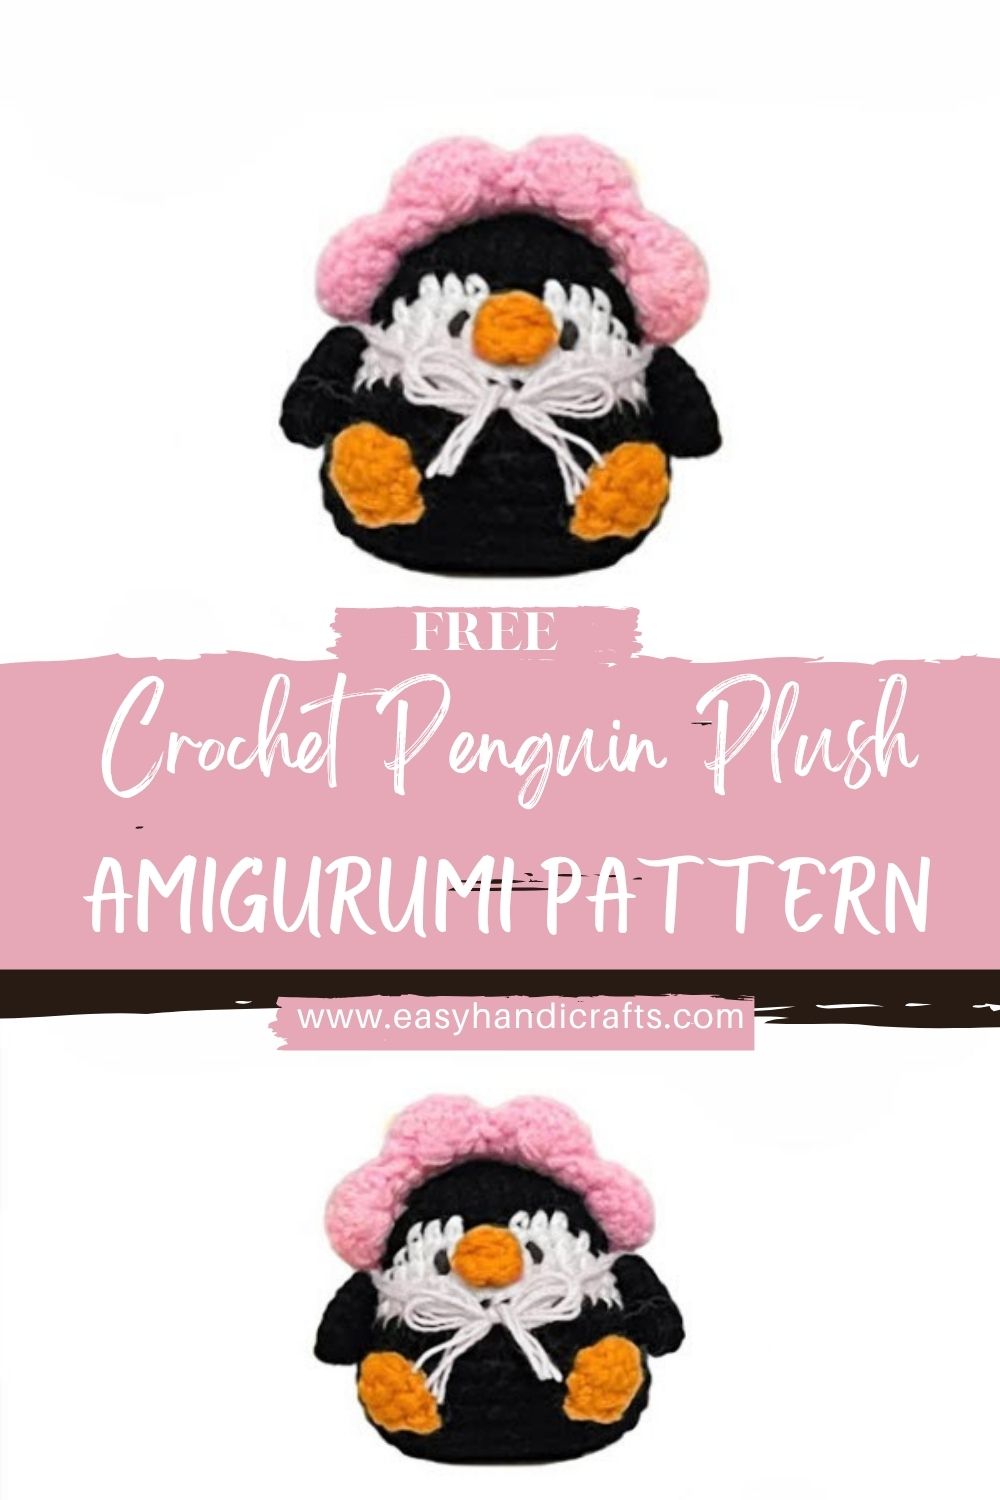
Immaculate Crochet Penguin Plush for Beginners Amigurumi Pattern
This crochet penguin amigurumi is a tiny plush with a big dose of charm. It’s quick to stitch, fun to shape, and even more adorable once the wings and little beak are added.
Because it’s small, this penguin plush pattern makes a lovely shelf decoration, a sweet gift topper, or a soft little companion for a desk. Best of all, it’s an easy crochet penguin that feels friendly for first-time amigurumi makers.
Amigurumi is the art of crocheting small stuffed pieces, usually animals, using tight, neat stitches in the round. That simple rhythm is exactly why so many crafters find it relaxing: first the base grows, next the shape rounds out, and later the details bring it to life.
This crochet penguin combines basic single crochet rounds with a few simple color changes to create the classic black-and-white look. Meanwhile, the wings, feet, and beak are made separately, which keeps every step clear and manageable. Since the shaping is gentle and the parts are small, this tutorial is perfect for beginners who want a clean, step-by-step path to a finished penguin plush.
Materials Needed (Exact Measurements)
- Yarn (worsted/DK recommended):
- Black yarn (main body): 30–40 g
- White yarn (belly/face patch): 15–20 g
- Orange yarn (beak + feet): 5–10 g
- Optional accent color (hat/scarf): 10–15 g
- Crochet Hook: 2.5–4.0 mm (choose a smaller hook for tighter stitches)
- Safety Eyes: 6–8 mm
- Stuffing: Soft polyfill, 15–25 g (small handful)
- Stitch Markers: 1–2 markers
- Yarn Needle & Scissors
Skill Level
Beginner (Easy)
Making Time (Overview)
Total approximate time: ~1.5–2 hours (depending on pace)
- Body + head: 45–70 minutes
- Wings: 10–15 minutes
- Feet: 10–15 minutes
- Beak: 5–10 minutes
- Face + assembly: 20–30 minutes
Step‑by‑Step Instructions
Helpful Notes Before Starting
- Work in continuous rounds unless stated otherwise.
- Move the stitch marker to the first stitch of each round.
- Use tight single crochet to avoid stuffing showing through.
Abbreviations:
- MR = magic ring
- sc = single crochet
- inc = increase (2 sc in one stitch)
- dec = decrease (single crochet 2 together; invisible decrease recommended)
- sl st = slip stitch
Body & Head (Main Shape)
Start with a magic ring
- First, make an MR with black yarn.
- Then crochet 8 sc into the ring.
- Next, pull the ring tight so the center closes neatly.
2) Increase for shape
- Next, increase evenly to build a round bottom:
- Round 2: inc in each stitch (16 sts)
- Round 3: (sc, inc) repeat around (24 sts)
- Round 4: sc around (24 sts)
- Round 5: (2 sc, inc) repeat around (32 sts)
- Round 6: sc around (32 sts)
- Meanwhile, keep stitch tension steady so the body stays smooth and firm.
Add the white belly (simple color sections)
- Next, begin the belly section by switching to white for the front stitches, then returning to black for the back stitches.
- For a narrow belly band, use a small white section (about 6 stitches) in the center front.
- For a wider belly, use a larger white section (about 10–12 stitches).
- Meanwhile, carry the unused color along the inside of the work with a little slack so the fabric doesn’t pucker.
Work up the head
- Later, keep crocheting in the round to build the upper body and into the head.
- Add a gentle increase round if a rounder head is preferred:
- Round 11: (3 sc, inc) repeat around (40 sts)
- Then work 3 rounds sc around to keep the head smooth.
Stuff as you go
- Next, begin stuffing gradually.
- Meanwhile, push stuffing into the sides first, then fill the center, keeping the penguin firm but still squeezable.
6) Decrease to close
- Finally, decrease steadily to close the top:
- Round 17: (4 sc, dec) repeat around (40 sts)
- Round 18: (3 sc, dec) repeat around (32 sts)
- Round 19: (2 sc, dec) repeat around (24 sts)
- Round 20: (sc, dec) repeat around (16 sts)
- Round 21: dec around (8 sts)
- Fasten off, close the opening, and weave the tail inside.
Making time (body + head): 45–70 minutes
Additional Parts
Wings (make 2)
- First, start with an MR using black yarn and crochet 5 sc into the ring.
- Next, (sc, inc) repeat to widen slightly (about 7–8 sts).
- Then, crochet 2–3 rounds of sc around to create a small, rounded wing.
- Finally, fasten off and leave a sewing tail.
- Next, pin the wings on both sides of the body at the same height.
- Then sew them on securely with small, neat stitches.
Making time (wings): 10–15 minutes
Feet (make 2)
- First, use orange yarn and make an MR with 6 sc.
- Next, increase slightly for a cute “flipper foot”: inc around (12 sts).
- Then crochet 1 round sc around, fasten off, and leave a tail.
- Later, attach the feet to the lower front of the body.
- Meanwhile, angle them slightly outward so the penguin looks balanced when sitting.
Making time (feet): 10–15 minutes
Beak (make 1)
- First, use orange yarn and crochet a tiny triangle:
- Option A (simple): ch 3, sc in 2nd ch, sc in next, fasten off.
- Option B (round beak): MR 3–4 sc, then fasten off.
- Next, place the beak just below where the eyes will sit.
- Finally, sew it down neatly.
Making time (beak): 5–10 minutes
Face & Assembly
1) Add safety eyes
- First, decide the front (center the white belly/face area).
- Next, position the safety eyes about 5–7 stitches apart, slightly above the midpoint of the head.
- Meanwhile, check the look from different angles before securing the backs.
2) Stitch expression
- Next, add tiny eye highlights using white yarn or embroidery thread.
- Then, stitch a small detail line if desired (a gentle smile or tiny cheek dots).
3) Attach parts
- Later, sew on the wings evenly on both sides.
- Next, sew on the feet at the bottom front.
- Then attach the beak centered under the eyes.
Smooth stuffing
- Finally, massage the plush gently to spread stuffing evenly and remove lumps.
Making time (face + assembly): 20–30 minutes
Special Features
- Texture: Soft plush body with a smooth, rounded amigurumi finish
- Expression: Bright eyes and a tiny beak create instant personality
- Size: Small and easy to hold—perfect for shelves, gifts, or a little desk buddy
Sizing Tips
- Thicker yarn + larger hook (3.5–4 mm): makes a bigger penguin with a more cuddly, plush feel.
- Thinner yarn + smaller hook (2.5–3 mm): creates a mini penguin with crisp stitches, great for smaller displays.
- Meanwhile, keeping the hook slightly smaller than the yarn label suggests helps prevent gaps.
Finishing Tips
- Keep stitches tight so stuffing stays hidden.
- Use stitch markers to track rounds and avoid accidental increases.
- Hide yarn ends by weaving through several stitches, then trimming inside the body.
- Adjust stuffing slowly; if it’s firm, it’s cute, but being overly packed can stretch stitches.
Common Mistakes to Avoid
- Uneven stuffing that makes one side bulge more than the other
- Misplaced safety eyes that throw off the sweet penguin expression
- Loose stitches that let stuffing peek through
- Skipping stitch marks often leads to miscounted rounds and uneven shaping
Variations & Customization Ideas
- Add a tiny hat or scarf: use an accent color for a cozy winter penguin theme.
- Color changes: try pastel bodies, speckled yarn, or even a “galaxy penguin” look.
- Mini keychain version: crochet with thinner yarn, add a small loop at the top, and attach a keyring.
- Seasonal versions: add a small heart for Valentine’s, a bow for birthdays, or a winter pom‑pom hat.
Tutor Suggestions (Friendly Advice)
- First, place the safety eyes and look at the face from far away. Small shifts make a big difference.
- Next, practice even tension on a small test circle if single crochet rounds are new.
- Later, try a textured belly (like hdc in the front loop) once the basics feel comfortable.
- Finally, pin parts before sewing so everything stays symmetrical.
Conclusion
This crochet penguin amigurumi is a sweet little project that turns basic stitches into a lovable plush. Because the shaping is simple and the pieces are small, it’s an ideal beginner win that still looks polished once finished. Later, once this penguin plush pattern feels comfortable, it becomes easy to experiment with hats, scarves, color swaps, and even mini versions. Most importantly, this easy crochet penguin makes a thoughtful gift, cheerful décor, or a handmade keepsake that stays cute all year long.