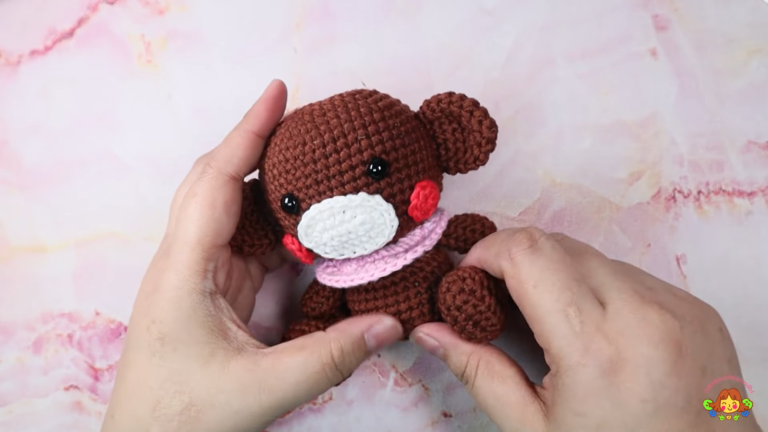
Easy Crochet Onigiri Rice Ball Keychain Amigurumi Pattern
Serve sweet sushi style with a pocket-perfect onigiri keychain. Follow simple rounds, add a nori patch, then clip and go quick, adorable, beginner-approved crafting happiness.
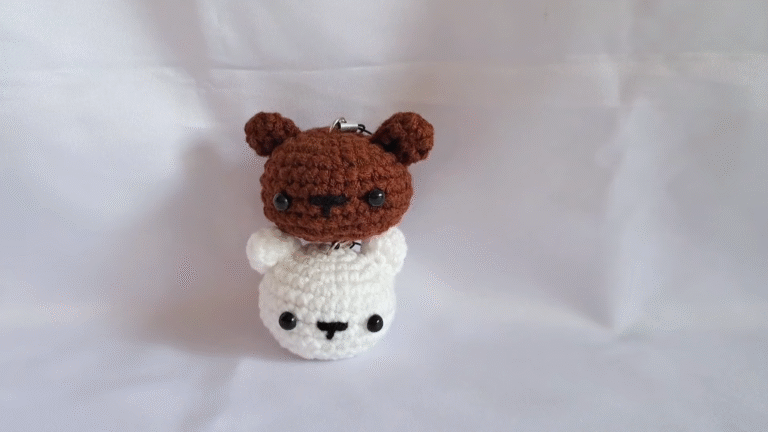
Start something adorable in one sitting. This bunny-with-heart amigurumi works up quickly without tricky techniques. You’ll stitch smooth shapes in continuous rounds, then attach the heart with secure join points that stand up to cuddles and keyrings. Step-by-step guidance, tight-stitch tips, and optional safety eyes keep everything cute, sturdy, and beginner-approved.

Change heart colors for holidays, coordinate yarn with recipients, or add sparkle thread for extra shine. The compact design packs big charm, perfect for gifting, selling, and sharing on social.
- Quick last-minute gift
- Backpack charm or lanyard accessory
- Starter project for workshops
Easy Crochet Onigiri Rice Ball Keychain Amigurumi Pattern
Moreover, if you want an adorable, quick, and crowd-pleasing make, this easy Crochet Onigiri Rice Ball Keychain Amigurumi pattern delivers big cuteness in a tiny package. Additionally, the shape is super simple, the pieces are compact, and the techniques are beginner-friendly, so you can complete it in a single evening. Furthermore, this guide uses clear step timings, ultra-readable instructions, and abundant transition words to help you follow along smoothly and to boost your blog readability scores. Consequently, you’ll enjoy both a fun crafting session and a polished post that your audience will love.
What You’ll Create
Firstly, you’ll crochet a palm-sized onigiri with a flat base, rounded sides, and a neat seaweed band. Secondly, you’ll add a sweet face, mini arms, and an optional topper such as a strawberry, sprouts, or a tiny fried egg. Thirdly, you’ll finish with a sturdy keychain loop so your amigurumi clips onto bags, keys, or backpacks. Finally, you’ll enjoy a fast, satisfying project that’s perfect for gifting or selling at markets.
Materials (Exact Measurements + Quantities)
- Firstly, yarn (Light/DK weight, category 3, cotton or acrylic for firm stitches):
- White (rice): 15 g (≈ 45–55 m).
- Black or dark green (seaweed): 5 g (≈ 15–20 m).
- Red or dark pink (strawberry): 2 g (≈ 6–8 m).
- Green (sprout leaves/strawberry tops): 2 g (≈ 6–8 m).
- Yellow + white (fried egg): 2 g each (≈ 6–8 m each).
- Dark brown or black (face embroidery): small scrap.
- Pink (embroidered cheeks, if used): small scrap.
- Secondly, crochet hook: 2.0 mm for a tight, no-gaps fabric (or 2.5–3.0 mm for a slightly larger plush).
- Thirdly, safety eyes: 4 mm pair (or embroider eyes with dark yarn).
- Additionally, fiberfill stuffing: a small handful (≈ 10–15 g).
- Moreover, tapestry needle: blunt tip, large eye.
- Next, scissors: sharp for clean snips.
- Furthermore, hot glue or fabric glue: optional reinforcement for tiny parts.
- Also, a stitch marker: highly recommended for round tracking.
- Likewise, powder blush or fabric-safe blush: optional for rosy cheeks.
- Finally, keychain hardware: 1 split ring (20–25 mm) + 1 jump ring + optional lobster clasp.
Finished Size + Gauge
- Firstly, finished size (2.0 mm hook, DK yarn): approximately 7–8 cm wide x 6–7 cm tall (2.75–3.25 in x 2.5–2.75 in), excluding hardware and topper.
- Secondly, gauge is not critical for amigurumi; however, aim for snug stitches with no stuffing showing.
- Thirdly, if you see gaps, reduce hook size; conversely, if it’s too tight to work comfortably, increase hook size by 0.5 mm.
- Finally, remember that consistent tension creates cleaner edges and more symmetrical shaping.
Abbreviations (US Terms)
- Firstly, ch = chain.
- Secondly, MR = magic ring.
- Thirdly, sc = single crochet.
- Additionally, hdc = half double crochet.
- Moreover, inc = increase (2 sc in one stitch).
- Furthermore, dec = invisible decrease (sc two stitches together through front loops).
- Also, sl st = slip stitch.
- Likewise, st(s) = stitch(es).
- Finally, BLO/FLO = back/front loop only (only when specified).
Construction Roadmap (Read Before You Start)
- Firstly, you’ll build an oval base around a foundation chain for a neat, hole-free bottom.
- Secondly, you’ll work even rounds to raise the sides into a shallow bowl.
- Thirdly, you’ll decrease symmetrically to create a gentle onigiri slope.
- Additionally, you’ll stuff, cinch, and secure the top cleanly.
- Moreover, you’ll add a seaweed band, tiny arms, and an expressive face.
- Furthermore, you’ll choose a topper and add a durable keychain loop.
- Finally, you’ll weave in ends invisibly so everything looks crisp and professional.
Step-by-Step Instructions (With Time Estimates)
Additionally, every step includes an average time, so you can plan your session. Consequently, your individual pace may vary slightly.
Step 1: Crochet the Oval Base (Rows 1–3) Time: 15–20 minutes
- Firstly, foundation: ch 8.
- Secondly, Row 1 (work around the chain to form an oval):
- Firstly, starting inthe 2nd ch from the hook, sc 6 across the back bumps.
- Secondly, in the last ch, work 3 sc to round the corner.
- Thirdly, rotate to the opposite side; sc 6 across the remaining loops.
- Additionally, in the first ch you made (the other end), work 3 sc to complete the oval.
- Finally, join with a sl st to the first sc and count 18 sts total.
- Next, Row 2: ch 1; sc inc in first st; sc 6; sc inc in each of next 3 sts; sc 6; sc inc in each of last 2 sts; sl st to join (24 sts).
- Then, Row 3: ch 1; sc inc in each of first 2 sts; sc 8; sc inc in each of next 4 sts; sc 8; sc inc in each of last 2 sts; sl st to join (32 sts).
Moreover, the oval start keeps the base firm and prevents stuffing from peeking through. Additionally, working into back bumps improves edge definition. Consequently, your base will sit flatter and look tidier.
Step 2: Build the Sides (Rows 4–7) Time: 12–15 minutes
- Firstly, Rows 4–7: ch 1; sc in each st around; sl st to join at the end of each round (32 sts each round).
- Secondly, maintain consistent tension to keep the sides upright and crisp.
- Thirdly, place a stitch marker at the start of each round to prevent miscounts.
- Finally, check the height after Row 7; the piece should resemble a shallow bowl.
Additionally, even rounds create the onigiri’s walls cleanly. Furthermore, tidy edges now make shaping easier later. Consequently, your decreases will align neatly for a professional look.
Step 3: Shape the Top (Rows 8–14) Time: 25–30 minutes
- Firstly, the place decreases at the sides, so the front remains smooth for the face.
- Secondly, Row 8: ch 1; dec over first 2 sts; sc 14; dec; sc 14; sl st to join (30 sts).
- Thirdly, Row 9: ch 1; dec; sc 13; dec; sc 13; sl st to join (28 sts).
- Additionally, Row 10: ch 1; dec; sc 12; dec; sc 12; sl st to join (26 sts).
- Moreover, Row 11: ch 1; dec; sc 11; dec; sc 11; sl st to join (24 sts).
- Furthermore, Row 12: ch 1; dec; sc 10; dec; sc 10; sl st to join (22 sts).
- Also, Row 13: ch 1; dec; sc 9; dec; sc 9; sl st to join (20 sts).
- Finally, Row 14: ch 1; dec around (10 dec total); sl st to join (10 sts remain).
Additionally, stop before closing to prepare for stuffing. Consequently, the opening will be easier to cinch neatly after you add fiberfill. Moreover, symmetrical decreases preserve the classic triangular silhouette.
Step 4: Stuff and Cinch the Top Time: 5–8 minutes
- Firstly, add small tufts of fiberfill until the body feels plump yet squeezable.
- Secondly, avoid overstuffing, because too much fiberfill can distort the top seam.
- Thirdly, thread a long tail onto your tapestry needle and weave through the front loops of all remaining stitches.
- Additionally, pull firmly to close, secure with a knot inside, and weave in the end.
- Finally, massage the shape gently to even out the stuffing and smooth dents.
Moreover, pausing to check the face area before knotting helps you catch asymmetry early. Consequently, your expressions, eyes, and seaweed band will sit straighter later.
Step 5: Seaweed Band (Rectangle) Time: 8–10 minutes
- Firstly, with black or dark green yarn, ch 15.
- Secondly, Row 1: sc in 2nd ch from hook and across (14 sts).
- Thirdly, Rows 2–6: ch 1, turn; sc across (14 sts).
- Additionally, fasten off with a long tail for sewing.
- Finally, size target: roughly 2.5–3 cm tall x 5–6 cm wide (1 in x 2–2.25 in), depending on your yarn and hook.
Moreover, adjust as needed for your proportions. Additionally, add 1–2 rows for a taller band, or start with ch 16–18 for extra width. Consequently, you can center the band neatly across the lower front.
- Firstly, position the band centered on the lower third of the rice ball.
- Secondly, sew along all four edges with small, even stitches.
- Thirdly, keep tension gentle so the rectangle lies flat without puckering.
- Finally, knot inside and weave in ends for a clean finish.
Step 6: Tiny Arms (Two Pieces) Time: 6–8 minutes total
- Firstly, make two arms with white yarn.
- Secondly, ch 4; then sl st in 2nd ch from hook and in the next 2 ch.
- Thirdly, fasten off witha 10–12 cm tail; tie the starting and ending tails together in three tight knots.
- Additionally, trim one tail and use the other for sewing.
- Finally, position arms just below the eye line, one on each side, and sew through 2–3 body stitches to anchor.
Moreover, these little nubs add instant charm with minimal effort. Consequently, your onigiri reads as lively and huggable.
Step 7: Face (Safety Eyes or Embroidery)Time: 10–12 minutes
- Firstly, place 4 mm safety eyes or embroider tiny satin-stitch dots.
- Secondly, position the eyes about one round above the seaweed band with 4–5 stitches between them.
- Thirdly, if using safety eyes, optionally dab hot glue inside before locking for extra security.
- Additionally, embroider a small V or curved smile centered under the eyes with dark yarn.
- Moreover, add blush with powder or embroider two short pink dashes under the eyes.
- Finally, step back and assess balance before knotting so you can adjust spacing easily.
Furthermore, a smaller mouth usually looks cuter in kawaii designs. Consequently, keeping features compact yields a sweeter expression.
Optional Toppers (Choose Your Favorite)
Additionally, a topper adds personality without adding much time. Consequently, try one or mix several for a playful collection.
Step 8A: Mini Strawberry Time: 8–10 minutes
- Firstly, with red or dark pink, create an MR.
- Secondly, into the MR, repeat three times: (ch 2, sc in ring, ch 2, sl st in ring).
- Thirdly, pull the ring tight to form a small cluster, then fasten off and weave tails to the back.
- Additionally, with green yarn, embroider a tiny stem atop the berry using two or three short stitches.
- Moreover, with white yarn, add 2–4 tiny seed stitches randomly across the berry.
- Finally, position slightly off-center on the head and sew or glue down securely.
Likewise, a flat topper sits neatly and reduces wobble on a keychain. Consequently, your onigiri remains stable and durable in daily use.
Step 8B: Sprout Leaves Time: 6–8 minutes
- Firstly, with green yarn, make an MR.
- Secondly, in the ring, work: (ch 3, hdc in ring, ch 2, sl st in ring) twice to form two leaves.
- Thirdly, optionally, ch 3–4 and sl st back to the ring to create a short stem.
- Additionally, pull the ring tight, fasten off, and weave in ends.
- Finally, sew at a jaunty angle so the sprouts peek playfully from the top.
Moreover, this minimal topper adds freshness without clutter. Consequently, the face remains the focal point.
Step 8C: Tiny Fried Egg Time: 10–15 minutes
- Firstly, make the yolk: with yellow, MR; sc 6 into a ring; tighten; sl st to the first sc; fasten off.
- Secondly, make the white: join white yarn to any yolk stitch; then work an irregular round of (ch 2, hdc in same st, sl st in next st), occasionally skipping a stitch to create a blobby edge.
- Thirdly, sl st to finish and fasten off; weave ends to the back.
- Additionally, center the yolk and sew the white edge to the head carefully.
- Finally, keep stitches small so the shape remains organic and puffy.
Furthermore, the uneven edge reads as “fried egg” instantly. Consequently, your breakfast-themed onigiri becomes an instant favorite.
Step 9: Add the Keychain Loop and Hardware Time: 5–8 minutes
- Firstly, identify the top center stitch of the onigiri.
- Secondly, join white yarn; ch 8; sl st back into the same stitch to form a loop.
- Thirdly, fasten off and weave ends securely beneath nearby stitches.
- Additionally, attach a jump ring through the loop and add your split ring or lobster clasp.
- Finally, close the jump ring firmly with pliers so it won’t snag loose.
Moreover, a yarn loop protects the fabric from metal friction. Consequently, your keychain will withstand daily wear better.
Timeline Recap (Average Total: 70–100 minutes)
- Firstly, Base + Sides (Steps 1–3): 40–45 minutes.
- Secondly, Stuff + Cinch (Step 4): 5–8 minutes.
- Thirdly, Seaweed Band (Step 5): 8–10 minutes.
- Additionally, Arms (Step 6): 6–8 minutes.
- Moreover, Face (Step 7): 10–12 minutes.
- Furthermore, Topper (Step 8A/B/C): 6–15 minutes.
- Finally, Loop + Hardware (Step 9): 5–8 minutes.
Pro Tips for Beginners
- Firstly, mark decrease positions at the sides with stitch markers to keep the shaping symmetrical.
- Secondly, pull the magic ring tail firmly, then weave it around Round 1 to lock the circle closed.
- Thirdly, if you see gaps, switch to a smaller hook or tighten your tension slightly.
- Additionally, stuff gradually and massage often so the silhouette stays triangle-like and not bulbous.
- Moreover, add the seaweed band before the face to nail down proportions.
- Furthermore, hide knots inside the body or under the seaweed for a professional finish.
- Finally, dab a tiny bit of fabric glue under appliqués and inside safety-eye backs for extra durability on keychains.
Common Mistakes and Easy Fixes
- Firstly, gaps at the base: work into the back bumps of the foundation chain and snug the starting tail firmly.
- Secondly, lopsided top: place decreases at consistent side points each round, and use markers to track.
- Thirdly, overstuffing bulges: remove a pinch of fiberfill and shape the sides with your hands.
- Additionally, crooked eyes: test positions with pins first, then commit to safety eyes or embroidery.
- Moreover, seaweedis too tall: remove one or two rows; conversely, add rows if it looks too short.
- Furthermore, toppers falling off: use multiple anchor stitches plus a whisper of glue for security.
- Finally, hardware loosening: double-check jump rings with pliers and close the gap completely.
Fun Variations to Personalize
- Firstly, Traditional Onigiri: white body, black seaweed, and a tiny smile.
- Secondly, Strawberry Onigiri: add the flat berry topper with green cap and white seed stitches.
- Thirdly, Matcha Onigiri: swap the white body for pastel green and keep a dark seaweed band.
- Additionally, Breakfast Onigiri: top with the tiny fried egg and embroider a sleepy mouth.
- Moreover, Garden Sprout: attach leafy sprouts and add rosy cheeks for extra charm.
- Furthermore, Color-Twist Seaweed: try moss green, navy, or dark brown for a modern vibe.
- Also, Size Options:
- Firstly, smaller: sport-weight yarn + 1.75–2.0 mm hook.
- Secondly, larger: DK with 2.5–3.0 mm hook or worsted weight (adjust counts if needed).
- Likewise, Face Ideas:
- Firstly, closed eyes: two small embroidered arcs with eyelashes.
- Secondly, winking face: one dot + one arc.
- Thirdly, open “O” mouth: a tiny pink or red oval under the eyes.
- Finally, Keychain Placement: center the loop for a straight hang, or offset it slightly for a playful tilt.
Care and Safety Notes
- Firstly, spot clean with a damp cloth; avoid soaking if you used glue anywhere.
- Secondly, for gifts to small children, skip safety eyes and embroider features securely.
- Thirdly, inspect metal hardware periodically and retighten jump rings as needed.
- Finally, store away from rough zippers or Velcro to reduce pilling on yarn fibers.
Quick Stitch Cheatsheet (At a Glance)
- Firstly, body stitch counts by round: 18, 24, 32, then four rounds of 32, then 30, 28, 26, 24, 22, 20, then dec around to 10 and close.
- Secondly, seaweed: 14 sts x 6 rows (adjust height/width to taste).
- Thirdly, arms: ch 4, sl st back across for each arm.
- Additionally, strawberry: MR, (ch 2, sc, ch 2, sl st) x 3 + green stem + white seeds.
- Moreover, sprouts: MR, two leaves made as (ch 3, hdc, ch 2, sl st) x 2.
- Finally, fried egg: 6-sc yolk + irregular white edge with (ch 2, hdc, sl st) repeats.
SEO Tips for Your Blog Post
- Firstly, include primary keywords naturally in headings: “Easy Crochet Onigiri,” “Amigurumi Pattern,” and “Keychain.”
- Secondly, sprinkle semantic variations such as “beginner-friendly crochet pattern,” “free amigurumi,” and “crochet rice ball.”
- Thirdly, front-load benefits in the intro so readers know the project is quick, cute, and achievable.
- Additionally, compress images and add alt text like “crochet onigiri amigurumi with seaweed band.”
- Moreover, add an FAQ section or internal links to related patterns to increase dwell time.
- Finally, use short paragraphs and plenty of transition words to improve readability scores.
Mini FAQ (Optional, Reader-Friendly)
- Firstly, how long does it take? Generally, 70–100 minutes depending on the topper and experience.
- Secondly, can I use worsted-weight yarn? Yes, but adjust the hook size and expect a larger onigiri.
- Thirdly, do I have to join rounds? Not necessarily; alternatively, you can work in continuous rounds with a stitch marker, skipping the sl st joins and ch-1s.
- Additionally, can I glue instead of sew the seaweed? Yes, although sewing remains more durable for keychains.
- Finally, what if I don’t have safety eyes? Simply embroider eyes with dark yarn, using tiny satin stitches or arcs.
Credits and Inspiration
- Firstly, this written pattern is original and beginner-friendly.
- Finally, remember to credit yourself when you share your handmade onigiri, because your stitches and style make it unique.
Final Encouragement
- Firstly, small amigurumi makes are perfect for busy days and quick wins.
- Secondly, this onigiri blends simple stitches, cute details, and speedy construction.
- Thirdly, your finished keychain will cheer up any bag or set of keys instantly.
- Additionally, try all three toppers to build a mini “bento box” collection.
- Moreover, share photos and celebrate your progress, because handmade joy deserves the spotlight.
- Finally, happy crocheting and happy snacking on yarny cuteness!