Charm Crochet Flower Blossom Smile Keychain Pattern
The Charm Crochet Flower Blossom Smile Keychain Pattern is perfect for beginners, uses tiny yarn scraps, and makes charming accessories for keys, bags, and backpacks.
Brighten your day with the Charm Crochet Flower Blossom Smile Keychain Pattern a cheerful, beginner-friendly project that works up fast and uses tiny yarn scraps. Simple stitches create a playful bloom and happy face you can customize with petal colors, centers, and expressions.

Ideal for quick crafting sessions, thoughtful last-minute gifts, and teaching new crocheters, this pattern finishes with a sturdy key ring or clasp for everyday use. Make one for every season, mood, or friend, and add a pop of color wherever you go.
Uses:
Key fob for daily keys
Bag charm for totes or purses
Backpack zipper pull for kids and teens

Here’s a transition-rich revision you can paste into your post. I increased connective phrases across headings, sentences, and list items to help you clear typical SEO readability thresholds.
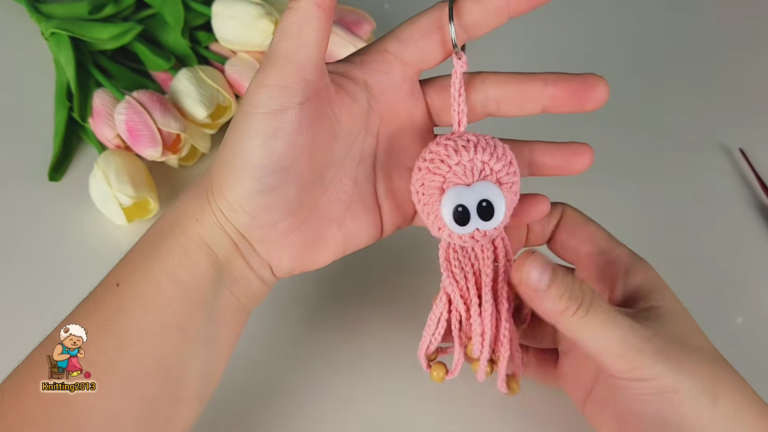
Charm Crochet Flower Blossom Smile Keychain Pattern (with Curly “Tentacles”)
Focus keyphrase: Happy Blossom Crochet Keychain Pattern
Note: The link above is an optional companion video. Because transcription wasn’t available, this pattern is a complete, beginner-friendly written tutorial you can follow on its own. Additionally, all steps are fully documented, so you can succeed without the video.
[Image: Smiling crochet flower keychain in yellow and pink, attached to a 1-inch key ring — Happy Blossom Crochet Keychain Pattern]
[Image: Step-by-step view of crocheting the flower center and petals — happy blossom crochet tutorial keychain]
[Image: Curly tentacles detail and embroidered face on a crochet flower charm — smiley flower keychain pattern]
Warm, engaging introduction
Bring a burst of happy color everywhere you go with this Happy Blossom Crochet Keychain Pattern. Moreover, this cheerful, beginner-friendly project transforms tiny yarn scraps into a smiling flower charm that’s fast, fun, and wonderfully customizable. As you stitch, you’ll crochet a soft, textured center, add bright petals, embroider a sweet face, and optionally attach two curly “tentacles” for extra personality and movement. Because it works up quickly, it’s great for last‑minute gifts, quick craft sessions, and teaching new crocheters. Furthermore, you can scale the size with simple tweaks. So, let’s get your hooks ready and make a mini bloom that spreads smiles with every jingle.
Making time: 35–60 minutes (first make on the longer side; quicker on repeats)
Skill level: Beginner to Confident Beginner
Techniques: Magic ring, increases in the round, basic stitches, optional surface detail, simple embroidery
Finished size (standard):
- Flower diameter (petal tip to tip): 2.75–3.25 in (7–8.5 cm)
- Center disc diameter: about 1.6–1.9 in (4–4.8 cm)
- Curly “tentacles” (optional): 1.5–2 in (4–5 cm) each
- Hanging strap length: 2–2.5 in (5–6.5 cm) to key ring
Gauge: Not critical; however, aim for a firm fabric with no holes. If the fabric is floppy, go down a hook size. Additionally, check after Round 2 and adjust early if needed.
US crochet terms throughout.
Abbreviations
- MR: magic ring
- ch: chain
- sl st: slip stitch
- sc: single crochet
- hdc: half double crochet
- dc: double crochet
- inc: increase (2 sc in same stitch)
- sk: skip stitch
- st(s): stitch(es)
- BLO: back loop only
- FLO: front loop only
Tip: Place a stitch marker in the first stitch of each round to track your place. Additionally, count stitches at the end of each round to prevent creeping errors.
Materials (with exact measurements)
- Yarn: Light worsted/Category 3 or Worsted/Category 4 cotton or acrylic scraps
- Center (face): 6–8 g (about 14–20 yd / 13–18 m) in yellow, cream, or your choice
- Petals: 6–8 g (about 14–20 yd / 13–18 m) in one color, or split among 2–3 colors
- Curly tentacles (optional): 2–3 g (about 5–7 yd / 4.5–6.5 m) combined
- Strap: 1–2 g (about 2–4 yd / 2–3.5 m) in any coordinating color
- Hook: 3.0 mm for Category 3 yarn, or 3.25–3.5 mm for Category 4 yarn (choose the smallest that gives you a firm fabric). Alternatively, use the hook size listed on your yarn and tighten the tension slightly.
- Safety eyes (optional): 6 mm (or embroider eyes with black thread if making for small children)
- Embroidery thread: Black (for smile), Pink (for blush) — 12–18 in (30–45 cm) each
- Tapestry needle and sewing needle
- Split key ring: 1 in (25 mm) or 1.25 in (32 mm)
- Lobster clasp (optional): 12–15 mm
- Small scrap of felt: 1.75–2 in (4.5–5 cm) circle for backing (optional, neat finish)
- Fabric glue (optional), or needle and thread to secure the backing
- Fiberfill: a pinch (optional, for a softly padded center)
- Stitch marker, scissors, ruler
Safety note: If gifting to children under 3, skip safety eyes and embroider the eyes to avoid small parts. Additionally, secure all embroidery knots firmly and trim ends short.
Construction overview
- First, make the body (center disc): it’s worked in the round with increases to create a firm, flat circle.
- Next, add tentacles (petals): work around the outer round; choose classic petals or curly “tentacles.”
- Then, stitch the face: add safety eyes or embroidered eyes and a simple smile.
- After that, attach the strap and hardware: create a slim strap and sew it securely to a split ring or clasp.
- Finally, finish neatly: weave ends, add a felt backing for a tidy reverse, and gently block petals if desired.
Because clarity matters for beginners, you’ll find step-by-step rounds below, plus tips and variations. Additionally, optional tweaks are clearly labeled so you can customize with confidence.
Step-by-step: Body (Center Disc)
Use the center color.
- Round 1: MR, 6 sc in ring. Tighten the ring. (6)
- Round 2: 2 sc in each st around. (12)
- Round 3: (sc, inc) around. (18)
- Round 4: (2 sc, inc) around. (24)
At this size, your disc should be about 1.5–1.7 in (3.8–4.3 cm) across with Category 4 yarn and a 3.25–3.5 mm hook. If you want a slightly larger flower, continue:
- Optional Round 5: (3 sc, inc) around. (30)
Neat edge tip: After the last round, sl st into the next st and fasten off if you plan to make the petals as separate pieces; otherwise, do not fasten off and proceed directly to petals for a one-piece construction. Consequently, the transition to petals will be smooth.
Face placement guide (do this now for the neatest finish):
- Safety eyes: Insert between Rounds 2 and 3, spaced 5–6 stitches apart. If you made Round 5, space 6–7 stitches apart. Additionally, avoid attaching washers until you confirm placement with the backing.
- Embroidered eyes: With black thread, make short horizontal stitches for closed eyes or French knots for open eyes, placed as above. Furthermore, take small bites of yarn so stitches sit neatly on the surface.
- Smile: With black thread, embroider a gentle curve between the eyes, sitting on Round 2. Moreover, add tiny pink blush stitches two stitches to either side of the smile.
Padding option: If you want a softly domed face, make a second identical center disc and whipstitch them together with a pinch of fiberfill inside. Then, attach petals to the front disc only for a layered look.
Step-by-step: Tentacles (Petals)
Choose one of the two petal styles (or mix them):
- Classic Petals: Flat, tidy, and flower-like.
- Curly Tentacles: Spiraled dangles for playful motion.
Classic Petal Round (worked around the outer edge of the center disc)
Attach petal color to any stitch on the last body round with a sl st. Then continue as follows:
- Repeat in each next st: (sl st, ch 2, 3 dc, ch 2, sl st) — this makes a soft, rounded petal anchored to one stitch.
You will make as many petals as the stitch count on your outer round (24 or 30). However, if that feels crowded, work one petal in every other stitch:
- For 24‑st center: 12 petals total
- For 30‑st center: 15 petals total
Petal shaping options:
- Pointy petals: (sl st, ch 3, 3 dc, ch 3, sl st). Alternatively, add a picot for extra definition.
- Puffy petals: (sl st, ch 2, 2 hdc, 1 dc, 2 hdc, ch 2, sl st). Consequently, petals look fuller.
- Picot tip: After the third dc, ch 3 and sl st into the top of that dc, then ch 2 and sl st — this makes a tiny point.
After the final petal, sl st to the first petal’s sl st and fasten off. Then, weave ends on the back for a clean finish.
Curly Tentacles (optional add-on)
Attach petal color or a contrast color at the bottom center of the flower back (any stitch near the 6 o’clock position works).
- Tentacle 1: Ch 14 (for a 1.75–2 in curl); work 3 sc in each ch back to the base. Then sl st into the same base st to anchor.
- Tentacle 2: Move one stitch to the left; sl st to join. Ch 12–14; work 3 sc in each ch back; then sl st to the base to anchor. Fasten off and weave ends.
Tip: For tighter curls, work 4 sc in each ch. Conversely, for gentler curls, work 2 sc in each ch. Additionally, lightly steam to set the spirals.
Mix-and-match idea: Use classic petals around the disc and add one or two curly tentacles at the bottom for a whimsical touch. Alternatively, alternate every third stitch with a curly tentacle for a fringe-like effect.
Step-by-step: Face (Details)
Because you may want the cutest placement, it’s best to add facial features once the petals are done, so you can judge proportion. Furthermore, secure each detail before moving on.
- Safety eyes: Insert between Rounds 2 and 3, 5–6 stitches apart (or 6–7 for a larger center). Then, attach washers to the back.
- Embroidered eyes: With black embroidery thread, stitch French knots or small straight stitches. Likewise, knot securely and weave ends.
- Smile: With black thread, make a shallow curve spanning 3–4 stitches on Round 2. For a “smirk,” extend one side slightly higher. Alternatively, for a big grin, add a tiny vertical stitch at each end.
- Blush: With pink thread or yarn, add one or two tiny stitches under each eye. Alternatively, use a light dab of fabric-safe blush.
Optional texture:
- Surface slip stitch a tiny heart on the cheek: sl st a small V shape with pink thread. Additionally, keep tension even for smooth lines.
- Add a bobble “nose” in the center: use a single bobble stitch in the middle of Round 2 before embroidering the smile. Consequently, the face gains dimension.
Strap and Hardware
You can attach your flower directly to a key ring with a jump ring, but a crochet strap keeps it soft and sturdy. Moreover, it distributes weight and reduces wear.
Simple strap (recommended)
- With strap color, ch 18 (approx. 2.5 in / 6.5 cm once finished).
- Row 1: Sc in 2nd ch from hook and in each ch across. (17 sc)
- Row 2: Ch 1, turn, sc across. (17 sc)
- Fasten off, leaving a 10–12 in (25–30 cm) tail for sewing.
Assembly:
- First, thread the strap through the split key ring or lobster clasp loop. Then fold the strap ends together by 0.4 in (1 cm) and whipstitch to form a loop around the hardware.
- Next, position the other strap end at the top back of the flower (12 o’clock). Stitch the strap end securely to the flower’s back with several passes; then weave in ends.
Alternative: Strong chain loop
- Ch 30 (or to 2.5–3 in desired length). Sl st into the first ch to form a loop. Finally, fasten off and sew the loop to the back of the flower at 12 o’clock. Then slide your split ring through the loop.
Special features
- Stash-busting friendly: Uses small yarn scraps; additionally, it’s perfect for color play.
- Customizable petals: Rounded, pointy, or picot-tipped; moreover, you can mix styles.
- Optional curly tentacles: Add movement and personality; consequently, your charm feels lively.
- Beginner-ready: Repetitive stitches and forgiving construction; therefore, it’s confidence-building.
- Neat backing: Felt circle option gives a professional finish; likewise, it hides ends.
- Quick make: Finish in about an hour; as a result, it’s ideal for gifts.
Finishing tips
- Backing: Cut a felt circle slightly smaller than your petals (about 1.75–2 in / 4.5–5 cm). Either glue it carefully to the back or sew with tiny whipstitches, avoiding the eye washers. Consequently, the reverse looks tidy and protected.
- Petal shaping: Gently dampen and pinch the tips between fingers to set the shape. Additionally, you can pin petals to a towel and let them dry for crisp edges.
- Stiffening (optional): If you want firmer petals, dilute white glue with water (1:1), lightly brush the petals, and let them dry flat. Alternatively, use a fabric stiffener spray.
- Ends: Weave ends in multiple directions for durability. Furthermore, a tug-test before trimming.
- Hardware check: Tug-test the strap and hardware to ensure security before gifting. Moreover, re-check after a day of use.
Common mistakes and how to avoid them
- Warping center disc: If your circle domes or ruffles, check your stitch count each round. Moreover, adjust tension or hook size; a slightly smaller hook often fixes gapping.
- Floppy petals: Use a smaller hook or cotton yarn for crisper edges. Alternatively, try the stiffening tip above.
- Uneven petal spacing: If petals look crowded, switch to every other stitch for fewer, more defined petals. Additionally, count petals before fastening off.
- Face off-center: Place eyes before finishing the back, hold the flower upright by the strap spot, and re-check spacing. Furthermore, mark eye positions with pins before committing.
- Curly tentacles untwisting: Work enough increases in the chain (3–4 sc per chain) and end each curl with a snug sl st at the base. Additionally, steam lightly to help set.
Sizing tips
- Smaller flower: Use DK/Category 3 yarn with a 2.5–3.0 mm hook and stop after Round 4 (24 sts). Then, work petals in every other stitch for a petite bloom.
- Larger flower: Use worsted/Category 4 with a 3.5–4.0 mm hook and include Round 5 (30 sts). You can also add an extra petal round behind the first for a layered look. Consequently, the flower gains depth.
- Strap length: Adjust the chain or row count to suit your preferred drop length (2–3 in works well for keys and bags). Additionally, test the length of your bag handle.
- Eye size: For a larger center, use 8 mm safety eyes; for smaller, use 5–6 mm. Likewise, adjust spacing proportionally.
Variations
- Layered petals: Make one full petal round in Color A, then join Color B behind Round 4 by working into the unworked loops (BLO or FLO) to add a second petal layer. As a result, you’ll get dimensional depth.
- Textured center: Replace Round 2 with [hdc, hdc inc] repeat for a slightly puffier surface. Or, for extra texture, substitute a bobble stitch in the center of Round 3. Additionally, consider a contrasting color for emphasis.
- Sunflower: Brown center, yellow petals, and a slightly larger diameter (include Round 5). Consequently, the look reads clearly as a sunflower.
- Daisy: White petals, yellow center; fewer petals (every other stitch). Moreover, block lightly for crisp edges.
- Pastel ombré: Change petal colors every 3–4 petals around the circle; then weave in ends neatly behind the felt backing.
- Dangling charms: Add a tiny leaf charm, a bead, or a tassel beside the tentacles. Additionally, secure with sturdy knots.
- Bookmark: Skip the hardware. Instead, extend a long chain (10–12 in), add a leaf or small bead, and use it as a page marker. Consequently, it becomes a quick gift.
- Keyring duo: Make two flowers, back-to-back, and whipstitch them together around the edges for a double-sided charm. Therefore, the face looks great from both sides.
Tutor suggestions (for teaching beginners)
- Start with materials prep: Pre-wind small balls of yarn, pre-cut felt circles, and have safety eyes/embroidery thread ready. Consequently, class time focuses on stitches.
- Demonstrate the magic ring slowly; however, offer ch 2, 6 sc in 2nd ch from hook as a beginner alternative.
- Use high-contrast yarn for the center and petals so students see their stitches clearly. Additionally, provide round-by-round checklists.
- Encourage counting aloud for each round; then have learners mark every increase round on a sticky note.
- Teach petal options in order of difficulty: rounded petals first, then pointy/picot petals, then curly tentacles. Moreover, let learners practice on a spare swatch.
- Check tension early: After Round 2, ensure fabric is firm. If not, adjust hook sizes promptly. Likewise, remind students not to split the yarn.
- Finish with personalization: Let students embroider faces last. Moreover, suggest a practice swatch for French knots or simple smiles before stitching the final piece.
Homemade texture ideas
- Puff-stitched center: On Round 3, replace each sc with a puff stitch (yarn over, insert, pull up a loop x3, then pull through all loops). However, this thickens the fabric—use a slightly smaller hook for firmness.
- Surface slip stitch outline: After finishing the center, surface sl st a circle around Round 2 using a contrasting color to frame the face. Additionally, keep your hook size small for precision.
- Speckled petals: Hold a strand of metallic sewing thread with the petal yarn for subtle sparkle without bulk. Alternatively, blend two close shades for a marled look.
Troubleshooting quick guide
- Fabric too open: Downsize the hook by 0.25–0.5 mm; then test a few stitches again.
- Disc curling upward: You may be too tight; relax your tension slightly or add a blocking step. Additionally, check that you didn’t miss an increase.
- Petals folding forward: Steam lightly and pinch to set. Stiffer cotton yarn helps; furthermore, avoid overlong petals on soft acrylics.
- Embroidery pulling through: Use shorter lengths of thread and avoid over-tightening. Additionally, anchor knots under the felt backing.
- Strap wobble: Reinforce with extra stitches through the strap and flower back; then tug-test before gifting.
Wash and care
- Cotton: Hand-wash cool, lay flat to dry. Additionally, reshape petals while damp.
- Acrylic: Spot clean with mild soap and water. Moreover, avoid high heat.
- Hardware: Remove if possible before washing to prevent rusting; dry thoroughly. Additionally, store in a dry place.
Step-by-step summary (quick checklist)
- First, crochet the center disc (Rounds 1–4; optionally Round 5).
- Next, add petals around the edge, either in every stitch or every other stitch.
- Then, optionally add two curly tentacles at the bottom back.
- After that, embroider the face or attach safety eyes; then add a smile and blush.
- Next, make a strap and attach the hardware securely.
- Finally, finish with felt backing (optional), weave ends, and block petals.
Why this pattern works for beginners
- Short, repetitive rounds help you build confidence; likewise, they’re easy to correct.
- Petals are self-contained mini-motifs, so mistakes only affect one petal at a time. Consequently, frustration stays low.
- The face can be repositioned before finalizing; therefore, you can test different expressions.
- The project completes quickly; as a result, learning is reinforced with a satisfying finish.
Estimated yardage recap
- Total: roughly 30–45 yd (27–41 m)
- Center: 14–20 yd (13–18 m)
- Petals: 12–20 yd (11–18 m)
- Tentacles + strap: 6–10 yd (5.5–9 m)
Eco and gift ideas
- Use leftover yarn to reduce waste; additionally, sort scraps by color families for cohesive sets.
- Make seasonal sets (spring pastels, summer brights, autumn rust + gold, winter jewel tones). Furthermore, bundle two charms per gift for variety.
- Gift-ready: Package with a mini note that says “Thanks for helping me bloom!” Moreover, add a tiny sachet for a scented surprise.
Alt text suggestions for images
- Image 1 alt: Happy Blossom Crochet Keychain Pattern — smiling flower keychain with yellow center and pink petals
- Image 2 alt: Crochet smiley flower keychain pattern steps — center disc and petal construction
- Image 3 alt: Smiley blossom crochet charm with curly tentacles — handmade keychain gift idea
- Image 4 alt: Happy Blossom Crochet Keychain Pattern strap attachment — crochet loop on split ring
- Image 5 alt: Beginner crochet flower charm with embroidered smile — cheerful blossom keychain tutorial
SEO note
- Focus keyphrase used: Happy Blossom Crochet Keychain Pattern. Additionally, repeat it in the meta description and one subheading for clarity.
- Sprinkle synonyms in headings and alt text: crochet smiley flower keychain pattern, smiling blossom charm tutorial, cheerful flower keychain crochet. Moreover, include “smiley blossom keychain” and “crochet flower charm pattern” naturally within body text.
With your Happy Blossom Crochet Keychain finished, clip it to your keys, backpack, or tote and carry a little handmade sunshine with you. Even better, because it’s quick and friendly to make, you can craft a garden full of smiles in an afternoon. Finally, have fun customizing colors, petal styles, and those playful little tentacles, then share the joy by gifting them to friends, teachers, and anyone who needs a bright moment.