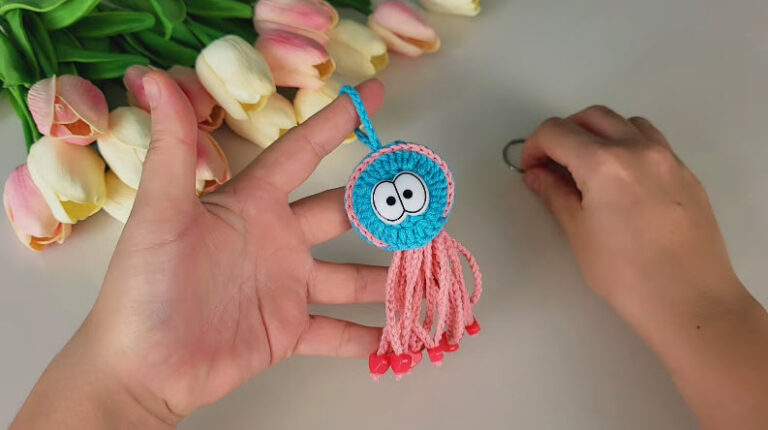
Crochet Hungry Caterpillar Keyring Amigurumi Pattern
Craving a cute, quick make? Try the Crochet Hungry Caterpillar Keyring Amigurumi Pattern, colorful, stash-busting, and sturdy, perfect for backpacks, teacher gifts, or craft-fair bestsellers.
Stitch a tiny burst of cheer with this Crochet Hungry Caterpillar Keyring Amigurumi Pattern. Designed for beginners, it works up fast with simple stitches, clear step-by-step guidance, and tips for tidy color changes. Use leftover yarn to build bright stripes, choose safety eyes or embroidery, and attach to a sturdy split ring for everyday durability.

Compact, lightweight, and customizable, this little crawler is perfect for last-minute gifts, market tables, or personal flair an adorable way to practice amigurumi shaping without the time commitment.
Uses:
- Clip to keys, backpacks, or pencil cases for a pop of color.
- Thoughtful gift for teachers, book lovers, party favors, or stocking stuffers.
- Small, quick make ideal for craft fairs and beginner workshops.
Crochet Hungry Caterpillar Keyring Amigurumi Pattern
To begin, if you’re craving a cheerful, stash-busting make that finishes fast, this Crochet Hungry Caterpillar Keyring Amigurumi Pattern is exactly what you need. Moreover, it transforms tiny yarn leftovers into a bright, durable keychain that’s perfect for gifts, party favors, and market tables. Additionally, you’ll find every step beginner-ready, with clear times, tidy techniques, and practical sizing tips.
Level of Difficulty
Firstly, this pattern is beginner-level. Furthermore, it uses only basic stitches (single crochet, increase, invisible decrease), simple shaping, and minimal sewing, which, in turn, makes it highly approachable.
Finished Size
Importantly, the finished keyring measures approximately 7–8 cm (2.75–3.25 in) long, excluding hardware, when worked with DK cotton and a 2.5 mm hook. Additionally, size will vary with yarn weight and personal tension.
Materials (Exact Measurements)
- To start, DK (8-ply) cotton yarn:
- Green: 6 g
- Red: 3 g
- Yellow/chartreuse (optional stripes/eye backing): 1 g
- Purple (antennae, optional): 1 g
- Black (embroidery): 0.5 g
- Next, crochet hook: 2.5 mm (US B/1–C/2) for firm amigurumi fabric
- Additionally, safety eyes: 6 mm (1 pair), or embroidered eyes for under-3s
- Moreover, keyring hardware: 25 mm split ring with 20–25 mm chain or swivel
- Fiberfill stuffing: 5 g
- Tapestry needle and stitch marker
- Scissors and small pliers (for jump rings)
- Optionally, tiny felt circles (8–10 mm) for eye backing and fabric glue for extra security
Special Features
- Notably, this is stash-friendly and scrap-efficient.
- Additionally, segmented construction keeps shaping simple.
- Furthermore, it’s fully customizable in length, colors, and facial details.
Abbreviations (US Terms)
- MR: magic ring
- ch: chain
- sc: single crochet
- inc: increase (2 sc in same stitch)
- dec: invisible decrease (for neat shaping)
- sl st: slip stitch
- sts: stitches
- R#: round number
Sizing Tips
- For a firmer, smaller keychain, use a 2.25 mm hook; conversely, for a slightly larger plush, use a 3.0 mm hook.
- Additionally, maintain snug tension to prevent stuffing from peeking through.
- Finally, adding one extra segment increases length by roughly 2–2.5 cm (0.75–1 in).
Step-by-Step Instructions (Body and Assembly)
Overall estimated time: 75–95 minutes, depending on pace.
- Preparation and Setup (Time: 3–5 minutes)
- First, place a stitch marker in the first stitch of each round to track counts.
- Next, organize small parts (eyes, antennae, jump rings) in a dish so nothing rolls away.
- Additionally, pre-cut a 20–25 cm tail on segments for easier sewing.
- Head (Red) (Time: 20–25 minutes)
- R1: MR, 6 sc (6).
- R2: inc around (12).
- R3: (sc, inc) x6 (18).
- R4: (2 sc, inc) x6 (24).
- R5–R6: sc around (24).
- Then, insert 6 mm safety eyes between R5–R6, spaced 5–6 sts apart; optionally, back with yellow felt.
- R7: (2 sc, dec) x6 (18).
- R8: (sc, dec) x6 (12).
- After that, lightly stuff, shaping as you go.
- R9: dec around (6). Finally, fasten off and weave in the end. Consequently, the head should feel firm yet not overstretched.
- Antennae (Purple, optional) (Time: 4–6 minutes)
- First, make 2: ch 5; starting in 2nd ch from hook, sl st back across.
- Next, fasten off, leaving sewing tails.
- Finally, sew antennae on top of the head, slightly off-center for character.
- Body Segments (Green) Make 3 (Time: 10–12 minutes each; 30–36 minutes total)
- Segment Pattern:
- R1: MR, 6 sc (6).
- R2: inc around (12).
- R3: (sc, inc) x6 (18).
- R4: sc around (18); optionally, change to yellow for a slim stripe.
- R5: (sc, dec) x6 (12).
- Next, lightly stuff.
- R6: dec around (6).
- Finally, fasten off each segment with a 20–25 cm tail for sewing. Moreover, keep stuffing modestly so segments nest smoothly.
- Assembly: Build the Caterpillar Curve (Time: 8–10 minutes)
- First, lay out the head and segments to preview your curve.
- Then, using the tail of the first segment, whipstitch it to the head; gently pull to nest the curves.
- Afterward, attach the second and third segments in a slight arc.
- Finally, weave in any remaining ends. Consequently, the silhouette will read as lively and balanced.
- Keyring Loop and Hardware (Time: 3–5 minutes)
- Yarn loop option: First, ch 8; then, sl st to form a loop. Next, sew it securely to the head’s top-back. Finally, slide on the split ring.
- Hardware option: Alternatively, open a jump ring with pliers, pass it through a top stitch, attach the chain and keyring, and close firmly. As a result, you’ll get a durable, professional attachment.
- Facial Details and Accents (Time: 5–7 minutes)
- If needed, embroider eyes with black thread; additionally, add yellow felt backing for contrast.
- Next, embroider a small mouth with black.
- Optionally, add tiny “feet” by stitching short horizontal marks along the underside. Consequently, the piece gains extra charm.
- Final Shaping and Finish (Time: 4–6 minutes)
- First, roll the caterpillar gently between your palms to even out the fill.
- Then, trim and secure all tails; additionally, dot a tiny bit of fabric glue on interior knots if desired.
- Finally, check that the curve holds and the hardware feels secure.
Common Mistakes (and How to Avoid Them)
- However, if stuffing shows through, your tension may be loose or your hook too large; therefore, switch to a 2.5 mm hook or tighten slightly.
- Moreover, if you lose stitch counts, always use a marker and, additionally, tally stitches at the end of each round.
- Furthermore, lumpy shaping usually means uneven stuffing; consequently, add fiberfill gradually and avoid overfilling near decreases.
- Additionally, color jogs at stripes can distract the eye; therefore, use an invisible color change and keep the jog at the back.
- Lastly, a wobbly keyring loop indicates weak anchoring; thus, stitch through multiple top stitches or use a jump ring for reinforcement.
Variations to Try
- Alternatively, make a Rainbow Caterpillar with each segment in a different color for maximum pop.
- For a mini version, use fingering-weight cotton and a 2.0–2.25 mm hook; moreover, stop increases at 12 sts for micro segments.
- Conversely, for a chunky plush, use worsted cotton with a 3.5 mm hook and, additionally, add a fourth segment.
- For personality, embroider sleepy eyes and, optionally, add blush dots with soft fabric paint.
- Finally, attach a tiny leaf charm (ch 6; then sc, hdc, dc, hdc, sc along the chain; sl st to start) for a playful nod to the theme.
Tutor Suggestions (Beginner Coaching)
- To begin, count out loud during increases and decreases to keep rhythm.
- Furthermore, the place increases over prior increases to maintain smooth spheres.
- Additionally, practice invisible decreases beforehand, because neat shaping dramatically improves the finish.
- Moreover, choose matte cotton yarn, since it shows stitches clearly and resists fuzz on keychains.
- Finally, take short breaks; as a result, your tension stays consistent, and your stitching remains comfortable.
Finishing Tips
- Before you finish, weave ends in two directions to lock them; consequently, daily wear won’t loosen the seams.
- Additionally, tug-test the hardware; if it budges, therefore add a second anchor point or extra stitches.
- Moreover, for shaping, hover a steam iron 2–3 cm above the piece and gently nudge into place; however, do not overheat the safety eyes.
- Finally, for gifting or markets, package in a 6×9 cm clear sleeve with a simple branded tag; as a result, your presentation looks professional.
Care and Safety
- As a rule, spot clean with a damp cloth only, because hardware does not enjoy machine washing.
- For children under 3, embroider features instead of using safety eyes; additionally, either secure hardware extremely well or remove it entirely.
SEO Note and Resource
- To wrap up, if this Crochet Hungry Caterpillar Keyring Amigurumi Pattern helped, consider bookmarking and sharing it to support other beginners. Additionally, with straightforward stitches, clear timing, and polished finishing, your caterpillar keyring will become a quick, colorful favorite you’ll proudly clip to your everyday carry.