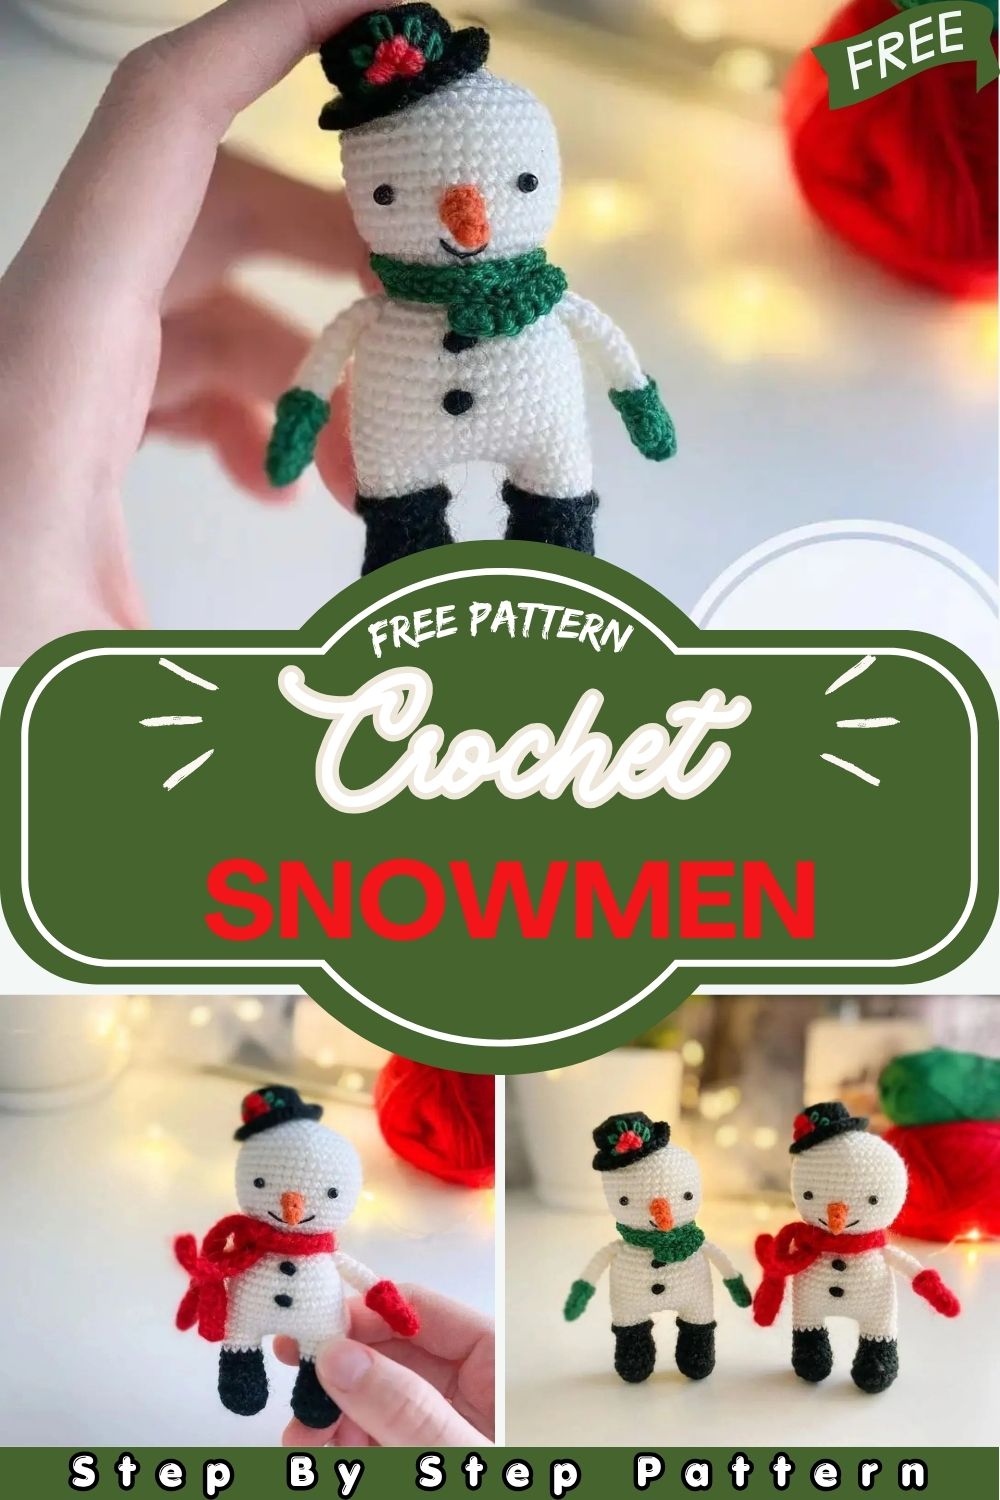
Shining Crochet Snowmen Amigurumi Pattern for Lovely Finishes
This adorable little Crochet Snowmen Amigurumi Pattern is the perfect winter crochet project! Standing just 8–9 cm tall, he is beginner-friendly and quick to work up. With his tiny hat, cozy scarf, and little mitten hands, this snowman makes a sweet holiday decoration or handmade gift.
Winter is the perfect time to pick up your crochet hook and make something truly special. This little snowman pattern is simple enough for beginners yet charming enough to impress everyone who sees it. Standing just 8–9 cm tall, he comes complete with a classic black hat, a warm wrapped scarf, and the cutest mittens. Whether you make him as a holiday decoration, a tree ornament, or a handmade gift for someone you love, this tiny snowman is guaranteed to bring a smile to every face.
Snowman Crochet Pattern
Finished size: 8–9 cm
Materials
- Yarn (white, black, a little orange, red and green)
- White and black – Vita Brilliant (380 m/100 g)
- Orange -YarnArt Jeans yarn divided in half
- Red – Alize Angora Real 40
- Green – Vita Coco
- Any yarn can be used.
- Crochet hook -Clover size 1.5 mm
- Plastic eyes size 3 mm + glue
- Black fine thread for mouth embroidery Iris yarn
- Polyester fiberfill, needle, pins, scissors
Abbreviations
- MR — Magic (amigurumi) ring
- ch — Chain
- sc — Single crochet
- inc — Increase
- dec — Decrease
- slst — Slip stitch
- dc — Double crochet
- BLO — Back loop only
- FLO — Front loop only
pattern instructions
Legs (Make 2)
Yarn: Black
- R1: 6 sc in MR (6)
- R2: 6 inc (12)
- R3: (1 sc, inc) × 6 (18)
- R4: 18 sc (18)
- R5: 2 sc, 4 dec, 8 sc (14)
- R6: 2 sc, 2 dec, 8 sc (12)
- R7: 12 sc — stuff the foot (12)
- R8: Work to the middle of the back of the leg (~8 sc), change to white
- R9: BLO — 12 sc (12)
- R10: 12 sc — stuff the leg (12)
Cut the read on the first leg. Make the second leg similarly. Do not cut the thread on the second leg. Continue crocheting the body. Attach black thread to R8 of the leg and work 12 slst in round. Weave in ends.
Body
Yarn: White (joined from legs)
- Join: Make 4 ch from the second leg, then:
- R11: 12 sc on first leg, inc, 2 sc, inc, 12 sc on second leg, 4 sc (34)
- R12: 5 sc, inc, 17 sc, inc, 10 sc (36)
- R13–20: 36 sc (8 rounds) (36)
- R21: (4 sc, dec) × 6 (30)
- R22: (3 sc, dec) × 6 — stuff the body (24)
- R23: (2 sc, dec) × 6 (18)
- R24: (1 sc, dec) × 6 (12)
- R25: 12 sc — continue to head (12)
Head
Yarn: White
Option A — Big Head
- R26: 12 inc (24)
- R27: (1 sc, inc) × 12 (36)
- R28: (5 sc, inc) × 6 (42)
- R29–37: 42 sc — 9 rounds (42)
- R38: (5 sc, dec) × 6 (36)
- R39: (4 sc, dec) × 6 (30)
- R40: (3 sc, dec) × 6 (24)
- R41: (2 sc, dec) × 6 (18)
- R42: (1 sc, dec) × 6 — stuff neck and head (12)
- R43: 6 dec — cut thread, tighten opening, weave in ends (6)
Option B — Regular Head
- R26: 12 inc (24)
- R27: (1 sc, inc) × 12 (36)
- R28–37: 36 sc — 10 rounds (36)
- R38: (4 sc, dec) × 6 (30)
- R39: (3 sc, dec) × 6 (24)
- R40: (2 sc, dec) × 6 (18)
- R41: (1 sc, dec) × 6 — stuff neck and head (12)
- R42: 6 dec — cut thread, tighten opening, weave in ends (6)
Arms (Make 2)
Yarn: Red (mittens), then White
- R1: 9 sc in MR (9)
- R2–3: 9 sc — 2 rounds (9)
- R4: 2 sc, bobble stitch (3 dc with common top = finger), 6 sc (9)
- R5: Change to white — BLO: 9 sc (9)
- R6: 2 sc, 3 dec, 1 sc (6)
- R7–11: 6 sc — 5 rounds (6)
Do not stuff the arm. Cut thread, leave end for sewing. Sew edges so the finger faces sideways. Attach red thread to R4 and work 9 sc around. Weave in ends.
Nose
Yarn: Orange
- R1: 4 sc in MR (4)
- R2: 4 sc (4)
- R3: 1 sc, inc, 2 sc — stuff a little (5)
Cut thread, leave end for sewing.
Hat
Yarn: Black
- R1: 6 sc in MR (6)
- R2: 6 in (12)
- R3: (1 sc, inc) × 6 (18)
- R4: BLO — 18 sc (18)
- R5–6: 18 sc — 2 rounds (18)
- R7: FLO — 18 sc (18)
- R8: (2 sc, inc) × 6, slst — cut thread, leave end for sewing (24)
Scarf
Make 40 ch (or any number of stitches enough to tie around the toy’s neck). From the 2nd stitch from the hook, work 39 sc. Tie around the neck.
Assembly
1 Face Details
- Glue eyes between R12–13 (counting from the crown), with 8 sc between them.
- Sew nose onto R14–15 (counting from the crown) of the head.
- Embroider mouth with black thread on R16 6 sc wide (or 3 sc).
2 Body Details
- Make 2 yarn buttons: cut ~30 cm thread, make a loop, pass one end through the loop 4–5 times, pull both ends to form a small ball. Sew between R16–17 and between R19–20.
- Sew arms 2 rounds below the neck.
3 Final Touches
- Sew the hat onto the head, stuff lightly as you go. Optional: embroider berries (same as buttons) and leaves with lazy daisy stitch.
- Tie a scarf around the neck. Your snowman is ready
Customization and Variations
One of the best things about this Crochet Snowmen Amigurumi Pattern is how easily you can change up his hat and scarf to give him a completely different personality.
Hat Style Changes
For the hat, try crocheting it in deep burgundy or forest green instead of black for a more festive holiday feel. You can also add a small brim detail or a tiny pompom on top to make it extra cute. If you want a more playful look, skip the structured hat and crochet a simple beanie-style cap instead.
Scarf Style Changes
For the scarf, experiment with stripes by alternating two colors every few rows. A chunky, oversized scarf gives him a cozy bundled-up look, while a thin delicate one keeps him looking neat and classic. You can also add a fringe at both ends for extra charm.
Every small change makes your snowman truly one of a kind.
Gifting Ideas
This tiny Crochet Snowmen Amigurumi Pattern makes the most heartwarming handmade gift for so many occasions. Here are some sweet ways to gift him:
- Christmas gift: Tuck him into a small gift box with tissue paper and a handwritten tag for a personal holiday surprise.
- Tree ornament: Attach a small ribbon loop to the hat and gift it as a ready-to-hang Christmas tree decoration.
- Baby shower gift: Make a few in soft pastel colors and bundle them together as an adorable nursery decoration set.
- Teacher appreciation gift: A handmade snowman is a thoughtful and unique way to show gratitude during the winter season.
- Party favor: Make a small batch and place them in clear bags tied with ribbon for a charming winter party favor.
Handmade gifts always carry extra love and this little snowman delivers just that!
Conclusion
This little Crochet Snowmen Amigurumi Pattern is more than just a crochet project he is a tiny handmade piece of winter magic. Whether you are a beginner or an experienced crafter, this pattern is enjoyable from the very first stitch to the last finishing touch.
Make one for yourself, gift one to someone special, or create a whole snowman family this holiday season.