Passionate Crochet Cat Doll Body Ears Tail Amigurumi Full Master Class Pattern
If you’re looking for a free crochet cat doll amigurumi pattern, this beginner-friendly project is a perfect place to start. This cute amigurumi cat doll works up with basic stitches and simple shaping, making it ideal for first-time amigurumi makers. Use it as a sweet handmade gift, a small desk decoration, or even turn it into a crochet keychain cat by adding keyring hardware.
Amigurumi is one of the most fun ways to crochet because you get fast, rewarding results—tiny shapes become adorable characters right in your hands. If you’re new to stuffed crochet toys, this beginner crochet amigurumi project is designed to feel approachable: you’ll practice working in the round, increasing and decreasing, stuffing, and simple sewing—core skills that carry over into almost every amigurumi cat pattern.
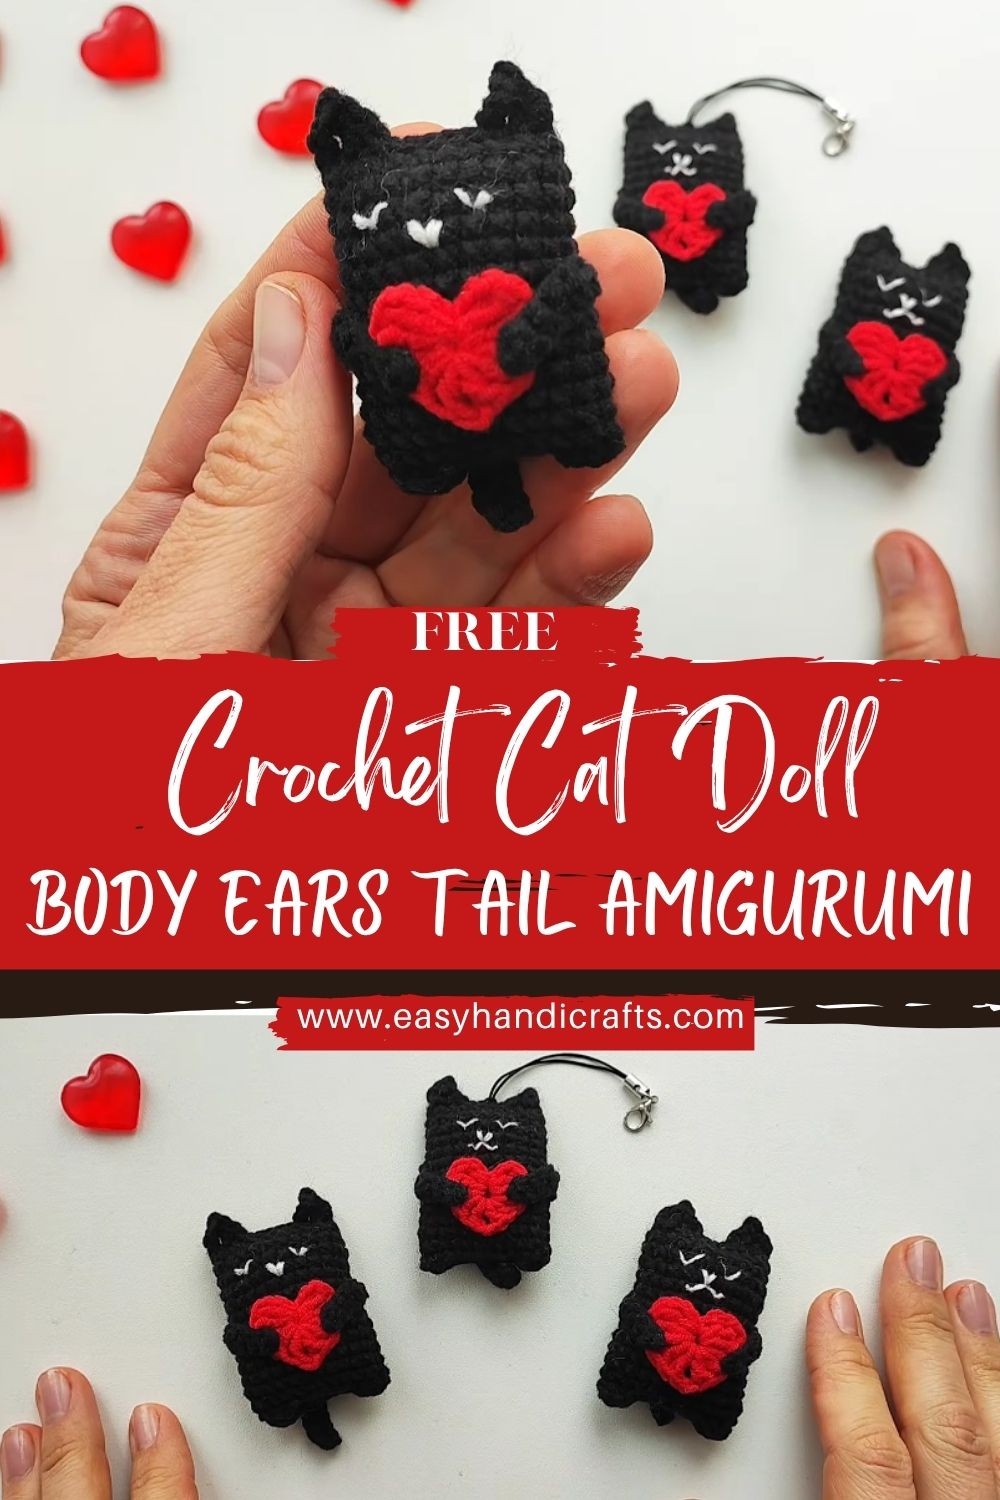
What makes this crochet cat doll extra charming is the cute, doll-like styling: a rounded head, little ears, a small body, and a sweet heart detail on the front. The heart can be crocheted or embroidered, so you can keep things super simple or add a pop of color for extra personality. Choose classic kitty shades (white, gray, black) or go playful with pastel yarns for a kawaii look.
This little cat is flexible, too. Make it as a soft toy, display it on a shelf, decorate a gift basket, or attach a loop and keyring to turn it into a sturdy crochet keychain cat. Either way, you’ll end up with a lovable handmade piece that’s perfect for gifting and easy to customize.
Materials Needed
- Yarn: DK (size 3) cotton or cotton-blend yarn
- Main color: 30–40 g (cat body)
- Accent color: 5–10 g (heart + small details)
- Hook size: 2.75 mm or 3.0 mm (choose smaller if stitches feel loose)
- Safety eyes: 6 mm (or black embroidery thread to stitch eyes)
- Fiberfill stuffing: about 15–25 g (small handfuls)
- Stitch markers: 1–2
- Yarn needle: 1
- Scissors: 1
- Keychain ring (optional): 1 (about 2.5–3 cm) if making a keychain version
Skill Level
Beginner / Easy
First, the pattern uses mostly single crochet with simple increases and decreases. Next, the parts are small and forgiving, and the assembly is straightforward, with slow, careful stitching.
Making Time (Overview)
Total time: 2–3 hours
Meanwhile, crochet speed varies so that beginners may take a little longer, and that is completely fine.
Instructions
Notes Before Starting
- Work in continuous rounds (no slip-stitch joins) unless otherwise stated.
- Use a stitch marker to mark the first stitch of each round.
- Abbreviations:
- MR = magic ring
- sc = single crochet
- inc = increase (2 sc in the same stitch)
- dec = decrease (invisible decrease recommended)
- st(s) = stitch(es)
1. Body (Main Part)
Making time: 60–90 minutes
First, the body is formed as a single main piece, starting at the bottom and shaping upward.
- Rnd 1: 6 sc in MR (6)
- Rnd 2: inc around (12)
- Rnd 3: (sc, inc) around (18)
- Rnd 4: (2 sc, inc) around (24)
- Rnd 5: (3 sc, inc) around (30)
- Rnd 6: (4 sc, inc) around (36)
- Rnd 7–12: sc around (36)
Next, it’s time to shape the top gently.
- Rnd 13: (4 sc, dec) around (30)
- Rnd 14: sc around (30)
- Rnd 15: (3 sc, dec) around (24)
- Rnd 16: (2 sc, dec) around (18)
Meanwhile, start stuffing now. First, add small pieces of fiberfill, then press them into the curve so the body stays smooth.
- Rnd 17: (sc, dec) around (12)
- Add a little more stuffing, then gently shape the body.
- Rnd 18: dec around (6)
- Fasten off and close the hole neatly. Weave in the end.
After that, set the body aside while the extra parts are made.
2. Additional Parts
Ears (Make 2)
Making time: 10–15 minutes total
First, the ears are tiny triangles that add instant “cat” character.
- Rnd 1: 4 sc in MR (4)
- Rnd 2: (sc, inc) around (6)
- Rnd 3: sc around (6)
- Rnd 4: (2 sc, inc) around (8)
- Rnd 5: sc around (8)
Next, fasten off, leaving a long tail for sewing. Do not stuff the ears; they look best slightly flat.
Arms (Make 2)
Making time: 15–20 minutes total
First, these are simple little tubes.
- Rnd 1: 6 sc in MR (6)
- Rnd 2: sc around (6)
- Rnd 3: sc around (6)
- Rnd 4: sc around (6)
- Fasten off, leaving a sewing tail.
After that, add just a pinch of stuffing if desired, but keep them soft so they sit nicely against the body.
Legs (Make 2)
Making time: 15–20 minutes total
Next, the legs are slightly longer for a cute sitting look.
- Rnd 1: 6 sc in MR (6)
- Rnd 2: (sc, inc) around (9)
- Rnd 3–5: sc around (9)
- Fasten off, leaving a sewing tail.
Meanwhile, lightly stuff the legs so they look rounded but not stiff.
Tail (Make 1)
Making time: 10–15 minutes
After that, the tail is made as a slim piece and attached with a gentle curve.
- Rnd 1: 6 sc in MR (6)
- Rnd 2–10: sc around (6)
- Fasten off, leaving a long sewing tail.
Next, leave the tail unstuffed or add only a whisper of stuffing. A softer tail curves cutely and feels more “plush.”
3. Heart / Accessories / Details (Chest Heart)
Making time: 10 minutes
First, a tiny heart detail gives the Crochet Cat Doll a sweet, handmade signature.
Simple mini heart (flat):
- Makeana MR.
- Into the ring: 3 dc, 1 tr, 3 dc, 1 ch, sl st (heart shape forms).
- Tighten the ring, fasten off, and leave a tail for sewing.
Next, stitch the heart onto the center of the chest using small, neat whip stitches. Meanwhile, keep stitches shallow so they don’t show inside the doll.
Face & Assembly
Face Placement (Beginner-Friendly)
First, decide the “front” of the body. Next, place the eyes before stitching anything down.
- For 6 mm safety eyes, place them between Rounds 10–11, about 6–7 stitches apart.
- If using embroidery, stitch small oval eyes with black thread in the same area.
After that, stitch a small mouth:
- Use pink or black thread.
- Make a tiny vertical stitch for the nose, then add a soft “v” or curved smile underneath.
Meanwhile, add whiskers:
- Stitch 2–3 short lines on each side of the face using thin yarn or embroidery thread.
Assembly Order (Neat and Easy)
- Sew ears to the top of the body, spaced evenly. First pin them with scrap yarn, then stitch them down.
- Attach arms slightly below the face area, one on each side.
- Attach legs near the bottom front so the doll can “sit.”
- Sew the tail to the back, slightly off-center for extra cuteness.
- Sew the heart onto the chest.
Finally, weave in all the ends securely and gently shape everything with your fingers.
Special Features
- Soft texture: tight single crochet makes a smooth, plush finish
- Cute mini size: small enough for shelves, desks, or backpacks
- Expressive face: tiny changes in eye spacing and mouth shape create new personalities
- Handmade charm: the heart detail adds a thoughtful, gift-ready touch
Sizing Tips
First, yarn choice changes everything. Using DK yarn makes a smaller doll, and switching to worsted (size 4) makes it bigger with the same pattern. Next, hook size also matters: a smaller hook creates tighter stitches and a firmer shape, while a larger hook makes looser fabric.
Meanwhile, remember this simple rule: tighter stitches = smaller, neater doll (and less stuffing showing). After that, if stitches feel gappy, drop down to a smaller hook size.
Finishing Tips
- First, count stitches at the end of each round to keep shaping even.
- Next, stuff in small pieces rather than one big clump to achieve a smooth surface.
- Meanwhile, keep stuffing lighter near the top so the head area doesn’t look lumpy.
- After that, pull knots inside the doll when possible, then weave ends through several stitches.
- Finally, use finger shaping: gentle pressing and rolling make the cat look polished.
Common Mistakes to Avoid
- Loose stitches: stuffing may peek through; next time, go down a hook size.
- Uneven stuffing: bumpy bodies usually come from large stuffing chunks; use smaller bits and spread them slowly.
- Misplaced facial features: eyes set too high or too close can change the expression; pin or mark placement first.
- Skipping stitch counting: one missed increase can tilt the shape; count regularly, especially on increase/decrease rounds.
Variations & Customization Ideas
First, play with colors: white, grey, orange tabby shades, or soft pastels all look adorable. Next, change the heart color to match a favorite theme—red for classic love, pink for sweet gifts, or gold for a “lucky charm” style.
Meanwhile, add accessories:
- A tiny bow near one ear
- A simple scarf (chain length around the neck and tie)
- A keychain version is created by stitching a loop at the top and attaching a ring to it.
After that, make bigger or smaller versions by changing yarn weight and hook size while keeping the same steps. Tutor Suggestions
First, focus on consistency rather than speed. Next, keep tension steady and stitches firm, because amigurumi looks best when it’s neat and tight. Meanwhile, if the first doll looks a little quirky, that’s normal—each one improves stitch control.
After that, remember: small parts are easier when made calmly, one round at a time, with a stitch marker always in place. Finally, celebrate the finish, because completing a Crochet Cat Doll is a real crochet milestone.
Conclusion
A Crochet Cat Doll is a cozy, beginner-friendly amigurumi project that turns simple stitches into a sweet handmade companion. First, the body works up quickly, and next, the tiny ears, tail, and heart detail bring the personality to life. Finally, with a few easy customization options, this little cat can become a thoughtful gift, a cute keychain, or a collectible series in every color.