Smile Crochet Daisy AirPods Case Pattern with ribbon tie
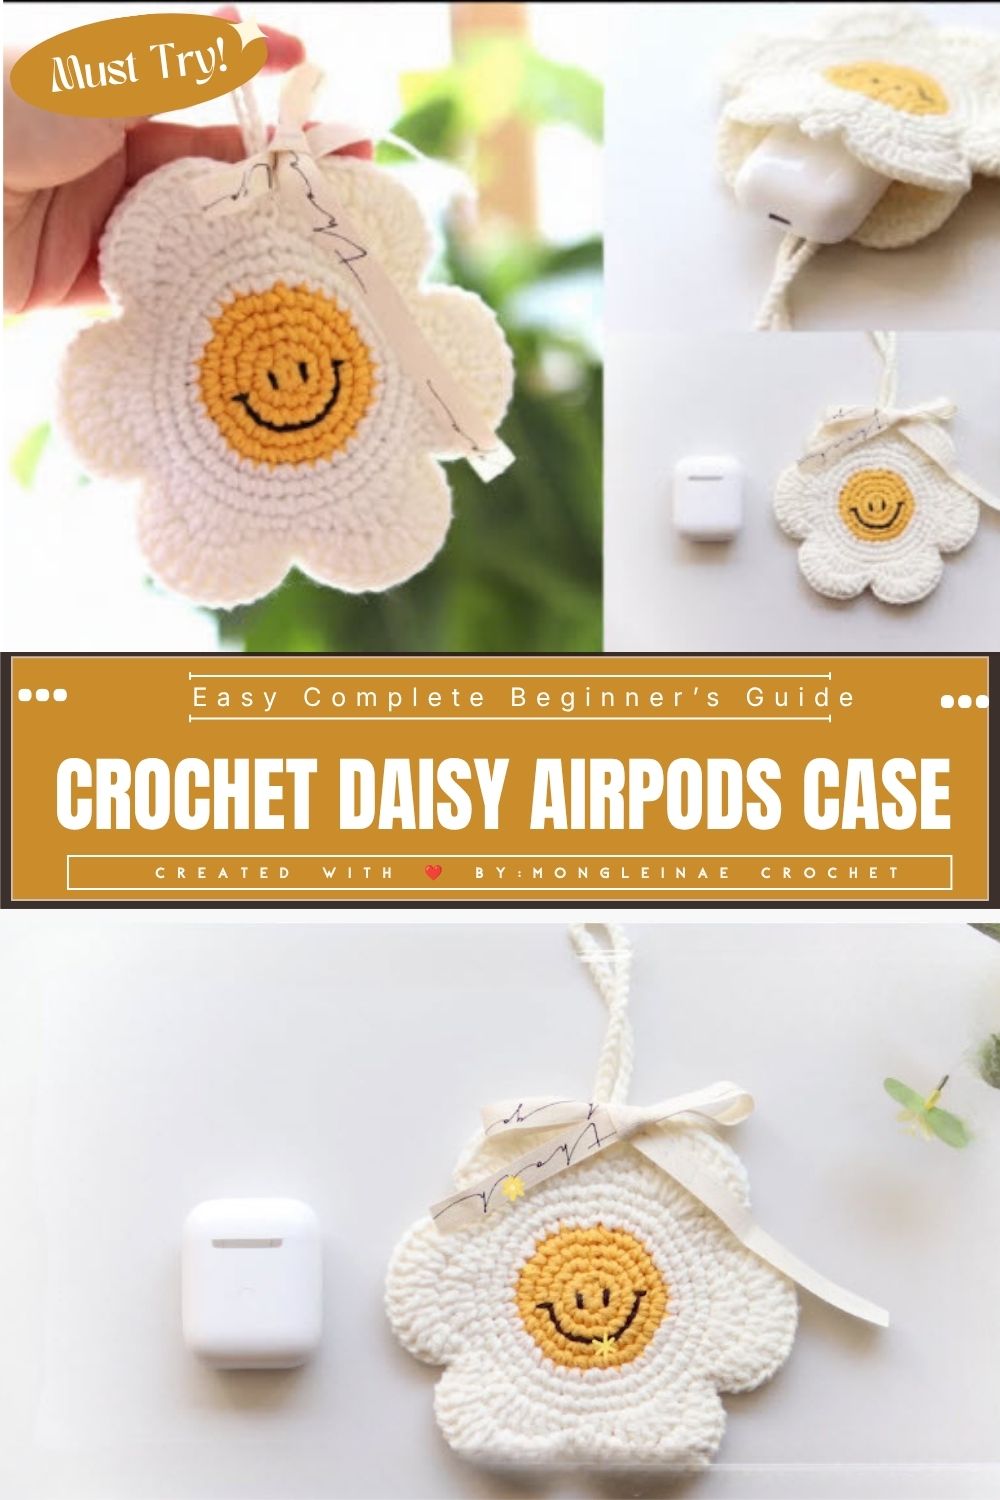
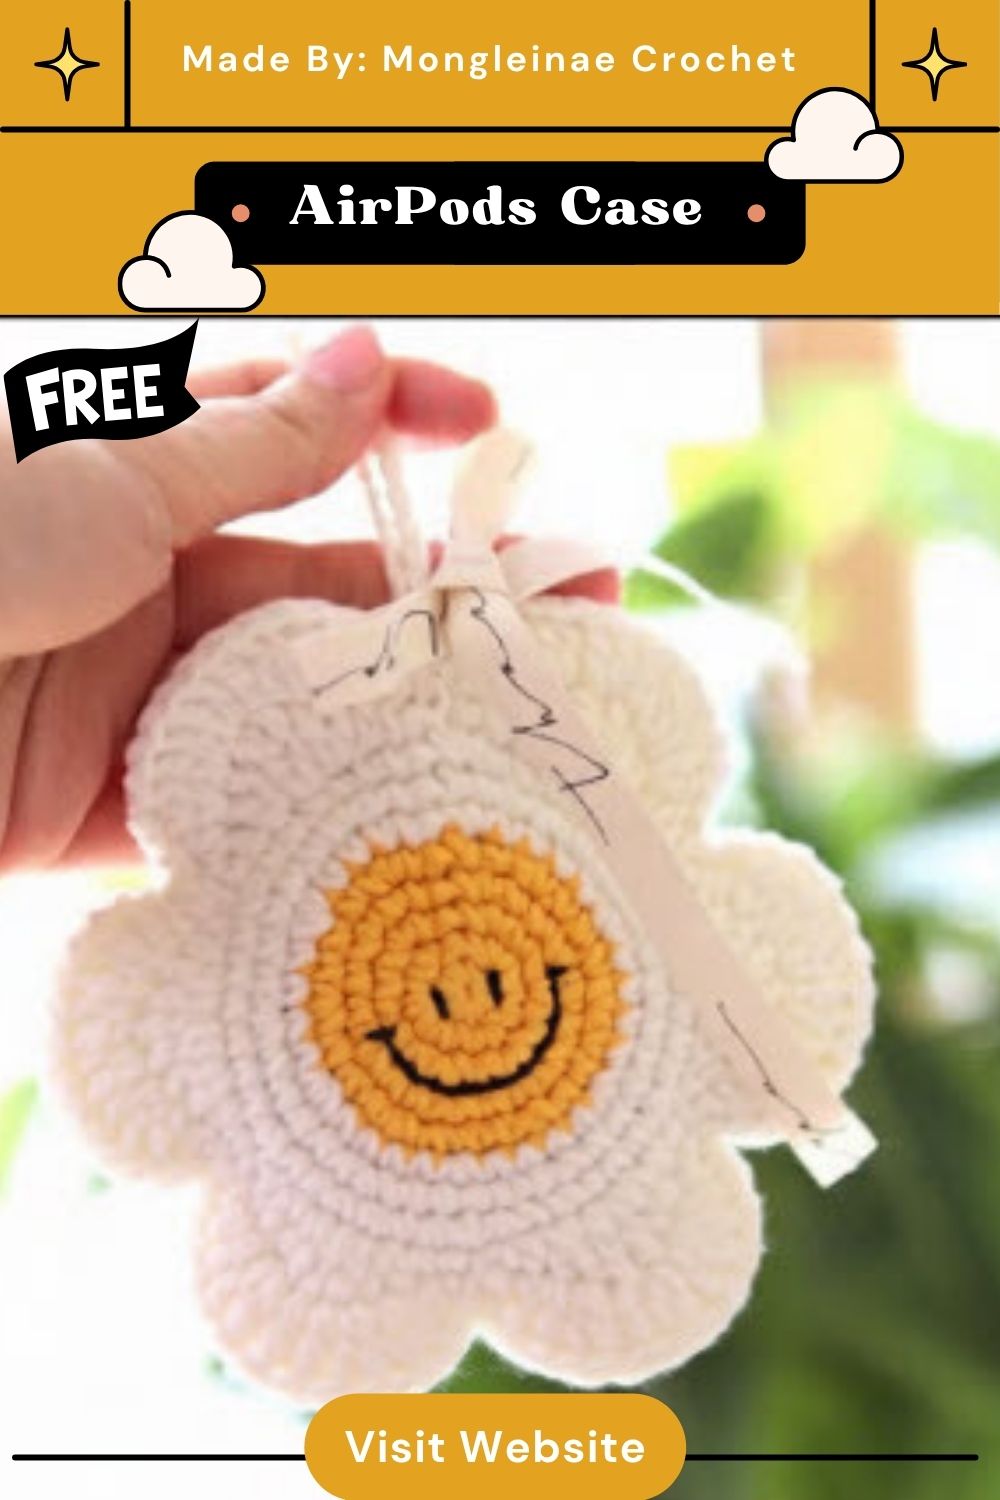
The Smile Crochet Daisy AirPods Case Pattern with a ribbon tie turns a simple earbuds pouch into a sunny little accessory. Soft white petals wrap around a golden center, finished with a hand-stitched smile. It works up fast and feels genuinely fun to carry.
This pattern stands out because it blends amigurumi charm with everyday function. Instead of a plain pouch, crafters get a dimensional flower shape with layered petals and a cheerful face detail. The daisy earbuds pouch style suits gift-giving occasions, while the smiling flower case look adds personality that mass-produced accessories rarely offer. Consequently, it doubles as both a practical case and a small decorative object.
The Look and Feel of This Piece
Visually, the finished case reads as a full bloom rather than a basic circle. The center holds a warm mustard-yellow color, densely stitched and slightly domed. Around it, white petals fan outward in soft, rounded points, giving the piece texture and movement. Meanwhile, the embroidered smile adds a playful, almost character-like quality to the center.
The Smile Crochet Daisy AirPods Case feels squishy and compact once stuffed, since amigurumi-style single crochet naturally creates a tight, dense fabric. Because of that density, it holds its shape well without wires or stiffeners. Overall, the piece feels handmade in the best way — a little imperfect, a little charming.
Materials Needed
- Worsted weight yarn in yellow and white
- 3.5mm or 4mm crochet hook
- Yarn needle for weaving ends
- Black embroidery thread or yarn for the smile
- Small embroidery needle
- Ribbon for the tie closure
- Stitch marker
- Scissors
Techniques Used
This project relies on a handful of core amigurumi techniques. Single crochet forms the base fabric throughout, creating the tight stitches needed for shape retention. Additionally, magic ring starts give the center a seamless, gap-free beginning. Petal shaping uses front loop or back loop increases to create dimension, while surface embroidery adds the facial detail at the end. Color changes between yellow and white also come into play as the piece transitions from center to petals.
Making It
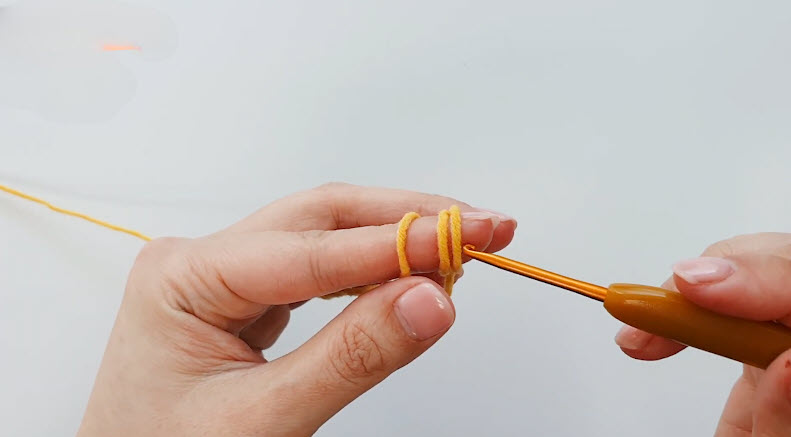
Step 1: Form the magic ring and secure the hook. Wrap the yellow yarn twice around the index finger to create the starting loop, then insert the crochet hook underneath both strands. Pull a small amount of yarn through gently, keeping the loop loose enough to work into but tight enough to hold its shape. This ring becomes the anchor point for every stitch that follows, so keeping the tail yarn taut with the opposite hand matters here.
Step 2: Insert the hook and pull up the first loop. With the ring held steady between thumb and middle finger, insert the hook into the center opening and pull up a fresh loop of yarn. Yarn over once more and draw through both loops on the hook to lock in the very first single crochet stitch. Repeat this motion slowly, working each new stitch directly into the ring rather than around it.
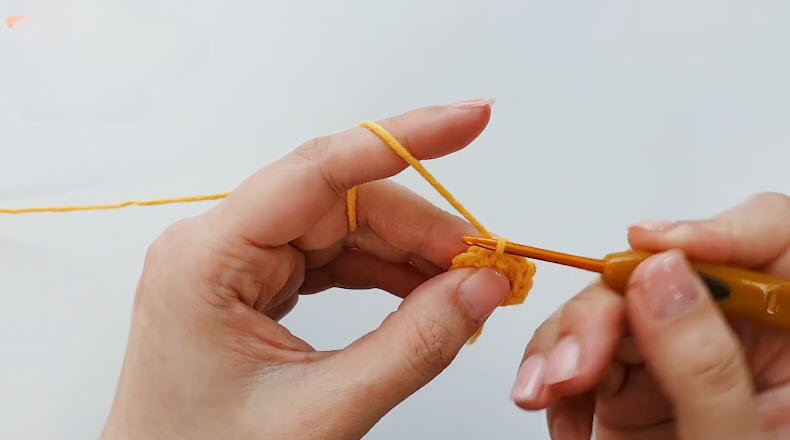
Step 3: Build out the full first round. Continue inserting the hook into the ring for each subsequent stitch, pulling up a loop and completing the single crochet every time. As the round fills in, the ring naturally tightens, so pulling the starting tail firmly closes any gap at the very center. By the end of this step, a small, solid yellow circle should sit flat with no visible hole.
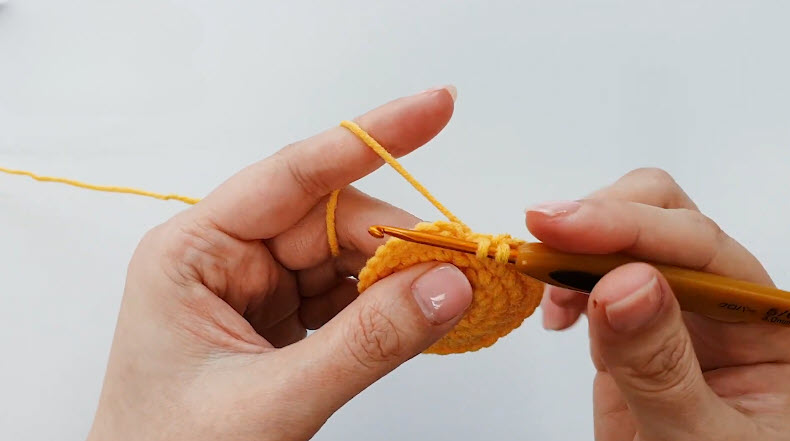
Step 4: Introduce the white yarn for the next round. Once the yellow circle round finishes, drop the yellow strand and yarn over with white instead, pulling it through to complete the join. Chain one stitch to set the new row height, then begin working single crochet stitches directly over the top of the previous round. This transition marks the boundary line between the center and the surrounding petal base.
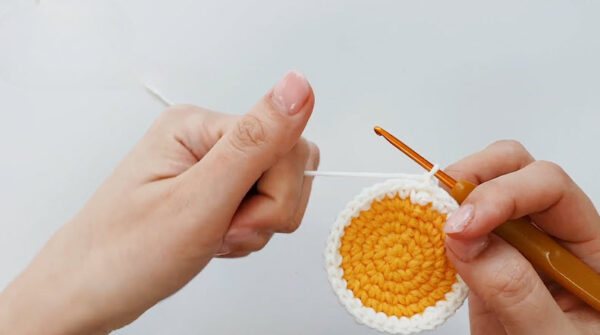
Step 5: Work the white base round evenly around the edge. Insert the hook into each stitch along the outer edge, keeping spacing consistent so the circle stays flat rather than curling or cupping. Counting stitches every few rounds helps confirm the edge is staying even, since an uneven count here throws off petal placement later. This round should sit snugly against the yellow center without pulling too tight.
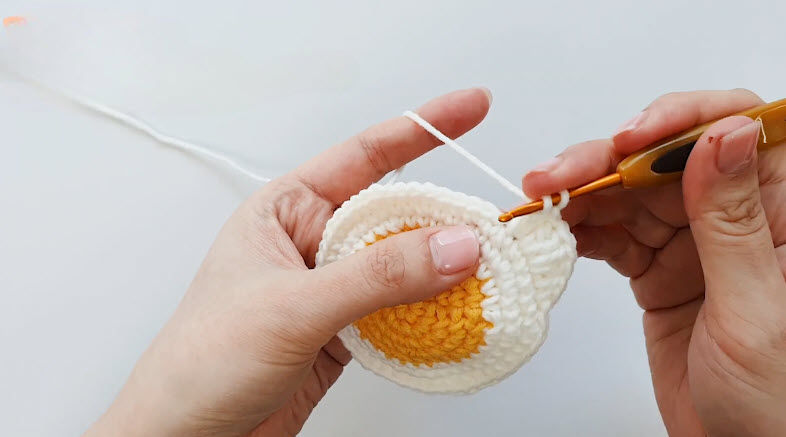
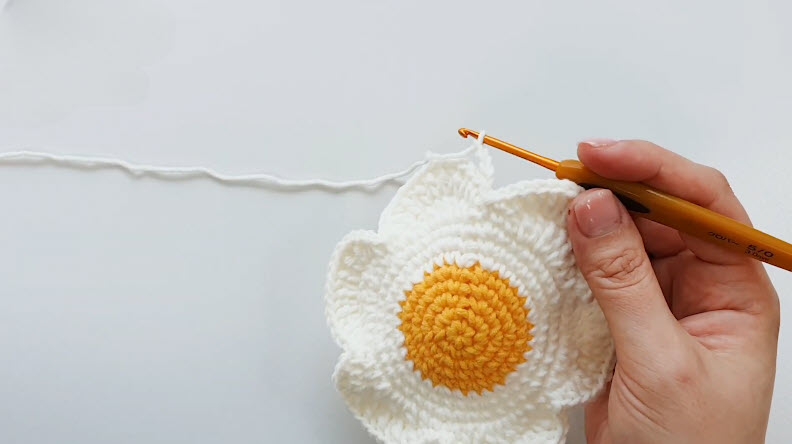
Step 6: Shape individual petals with the hook. Working directly into the front loops of the base round, insert the hook and build a small cluster of stitches typically a chain followed by double or treble crochet stitches — that curve outward into a rounded petal tip. Slip stitch back into the base to close each petal before moving to the next stitch and repeating. Continuing this pattern evenly around the circle produces the full ring of overlapping petals seen in the finished flower.
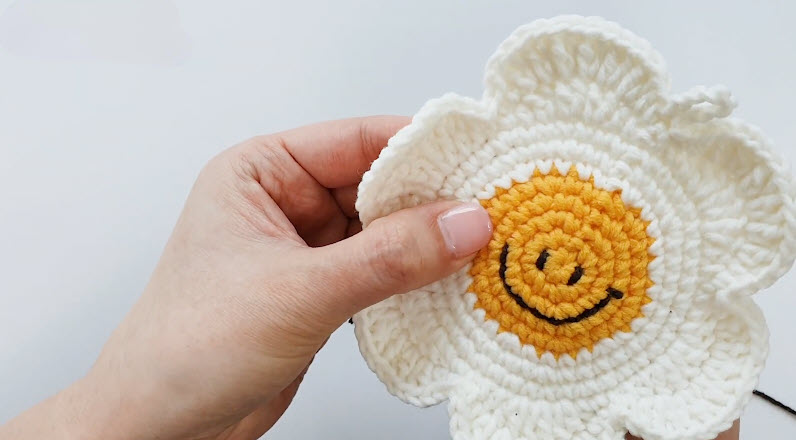
Step 7: Stitch the smiling face with embroidery thread. Thread black embroidery yarn onto a small needle and, working directly on the yellow center, stitch two short curved lines for the eyes and one longer curved line for the smile. Keeping the stitches close together gives the face a clean, solid look rather than a sketchy outline. Once secured, weave the thread end through the back of the stitches to hide it completely before trimming.
Common Mistakes
Tension issues cause most trouble with this pattern, particularly during the magic ring stage. If the ring stays loose, a visible hole often appears at the center once stitching finishes. Similarly, uneven petal spacing can throw off the overall symmetry, so counting stitches between increases matters. Another frequent slip involves stuffing too early, before the color change round, which makes shaping the petals harder. Finally, embroidery placed too far from center can make the smile look off-balance rather than centered.
Color and Yarn Variations to Try
Although yellow and white feel classic, this Smile Crochet Daisy AirPods Case adapts easily to other palettes. Pastel pink petals with a lavender center create a softer, spring-inspired version. Alternatively, orange and brown combinations lean toward a sunflower look for autumn gifting. Neon shades work surprisingly well too, giving the piece a bold, modern edge rather than a traditional floral feel. Variegated yarn can also add subtle shading across the petals without extra effort.
Styling Ideas for the Home
Beyond its function as a case, this piece works well as a small decorative accent. It can sit on a desk shelf, clipped to a tote bag, or displayed near a workspace for a cheerful pop of color. Some crafters attach it to a keyring instead, letting it dangle from a backpack zipper. Others tuck it into a bowl of trinkets as a standalone decorative object, since the dimensional petals hold visual interest on their own.
Best Occasions or Settings to Use This
This pattern suits birthday gifts, small craft fair items, or casual everyday use for anyone who wants a playful tech accessory. It also fits well as a handmade stocking stuffer or a thoughtful addition to a care package. Because the size stays compact, it travels easily in a purse or backpack pocket without adding bulk.
Beginner-Friendly Tips
New crocheters should focus on keeping tension consistent throughout the yellow center, since that section sets the tone for the rest of the piece. Counting stitches carefully before each petal increase also prevents lopsided shaping later. Furthermore, practicing the embroidery on scrap fabric first can build confidence before committing thread to the finished piece. Taking breaks between color changes helps avoid fatigue-related tension shifts too.
Why This Style Is Trending
Amigurumi tech accessories have grown popular as more crafters look for functional yet decorative handmade items. This particular design taps into that shift while adding a nostalgic, smiley-face charm that feels lighthearted.
- Floral amigurumi shapes continue trending across pattern communities
- Functional crochet items appeal to gift-focused makers
- Smiley details add a retro, feel-good aesthetic
Pairing Ideas
This case pairs nicely with a matching keychain flower, a small crochet coin pouch, or a coordinating phone charm strap. Crafters often make a set using the same petal technique across different sizes, creating a cohesive bundle for gifting.
FAQ
How long does this pattern take to complete?
Most crafters finish the case within two to three hours, depending on stitching speed and embroidery detail.
Can this pattern work without a ribbon tie?
Yes, a button loop or drawstring closure can replace the ribbon if preferred.
What yarn weight works best?
Worsted weight yarn gives the most reliable stitch definition and durability for this design.
Is stuffing required before closing the piece?
Light stuffing between the yellow and white layers helps the petals hold their dimensional shape.
Conclusion
The Smile Crochet Daisy AirPods Case Pattern with ribbon tie offers a satisfying blend of texture, color, and personality in one small project. It suits beginners building confidence with shaping while still appealing to experienced makers looking for a quick, joyful make. Ultimately, it turns a simple accessory into something worth showing off.