Free Crochet Table Topper and Purse Duo Pattern
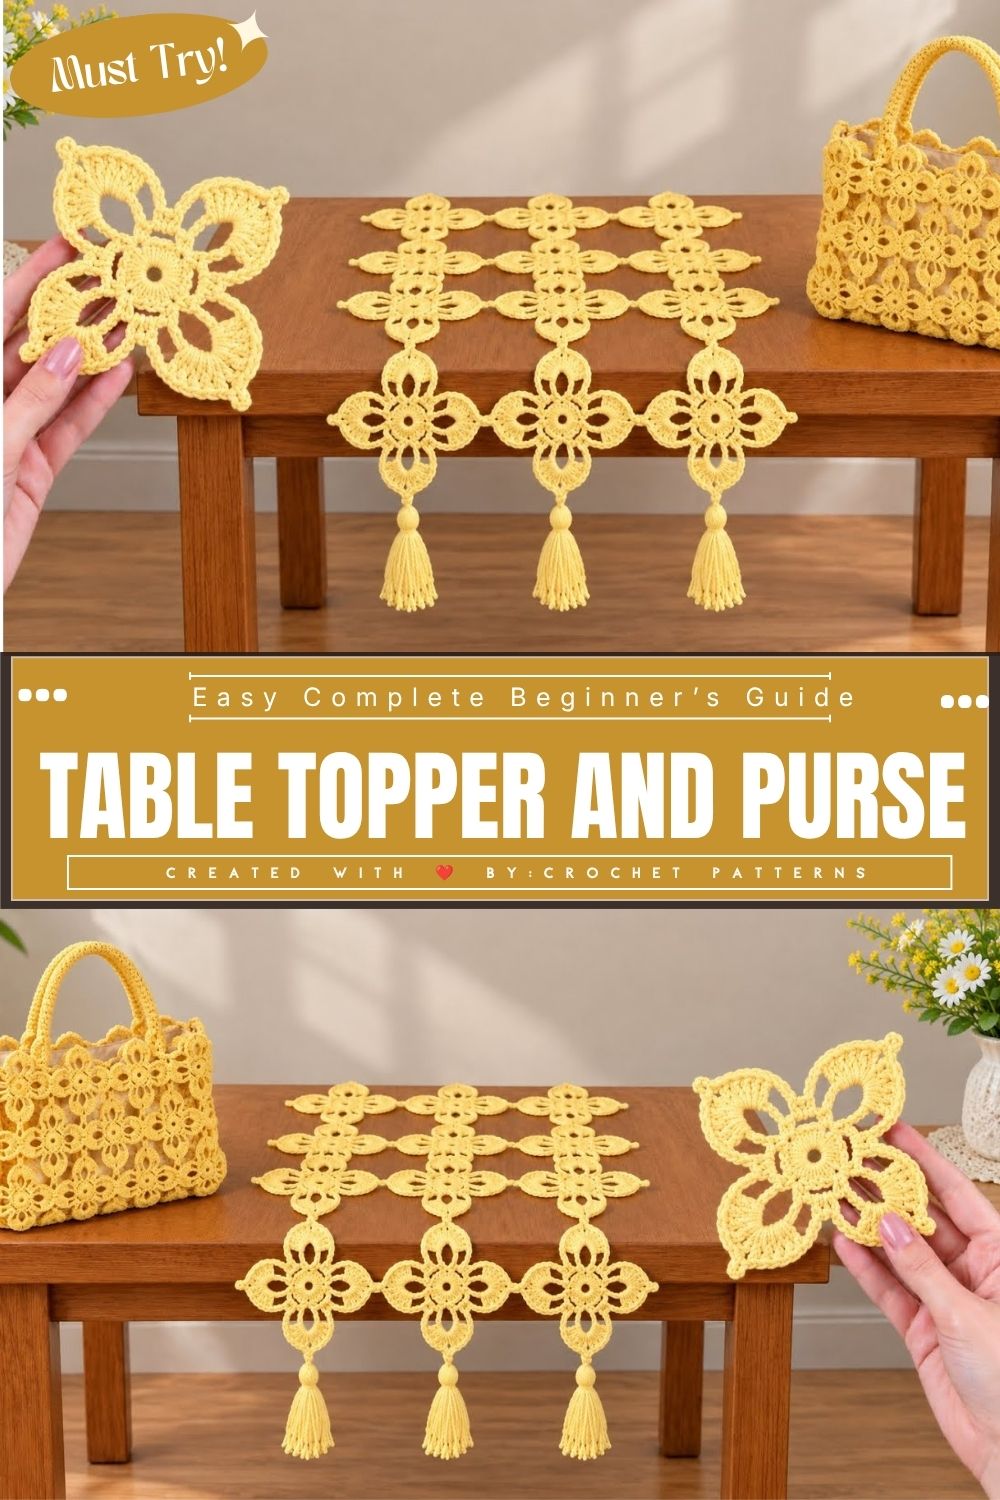
Warm sunlight across a lace curtain and a stack of soft yellow yarn sparked the Sunshine Bloom Crochet Table Topper and Purse, a four-petal motif that slowly grows into a coaster, a purse, and a matching table runner for cheerful handmade decor.
Every stitch in this flower motif pattern begins the same humble way, with a magic ring wrapped snugly around one finger, yet the finished piece reaches far beyond a single coaster. Layered petals build into a butterfly-shaped bloom, and once you master that one small crochet motif, three different home accessories open up from the same small pile of yarn.
Pattern Overview
This project centers on one flexible flower motif, crocheted in rounds from a magic ring, then shaped into petals fanning out like tiny butterfly wings. Once a handful of motifs are finished, they stand alone as coasters, join edge to edge for a runner, or stack into small panels for a purse.
The stitching itself stays identical across all three finished projects. Only motif count, joining method, and a touch of backing or lining decide the final shape your bloom eventually takes.
Skill Level
Beginner to intermediate. Anyone comfortable with a magic ring, single crochet, and basic increases can complete the motif; the purse assembly (lining and closure) suits crocheters who have sewn a seam or two before.
Complete Materials and Supplies List
- Yarn: worsted weight (4) cotton or cotton-blend yarn in soft yellow, plus a contrast shade (white, cream, or pink) if you want two-tone petals
- Crochet hook: 2.75mm (C) for a fine, lacy motif, or a 4mm (G) hook for a chunkier version
- Stitch markers: to track the first stitch of each round
- Tapestry needle: for weaving in ends and sewing motifs together
- Scissors: small, sharp fabric scissors
- Coaster backing: a circle of felt or cork, cut slightly smaller than the motif
- Table runner backing (optional): lightweight cotton fabric for a cleaner underside
- Purse notions: cotton lining fabric, a magnetic snap or zipper, and a purse handle or chain strap
- Blocking pins and a foam mat: to keep every motif flat and matching in size
Crochet Techniques Used
- Magic ring (adjustable ring) foundation
- Single crochet and double crochet
- Increase and decrease stitches to shape petals
- Picot or shell stitch for petal edges
- Joining motifs (slip stitch or whip stitch join)
- Sewing parts together with a tapestry needle
- Simple blocking for uniform motif size
Step-by-Step Crochet Pattern Instructions
Step 1: Starting the Flower Center with a Magic Ring
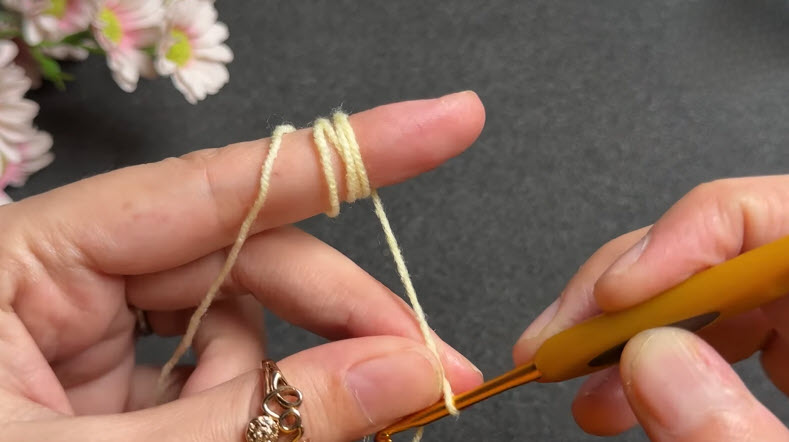
Wrap the yarn around your finger twice, then pull a loop through with your hook to form the ring. Chain one, then crochet single stitches directly into the loop before pulling the tail to close it snugly.
- Work 8–10 single crochet stitches into the ring
- Pull the yarn tail firmly so no gap remains at the center
- Close the round with a slip stitch into the first stitch
Pro Tip: Keep your first few stitches tighter than usual. A loose magic ring center is the most common reason amigurumi-style flower motifs end up with a visible hole.
Step 2: Building the Petal Base
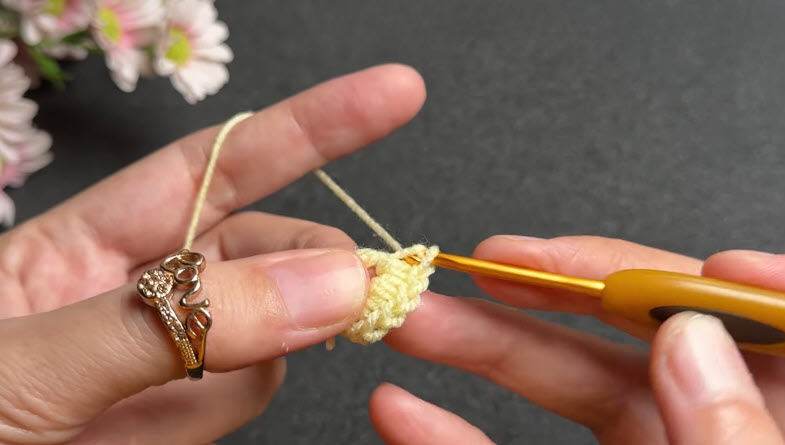
From that tight center ring, chain three and skip one stitch, repeating around to create loop spaces for your petals. These loops become the foundation each petal is built on top of in the following round.
Step 3: Crocheting the Petals
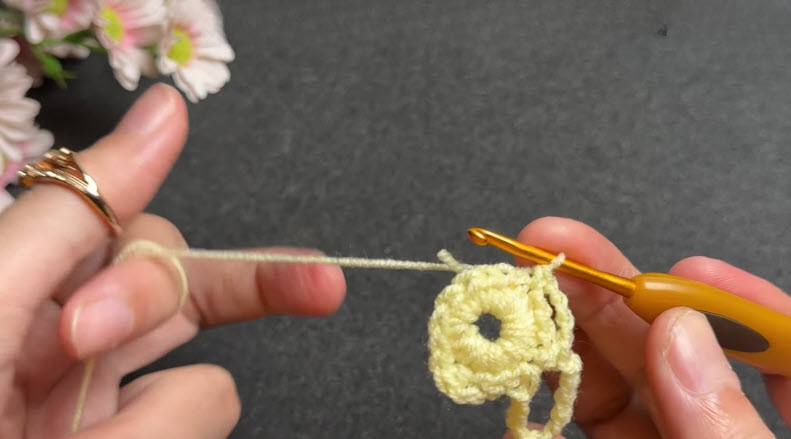
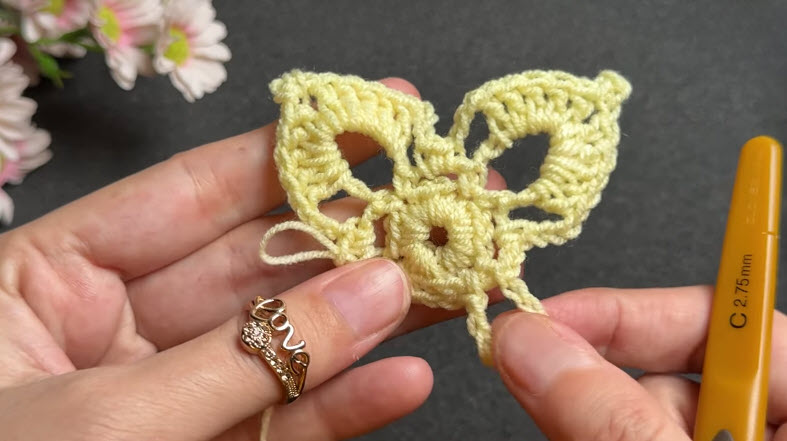
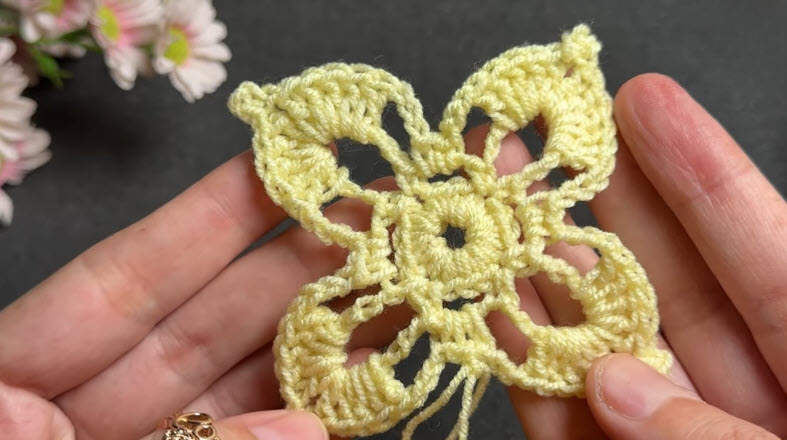
Work into each chain loop with a cluster of double crochet, treble crochet, or a shell stitch combination this is where the shape stretches from a flat flower into rounded, leaf-like wings. Four evenly spaced petals give the classic butterfly look shown in the sample photos.
- Work 5–7 stitches into each loop for a full, rounded petal
- Slip stitch between petals to keep the shape crisp
- Fasten off and weave in the tail once all petals are complete
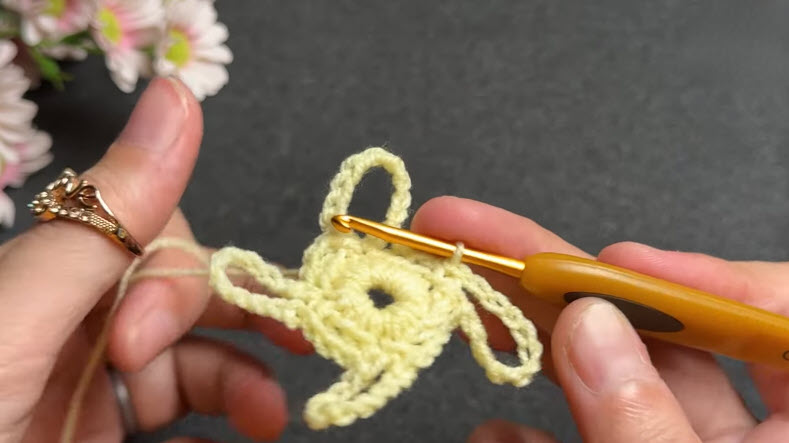
Step 4: Shaping a Second Petal Layer (Optional Butterfly Wings)
For the fuller, wing-like version, attach a new round of stitches behind or between the first petals, working taller stitches (treble or double treble) into the gaps to create a second, larger layer of petals framing the first.
Step 5: Making Multiples of the Motif
Repeat Steps 1 through 4 until you have enough motifs for your chosen project:
- Coaster: one motif per coaster, backed with felt or cork
- Table runner: anywhere from six to twelve motifs, joined in a single row
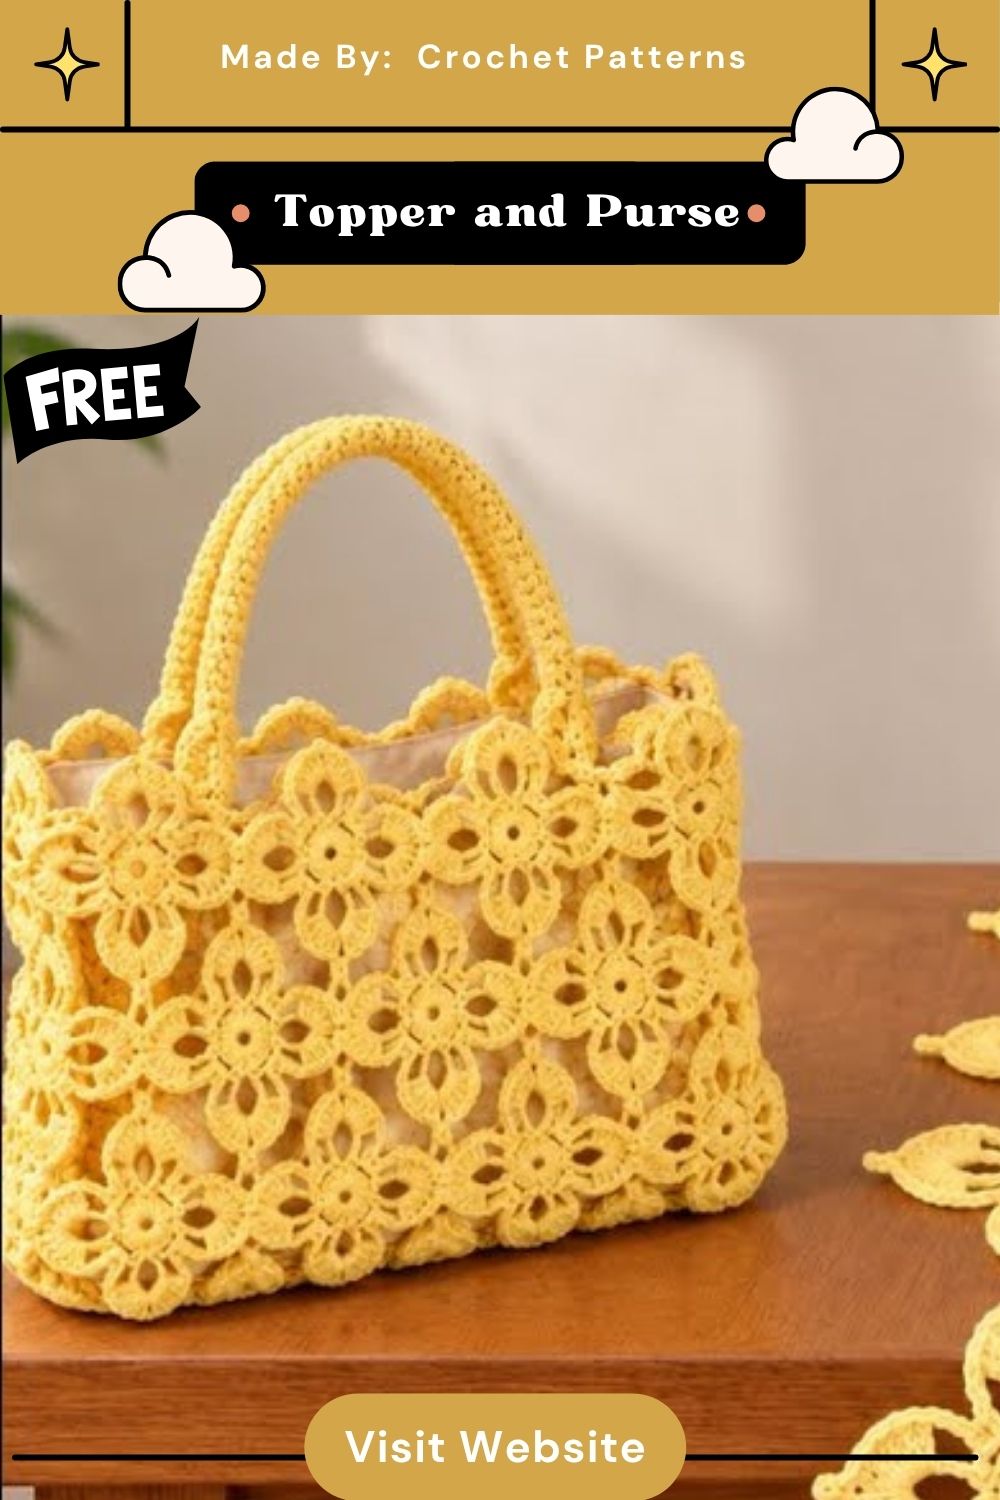
- Purse: roughly ten to sixteen motifs, joined into two rectangular panels
Step 6: Assembling a Coaster
Lay a finished motif flat, trace it onto felt or thin cork, and cut the backing about a quarter-inch smaller than the crochet edge. Whip stitch the backing to the underside of the motif, hiding the stitches along the natural curve of the petals.
Step 7: Joining Motifs into a Table Runner
Arrange motifs in a straight line, petal tips touching, and join them with a slip stitch or whip stitch seam where the edges meet. A simple single crochet border run around the whole finished strip keeps every seam tidy and adds a bit of length on each end.
Pro Tip: block every motif to the same size before joining. Even a small size difference becomes obvious once several motifs sit side by side in a runner.
Step 8: Building the Purse Panels
Join motifs edge to edge into two matching rectangles, one for the front and one for the back of the purse. Single crochet around the top edge of each panel to create a firm, stretch-resistant opening before the panels are joined together.
Step 9: Attaching Lining, Handle, and Closure
Sew the two crocheted panels together along the sides and bottom, leaving the top open. Cut and sew a fabric lining to match the inside shape, then stitch the lining into the purse along the top opening. Attach a magnetic snap or zipper to the opening, and sew a handle or chain strap to each side seam.
Step 10: Finishing Touches
Weave in every loose end with a tapestry needle. Run each tail through several stitches on the wrong side before trimming.
Give the finished coaster, runner, and purse a final light steam or spray block. This helps each petal lie flat and keeps the colors looking even across all three pieces.
Helpful Beginner Tips
- Keep stitches tight: amigurumi-style motif work looks best when stitches sit close together, since gaps show more on a flat, decorative piece than on a stuffed toy
- Use stitch markers: mark the start of each round so you never lose track partway through a petal layer
- Block before joining: pin each finished motif to a foam mat and lightly steam it, so every piece matches in size before assembly
- Match tension across motifs: crochet all your motifs in one sitting when possible, since tension can shift slightly from day to day
Design Customization Ideas
Play with Color
Swap the soft yellow for a two-tone motif: cream centers with blush petals, or sage green with white to match any table setting or bag you already own.
Add Cute Accessories
Sew a small button, bead, or fabric bow at the center of each motif for extra sparkle, or add a tiny tassel to the corner of the purse.
Try a Mini Size Variation
Work the same pattern with a finer thread and a 2mm hook for miniature motifs, perfect for coaster sets, gift tags, or a smaller clutch-style purse.
Mix Motif Sizes
Combine a few larger motifs with smaller ones along the table runner for a scalloped, uneven edge that reads as more organic and handmade.
Frequently Asked Questions
What is the best yarn for this crochet motif?
A cotton or cotton-blend worsted weight yarn holds its shape best for coasters, runners, and purses, since cotton has less stretch than acrylic and keeps petals crisp rather than floppy.
How do I make the crochet pieces firmer?
Starching lightly or blocking with a stiffening spray helps coasters and table runner sections hold their shape on a table, while the purse panels stay soft and flexible for everyday carrying.
How long does this project take?
A single coaster motif takes roughly 20–30 minutes once you know the pattern, a full table runner takes two to three evenings, and a complete purse with lining usually spans a weekend project.
Conclusion
One small flower motif offers a surprising range of possibilities. It can become a single coaster, a full table runner, or a finished purse without requiring any new stitches. Grab your yarn and start with that first magic ring. Then see which of the three projects you reach for first. Save the pattern so your next bloom is always just a hook away.