Free Crochet Toilet Paper Roll Cover Pattern
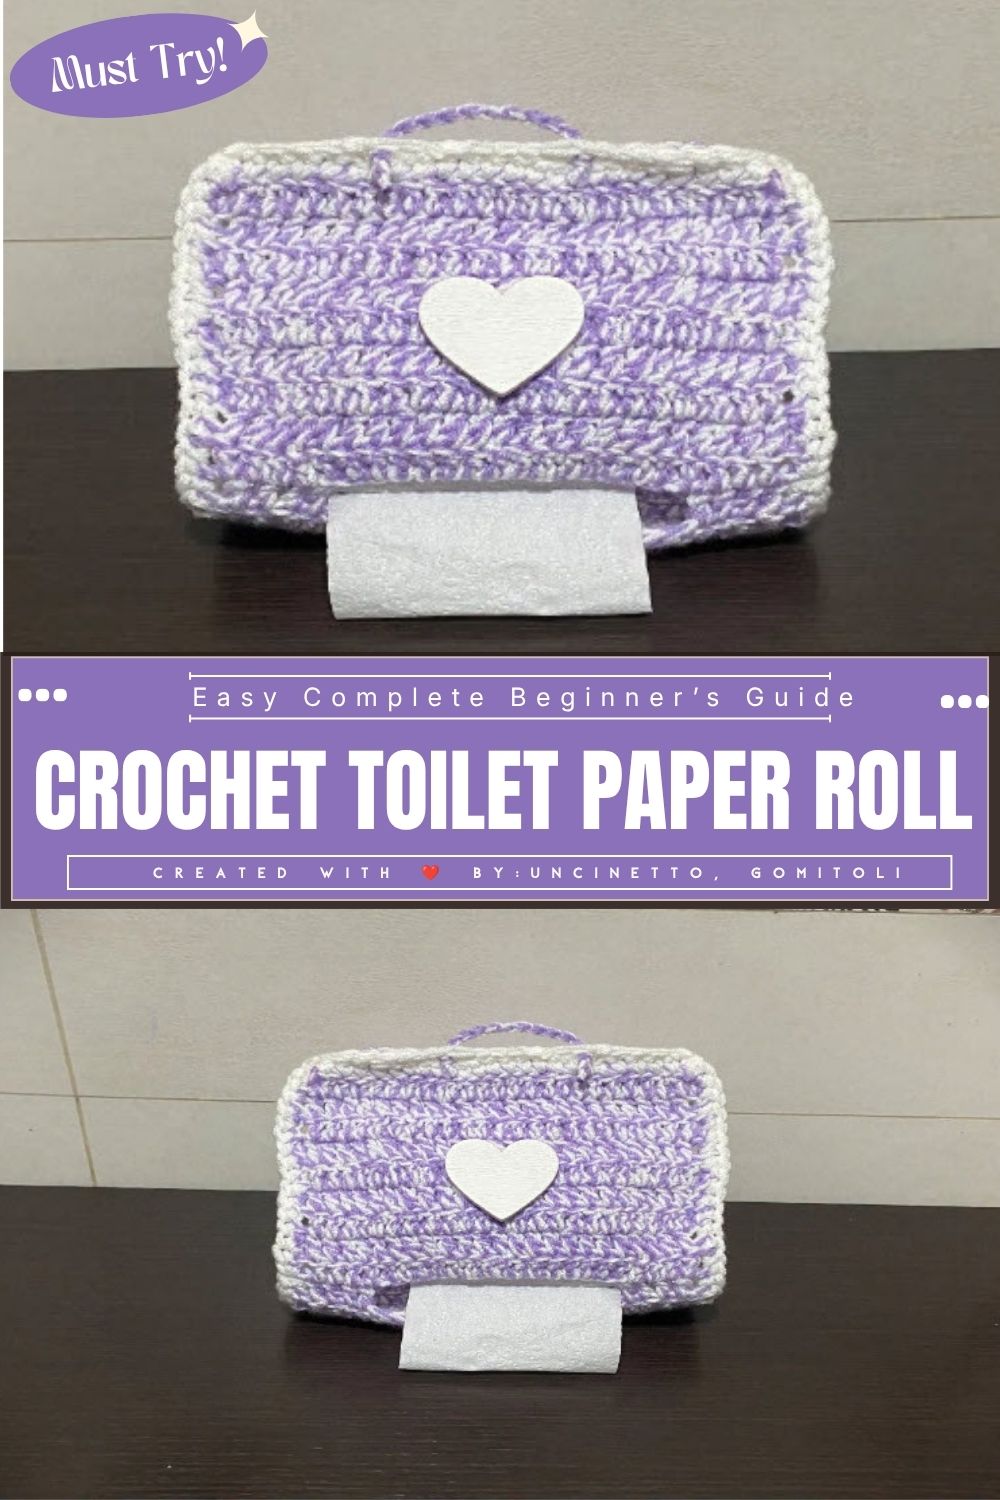
Toilet paper rolls disappear fast, and a plain spare roll sitting on the shelf never looks pretty. This soft, striped Crochet Toilet Paper Roll Cover turns an ordinary spare roll into a sweet bathroom accent, with a handy handle so you can grab it in seconds.
Have you ever noticed how a spare toilet paper roll just sits there looking dull and forgotten? This soft, striped crochet cover fixes that instantly, turning an ordinary spare roll into a sweet bathroom accent, with a handy handle so you can grab it in seconds. It’s a quick, cozy little project that mixes two yarn colors, simple stitches, and a neat handle opening perfect for beginners who want a useful, gift-worthy makeover for something as plain as a spare roll of tissue.
Project Overview
This free crochet pattern makes a cozy, ribbed cover for a spare toilet paper roll. Worked flat in a textured two-color stitch, it wraps snugly around the roll and closes with a neat handle opening, so it doubles as a decorative storage piece and a simple carry-along for guests or travel.
It’s a beginner-friendly project that uses simple stitches you already know. In an evening or two, you’ll have a handmade piece that adds charm to any bathroom shelf.
Skill Level
Beginner to confident beginner.
This is one of the best easy crochet projects for anyone who already knows single crochet and wants to practice working in a simple repeating pattern. There’s no shaping, no counting complicated increases, and no fussy finishing — just steady rows and one small handle opening.
Materials and Supplies
Here’s everything you need to gather before you start this crochet tutorial:
- Yarn: A worsted weight (medium, #4) yarn in two coordinating colors — a marled purple-and-white yarn plus a solid white yarn works beautifully, but you can use any two shades you love
- Crochet hook: A hook sized to match your yarn (a 5.0mm–5.5mm hook is a comfortable choice for worsted weight yarn)
- Stitch markers: A couple of locking stitch markers to mark row starts and the handle placement
- Yarn needle: A large-eye tapestry needle for weaving in ends and sewing the side seam
- Scissors: For snipping yarn as you switch colors and finish
- A spare toilet paper roll: To use as your sizing guide while you crochet and wrap the cover
- Optional accessory: A small ribbon, button, or wooden bead if you want to dress up the handle opening
Because this project is flat, seamed, and stuffing-free, you won’t need safety eyes or fiberfill here — this pattern skips those amigurumi extras and keeps the supply list short and simple.
Crochet Techniques Used
You’ll only need a small handful of techniques for this handmade crochet idea, which is exactly why it’s such a great confidence-building project:
- Starting with a foundation chain
- Single crochet (and a simple textured stitch pattern worked in rows)
- Working a small buttonhole-style opening for the handle
- Changing yarn colors cleanly between rows
- Sewing pieces together with a yarn needle (the side seam)
- Adding a simple single crochet edging/border
Step-by-Step Crochet Pattern Instructions
Below is the full walkthrough, matched up with each stage of the project so you can follow along picture by picture.
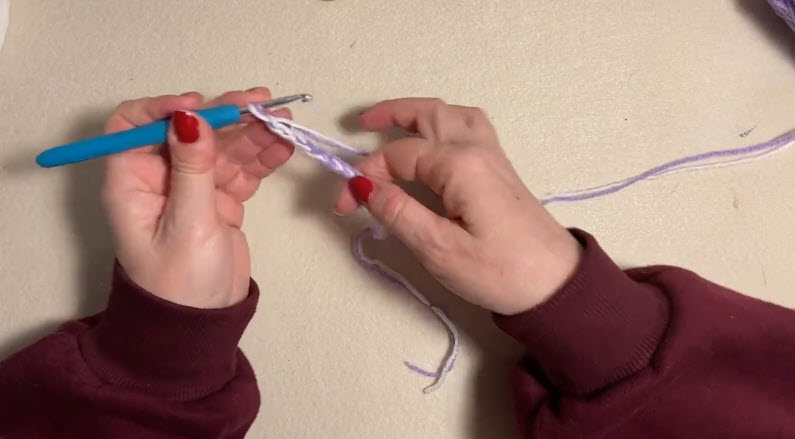
Step 1: Start Your Foundation Row
In the first photo, you can see the hook loaded with the marled purple-and-white yarn, working the very first stitches of a foundation chain. Hold your hook and yarn the way that feels natural to you, chain the number of stitches needed to match the width of your toilet paper roll (measure loosely around the roll and add a little for ease), then turn and work your first row of single crochet back across the chain. This first row sets the width for your entire cover, so keep your tension relaxed and even.
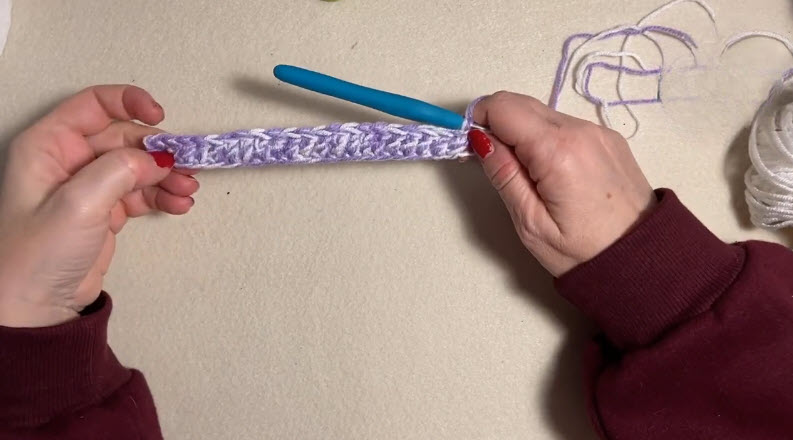
Step 2: Build Up the Textured Panel
The second photo shows a narrow strip standing up between the hands, with several rows already worked. You can clearly see the textured, ribbed look of the stitch pattern starting to form. Keep repeating your row pattern here — chain up, turn, and work your chosen stitch across each row. This is the most relaxing part of the whole project, and a great place to watch a show while your rectangle slowly grows.
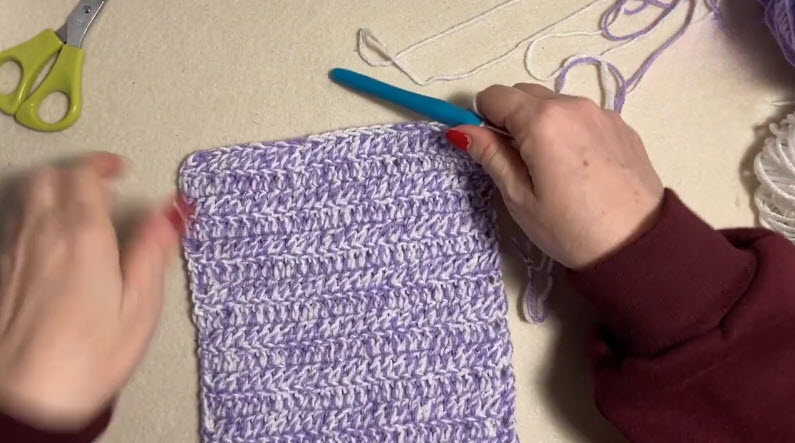
Step 3: Keep Crocheting Until the Panel Is Long Enough
By the third photo, the piece has grown into a proper rectangle, wide and long enough to wrap fully around a toilet paper roll with a little overlap for seaming. Lay your work-in-progress next to your spare roll every few rows to check that you have enough fabric to comfortably wrap around the tube with a slight overlap at the back.
Step 4: Create the Handle Opening
The fourth photo shows the panel being wrapped around the roll for a test fit, with a small slit or opening already worked near one edge. To make this handle opening, skip a small group of stitches in the middle of one row (instead of crocheting into them, simply chain across the gap), then crochet into the remaining stitches on the return row as normal. This leaves a small oval opening once the piece is folded, which becomes your carry handle.
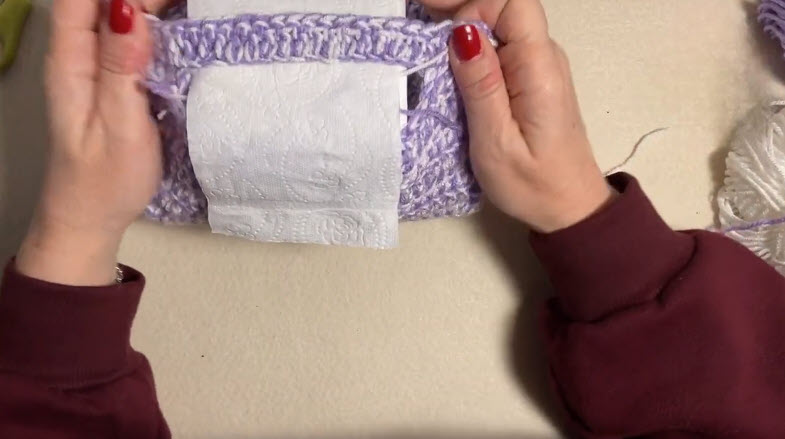
Step 5: Check the Fit and Flatten the Piece
In the fifth photo, the finished flat panel is laid out fully open, and you can clearly see the handle opening positioned near the top edge. Before seaming anything, lay your panel flat like this and double-check that the handle sits where you want it and that the panel wraps the roll with a neat, snug overlap.
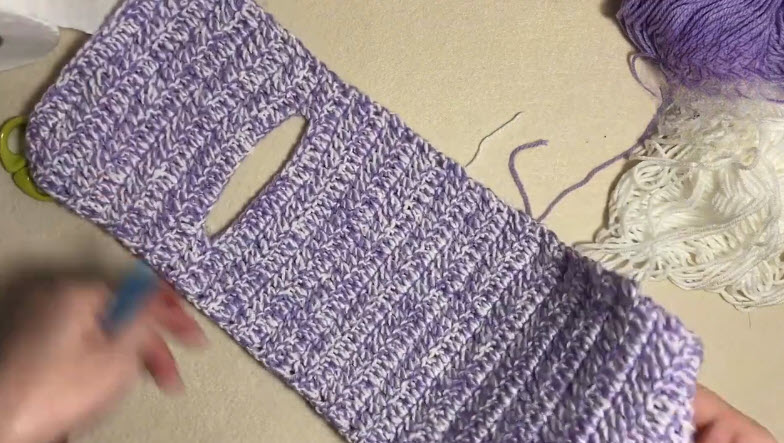
Step 6: Add the Contrast Edging
The sixth photo shows the hook working a fresh round of single crochet stitches in white yarn along the top edge of the piece. This edging tidies up the raw edge, reinforces the handle opening so it doesn’t stretch out of shape, and adds a lovely contrast border. Work single crochet evenly around the top opening, adding a couple of extra stitches at the curve of the handle so it lies flat instead of puckering.
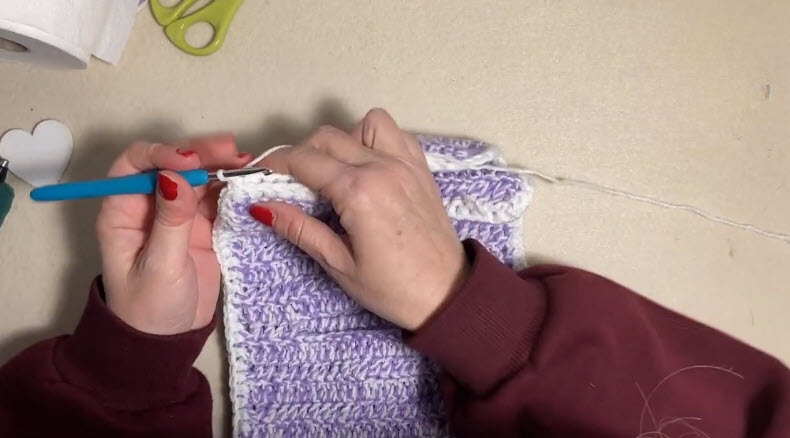
Step 7: Seam the Sides and Finish
Once your edging is complete, fold the panel around your spare roll and use your yarn needle to sew the side seam closed with a simple whip stitch or mattress stitch, matching your yarn color to the panel as you go. Weave in all your loose ends on the inside of the cover so nothing shows on the outside.
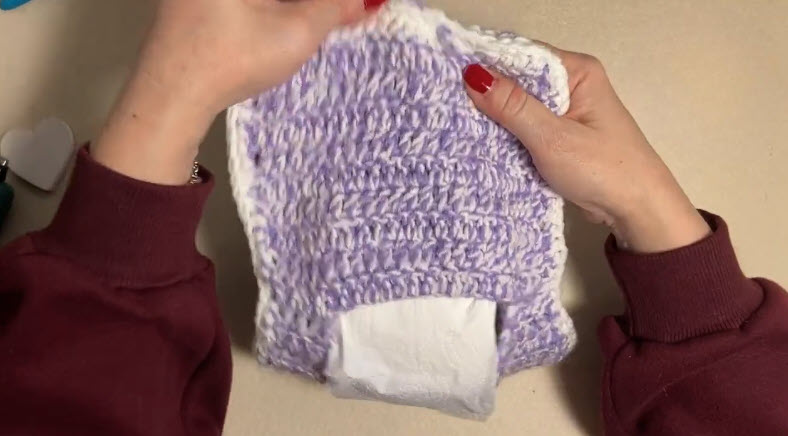
Step 8: Slide the Roll Inside
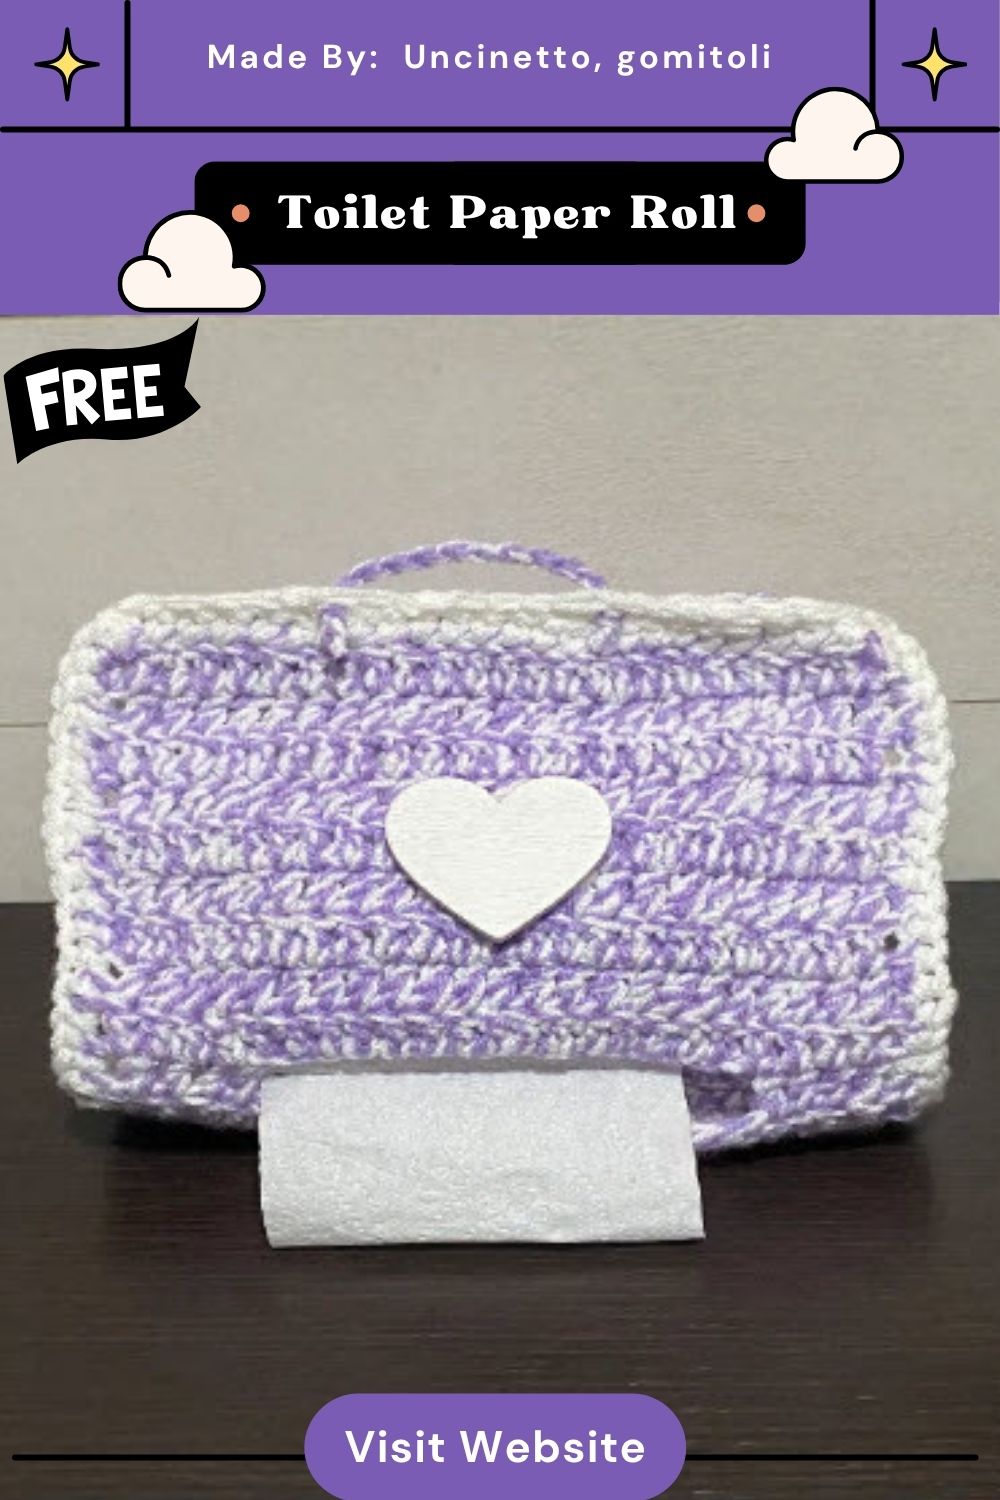
The seventh and final photo shows the completed cover slipped over the spare roll, with the white trim framing the top and the roll peeking out underneath. Slide your spare toilet paper roll inside the finished cover, and you’re done a cozy, handmade cover ready to sit on a shelf, in a basket, or tucked into an overnight bag.
Helpful Beginner Tips
A few small habits make a big difference on a project like this:
- Keep your stitches snug. Slightly tighter tension gives this cover more structure. It also helps the cover hold its shape around the roll instead of feeling floppy.
- Use stitch markers generously. Clip one at the start of every row while learning the stitch pattern. Add another to mark exactly where the handle opening should begin. This saves you from ripping back rows later.
- Measure often, not just once. Because this project is sized to fit a real object, check your panel against the actual roll every few rows. This is more reliable than counting rows alone.
- Weave in ends as you go. There is no stuffing to hide loose tails inside. Tidy finishing really shows on this project, so take the extra few minutes to secure the ends neatly.
- Design Customization Ideas
Once you’ve made one cover, it’s easy to make it your own:
- Play with color. Swap the purple-and-white marl for any two shades — soft pastels, neutral beige and cream, or bold colors that match your bathroom decor.
- Add cute accessories. Sew on a small fabric flower, a wooden button, or a little tassel near the handle for extra charm.
- Try a mini version. Scale down your foundation chain and row count slightly to make a smaller cover for travel-size rolls, or size it up to cover a larger jumbo roll.
- Change the stitch pattern. Once you’re comfortable, try swapping the textured stitch for a simple ribbing or basic single crochet for a slightly different look.
Frequently Asked Questions
What is the best yarn to use for this crochet pattern?
A smooth worsted weight acrylic or cotton-blend yarn works best for this project. Cotton-blend yarn gives the cover a bit more structure and is easy to spot-clean. Acrylic is soft, affordable, and available in a wide range of colors. Both options work well for this type of easy crochet project.
How do I make the cover firm enough to hold its shape?
Since this piece isn’t stuffed, firmness comes mostly from your tension and edging. Crochet with slightly tighter stitches than you might use for a soft blanket. Don’t skip the single crochet border around the top. It reinforces the opening and helps the cover keep a neat, defined shape around the roll.
How long does this project take to make?
Most beginners can finish this cover in one to two relaxed evenings. It is worked flat in simple rows with no complicated shaping. This makes it a quick, satisfying project that still leaves you with a genuinely useful handmade item.
Wrap-Up and Your Next Project
Give it a try, snap a photo of your finished cover, and share it with the crochet community. If you enjoyed this pattern, keep exploring more easy, handmade crochet ideas to fill your home with cozy, one-of-a-kind touches.