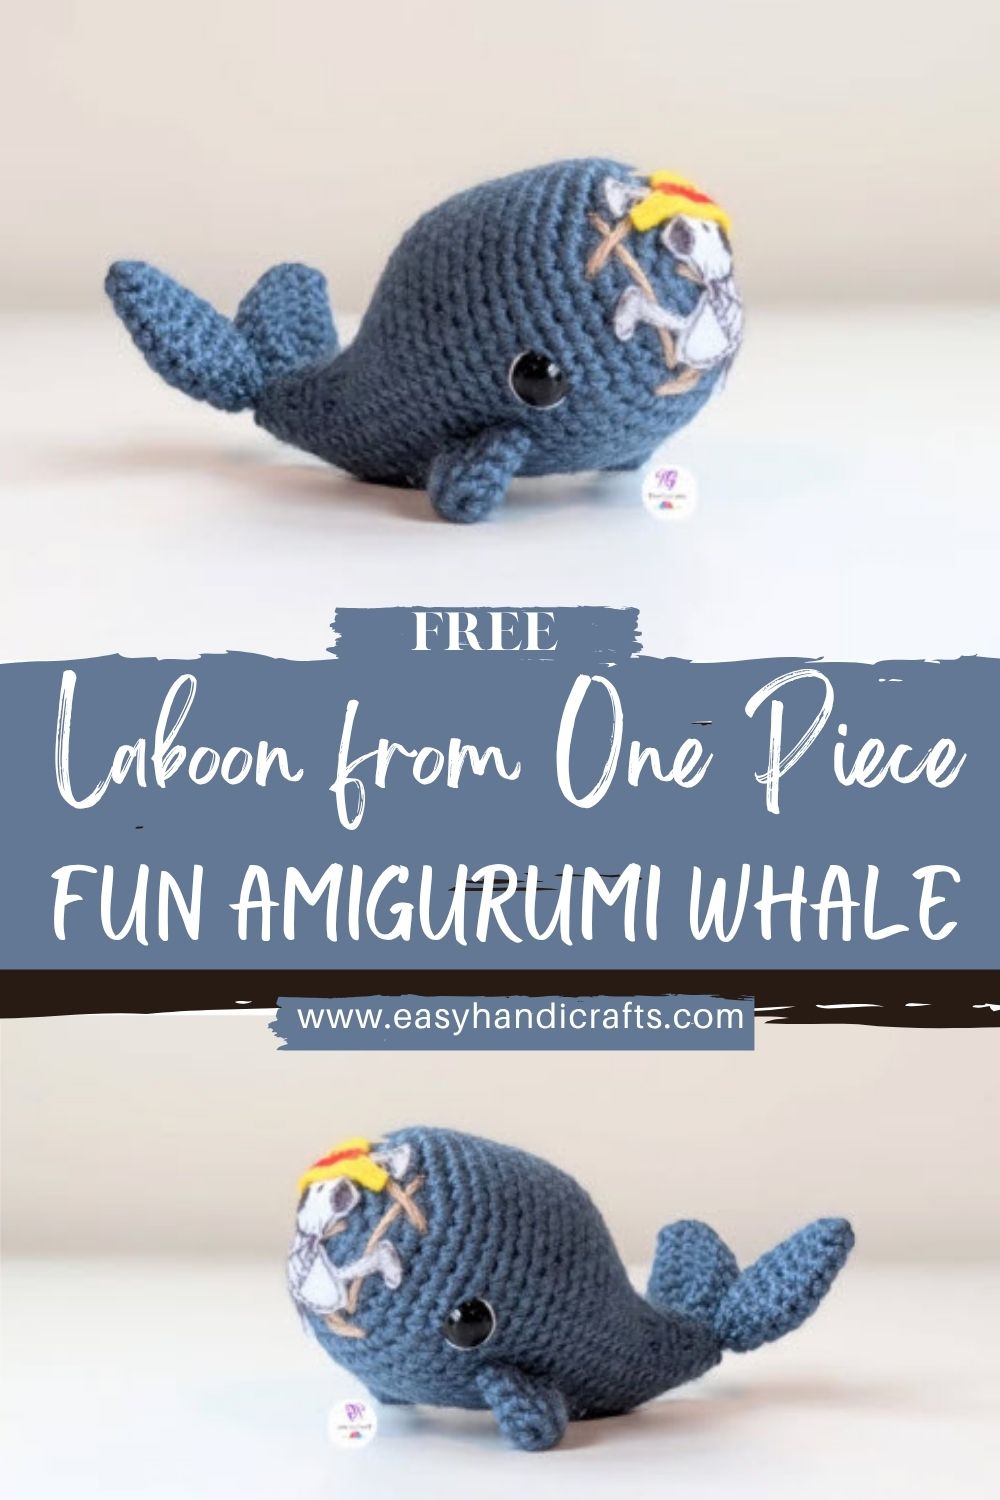
Spectacular Crochet Laboon from One Piece Fun Amigurumi Whale Pattern
Crocheting your own Laboon from One Piece is such a sweet way to mix anime fun with a cozy yarn-filled afternoon. If you’re craving a beginner-friendly amigurumi whale project, this crochet Laboon is a great pick. It uses simple stitches, works up in a few hours, and gives you an adorable handmade character that looks right at home on a shelf, desk, or gift pile.
If you’re a One Piece fan, then making a crocheted Laboon amigurumi feels extra special, like you’re bringing a tiny piece of that story into your own hands. Laboon is friendly, memorable, and surprisingly perfect for crochet because his shape is mostly a soft, round body with a few small add-ons.
In this step-by-step Laboon crochet tutorial, I’ll walk you through the whole process in a calm, beginner-focused way. First, we’ll build the body with a simple round; next, we’ll add the tail and fins, and then we’ll give him that cheerful face that makes him instantly recognizable. Meanwhile, I’ll share a few “learned-it-the-hard-way” tips, like where to place the eyes and when to start stuffing, so your Laboon turns out neat, squishy, and sturdy.
Materials Needed
Here’s what I used for mine (and what I recommend if you want a similar look):
- Yarn Type & Weight: Medium-weight yarn (worsted weight)
- Main color: blue (or any whale shade you love)
- Optional accent: white/cream for a lighter belly
- Hook Size: 3.5mm or 4mm crochet hook
- Safety Eyes: 12mm black safety eyes
- Stuffing: Polyester fiberfill (or your preferred stuffing)
- Stitch Markers, Needle: For tracking rounds and sewing pieces on
- Keychain Ring or Accessories (optional): If you want Laboon as a keychain or hanging decoration
Skill Level
Difficulty: Beginner Easy
If you can do single crochet and you’re willing to count stitches, you can absolutely make this.
Making Time
Approximate time: 3–4 hours
It depends on your speed (and how often you stop to adjust the face—because I always do!).
Before You Start: Tiny Stitch Legend
- MR = magic ring
- sc = single crochet
- inc = increase (2 sc in the same stitch)
- dec = decrease (I recommend invisible decreases for a cleaner look)
Amigurumi is usually worked in continuous rounds, so use a stitch marker to track the first stitch of each round.
Part 1: Body
Step A: Start the Base
First, make a magic ring and crochet a small circle. This is the foundation that keeps Laboon round and plush.
- Round 1: MR, 6 sc (6)
- Round 2: inc around (12)
- Round 3: (sc, inc) around (18)
- Round 4: (2 sc, inc) around (24)
- Round 5: (3 sc, inc) around (30)
- Round 6: (4 sc, inc) around (36)
At this point, you’ll see a nice flat circle forming. If it starts looking wavy, your increases may be too close together. If it curls into a bowl, loosen your tension a bit.
Step: Form the Shape
Next, we give Laboon his round “whale body” by crocheting even rounds.
- Rounds 7–12: sc around (36)
Meanwhile, this is a great time to hold it in your hands and decide if you want him more round (fewer even rounds) or a bit longer (add 1–3 more rounds).
Step C: Finish the Body (Decreasing +Stuffing)
Later, the opening gets smaller, so don’t wait too long to stuff.
- Round 13: (4 sc, dec) around (30)
- Round 14: (3 sc, dec) around (24)
- Round 15: (2 sc, dec) around (18)
- Start stuffing firmly, shaping as you go
- Round 16: (sc, dec) around (12)
- Round 17: dec around (6)
Finally, fasten off, thread your yarn needle, and weave through the last 6 stitches to close the hole. Pull snug and weave in the end.
Add Safety Eyes
Place the 12mm safety eyes before the body is fully closed (it’s easier to reach inside that way). A simple placement that looks cute:
- Between Rounds 9 and 11, about 7–8 stitches apart.
Tip: Before snapping the backs on, hold the eyes in place and “test the face.” Moving them one stitch closer or farther can totally change the expression.
Part 2: Tail
The tail is small, quick, and adds a lot of character.
- Round 1: MR, 6 sc (6)
- Round 2: inc around (12)
- Round 3: (sc, inc) around (18)
- Round 4: sc around (18)
- Round 5: (sc, dec) around (12)
- Round 6: sc around (12)
Fasten off, leave a long tail for sewing.
Attach the tail:
Next, sew it to the back of the body, centered. I like to pin it first (or just hold it in place) and check that it looks straight from the front.
Part 3: Fins (Make 2)
Fins should match, but don’t stress, tiny differences disappear once they’re attached.
- Round 1: MR, 6 sc (6)
- Round 2: (sc, inc) around (9)
- Round 3: sc around (9)
- Round 4: (sc, dec) around (6)
Fasten off, leave a long tail for sewing.
Attach the fins:
Sew one fin on each side of the body, roughly around the middle. Later, when you look from the top, they should feel evenly spaced.
Part 4: Face & Assembly
Add a Smile
Now, for my favorite part, the moment Laboon starts to look like Laboon.
Using black embroidery thread or thin black yarn:
- Stitch a small curved smile under the eyes.
- If you want extra cuteness, add tiny cheek stitches or a little curve at each end of the smile.
Meanwhile, don’t be afraid to redo the embroidery. I often adjust it once or twice until the expression feels friendly.
Final Assembly Check
Finally, give your whale a little “quality check”:
- Are the eyes level?
- Are the fins even?
- Is the tail secure?
When you’re happy, weave in all ends well so nothing loosens over time.
Special Features & Customization Ideas
Texture
- Smooth yarn: clean, classic amigurumi look
- Soft/textured yarn: extra cuddly and plush, but stitches can be slightly harder to see
Accessories
If you want a fun One Piece twist, try:
- a mini pirate hat
- a tiny scarf
- a small keychain loop on top (just crochet a short chain loop and stitch it securely)
Sizing Tips
- Bigger Laboon: thicker yarn + larger hook
- Smaller Laboon: thinner yarn + smaller hook
Just remember: with amigurumi, you usually want the fabric tight enough that stuffing doesn’t peek through.
Finishing Tips (My Cozy “Make It Look Neat” Habits)
- Neat stitching: Keep your tension even, especially on decreases.
- Secure shaping: Stuff in small amounts, then push and shape gently with your fingers.
- Sturdy sewing: For fins and tail, sew through the body and the piece several times. It makes a big difference if it’ll be handled a lot.
Common Mistakes to Avoid
- Incorrect stitch count: Count at the end of each round, you will be grateful.
- Tight tension: If your hands start feeling sore or your hook won’t glide, loosen up a little.
- Stuffing too late: Start stuffing once the body is about two-thirds complete, then top up as you close.
Variations & Customization Ideas
- Color changes: Try a pastel whale, a deep navy whale, or even a speckled “ocean” yarn look.
- Expression ideas: Move the eyes slightly, add brows, or change the smile curve to make him look extra cheerful, shy, or sleepy.
- Theme ideas: Holiday Laboon with a tiny hat, or a summer Laboon with a little sailor vibe
Conclusion
Now that you’ve completed your own crochet Laboon from One Piece, you’ve got a handmade amigurumi whale that’s full of personality. Display him proudly, gift him to a fellow fan, or turn him into a bag charm for a little anime joy on the go. Most importantly, enjoy that feeling of finishing a plush you made stitch by stitch—because it never gets old. If you want, please tell me what yarn color you’re using and whether you’re making him as a plush or a keychain, and I can suggest small tweaks for sizing and eye placement.