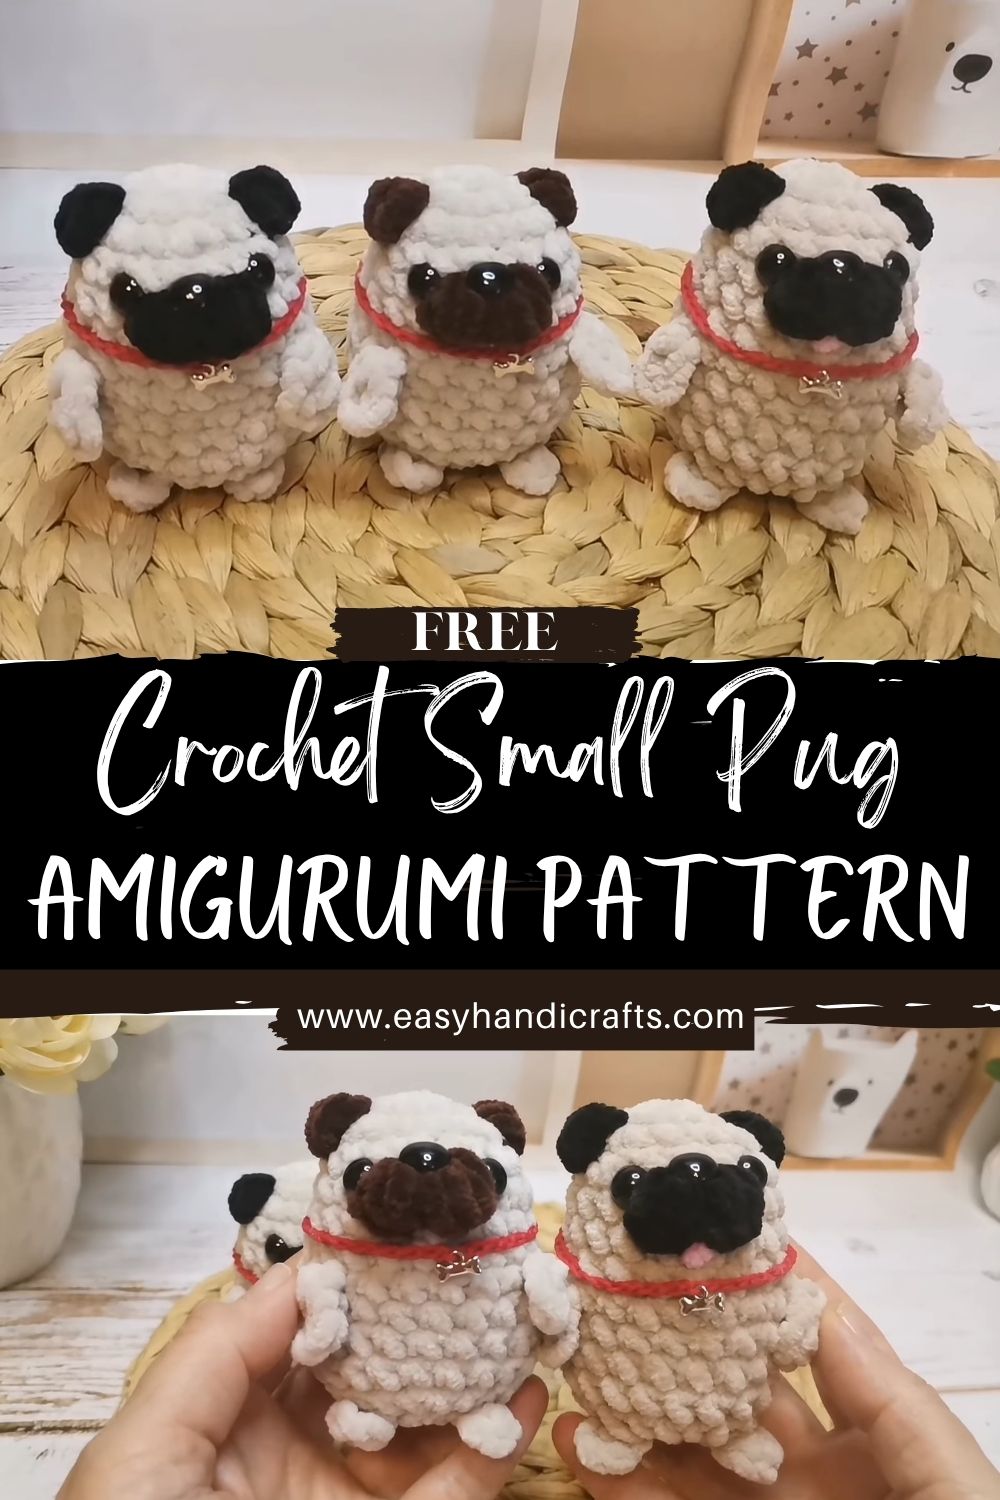
Cute Crochet Small Pug Amigurumi Pattern & Beginner
Looking for a crochet pug pattern that’s adorable and easy to follow? This amigurumi pug dog tutorial will help you crochet a small, round, fluffy pug with big eyes and tiny ears perfect for beginners. It’s a quick crochet toy you can finish in a short time, and it makes a sweet handmade gift for birthdays, baby showers, or anyone who loves cute dogs.
This crochet pug pattern is made in an amigurumi style. Amigurumi is the Japanese art of crocheting small stuffed toys using yarn and a hook, with simple shaping. Most amigurumi patterns are worked in rounds, stuffed with fiberfill, and finished with small details like eyes and a face.
Crocheting toys is fun and helpful because it offers:
- Stress relief and relaxation
- A creative hobby that improves focus and patience
- Unique handmade gifts people truly appreciate
- A great way to use leftover yarn (scrap-friendly)
Why a Pug Design is So Popular
Pugs are a favourite because they have:
- A small size (easy, quick project)
- An adorable face with big eyes and a cute snout
- A look that’s easy to customise (colours, expressions, accessories)
This pug design uses basic stitches and simple shaping, so it’s great for beginners and still looks super professional when finished.
Materials Needed
You can adjust the arm and hook size depending on how big you want your pug to be.
- Soft plush or cotton yarn (beige, brown, black)
- Crochet hook: 2.0mm – 4.0mm (depending on yarn)
- Safety eyes: 6mm–10mm
- Fiberfill stuffing
- Yarn needle
- Scissors
- Stitch marker (optional but very helpful)
Abbreviations (US Terms)
- sc = single crochet
- inc = increase (2 sc in the same stitch)
- dec = decrease
- sl st = slip stitch
- ch = chain
- mr = magic ring
Notes Before You Start (Beginner-Friendly)
- Work in continuous rounds unless told otherwise.
- Use a stitch marker on the first stitch of each round.
- For a neat finish, use tight stitching. Stuffing the Stuffing doesn’t show through.
Body (Main Part)
Round 1: 6 sc in mr (6)
Round 2: inc in each stitch (12)
Round 3: (sc, inc) repeat around (18)
Round 4: (2 sc, inc) repeat around (24)
Round 5–8: sc in each stitch around (24)
Round 9: (2 sc, dec) repeat around (18)
Insert Safety Eyes
- Insert safety eyes between rounds 6 and 7 (or 7 and 8 for a slightly higher look).
- Place eyes about 6–8 stitches apart (depending on your pug’s face shape).
- Add the backings securely.
Continue Stuffing + Stuffing.
Round 10: (sc, dec) repeat around (12)
- Start stuffing firmly now (add small pieces of fiberfill).
Round 11: dec around (6)
Fasten off, weave the yarn tail through the last stitches, pull tight to close, and hide the end inside.
Legs (Make 4)
Use the same main body colour.
Round 1: 6 sc in mr (6)
Round 2: (sc, inc) repeat around (9)
Round 3–4: sc around (9)
Fasten off, leaving a long tail for sewing.
- Stuff lightly (or keep them unstuff for a flatter look).
- Attach 4 legs evenly to the bottom of the body.
Ears (Make 2)
Use brown or black yarn for classic pug ears.
Round 1: 5–6 sc in mr (5–6)
Round 2: sc around (5–6)
(Optional Round 3 for slightly bigger ears): sc around
Fasten off, leave a tail for sewing.
Flatten each ear and sew it onto the top of the head.
Snout (Muzzle)
Use beige or a lighter colour than the face.
Ch 6
Now work around the chain to form an oval:
- Sc in 2nd ch from hook and across (4 sc)
- 3 sc in last chain (to turn the corner)
- Continue on the other side of the chain with sc (3 sc)
- 2 sc in the last stitch to complete the oval
For a slightly bigger muzzle, do 1 more round:
- sc around, with small increases at the two curved ends (the “corners”) to keep it oval.
Fasten off with a long yarn tail. Sew the muzzle centred under the eyes.
Tail (Curly Pug Tail)
Use beige or brown yarn.
Ch 6–8 (longer chain = curlier tail)
sl st back along the chain to the start.
It will naturally curl into a spiral. Sew it to the back of the body.
Assembly (Put It All Together)
- Stuff body firmly (make it round and plush).
- Attach legs evenly on the bottom.
- Sew on the snout under the eyes.
- Attach ears on top (slightly to the sides looks cute).
- Embroider nose & mouth using black yarn:
- Small triangle or oval nose on the muzzle
- Simple “Y” or curved smile line under the nose
- Sew everything securely and weave in all ends.
Tips for Beginners
- Use a stitch marker to track rounds (very important in amigurumi).
- Keep your tension consistent for smooth, even stitches.
- Choose soft yarn for a fluffy, plush look.
- Follow the tutorial video for extra help with assembly and placement.
- Practice the magic ring (mr) if it’s new to you—once you learn it, amigurumi becomes much easier.
Customization Ideas
Make your crochet pug unique:
- Change colours: white pug, grey pug, black pug, or even pastel
- Add a scarf or collar (a simple chain strap works great)
- Make a keychain version (smaller yarn + small hook + keyring)
- Add blush cheeks or a tiny tongue for extra cuteness
- Use bigger eyes for a more “kawaii” style
Conclusion
This crochet pug pattern (amigurumi) is a fun, relaxing project that’s perfect for beginners. The small round shape, big eyes, and tiny ears make it extra cute, and it works up quickly with basic stitches. Make one as a handmade gift, use it as room decor, or even sell finished pugs as cute handmade items.
Try it once, and you’ll want to crochet a whole collection of little pugs!