Free Crochet Christmas Tree Keychain Pattern For Bag Charm
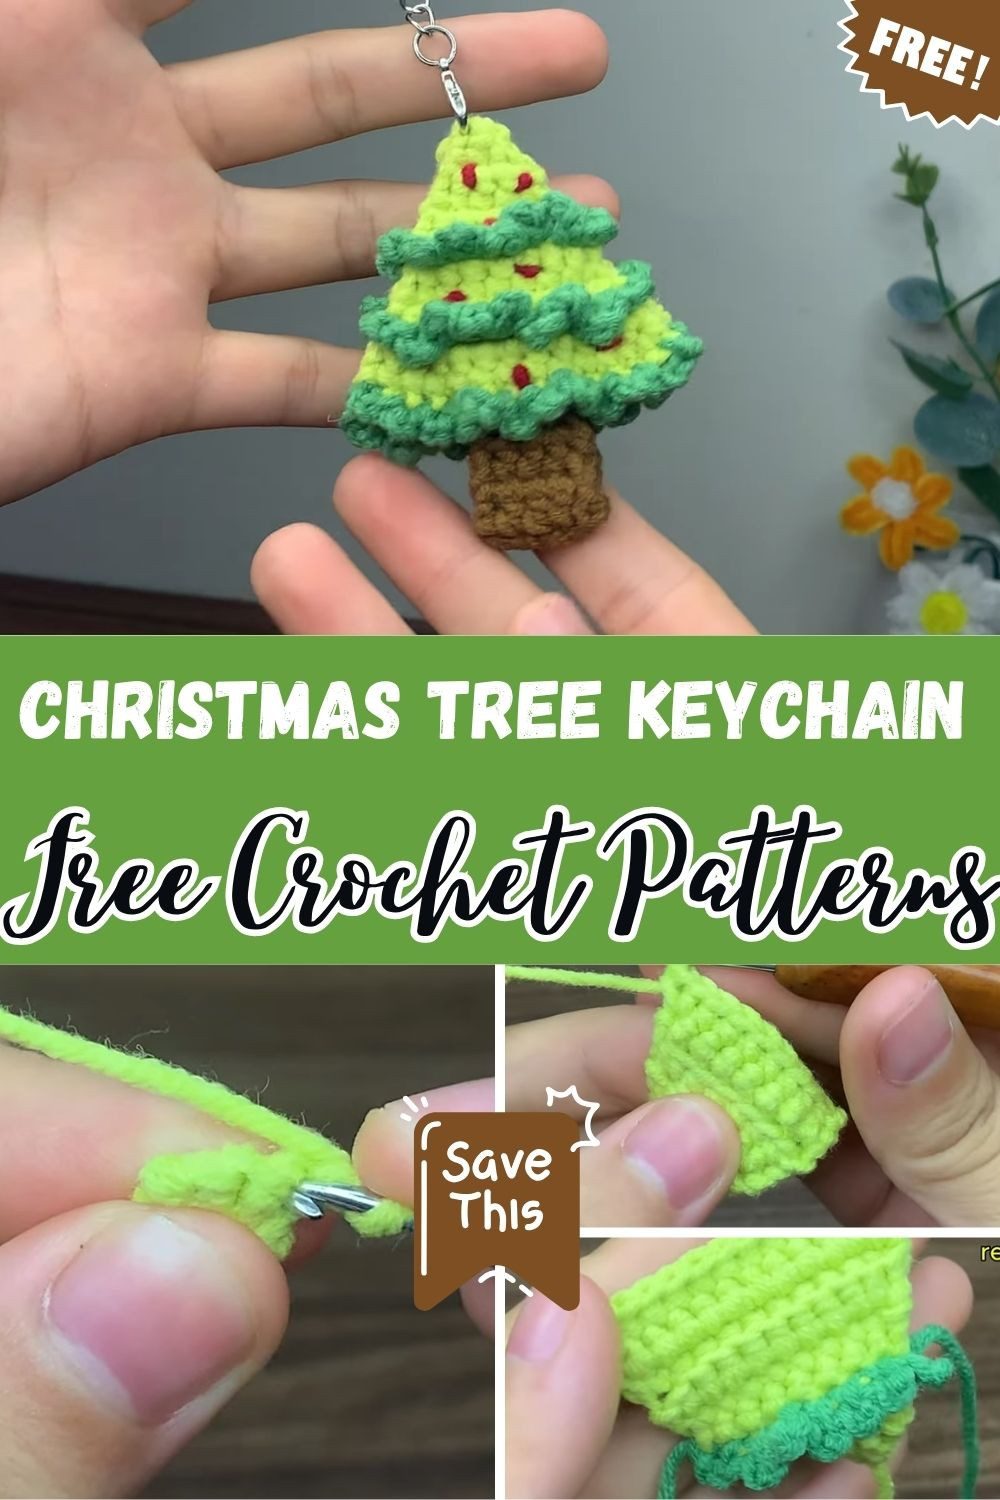
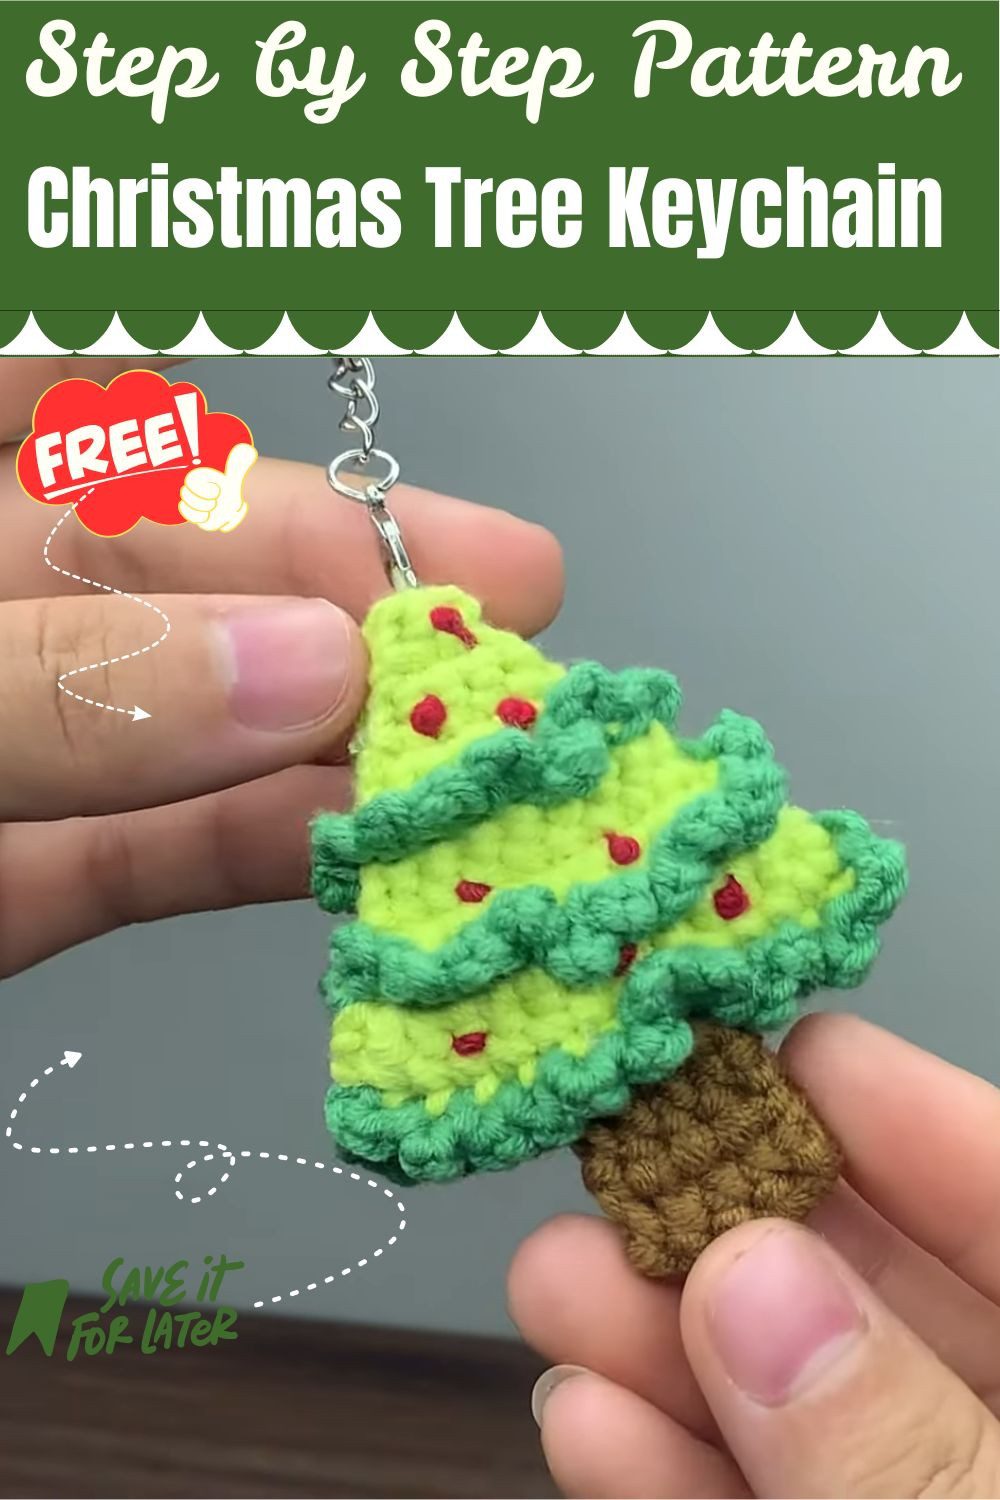
Small enough to clip onto a zipper, this Free Crochet Christmas Tree keychain stacks ruffled green layers over a light green body, finished with red dots. Handmade ornaments and easy crochet gifts trend in November, while crochet stocking stuffers and quick gifts rise in December.
Light green rows, dark green ruffles, and a brown trunk come together in this crochet Christmas tree keychain. Next, add a few red dots for ornaments, then attach a metal clasp to hang it from a purse, backpack, or set of keys. In addition, the free crochet pattern shows each stage with clear photos, so every row is easy to follow. Overall, search interest moves from handmade Christmas ornaments and easy crochet gifts in November to crochet stocking stuffers and quick gifts in December.
Free Crochet Christmas Tree Keychain Overview
The finished tree is a small triangle with three visible ruffled layers. Each layer starts as a ledge, made by working one row in only the front loops or only the back loops. Then that ledge is trimmed with chain 3 and slip stitch frills.
The light green body stays smooth and tightly worked, so the dark green ruffles stand out against it. Meanwhile, red knots add color, and the brown trunk peeks out at the bottom.
However, the pattern does not list a finished measurement, so the size depends on your yarn and tension. For example, with 2 mm yarn and a 2.5 mm hook, the result is a small charm rather than a large decoration.
Skill Level and Techniques
The pattern uses only a handful of stitches: chain, single crochet, increase, and slip stitch. Still, the parts that need attention are the magic ring, the loop-specific rows, and the glue assembly.
Anyone comfortable with basic single crochet and turning rows should be able to follow it. Even so, the two loop-only rows are the trickiest part, because working into the wrong loop hides the ledge you need later.
Finished Size: The flat Christmas tree, including the brown trunk, measures about 3.5 inches (9 cm) tall. It is about 2.5 inches (6.5 cm) wide at the bottom branch layer. The key ring and chain are not counted. Thicker yarn or a bigger hook will make it a little larger.
Materials for the Crochet Christmas Tree Keychain
- Light green, dark green, brown and red yarn, about 2 mm thick (5-ply, family-style cotton)
- 2.5 mm crochet hook
- Scissors
- Tapestry needle
- Glue
- Hanging loop (ribbon, or a strand of the same yarn if you have none)
Cotton gives the stitches clear definition, which helps the ruffles hold their shape. Therefore, if you swap yarns, match the thickness as closely as you can and keep the same hook, so the pieces stay small and the stitches stay snug.
Abbreviations Used
- ch: chain
- sc: single crochet
- inc: 2 sc in the same stitch
- sl st: slip stitch
Tips Before Starting the Crochet Christmas Tree Keychain
First, count your stitches at the end of every row. Each row of the tree body should have exactly one more stitch than the row before, so a quick count catches mistakes early.
Also, mark the front loop and back loop rows with a scrap of yarn. Rows 7 and 10 are the only rows worked in a single loop, and everything else uses both loops.
Next, make both tree pieces with the same tension. Otherwise, if one comes out larger, the front and back will not line up when glued.
Finally, split the red yarn before you begin. Thinner strands make smaller, neater ornaments, and the plies separate more easily when the yarn is fresh.
Crochet Christmas Tree Keychain Step-by-Step Instructions
The tree body is worked flat, and you turn after each row. Make two identical pieces.
Step 1: Make the Magic Ring
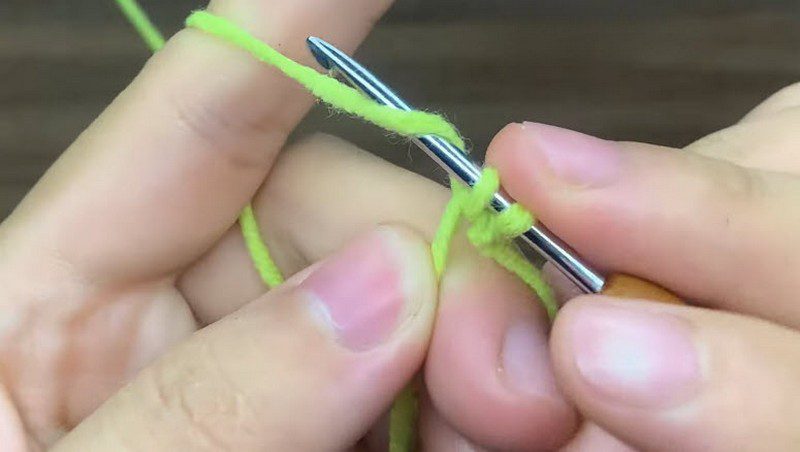
Using light green and the 2.5 mm hook, make a magic ring. Then chain 1 and work 2 sc into the ring. After that, pull the ring tight so the center closes up. You now have 2 stitches, and this tiny start becomes the peak of the tree. The first photo shows the yarn wrapped over the hook at this point.
Step 2: Work the First Increase Rows
From here on, chain 1 and turn at the start of every row. Each row ends with an increase, and every other stitch is plain sc.
- Row 2: 1 sc, inc in the last stitch (3)
- Row 3: 2 sc, inc (4)
- Row 4: 3 sc, inc (5)
- Row 5: 4 sc, inc (6)
- Row 6: 5 sc, inc (7)
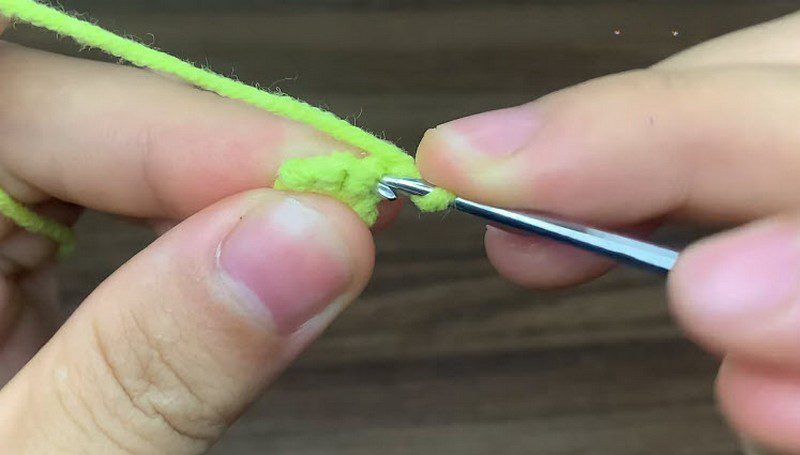
The second photo shows this small starting piece with the hook inside the last stitch.
Step 3: Build the Ledges and Finish the Body
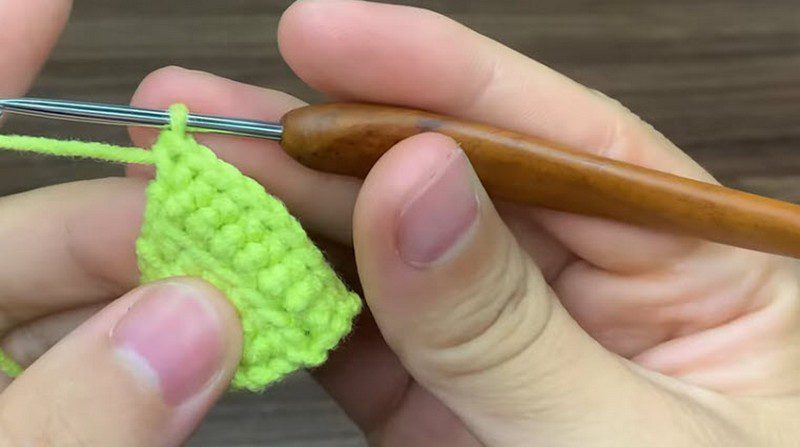
Row 7 is where the shaping begins. Work in the front loops only: 6 sc, then inc (8). As a result, this leaves a ledge that will hold the first ruffle.
- Row 8: back to both loops, 7 sc, inc (9)
- Row 9: 8 sc, inc (10)
- Row 10: back loops only, 9 sc, inc (11)
- Row 11: both loops, 10 sc, inc (12)
- Row 12: 11 sc, inc (13)
Next, chain 1, cut the yarn, fasten off, and pull the loop tight. The third photo shows the triangle taking shape with the ledge visible. Finally, repeat Steps 1 to 3 for the second piece.
Step 4: Add the Dark Green Branches
Join dark green onto the free ledges left by the front-loop and back-loop rows. Chain 3, then slip stitch into the next stitch along the ledge. After that, repeat “chain 3, slip stitch” until you reach the end of the row.
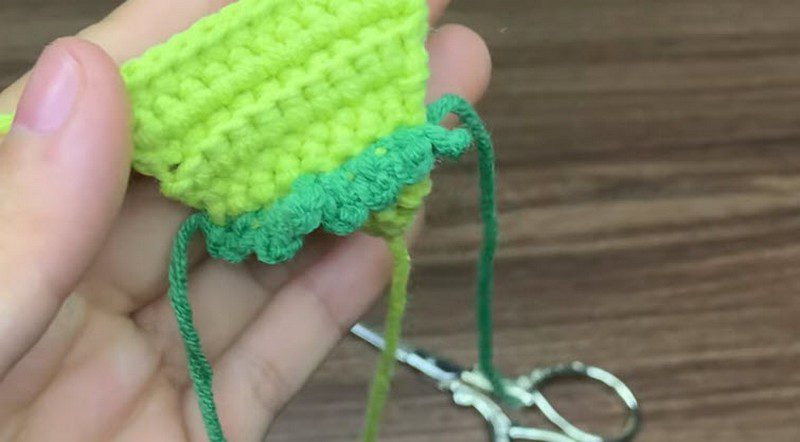
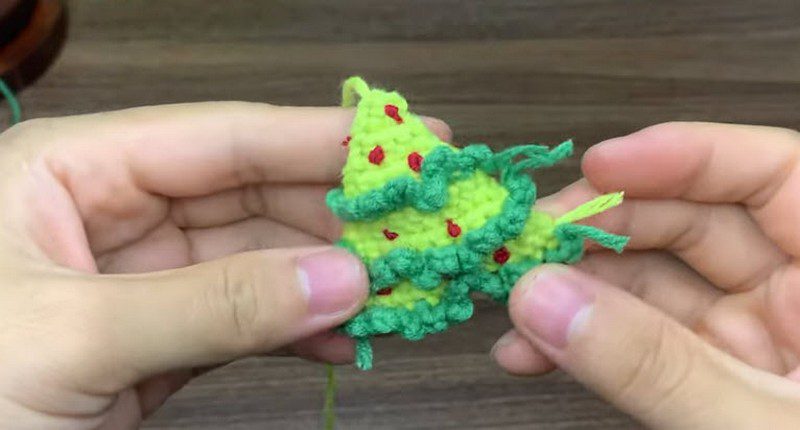
Work the first ledge slightly outward so the edge of the tree stays covered. Likewise, work the second ledge the same way. For the bottom ledge, stitch into only the outer half of each stitch, repeating chain 3 and slip stitch to the end. Then cut the yarn, and trim or weave in the ends. The fourth photo shows the ruffle forming along the bottom edge, with the dark green tails still hanging.
Step 5: Assemble the Crochet Christmas Tree Keychain
First, split a piece of red yarn into thinner strands, or use thinner yarn if you have it. Then tie small knots and stitch them onto the tree as ornaments. Decorate the second piece exactly the same way. Any colors work for the ornaments.
Next comes the trunk, which uses brown. Make a slip knot and chain 4. Row 1: chain 1, then 1 sc in each of the 4 chains. Rows 2 to 17: chain 1, turn, 4 sc. After row 17, chain 1 and fasten off. Note that the width of the trunk equals the length of the starting chain, so change it if you like. In addition, work more rows for a longer trunk.
Finally, put glue on the trunk and place it between the two tree pieces. Press the pieces together with the trunk in the middle. Then attach the hanging loop at the top with ribbon or a strand of yarn. The last photo shows the finished tree with its ruffles and red ornaments.
Ways to Change the Crochet Christmas Tree Keychain
To begin with, swap the ornament color for white, gold, or yellow. The pattern states that any colors work, so bright knots on the green body are a fair starting point.
Likewise, a wider trunk is possible by chaining more than 4, since the trunk width equals the starting chain. However, keep in mind that a wider trunk changes how it sits between the two pieces.
Besides that, a longer trunk simply means more rows of 4 sc. This can help if you want the tree to hang lower from a bag.
Fixing Common Problems
The ledges are hard to find. The loop-only rows are the cause. Therefore, check that Row 7 used only the front loops and Row 10 used only the back loops, then look along the row edges for the unworked loops.
The two pieces do not match. Compare stitch counts first. If both pieces have 13 stitches in the last row but differ in size, one was worked tighter. In that case, try the looser piece with a smaller hook, or glue them anyway and trim the edges.
The ruffles look flat. Chain 3 gives each frill its height. However, if the stitches are very tight, the ruffles pull close to the body. Relax your tension on the slip stitches.
The glue shows. Use only a small amount on the trunk, and press the pieces together gently so nothing squeezes out at the edges.
Turn It Into a Mini Ornament Set
The same tree can hang on a Christmas tree branch instead of a bag. In that case, skip the keychain ring and attach a loop of ribbon or yarn at the top. Moreover, a few trees in different ornament colors make a small set, and each one works up the same way.
Care Tips
The pattern uses cotton yarn, and glue holds the pieces together. For that reason, spot clean with a damp cloth rather than soaking the tree, since water could loosen the glue. Then let it dry flat, and store it away from heavy items so the ruffles keep their shape.
FAQs About the Crochet Christmas Tree Keychain
What yarn does this pattern use?
It calls for about 2 mm, 5-ply, family-style cotton in light green, dark green, brown, and red.
What hook size is needed?
A 2.5 mm crochet hook.
How many pieces are made?
Two tree bodies and one trunk, plus the dark green ruffles and red ornaments on each tree piece.
How are the pieces joined?
Glue. The trunk goes between the two tree pieces, and then the pieces are pressed together.
Can the trunk be longer?
Yes. The pattern suggests more rows for a longer trunk and a longer starting chain for a wider one.
Ready to Hang
A small stack of increase rows, two open ledges, and a few ruffled rounds are all it takes to get this tree together. So pick your greens, gather the red scraps, and start with the magic ring. In the end, the charm is finished once the glue dries and the loop is attached.