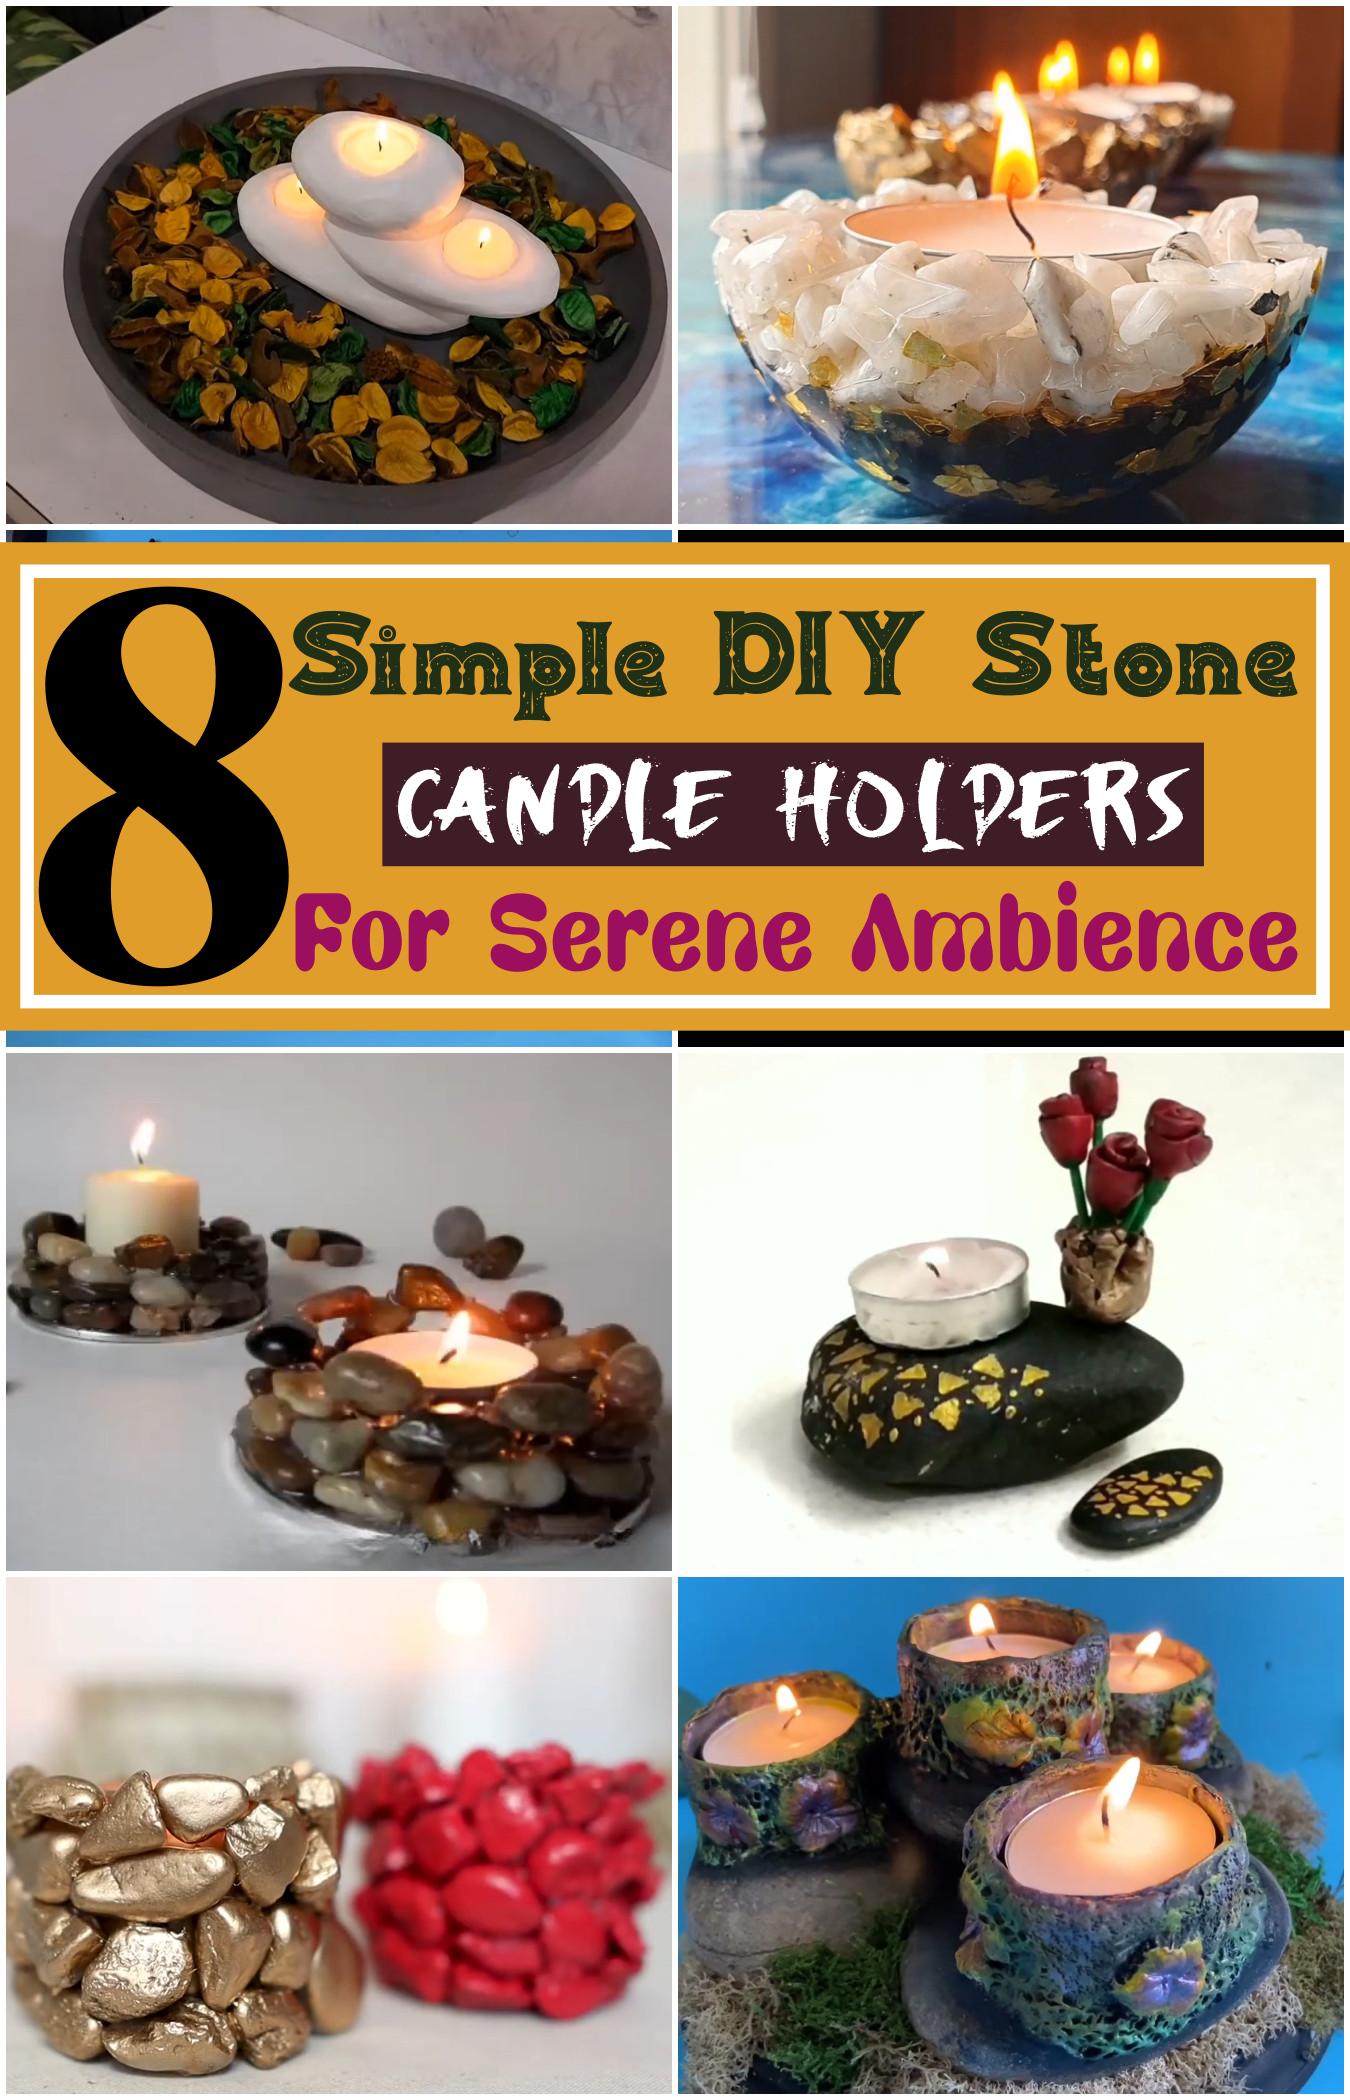
Simple DIY Stone Candle Holders For Serene Ambience
Transform your space into a peaceful retreat with simple DIY stone candle holders that evoke nature’s calming essence. Ideal for indoor or outdoor settings, these elegant holders combine minimal effort with maximum impact. Gather smooth river stones, a heat-safe adhesive, and tealight candles to create timeless decor pieces that complement rustic, boho, or modern aesthetics. This eco-friendly decor idea not only enhances the ambience with soft, flickering light but also reflects a mindful approach to styling your surroundings. The keyword “Simple DIY Stone Candle Holders For Serene Ambience” taps into searchers seeking aesthetic yet easy home decor solutions. These holders are perfect for those who value tranquility, personalization, and minimal design, making them a trending favorite in modern home settings.
Each piece becomes a small meditation in design—earthy stones arranged in pleasing symmetry or contrast. The project welcomes creativity: incorporate beach pebbles, quartz, or marbled stones for added texture and interest. For seasonal flair, tuck sprigs of dried lavender or eucalyptus between the stones. Though no formal experience is needed, precision and patience ensure a lasting result. This décor idea is especially loved for its relaxing visuals and budget-friendly approach. Those who enjoy natural home accents will appreciate the serenity stone candle holders bring. Optional extras can include reader-submitted photo galleries of finished holders, and a quick guide on avoiding common design missteps like loose attachments or poor stone balance. These creations are more than decorative; they become calming visual anchors that help define personal sanctuaries.
DIY Stone/Pebble Candle Holders
Creating DIY stone or pebble candle holders is a delightful way to add a natural touch to any space. These holders are simple to make, budget-friendly, and customizable to suit any décor style.
Procedure of Making: Begin by selecting smooth, flat stones or pebbles. Arrange them in a stable formation, ensuring they can securely hold a candle. Adhere the stones together using a strong adhesive like hot glue or epoxy resin. For added safety, place a felt pad under the base to protect surfaces from heat and scratches.
Materials: Gather stones or pebbles, a sturdy adhesive, a base (such as a ceramic tile or wooden disc), and a candle. Optional materials include paint for decoration and felt pads for surface protection.
Different Design Ideas: Explore various designs, such as stacking stones to create a tiered effect, arranging them in a circular pattern for a rustic look, or painting the stones to match your interior theme. Combining stones with other natural elements like wood or shells can also enhance the aesthetic appeal.
Precautions: Always use heat-resistant materials to prevent fire hazards. Ensure the candle is securely placed and never leave a burning candle unattended. Keep the holder away from flammable materials and maintain a safe distance from walls and curtains.
By following these steps, you can create charming and functional stone or pebble candle holders that bring warmth and elegance to your home.

https://www.youtube.com/watch?v=GW3k_JJS8Ww
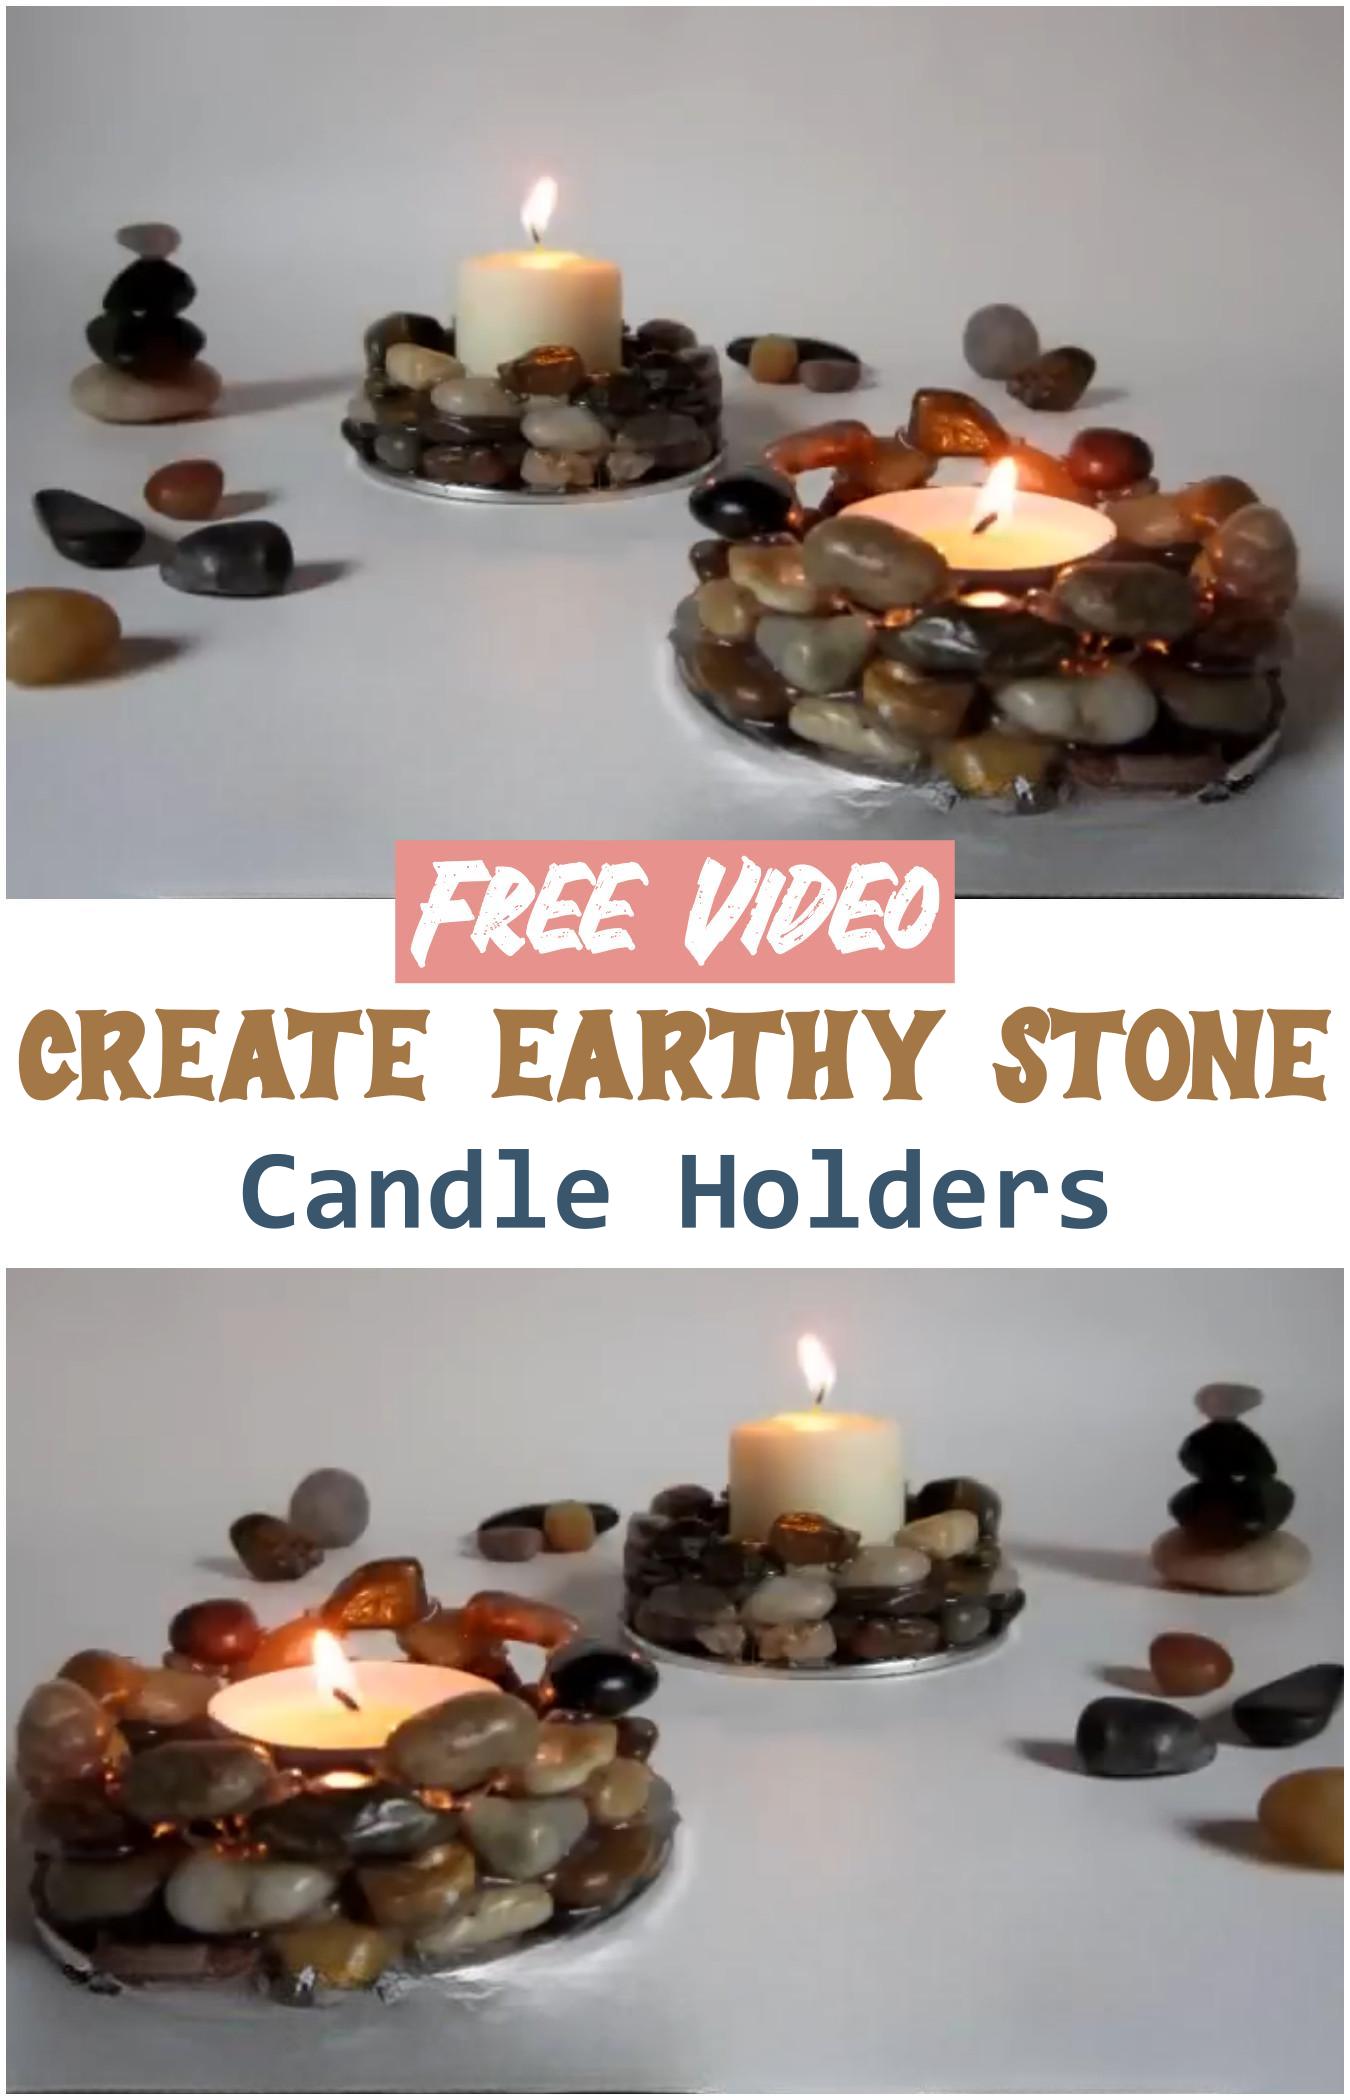
Create Earthy Stone Candle Holders
Creating earthy stone candle holders is a straightforward and enjoyable project suitable for beginners. Begin by selecting a flat, stable rock such as sandstone, slate, or river rock. If the rock has a natural indentation, it can serve as a base for a candle. Alternatively, drill a hole into the rock using a masonry bit to fit a candle snugly. For added stability, consider stacking smaller rocks and securing them with strong adhesive. Ensure the structure is level and allow any glue to dry completely before use.
Materials:
- Flat, stable rocks (e.g., sandstone, slate, river rock)
- Masonry drill bit (if drilling)
- Strong adhesive (e.g., E-6000)
- Candles (votive or tea lights)
- Optional: Felt pads to protect surfaces
Different Design Ideas:
- Natural Cavity Holders: Utilize rocks with existing indentations to hold candles, enhancing the natural aesthetic.
- Stacked Rock Holders: Create a tiered effect by stacking smaller rocks and securing them with adhesive for a unique design.
- Drilled Holders: For a more polished look, drill a hole into a flat rock to fit a candle snugly.
- Geode Candle Holders: Incorporate geodes with hollow centers to add a touch of elegance and sparkle.
Precautions:
- Heat Resistance: Ensure the chosen rock can withstand the heat generated by the candle to prevent cracking.
- Surface Protection: Place felt pads beneath the candle holder to protect furniture from heat damage.
- Secure Placement: Verify that the candle holder is stable and will not tip over easily.
- Fire Safety: Never leave a burning candle unattended and keep it away from flammable materials.
By following these guidelines, creating earthy stone candle holders can be a rewarding project that adds a rustic charm to any space.
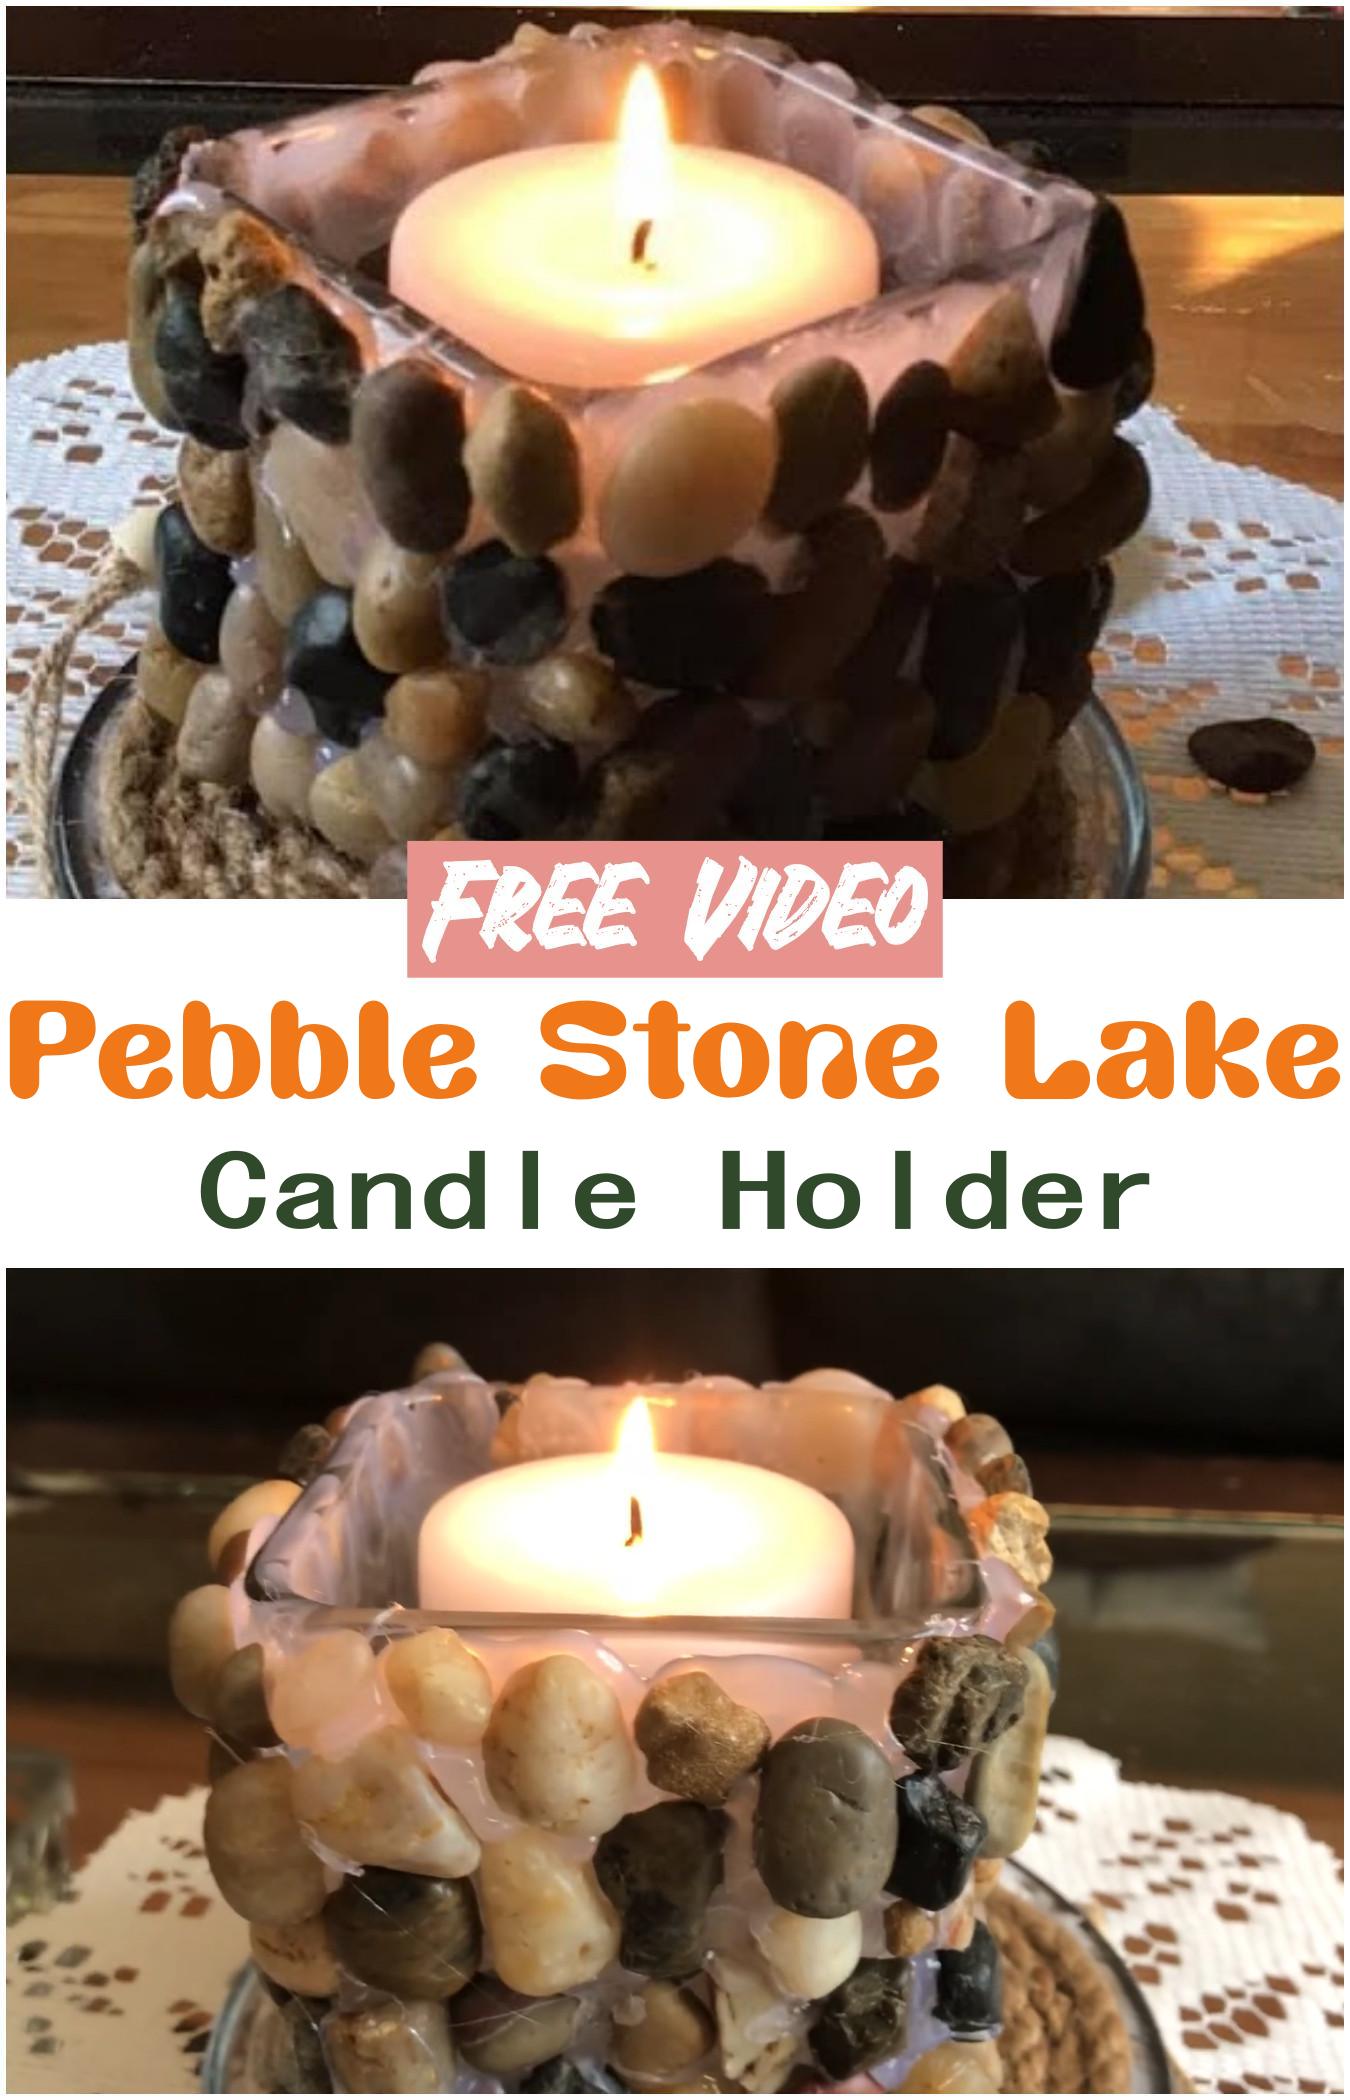
Pebble Stone Lake Candle Holder
Begin by selecting smooth, flat pebbles, preferably from riverbeds or beaches. Arrange them in a circular pattern to form a stable base. Secure the pebbles together using a strong adhesive, ensuring the structure is stable. For added safety, place a small glass or metal holder in the center to contain the candle.
Materials:
- Smooth, flat pebbles
- Strong adhesive (e.g., epoxy or hot glue)
- Candle (votive or tea light)
- Optional: Small glass or metal holder
Different Design Ideas:
- Minimalistic Style: Use uniform-sized pebbles arranged neatly for a clean look.
- Rustic Charm: Incorporate irregularly shaped pebbles for a more natural appearance.
- Coastal Theme: Add seashells or sand around the base for a beach-inspired design.
- Zen Garden: Stack pebbles in a cairn formation for a tranquil, meditative effect.
Precautions:
- Ensure the adhesive is fully dried before using the candle holder to prevent accidents.
- Use LED candles if concerned about heat exposure to the pebbles.
- Keep the candle holder on a stable, heat-resistant surface to avoid fire hazards.
- Regularly clean the holder to maintain its appearance and functionality.
A Pebble Stone Lake Candle Holder not only illuminates your space but also adds a touch of nature’s beauty to your decor.
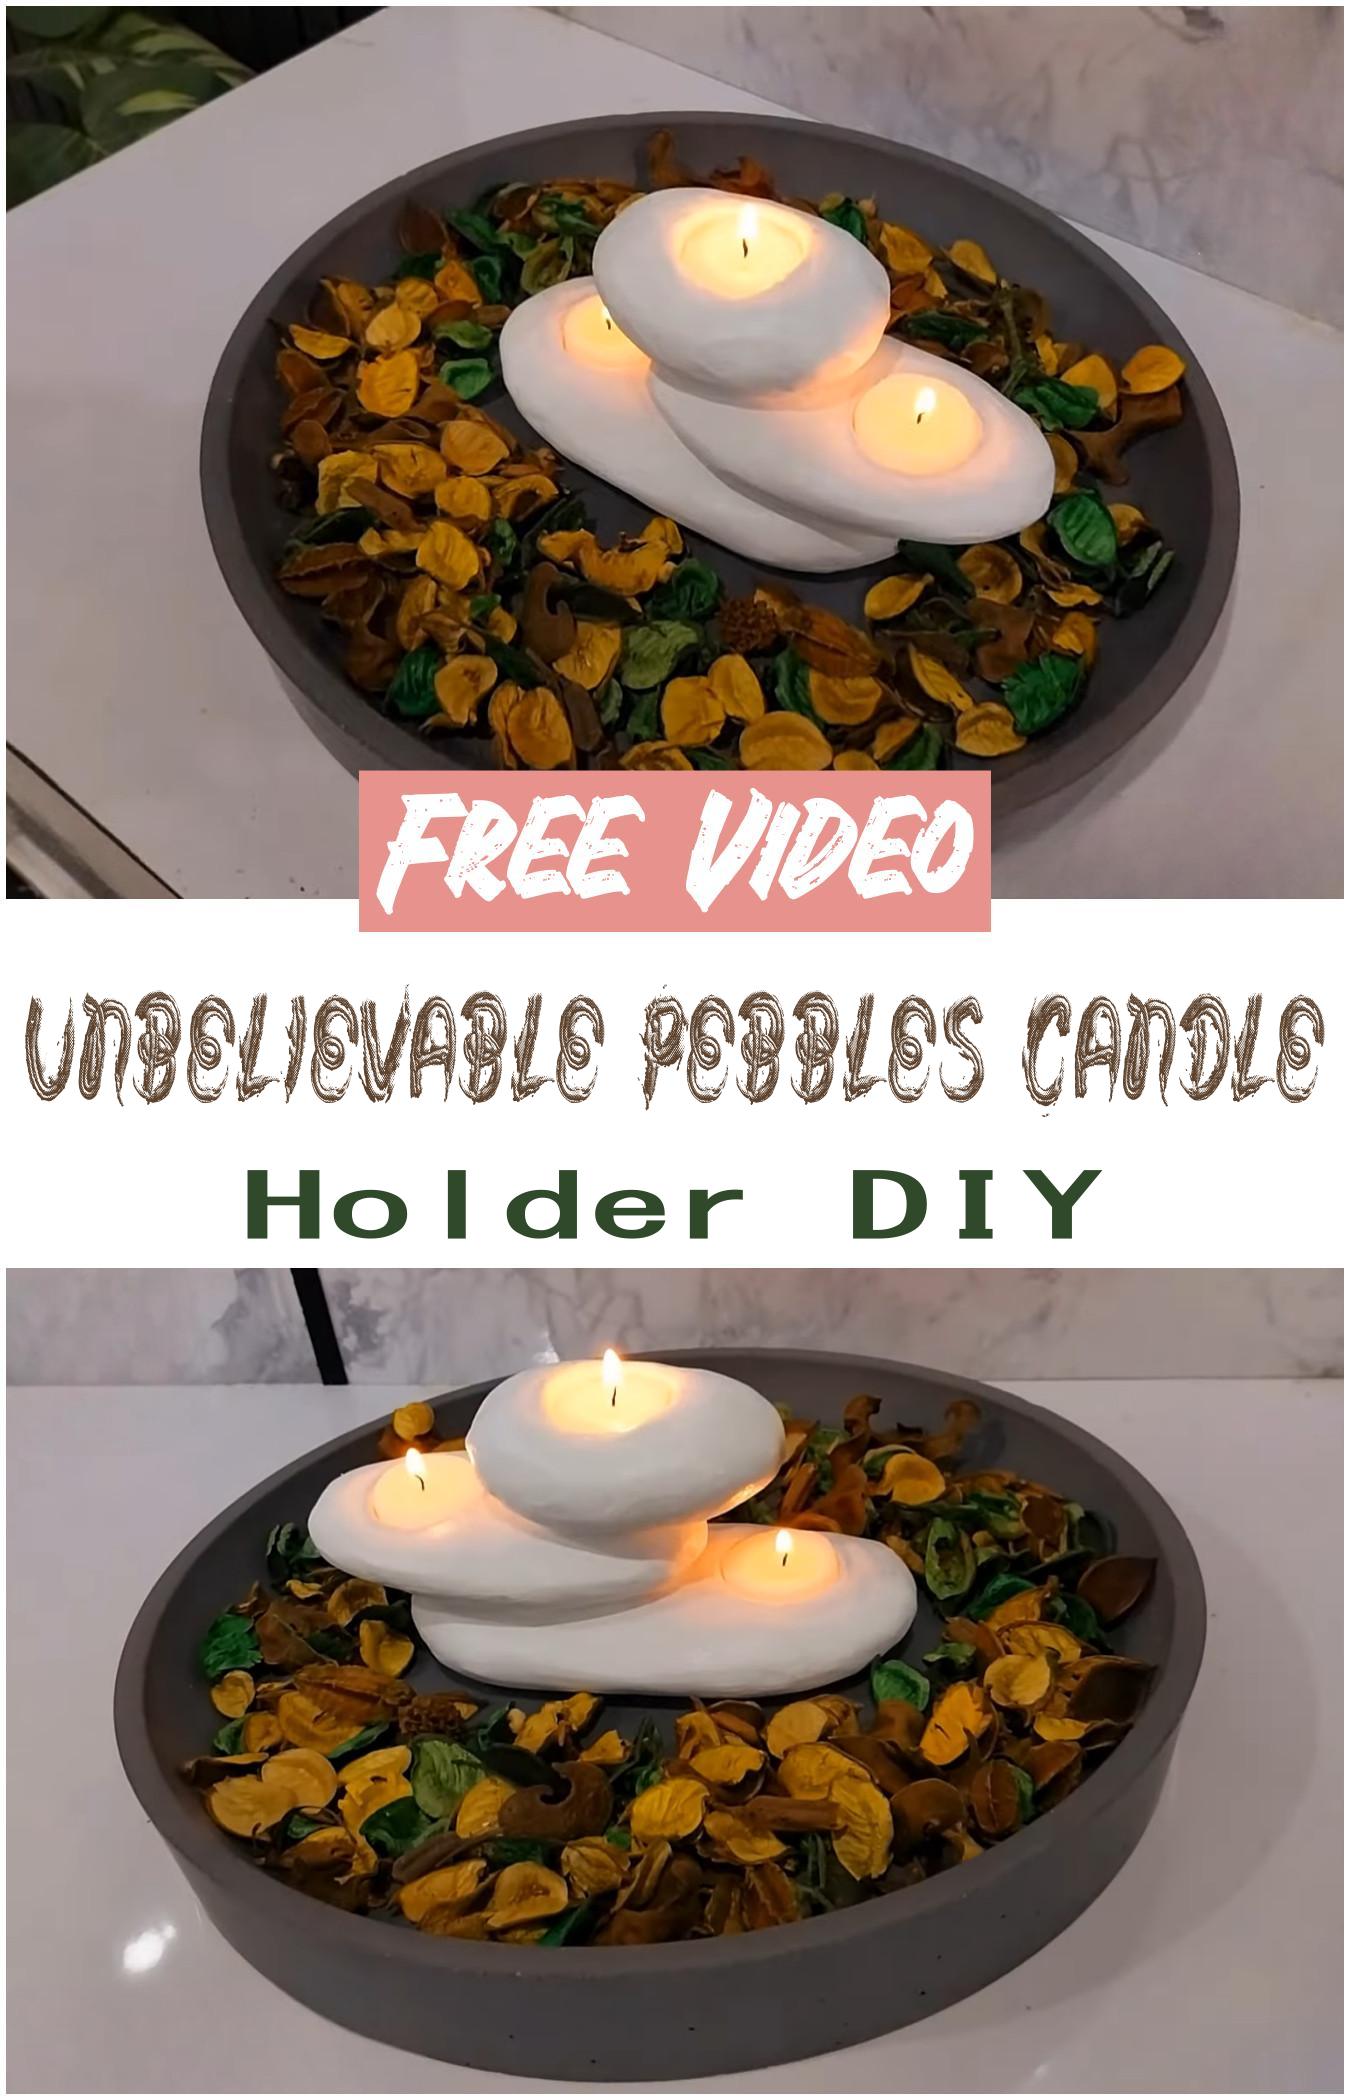
Unbelievable Pebbles Candle Holder DIY
Unbelievable Pebbles Candle Holder DIY: A Natural Touch for Your Home
Procedure of Making:
Begin by selecting smooth, flat pebbles, preferably from riverbeds or beaches. Arrange them in a circular pattern to form a stable base. Secure the pebbles together using a strong adhesive, ensuring the structure is stable. For added safety, place a small glass or metal holder in the center to contain the candle.
Materials:
- Smooth, flat pebbles
- Strong adhesive (e.g., epoxy or hot glue)
- Candle (votive or tea light)
- Optional: Small glass or metal holder
Different Design Ideas:
- Minimalistic Style: Use uniform-sized pebbles arranged neatly for a clean look.
- Rustic Charm: Incorporate irregularly shaped pebbles for a more natural appearance.
- Coastal Theme: Add seashells or sand around the base for a beach-inspired design.
- Zen Garden: Stack pebbles in a cairn formation for a tranquil, meditative effect.
Precautions:
- Ensure the adhesive is fully dried before using the candle holder to prevent accidents.
- Use LED candles if concerned about heat exposure to the pebbles.
- Keep the candle holder on a stable, heat-resistant surface to avoid fire hazards.
- Regularly clean the holder to maintain its appearance and functionality.
An unbelievable pebble stone candle holder not only illuminates your space but also adds a touch of nature’s beauty to your decor.
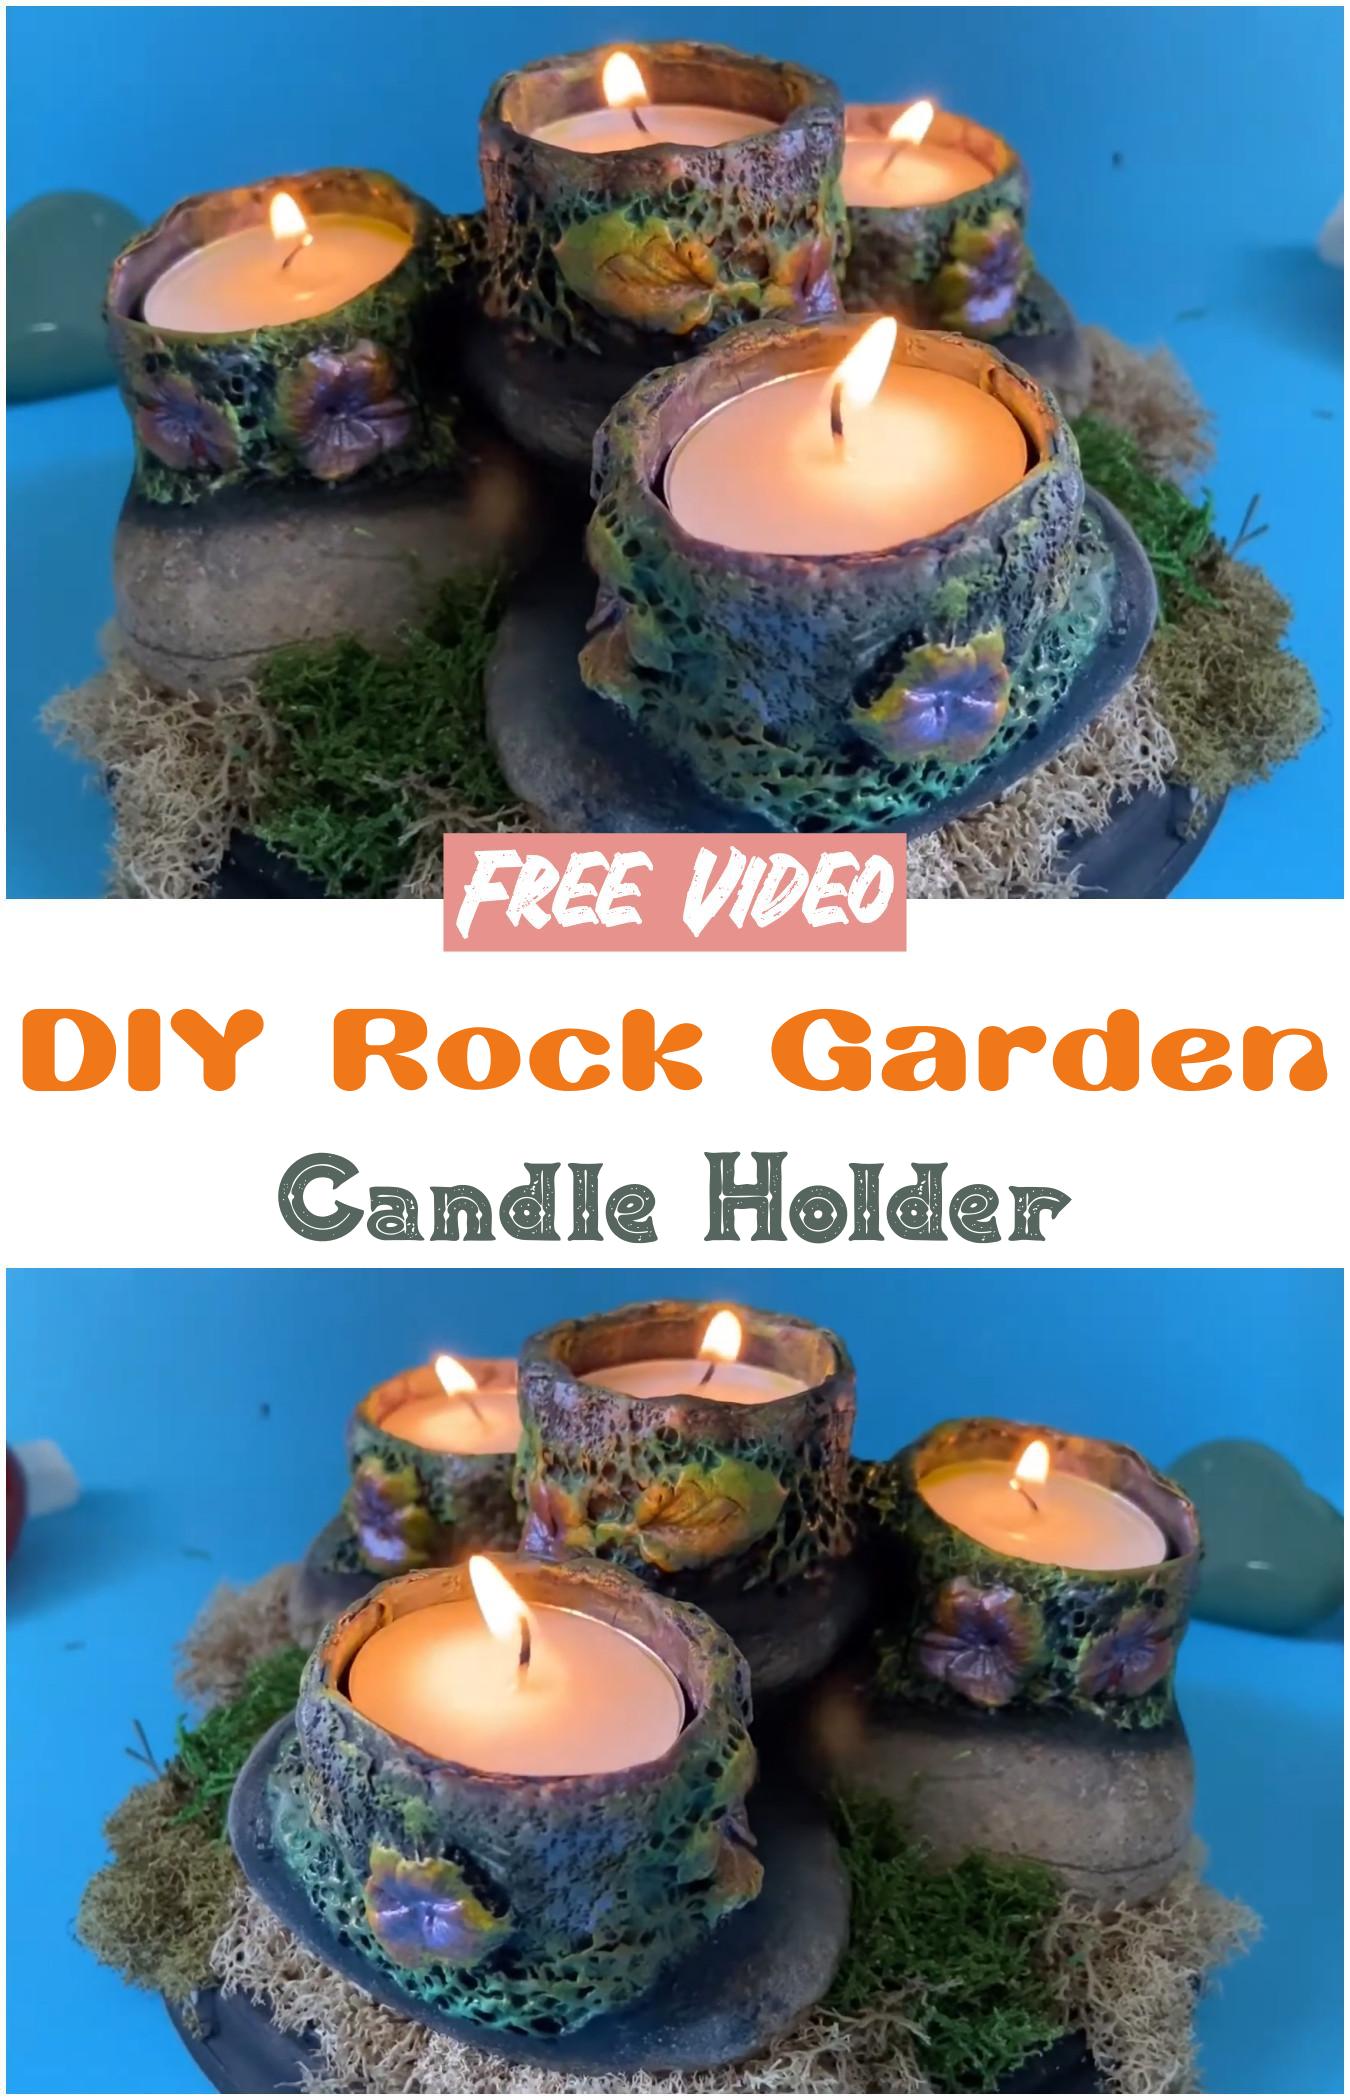
DIY Rock Garden Candle Holder
DIY Rock Garden Candle Holder
Create a charming and eco-friendly candle holder using natural stones, perfect for adding warmth to any outdoor space.
Materials:
- Smooth, flat stones (medium to large size)
- Strong adhesive or hot glue gun
- Tea light or LED candle
- Optional: Paint, decorative pebbles, or moss for decoration(thespruce.com)
Procedure:
- Select stones with flat surfaces to ensure stability.
- Arrange the stones in a circle or desired shape, leaving space in the center for the candle.
- Use adhesive to secure the stones together, forming a stable base.
- Place the candle in the center.
- Optional: Decorate with paint, pebbles, or moss for added aesthetic appeal.
Different Design Ideas:
- Create a spiral pattern using varying sizes of stones.
- Incorporate colored stones or glass beads for a vibrant look.
- Design a rustic lantern by stacking stones and placing a candle inside.
Precautions:
- Ensure the adhesive is fully dry before placing the candle.
- Avoid using real candles in windy areas; opt for LED candles instead.
- Keep the holder on a stable surface to prevent tipping.
This DIY project offers a creative way to repurpose natural materials, adding a rustic touch to your garden or patio.
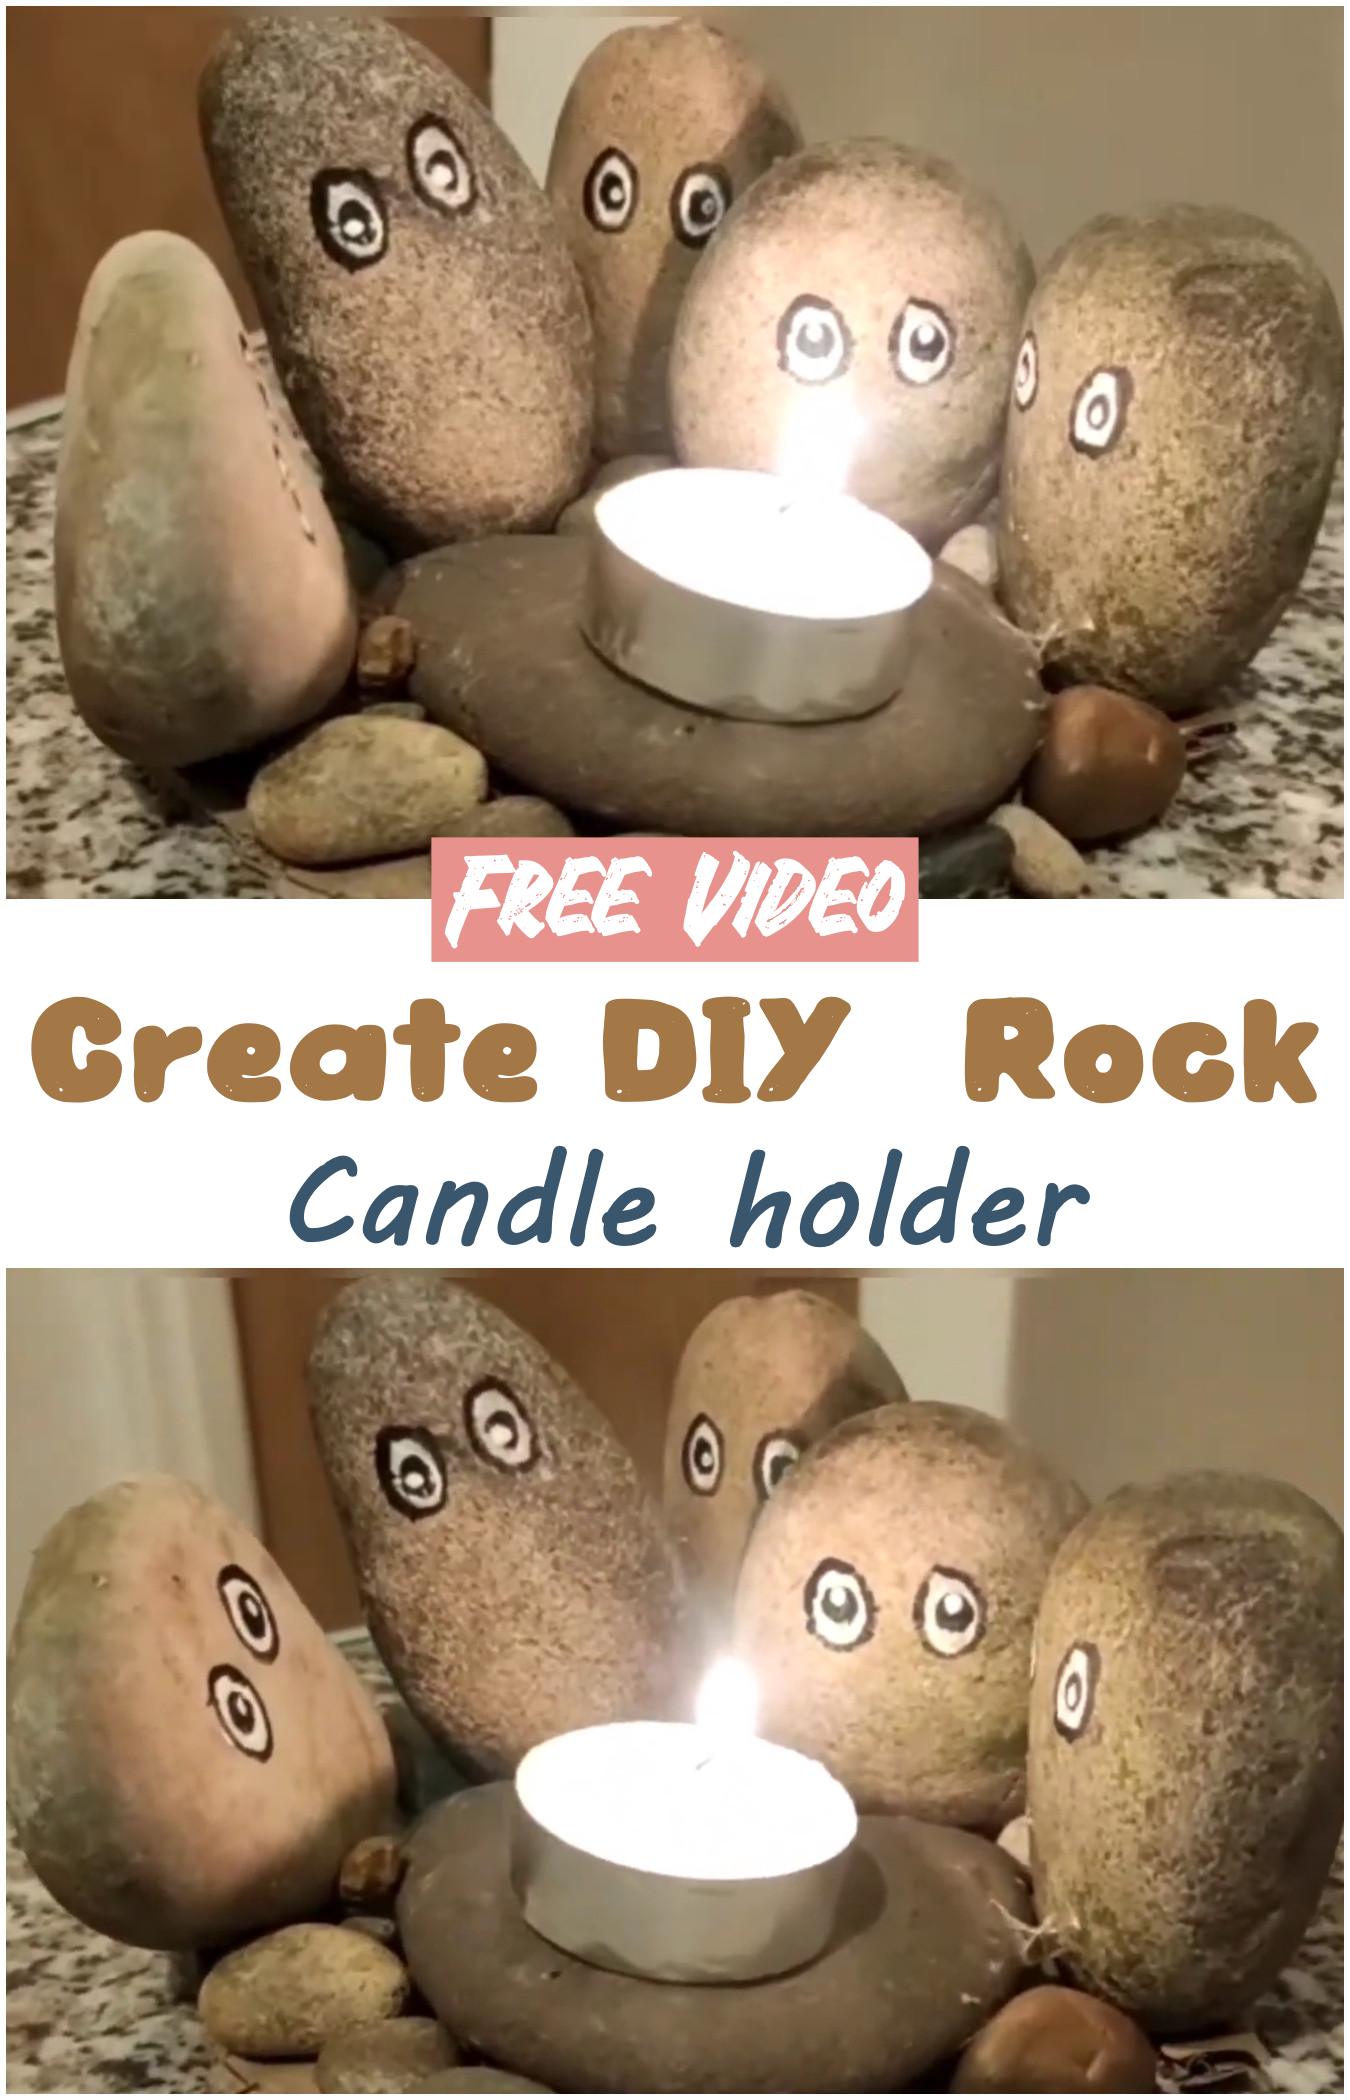
Create DIY Rock Candle holder
Creating a DIY rock candle holder is a delightful way to add a touch of nature to your home decor. This beginner-friendly project requires minimal tools and offers room for creativity.
Procedure of Making:
- Select a smooth, flat stone with a stable base.
- Using a drill with a masonry bit, carefully create a shallow hole in the center to fit your candle snugly.
- Sand the edges of the hole to remove any roughness.
- Optionally, paint or decorate the stone to match your desired aesthetic.
- Place a candle in the hole and enjoy the warm ambiance.
Materials:
- Smooth, flat stone
- Drill with masonry bit
- Sandpaper
- Paint or decorative materials (optional)
- Candle
Different Design Ideas:
- Opt for a rustic look by leaving the stone in its natural state.
- Paint the stone with vibrant colors or patterns to add a pop of personality.
- Incorporate additional elements like small succulents or decorative pebbles around the base for a more elaborate centerpiece.
Precautions:
- Ensure the stone is dry and free from cracks before drilling.
- Use appropriate safety gear, such as goggles and gloves, when drilling.
- Avoid using flammable materials near the candle to prevent fire hazards.
- Never leave a burning candle unattended.
This DIY project not only enhances your living space but also provides a sense of accomplishment. With simple materials and a bit of creativity, you can craft a unique candle holder that reflects your personal style.
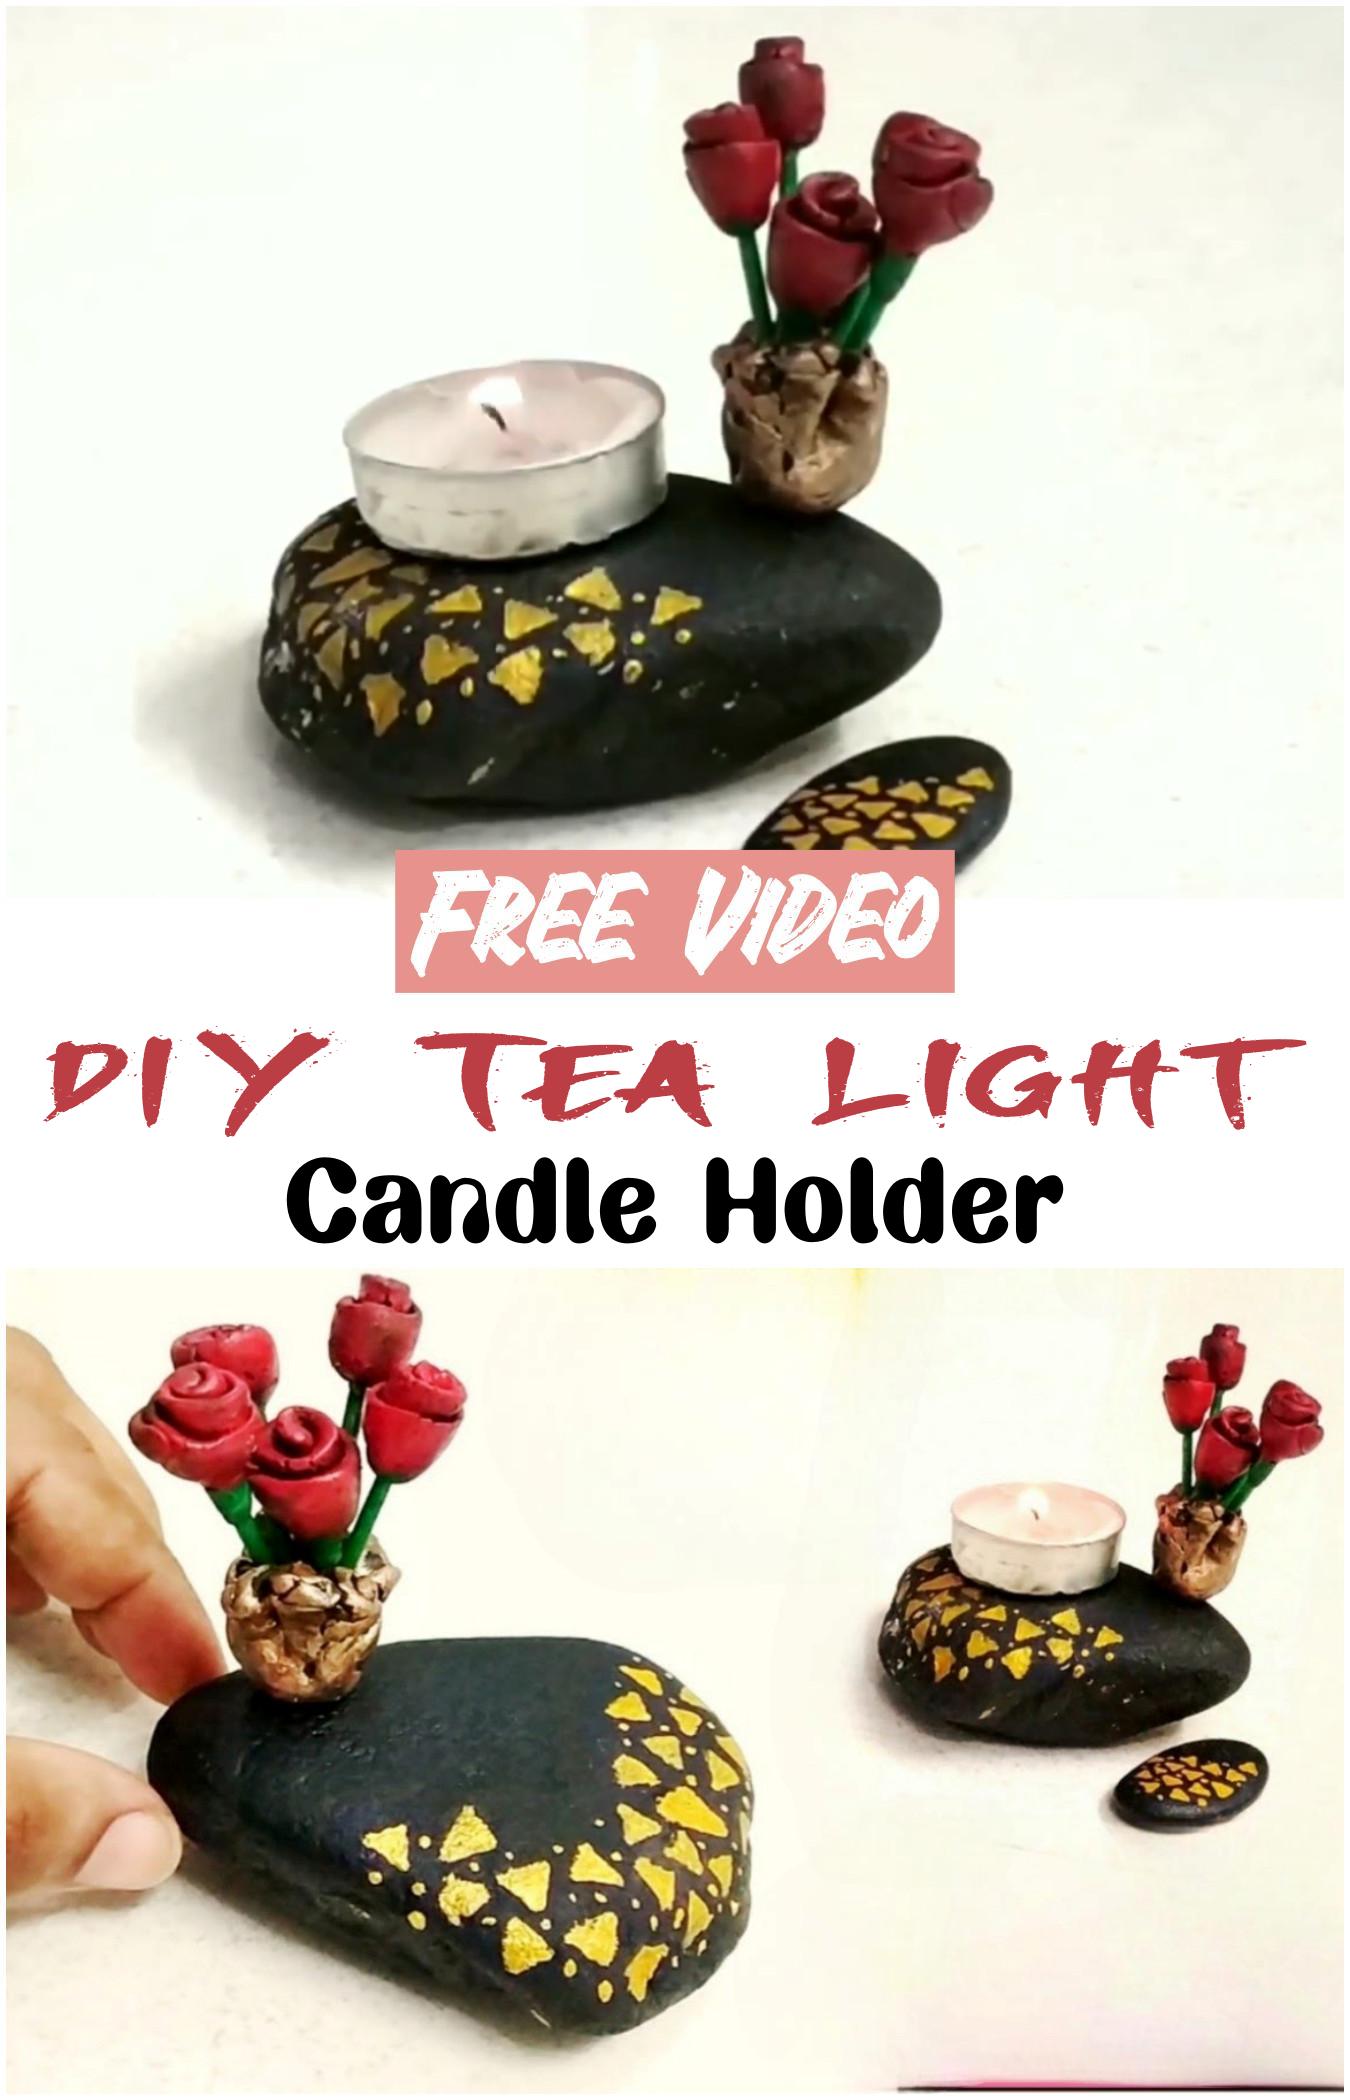
DIY Tea Light Candle Holder
Begin by selecting a suitable material such as air-dry clay, polymer clay, or plaster of Paris. For a simple design, mold the clay into a disc shape, then form it into a cone or bowl to hold the tea light securely. Ensure the base is flat to prevent tipping. After shaping, allow the holder to dry completely, following the manufacturer’s instructions. Once dry, you can paint and decorate it to match your style.
Materials:
- Air-dry clay, polymer clay, or plaster of Paris
- Rolling pin or hands for shaping
- Paints and brushes for decoration
- Optional: varnish for a glossy finish
Different Design Ideas:
- Ghost Holder: Shape the clay into a ghost figure with a hollow center to place the tea light underneath. Smooth the surface and add facial features for a whimsical touch.
- Rock-Inspired Holder: Use plaster of Paris to create a rock-like texture, adding a rustic charm to your holder.
- Modern Minimalist: Craft a sleek, geometric holder using polymer clay, then paint it with metallic or matte finishes for a contemporary look.
Precautions:
- Always use flameless LED tea lights to ensure safety, especially when using materials like clay or plaster that can be sensitive to heat.
- Avoid placing the holder on flammable surfaces.
- Ensure the holder is stable and won’t tip over easily.
This project is not only enjoyable but also allows for endless creativity in design and decoration.
Easy And Elegant Gem Stone Candle
Begin by selecting a heat-resistant container, such as a glass jar or ceramic cup. Melt your chosen wax (soy or paraffin) in a double boiler until it reaches approximately 180°F (82°C). If desired, add fragrance oils and colorants. Carefully pour the melted wax into the container, leaving about an inch from the top. Before the wax fully sets, gently place your gemstone pieces into the wax, ensuring they are evenly distributed. Allow the candle to cool and solidify completely before trimming the wick to about ¼ inch.
Materials:
- Wax: Soy, paraffin, or gel wax
- Wick: Cotton or wood wick
- Gemstones: Tumbled stones like amethyst, rose quartz, or citrine
- Fragrance oils (optional)
- Colorants (optional)
- Heat-resistant container: Glass jar or ceramic cup
- Double boiler or microwave-safe container for melting wax
Different Design Ideas:
- Layered Colors: Pour wax in layers of different colors, allowing each layer to set before adding the next.
- Embedded Gemstones: Place gemstones at various levels within the candle for a multi-dimensional effect.
- Floating Crystals: Use gel wax to create a translucent candle with floating gemstones inside.
- Themed Candles: Match gemstones to themes like love (rose quartz), tranquility (amethyst), or abundance (citrine).
Precautions:
- Gemstone Safety: Ensure the gemstones used are heat-resistant. Some stones may contain inclusions that can expand under heat, potentially causing cracking or explosion. Avoid stones with perfect cleavage, such as selenite or calcite, as they are more prone to breaking under heat
- Wax Temperature: Do not overheat the wax, as it can cause discoloration or release harmful fumes.
- Wick Placement: Secure the wick properly to prevent it from leaning or touching the sides of the container.
- Burning Safety: Always burn the candle on a heat-resistant surface and never leave it unattended.