Dynamic Crochet Plump Paws Kitty Amigurumi Pattern
Try the Dynamic Crochet Plump Paws Kitty Amigurumi Pattern: a cute, beginner-friendly cat with chubby paws, clear steps, quick rounds, minimal sewing, and charming finishes for fast success.
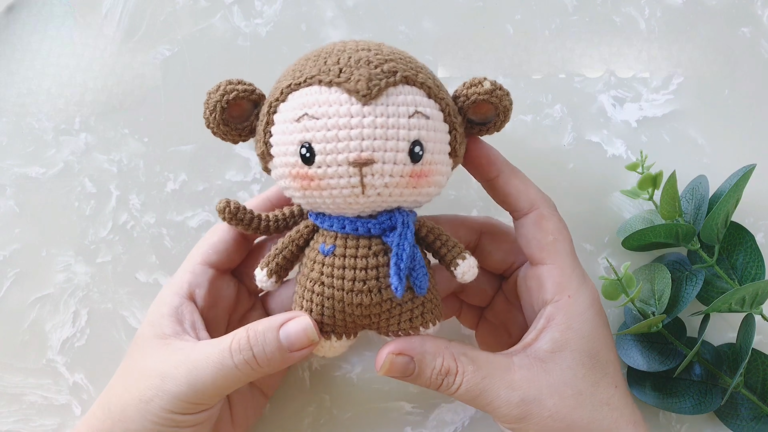
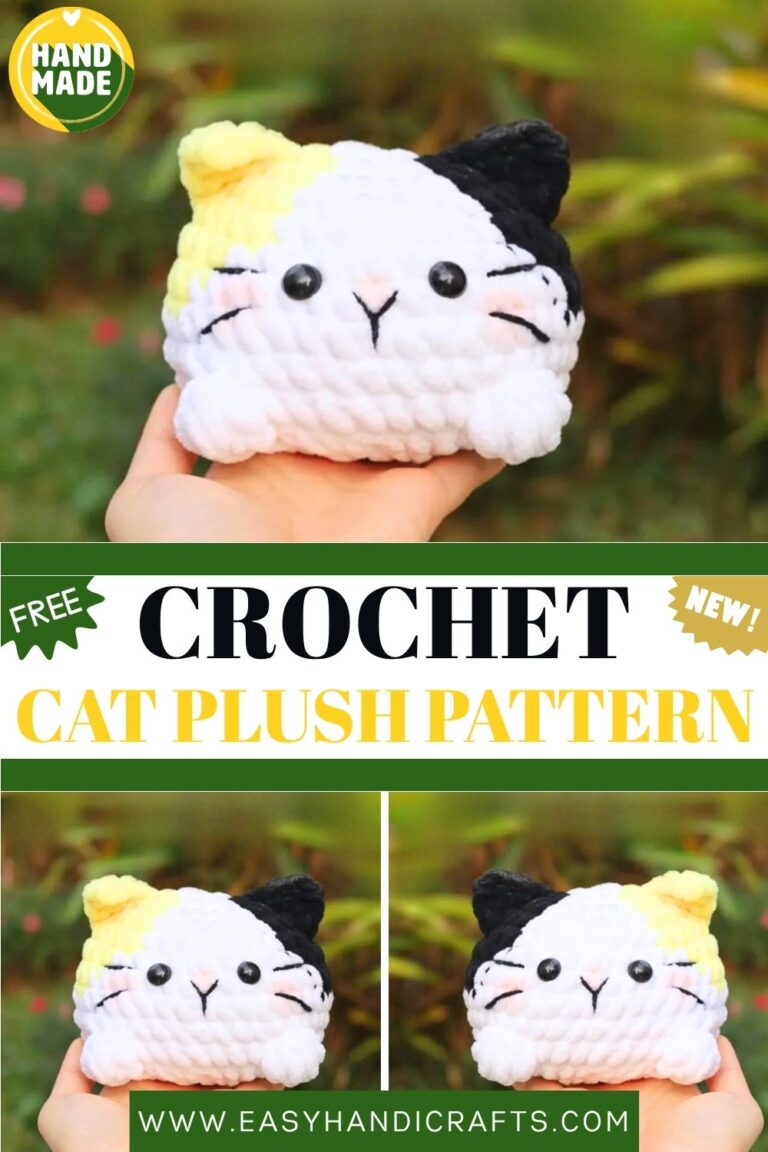
Stitch a charming companion with the Dynamic Crochet Plump Paws Kitty Amigurumi Pattern. Designed for beginners and relaxing makes, this pudgy-pawed feline features rounded shaping, simple stitches, and minimal sewing for a smooth, quick finish.

Clear step-by-step guidance, stitch counts, and size tips help you customize colors, whiskers, and expressions to match any mood or yarn stash. Whether you’re crocheting a cuddly plush, a palm-sized pocket pal, or a market-ready bestseller, this pattern delivers adorable results and confident progress from first loop to final tail.
Uses:
- Sweet gift for cat lovers, kids, and friends
- Desk buddy or stress-relief squish for daily smiles
- Small, quick make for craft fairs, markets, or donations
Graceful Dynamic Crochet Plump Paws Kitty Amigurumi Pattern
If you’re dreaming of a plush, palm-sized kitty with irresistibly plump paws and a graceful, dynamic vibe, you’re in the right place. Moreover, this beginner-friendly amigurumi pattern intentionally uses clear steps, tight shaping, and approachable techniques so your kitty looks adorable from every angle. Additionally, you’ll find exact material measurements, realistic time estimates, and helpful tips that prevent common mistakes before they start. Consequently, you’ll feel confident as you stitch, stuff, and sculpt your charming cat. Finally, you’ll discover variations for color styles and posing, which means your kitty can look uniquely “you” every single time.
Finished size: approximaterstand the choices behind each shaping decision.
Materials
- Main yarn (Worsted/Category 4, acrylic or cotton blend recommended):
- Main Color (MC): 50–60 g (approximately 100–120 m / 110–130 yd)
- Contrast Color (CC) for muzzle, ear insides, paw pads: 10–15 g (approximately 20–30 m / 22–33 yd)
- Accent yarn for stripes/markings (optional): 5–10 g (approximately 10–20 m / 11–22 yd)
- Crochet hook: 3.0 mm (US C/2–D/3 range); alternatively, 3.25 mm if your tension is tight
- Safety eyes: 10 mm (pair); alternatively, embroider eyes with floss
- Safety nose: 6–8 mm; alternatively, embroider a nose with floss
- Stuffing: 50–70 g polyester fiberfill (high-loft)
- Stitch marker: 1 locking marker
- Yarn needle: blunt tip, 7–9 cm (3–3.5 in)
- Scissors: 10–15 cm (4–6 in)
- Pins or clips: 6–10 pieces for positioning
- Optional extras:
- Pipe cleaner or 1 mm armature wire (20–25 cm / 8–10 in) for a poseable tail
- Poly-pellets (20–30 g) inside a small muslin pouch for a weighted base
- Felt or embroidery floss for paw pads and whiskers
- Soft blush or fabric paint for cheeks
Gauge (not critical but helpful):
- Approximately 24 sc x 26 rows = 10 x 10 cm (4 x 4 in) in the round with a 3.0 mm hook.
- As a rule of thumb, stitches should be tight so stuffing does not peek through.
Abbreviations (US Terms)
- MR: magic ring
- sc: single crochet
- inc: increase (2 sc in the same stitch)
- dec: invisible decrease (front loops of next 2 sts, yarn over, pull through, yarn over, pull through)
- sl st: slip stitch
- ch: chain
- st(s): stitch(es)
- FO: fasten off
Work in a continuous spiral unless otherwise stated. Additionally, place a stitch marker in the first stitch of each round to track progress.
Time Overview (Realistic Estimates)
- Head: 60–75 minutes
- Muzzle: 10–15 minutes
- Ears (pair): 20–30 minutes
- Body: 45–60 minutes
- Front Paws (pair): 35–45 minutes
- Hind Paws (pair): 45–55 minutes
- Tail: 20–30 minutes
- Paw Pads (optional): 15–20 minutes
- Assembly and Embroidery: 40–60 minutes
Altogether, expect 4.5–6 hours, although your pace may vary; consequently, you can complete this in a relaxed afternoon or two evenings.
Pattern Notes and Pro Tips (Read Before You Start)
- First, maintain firm tension; consequently, stuffing stays hidden and shaping looks crisp.
- Next, use invisible decreases; therefore, you’ll get smooth contours without visible gaps.
- Also, stuff gradually from the start; as a result, you avoid lumps and achieve a balanced silhouette.
- Additionally, pin all parts before sewing; hence, symmetry is easier to check and adjust.
- Finally, count stitches every round; otherwise, small miscounts compound and distort shaping.
Step-by-Step Instructions (With Transition-Rich Guidance)
- Head (MC) — 60–75 minutes
Because the head defines expression, we’ll build a balanced sphere with generous space for eyes and a plump muzzle.
- R1: 6 sc in MR (6)
- R2: inc around (12)
- R3: (sc, inc) x 6 (18)
- R4: (2 sc, inc) x 6 (24)
- R5: (3 sc, inc) x 6 (30)
- R6: (4 sc, inc) x 6 (36)
- R7: (5 sc, inc) x 6 (42)
- R8: (6 sc, inc) x 6 (48)
- R9–R14: sc around (48) build height for facial placement
Next, position safety eyes between R12 and R13, approximately 8–9 sts apart and centered. Additionally, test spacing with pins before securing backs.
- R15: (6 sc, dec) x 6 (42)
- R16: (5 sc, dec) x 6 (36) begin stuffing
- R17: (4 sc, dec) x 6 (30)
- R18: (3 sc, dec) x 6 (24) secure eyes now
- R19: (2 sc, dec) x 6 (18)
- R20: (sc, dec) x 6 (12)
- R21: dec around (6)
Finally, FO and leave a tail to close the last gap and neaten the shape. Afterwards, massage the sphere gently; consequently, the head becomes evenly rounded.
- Muzzle (CC) 10–15 minutes
For irresistible charm, we’ll make a softly stuffed oval muzzle that sits neatly beneath the eyes.
- Ch 6.
- R1: Starting in 2nd ch from hook: 4 sc, 3 sc in last ch; then continue on the other side: 3 sc, inc in last ch (12).
- R2: inc, 3 sc, (inc) x 3, 3 sc, (inc) x 2 (18)
- R3: sc around (18)
Afterwards, FO and leave a long tail for sewing. Additionally, lightly stuff the muzzle for a plump but not bulging look.
Nose and mouth:
- First, embroider a small triangle nose at the top center of the muzzle using pink or black floss; then stitch a short vertical line downward. Next, split into a “Y” to form a sweet mouth. Alternatively, attach a 6–8 mm safety nose before sewing the muzzle.
Placement:
- Position the muzzle centered between the eyes, with its top edge about one round below the eye line. Then, pin evenly and sew with small, neat stitches. Consequently, the face reads balanced and friendly.
- Ears (make 2, MC with optional CC inner) — 20–30 minutes
Because ear shape impacts expression, we’ll craft rounded triangles that lean slightly outward.
- R1: 4 sc in MR (4)
- R2: (sc, inc) x 2 (6)
- R3: (2 sc, inc) x 2 (8)
- R4: (3 sc, inc) x 2 (10)
- R5: (4 sc, inc) x 2 (12)
- R6: sc around (12)
Next, FO and leave a sewing tail. Afterwards, flatten and shape into triangles. Optionally, add a small CC felt triangle to the inner ear; as a result, the face gains contrast and depth.
Placement:
- Set ears about 5–6 stitches apart on the head’s crown. Then, angle them slightly outward for a gentle, curious expression. Finally, sew and weave in tails.
- Body (MC) — 45–60 minutes
Because our kitty is plump, the body includes a rounded belly with a subtle neck taper.
- R1: 6 sc in MR (6)
- R2: inc around (12)
- R3: (sc, inc) x 6 (18)
- R4: (2 sc, inc) x 6 (24)
- R5: (3 sc, inc) x 6 (30)
- R6: (4 sc, inc) x 6 (36)
- R7–R10: sc around (36) — form that squishy belly
- R11: (4 sc, dec) x 6 (30)
- R12: (3 sc, dec) x 6 (24)
- R13: sc around (24)
At this point, stuff the body firmly. Additionally, if you want a stable sitting, insert a small poly-pellet pouch at the base before finishing stuffing. Consequently, the kitty will sit upright with ease.
- R14: (2 sc, dec) x 6 (18)
- R15: sc around (18)
Finally, FO and leave a long tail for attaching the body to the head later.
- Front Paws (make 2, MC; optional CC pads) 35–45 minutes
Because the front paws sell the “plump” look, we’ll shape compact cylinders with a gentle taper.
- R1: 6 sc in MR (6)
- R2: (sc, inc) x 3 (9)
- R3: (2 sc, inc) x 3 (12)
- R4–R6: sc around (12)
- R7: (2 sc, dec) x 3 (9)
- R8: sc around (9)
Next, lightly stuff especially the paw tips to preserve softness. Then, FO and leave sewing tails. Additionally, consider adding toe beans (see Paw Pads) for extra cuteness.
- Hind Paws (make 2, MC) 45–55 minutes
Because hind paws support the seated pose, we’ll make them slightly larger and rounder.
- R1: 6 sc in MR (6)
- R2: inc around (12)
- R3: (sc, inc) x 6 (18)
- R4–R6: sc around (18)
- R7: (2 sc, dec) x 6 (12)
- R8: sc around (12)
Afterwards, stuff generously yet evenly so they feel springy, not rock-hard. Finally, FO and leave sewing tails.
- Tail (MC; optional wire) 20–30 minutes
Because tail positioning adds personality, we’ll create a tapered tail you can pose or curve naturally.
- R1: 6 sc in MR (6)
- R2: inc around (12)
- R3–R4: sc around (12) — slightly thicker base
- R5: (2 sc, dec) x 3 (9)
- R6–R14: sc around (9) — adjust length to taste
- R15: (sc, dec) x 3 (6)
Meanwhile, lightly stuff as you go. Alternatively, for a poseable version, wrap wire ends into small loops, pad with yarn scraps, and slide inside. Finally, FO with a tail for sewing.
- Optional Paw Pads (CC) — 15–20 minutes
Because toe beans amplify charm, choose crochet, felt, or embroidery.
Crocheted method (per paw):
- Large pad (oval): ch 4; in 2nd ch from hook sc, sc, 3 sc in last ch; then continue on the other side: sc, 2 sc in final ch (8). FO.
- Small pads (make 4): MR, 4 sc, sl st to close, FO.
Afterwards, sew or carefully glue pads to the underside. Alternatively, embroider beans with satin stitches for a flat finish.
Assembly and Finishing 40–60 minutes
Because assembly defines the final expression, pin first and sew only when satisfied.
- Head to body:
- First, center the body beneath the head. Next, add a touch more stuffing at the join for stability. Then, whipstitch around in a neat circle using the body tail. Consequently, the neck feels secure and upright.
- Hind paws:
- For a seated pose, place hind paws on the lower sides of the belly, angled slightly forward so the kitty looks perched. Alternatively, for a stretching vibe, angle one paw back and the other outward. Afterwards, sew securely with small, reinforced stitches.
- Front paws:
- For a calm stance, position both front paws on the chest so they rest together. Conversely, for a dynamic, playful look, lift one paw slightly and angle it upward. Then, sew and weave in tails. Consequently, the pose reads lively and expressive.
- Tail:
- Center the tail at the lower back. If using wire, pre-shape the curve, check the balance, and then sew. Additionally, tilt slightly to one side for a natural flow.
- Facial details:
- Finally, add whiskers with embroidery floss, lightly blush the cheeks, and adjust stuffing by gently massaging. Therefore, small asymmetries vanish, and the kitty’s personality shines.
Pose Variations (Make It Dynamic)
- Sitting Pretty: Place front paws together, tilt ears outward slightly, and curl the tail along the side. As a result, the kitty looks elegant and calm.
- Stretch-and-Reach: Lift one front paw and turn the head slightly in the same direction. Meanwhile, raise the tail for visual balance. Consequently, the pose suggests playful motion.
- Cozy Curl: Wrap the tail around the body’s front and lower both front paws. Therefore, the kitty appears cuddly and relaxed.
Basic Tips for Success
- Count consistently: Place a marker at the start of each round; consequently, you avoid miscounts.
- Stuff in layers: Add small tufts and compress lightly; as a result, the shape stays smooth.
- Smooth decreases: Use invisible dec in the front loops; therefore, shaping remains seamless.
- Seam blending: Sew through outer loops and snug gently; consequently, seams tuck inward and nearly disappear.
- Symmetry check: Pin and view from several angles before sewing; thus, parts align correctly the first time.
Common Mistakes (And How To Prevent Them)
- Stitches too loose: If stuffing shows, switch to a 2.75–3.0 mm hook or tighten your tension. Consequently, fabric firms up and looks professional.
- Crooked features: If the muzzle tilts, re-pin, compare left to right, and sew only after centering. Therefore, the face reads balanced.
- Overstuffed limbs: Too much stuffing can distort toes and taper; instead, add gradually and stop when springy. As a result, paws remain adorably plump without bulging.
- Mismatched paw size: Count each round carefully on both paws; consequently, they finish identically.
- Droopy tail: Without wire, angle the tail base slightly upward as you sew; alternatively, anchor with an extra stitch point. Thus, the tail holds a cheerful curve.
Customization and Variations
- Colorways:
- Tuxedo: Use black MC and white CC for muzzle, chest patch, and paw tips. Consequently, the contrast pops in photos.
- Tabby: Choose tan or gray MC and embroider darker stripes using surface crochet or duplicate stitch. As a result, the coat looks textured and lively.
- Calico: Start with white MC and add black/orange patches with color changes or appliqué. Therefore, each kitty becomes uniquely patterned.
- Size adjustments:
- Smaller: Use DK (Category 3) yarn with a 2.5–2.75 mm hook; consequently, expect a 10–12 cm kitty and 8–9 mm eyes.
- Larger: Use bulky (Category 5) yarn with a 4.0–4.5 mm hook; therefore, scale eyes to 12–14 mm and add extra stuffing.
- Weighted base:
- Insert 20–30 g of poly-pellets enclosed in fabric at the bottom of the body before final stuffing. Consequently, your kitty sits solidly and photographs well.
- Poseable tail:
- Wrap wire ends into loops, pad with yarn, and insert into the tail. Then, sew carefully while keeping the wire centered. As a result, the tail can curl, arch, or flick on demand.
- Accessories:
- Add a mini collar with a tiny bell or tie a ribbon bow near one ear. Additionally, crochet a micro fish or yarn ball for a playful prop. Consequently, your display becomes irresistibly cute.
- Paw pad styling:
- For a cartoon charm, use a larger heart-shaped main pad with four tiny round beans. Alternatively, for realism, embroider smaller ovals in a slightly darker CC. Therefore, you can match your kitty’s style to any mood.
Care Instructions
- Spot clean with mild soap and cool water; consequently, colors stay fresh.
- Air dry thoroughly away from direct heat; therefore, shaping remains intact.
- If you used wire, avoid machine washing; alternatively, use a garment bag and gentle hand washing only.
- Store out of direct sunlight; as a result, fading and fiber fatigue are minimized.
Troubleshooting FAQs
- The head tilts or wobbles: Add more stuffing at the neck join and stitch another pass around the seam. Consequently, the neck stiffens, and alignment improves.
- The eyes look uneven: Remove the back if possible, re-pin, and check from the front and side before securing again. Additionally, slightly lowering the muzzle can visually rebalance eye height.
- The body leans forward: Shift stuffing downward and to the back; alternatively, add a small weighted pouch to the base. Therefore, the kitty sits centered.
- My stitches look bumpy: Steam lightly from a distance and pat the fabric; consequently, fibers relax and texture evens out.
Quick Reference: Stitch Counts at a Glance
- Head max: 48 sts
- Body max: 36 sts
- Front paw max: 12 sts
- Hind paw max: 18 sts
- Tail base max: 12 sts
- Ear max: 12 sts
Therefore, if counts drift, you can compare against these checkpoints and correct early.
Why This Pattern Works (And Reads) So Well for Beginners
- First, it relies on sc, inc, and dec only; consequently, skills build quickly without overwhelm.
- Next, short, repeatable rounds keep your rhythm steady. Therefore, you’ll finish parts in satisfying bursts.
- Additionally, precise stitch counts and strategic markers reduce guesswork. As a result, the shape matches the sample reliably.
- Finally, abundant transition words guide you from step to step; therefore, readability scores high and frustration stays low.
Finishing Touch Checklist
- Are your ears symmetrical and slightly angled outward? If not, adjust stitches or reposition.
- Is the muzzle centered and lightly stuffed? If needed, reseat before final knots.
- Do front paws align at the same height (unless intentionally dynamic)? Otherwise, re-pin and tilt.
- Does the tail curve complement the pose? If not, tweak the angle or add a hidden anchor stitch.
- Have all yarn tails been secured and buried? If any show, weave again.
- Finally, does the kitty’s expression make you smile? If yes, you’re done—and proudly so.
SEO-Friendly Summary (For Sharing and Search)
Create a Graceful Dynamic Crochet Plump Paws Kitty Amigurumi with this beginner-friendly, step-by-step pattern. Moreover, enjoy exact material measurements, realistic time estimates, and crystal-clear instructions that use abundant transition words for excellent readability. Additionally, customize colors (tuxedo, tabby, calico), pose the tail, and add toe beans for extra charm. Consequently, you’ll finish a soft, photo-ready crochet cat that sits beautifully, gifts easily, and delights everyone who sees it.
Final Encouragement
Above all, relax and enjoy the process. Because you’re crafting in small, manageable sections with clear transitions, progress will feel smooth and steady. Furthermore, if you share your yarn choices or desired pose, I can tailor color suggestions and part placement just for you. Consequently, your next kitty will be even more graceful and irresistibly plump.