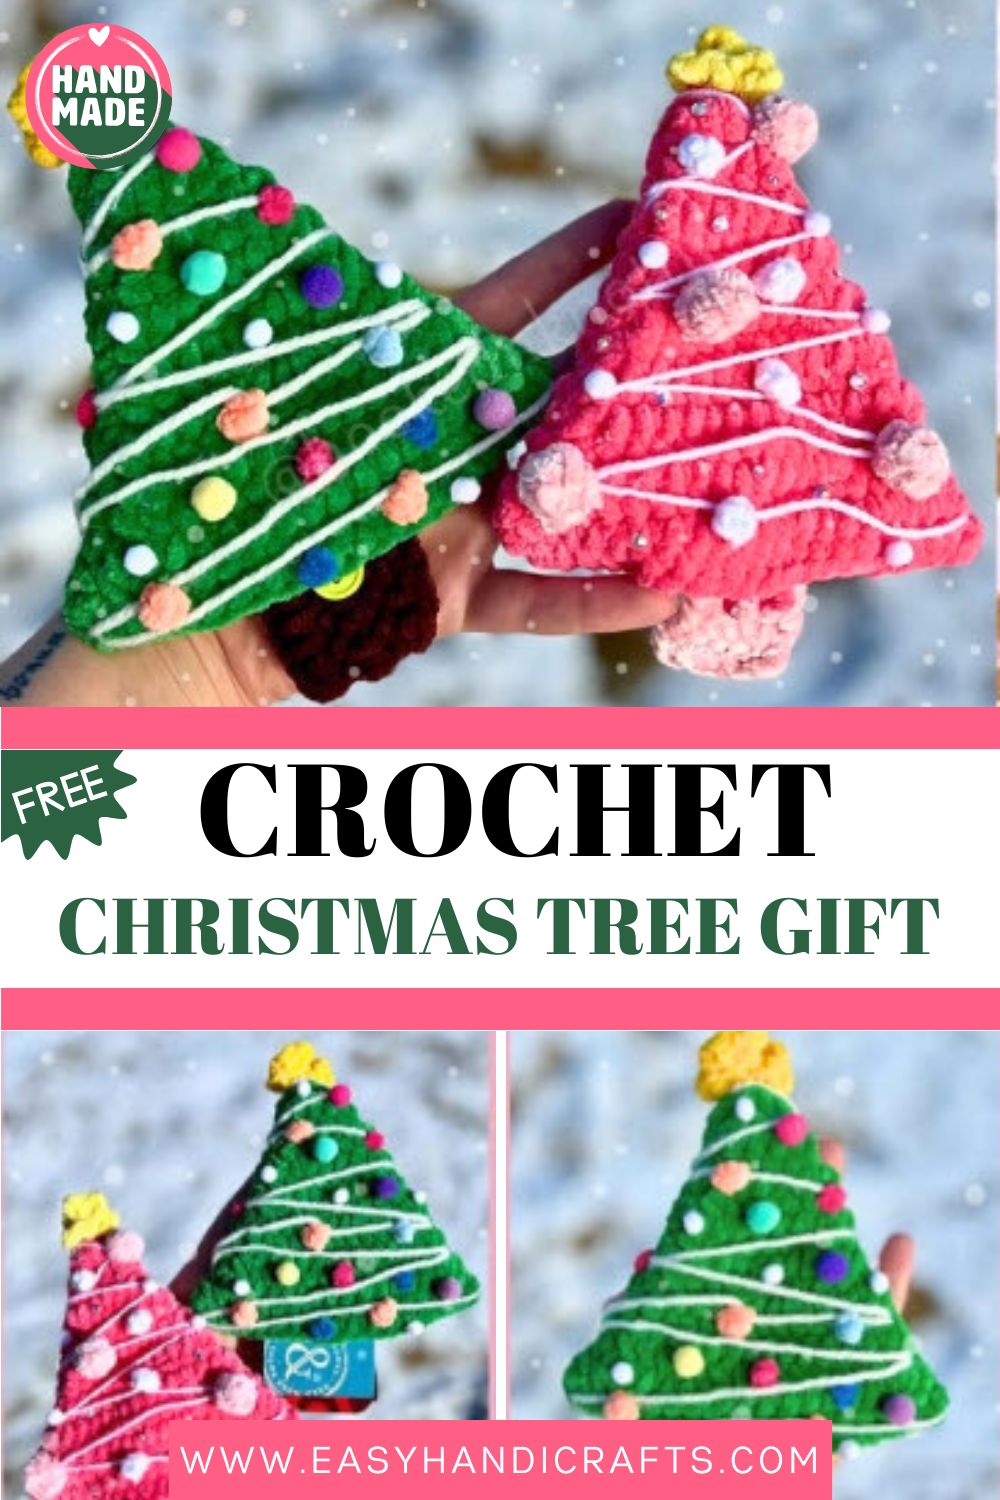
Free Crochet Christmas Tree Gift Card Holder Pattern
Surprising someone with a gift card tucked inside a tiny crochet Christmas tree feels truly special. That little bit of extra effort turns an ordinary gift into something far more memorable. And the best part? This project works up so quickly that you can make several before the holiday rush even begins.
A Crochet Christmas Tree gift card on its own can feel a little plain and flat, but the moment you tuck it inside a small green crochet tree and close the top with a button, it instantly turns into a memorable gift. You simply make two flat pieces, sew them together while adding the trunk, and then slip the gift card inside.
Free Crochet Christmas Tree Gift Card Holder Pattern
Tools and Materials
- Super bulky yarn (weight 6) in green for the tree
- Brown yarn for the trunk
- Optional colors for ornaments and decorations
- Crochet hook, 4 mm or 5 mm
- Scissors
- Tapestry needle, plus a needle for sewing the button
- A small button for the closure (sizes like 0.63 x 0.63 x 0.06 in. or 0.56 x 0.56 x 0.06 in. work well)
- Stitch markers
- Optional: glue and pom-poms
Abbreviations
- ch: chain
- sc: single crochet
- inc: increase (work 2 sc in the same stitch)
- sl st: slip stitch
- st: stitch
- scs: single crochets (plural of sc)
Pattern Overview
Here is what you are signing up for, in plain terms.
- Two green triangles. These are the front and back of the tree.
- One brown rectangle for the trunk, and yes, the button lives here.
- An optional yellow star up top if you want the full festive look.
- A bit of seaming at the end, with a gap left open so the card slides in.
None of it is hard. The shaping looks fancier than it actually is.
Special Techniques
You will not need much beyond the basics. A couple of small things are worth knowing first.
- Edge increases. The tree widens because you add a stitch at each side. Keep them even or it leans.
- Whipstitch seam. This is how the two halves join. Simple, tidy, holds up to handling.
- Magic ring star. The star opens from a magic ring, which keeps the middle from gaping.
- Surface slip stitches. Want ga arland? Stitch straight onto the fabric. No extra sewing needed.
Skill Level
Good for confident beginners and anyone past the first few projects. You need basic stitches, simple increases, and a little seaming. Past that, you are completely fine here.
Tree Front and Back (Make 2)
Work these in green. Follow the steps below to make both the front and the back of your tree. Remember, the chain at the end of each row does not count as a stitch.
Starting Rows (1 to 9)
These first rows set the base of the tree. Take them slow.
- Row 1: Start by making a slip knot, then ch 2. Work 2 sc in the second ch from the hook. Ch 1, turn. (2 scs)
- Row 2: 2 inc, ch 1, turn. (4 scs)
- Row 3: 4 sc, ch 1, turn. (4 scs)
- Row 4: inc, 2 sc, inc, ch 1, turn. (6 scs)
- Row 5: 6 sc, ch 1, turn. (6 scs)
- Row 6: inc, 4 sc, inc, ch 1, turn. (8 scs)
- Row 7: 8 sc, ch 1, turn. (8 scs)
- Row 8: inc, 6 sc, inc, ch 1, turn. (10 scs)
- Row 9: 10 sc, ch 1, turn. (10 scs)
Shaping the Top (Rows 10 to 19)
Now the tree keeps widening. Just hold that rhythm.
- Row 10: inc, 8 sc, inc, ch 1, turn. (12 scs)
- Row 11: 12 sc, ch 1, turn. (12 scs)
- Row 12: inc, 10 sc, inc, ch 1, turn. (14 scs)
- Row 13: 14 sc, ch 1, turn. (14 scs)
- Row 14: inc, 12 sc, inc, ch 1, turn. (16 scs)
- Row 15: 16 sc, ch 1, turn. (16 scs)
- Row 16: inc, 14 sc, inc, ch 1, turn. (18 scs)
- Row 17: 18 sc, ch 1, turn. (18 scs)
- Row 18: inc, 16 sc, inc, ch 1, turn. (20 scs)
- Row 19: 20 sc. (20 scs)
Note: Check that your gift actually fits inside the tree. Need it bigger or smaller? Just keep that alternating inc going at the start and end of every other row, and sc across until the size feels right. Then fasten off and weave in your ends.
Decoration tip: You can add embellishments to one side or both before you sew. Or wait until the end. Whatever feels easier to you.
Tree Trunk (Make 1)
Work this part in brown. This is where the button gets fastened later, so keep your stitches neat.
- Row 1: With brown yarn, ch 6.
- Row 2: Sc in the second ch from the hook and in each ch across. Turn. (5 scs)
- Rows 3 to 6: Ch 1, sc across. Turn. (5 scs)
- Fasten off, leaving a long tail for sewing.
Optional Star (Make 1)
Work this one in yellow. It takes a minute, but it really finishes the tree off.
- With yellow yarn, make a magic ring.
- Work [sl st, ch 3] five times into the magic ring to form 5 points. Sl st to end.
- Pull the ring tight and fasten off, leaving a long tail for sewing.
Common Mistakes
A few small slips trip people up on this one. Watch for these.
- Counting the turning chain as a stitch. It does not count, so you do not add it.
- Lopsided increases. If they wander, the tree tilts. Glance at your edges as you go.
- Sewing the bottom shut. Leave it open, or the card has nowhere to slide.
- A loose magic ring. Pull it tight, the star center gaps open.
Assembly
This is where it comes together. Slow down a touch here and the finish looks clean.
- Sew the front and back together. Place the two pieces with the wrong sides facing in. Whipstitch around the edges in green. Leave about 12 stitches open at the bottom for the pouch.
- Attach the trunk. Sew the brown trunk to the bottom of the tree, back side only. Leave room for the card to slide in and out.
- Add the button. Sew a small button to the front of the trunk. Then make a stitch or chain loop on the bottom front edge to work as the buttonhole.
- Decorate the tree. Use contrasting yarn for garland or surface slip stitches. Drop on small buttons, beads, or French knots for ornaments. Sew the star to the very top.
Important Remarks
A handful of things keep your tree looking good for years.
- Stick with green and brown for the classic look, or swap in any shade you fancy.
- Test your card or treat for fit before you close that seam. Trust me on this.
- Weave your ends in properly. Loose tails are how a pouch starts to unravel.
- These are quick, so make a pile of them if you are gifting a whole group.
Conclusion
So there you have it, your own little Crochet Christmas Tree gift card holder. Quick to make, sweet to give, and handy when the holidays roll around. Slip a card inside, or just set it on a shelf as decor. Either way, it brings a smile. Grab your yarn and enjoy.