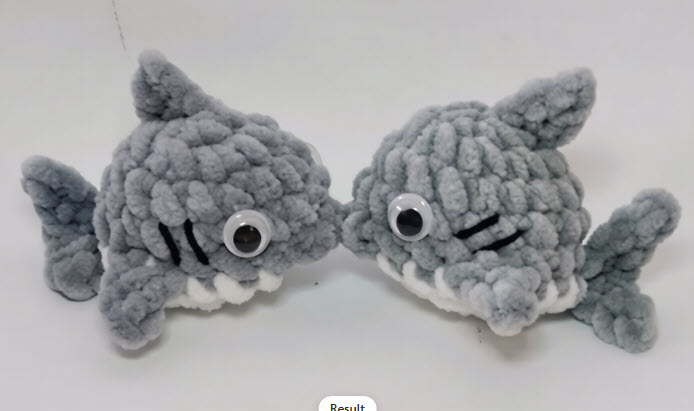
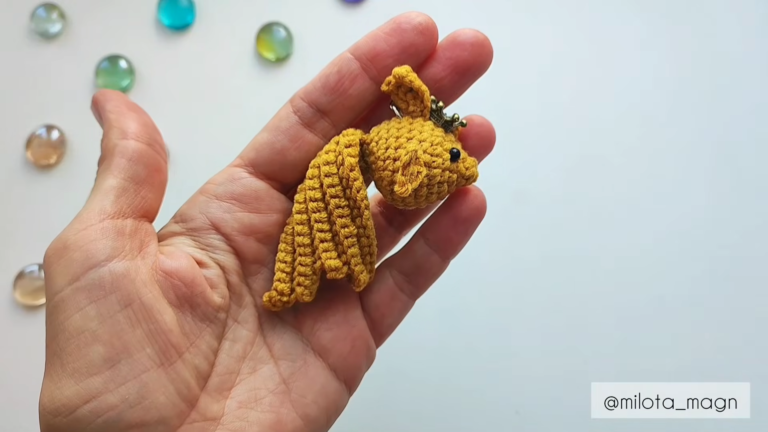
Unique Crochet Deepsea Fish Amigurumi Pattern Ocean Toy
Dive into creativity with our Unique Crochet Deepsea Fish Amigurumi Pattern Ocean Toy, handmade charm, clear beginner steps, and customizable colors. Perfect for gifts, nursery décor, or desk buddies, it stitches up quickly and showcases an adorable undersea personality.
Bring the deep sea to your hook with a playful fish that’s quick to stitch and full of charm. The Unique Crochet Deep-Sea Fish Amigurumi Pattern Ocean Toy features oversized eyes, wavy fins, and simple texture stitches that beginners master fast. Modular pieces work up quickly, inviting color play and easy customization.

Light on sewing and yarn, it’s an enjoyable, portable project for any schedule. Finish it as a thoughtful handmade gift, cheerful nursery décor, or a desk buddy that brightens your workspace and sparks conversation.

Unique Crochet Deep-Sea Fish Amigurumi Pattern Ocean Toy
Bring the magic of the ocean to the hook with a playful deep-sea fish amigurumi that practically swims off the worktable. From the first stitch, the rounded cheeks, fluttering fins, and gentle body curve create a charming character without complexity. First, the simple shapes help beginners relax and find a steady rhythm. Next, the easy textures add interest without confusion, so progress remains smooth. Finally, the small, modular pieces keep the project portable, quick, and wonderfully rewarding. Because the design is soft, sturdy, and endlessly customizable, this fish works beautifully as a thoughtful gift, a nursery accent, or a cheerful desk companion. Moreover, the pattern encourages color play, think jewel-toned blues, bright corals, or glowy greens—so each fish feels unique, personal, and packed with personality.
Items Needed
- Yarn: DK weight (Light #3) cotton or cotton-acrylic blend
- Main body color: 30–35 g (approx. 90–110 yd / 82–100 m)
- Belly/contrast color: 10–12 g (approx. 30–38 yd / 27–35 m)
- Accent color for fins/back flower: 6–8 g (approx. 18–25 yd / 16–23 m)
- Hook: 2.75 mm (C) for tight stitches; alternatively, 3.0 mm for a slightly softer fabric
- Safety eyes: 8 mm or 10 mm (pair) with washers
- Stuffing: 20–25 g polyester fiberfill
- Stitch markers: 2–4 markers to track rounds and eye placement
- Tapestry needle: blunt tip, size 16–18
- Scissors: sharp, small size for clean snips
- Pins or clips: a few, for positioning parts before sewing
- Optional accessories:
- Keychain ring: 25–30 mm
- Jump ring: 8–10 mm
- Lobster clasp: 12–15 mm
- Tiny rattle insert or squeaker (for baby-safe versions, use securely sewn embroidered eyes instead of safety eyes)
Skill Level
Beginner-Friendly (Easy). Basic familiarity with single crochet in the round, increases, and decreases is recommended. Nevertheless, each piece is small and repetitive, so confidence grows quickly even on a first amigurumi project.
Making Time (Overview)
Total time: approximately 3–4.5 hours, depending on speed and detail choices.
- Body: 60–75 minutes
- Tail and fins (including back fin): 60–80 minutes
- Heart/extra details: 15–25 minutes
- Face and assembly: 30–45 minutes
Step-by-Step Instructions
Before starting, place a stitch marker in the first stitch of each round to maintain consistent counts. Additionally, keep tension firm to prevent stuffing from peeking through the fabric. As the work grows, stuff gradually and shapes as you go,o so the silhouette remains smooth.
Body
- Shape the nose and head base
- First, begin with a tight magic ring in the main body color. Then, build a small circle with steady increases to form a rounded nose that feels plush rather than pointy. After establishing the curve, add one or two rounds without increases to create a gentle slope into the head. At this stage, consider a subtle belly stripe: switch to the contrast color for one round and switch back to the main color on the next. Meanwhile, keep the marker visible and count carefully to maintain symmetry.
- Tip: For a classic deep-sea look, keep the nose slightly smaller and the head slightly taller; consequently, the big-eyed expression becomes even more endearing.
- Grow the body and add text.ure
- Next, continue increasing until the head reaches the desired width (about 5–6 cm across for a small toy). Before the fabric becomes too deep to navigate comfortably, place the safety eyes on opposite sides of the head, staggered slightly above the belly line for a lively angle. Subsequently, work several maintenance rounds (no increases) to shape a smooth head and upper body. For ocean-inspired texture, alternate occasional rounds using front-loop-only stitches to create shallow ridges along the sides. As a result, the body gains subtle movement and an underwater “wave” effect without complicating the pattern.
- Tip: Stuff lightly at first so the head remains soft enough to adjust eye angles. Then, add more filling just before closing to set the final shape.
- Taper, stuff, and close
- Then, begin decreasing to taper toward the tail end. As the opening narrows, add firm, even stuffing while shaping the silhouette into a gentle oval. The goal is a fish that stands upright when propped, with a rounded belly and a slightly narrower tail end for attaching the fin later. Finally, finish with a small opening, fasten off, and leave a long tail for sewing. Afterward, flatten the tail end slightly with fingers to create a neat base for the tail piece.
- Making time for this part: 60–75 minutes
Additional Parts for (Crochet Deepsea Fish Amigurumi)
Because small details bring charm to amigurumi, the tail, fins, and back flower come next. Each element works up quickly and, together, they transform the body from simple to spectacular.
Tail Fin
- Craft a leaf-like. fin
- First, work a short foundation of chain stitches in the accent color. After forming the chain, single crochet up the chain, place two to three stitches in the tip to round it, and continue back down the opposite side for a mirrored, leaf-like shape. To enhance the curve, slightly larger increases at the tip create a graceful edge.
- Add a ripple texture
- Next, crochet one round in back loops only to produce a delicate ridge. For extra drama, add a picot at the tail tip. If a cleaner edge is preferred, simply slip stitch around the perimeter. In either case, the outline looks tidy and intentional.
- Prepare to attach
- Finally, fasten off with a long yarn tail for sewing to the flattened end of the body. Pin the tail vertically for a dynamic, swimming pose or horizontally for a calm, resting pose so the silhouette matches the desired mood.
- Making time: 20–30 minutes
Side Fins (Pectoral Fins)
- Form small teardrops
- First, make two matching fins. Create a small circle with a magic ring anincreasingcrease rounds. Then, work a short row back and forth across half the stitches to produce a natural teardrop curve without adding bulk.
- Define the edges
- Next, add a contrast edge by working slip stitches or surface crochet around the fin perimeter. Alternatively, place a tiny picot at the narrow tip to mimic delicate fin spines. Either way, the outline gains crisp definition.
- Ready for placement
- Finally, fasten off with long tails. Pin one fin on each side, slightly behind and below the eyes, to suggest forward motion and balanced lift.
- Making time: 25–30 minutes (pair)
Back Flower (Dorsal Rosette)
- Build the rosette base
- First, with the accent color, create a small circle. Then, work one round of increases to form a neat disc that sits comfortably on the body.
- Add petals or a ruffle.s
- Next, create simple petals by chaining three stitches, slip-stitching into the next stitch, and repeating around. For a softer ruffle, work two to three single crochets in each stitch instead. Consequently, the detail resembles a whimsical “bioluminescent bloom” resting on the fish’s back.
- Prepare for sewing
- Finally, fasten off with a long tail. Position the rosette on top of the body, centered just behind the head. This placement adds height, charm, and a unique profile while balancing the fins.
- Making time: 10–15 minutes
Dorsal Fin (Alternative to Back Flower)
- Create a triangle fin
- First, chain a short row and single crochet across. Then, decrease one stitch at the start of each row to shape a compact triangle that reads clearly from every angle.
- Edge and shape
- Next, work a final round of slip stitches for a crisp edge. To add dimension, lightly pinch the base when sewing so the fin arches gently.
- Placement
- Finally, sew along the top center of the body if a classic dorsal-fin style is preferred instead of the rosette. This alternative keeps the silhouette clean and streamlined.
- Making time: 10–12 minutes
Accessories / Details (if applicable)
- Tiny heart applique
- First, use a bright, contrasting yarn. In a magic ring, work: chain 2, 3 double crochets, 1 treble, 3 double crochets, chain 2, slip stitch to close the heart. Immediately pull the ring tight to define the notch and smooth the curves.
- Next, fasten off with a tail for sewing. Place the heart on either side of the body as a sweet “signature,” or center it near the tail for a playful accent.
- Keychain option
- Then, for a travel-friendly ocean buddy, attach a jump ring through a discreet stitch at the top of the head or rosette. After attaching the jump ring, add a key ring and lobster clasp. Because the toy is lightweight, it hangs evenly without drooping or twisting.
- Beads or embroidery
- Finally, add a few embroidered “freckles” near the eyes or tiny beads along the back of the flower (for adult use only). With subtle placement, these touches bring the fish to life without overwhelming the design.
- Making time: 15–25 minutes, depending on choices
Face & Assembly for (Crochet Deepsea Fish Amigurumi)
- Eye placement:
- First, test several positions with pins before securing safety eyes. For a curious expression, angle the eyes slightly upward and outward. Conversely, for a sleepy look, place them closer together and lower on the head.
- Sewing parts:
- Next, pin the tail, fins, and bacflapser in place. Use the tapestry needle to whipstitch around the base of each piece with small, even stitches. Additionally, pass through the body and the part with firm but gentle tension to avoid puckering.
- Stuffing adjustments:
- Then, before securing the final stitch, add or remove a pinch of stuffing to perfect the silhouette. As a result, the body remains firm yet squeezable, and the seams stay smooth.
- Embroidery details:
- Finally, add a tiny smile with a short line of backstitch, or embroider a simple “gill” curve on each side. Knot securely inside the body and weave ends through several stitches for durability and a clean finish.
- Beginner-friendly tip:
- Because sewing can feel intimidating, place three guiding pins on each piece (top, left, right) and stitch between them. Consequently, alignment stays straight while stress remains low.
Special Features for (Crochet Deepsea Fish Amigurumi)
- Expressive silhouette:
- The softly rounded head and tapered tail create a classic amigurumi fish profile that photographs beautifully from every side. Consequently, the toy looks lively whether perched on a shelf or dangling from a keychain.
- Underwater texture:
- Gentle ridges made with front-loop-only rounds suggest waves and scales while remaining simple to work. Therefore, texture appears refined even with basic stitches.
- Customizable back detail:
- The choice between a playful back flower rosette or a tidy dorsal fin provides two distinct looks using the same base pattern. As a result, one body can become multiple styles for a coordinated set.
- Gift-ready scale:
- At approximately 12–15 cm (4.75–6 in) from nose to tail with DK yarn and a 2.75–3.0 mm hook, the fish fits easily into small gift boxes or hangs perfectly as a charm. Consequently, it suits birthdays, baby showers, and just-because surprises.
- Stash-friendly:
- Small yardage requirements make this project ideal for using leftovers, mixing shades, and exploring color gradients. Hence, it encourages creativity without demanding new supplies.
Sizing Tips
- Hook size:
- First, use a smaller hook for a tighter fabric and a smaller fish; use a larger hook for a slightly bigger, softer toy. For DK yarn, 2.75 mm yields a compact finish, whereas 3.0 mm creates a gentler drape.
- Yarn choice:
- Next, cotton provides crisp stitch definition and a polished look; acrylic adds bounce and softness. For a best-of-both blend, cotton-acrylic yarn offers structure and comfort together.
- Stuffing:
- Then, add more stuffing for a rounder, sturdier body or slightly less for a squishier, plush feel. To avoid lumps, insert small tufts and distribute them evenly as the body closes.
- Color blocking:
- Finally, strategic color changes (nose tip, belly stripe, or tail edge) can visually lengthen or shorten the fish’s profile. Therefore, size illusions become possible without altering stitch counts.
Finishing Tips for (Crochet Deepsea Fish Amigurumi)
- Seam quality:
- First, stitch parts with small, consistent whipstitches along the base. If a seam shows, add one final pass of slip stitches in matching yarn to disguise joins and secure edges.
- End management:
- Next, split yarn tails into two and weave them in opposite directions through the stuffing area. Consequently, ends lock inside and resist tugging.
- Edge polish:
- Then, lightly steam-blockthe fins under a pressing cloth to set the shape. However, avoid direct heat to prevent damaging acrylic fibers or melting synthetic materials.
- Lint-free look:
- Finally, give the fish a quick roll with a lint brush or a piece of tape to lift stray fibers before gifting or photographing. As a finishing touch, smooth the eyes and reshape the fins with fingertips.
Common Mistakes to Avoid for (Crochet Deepsea Fish Amigurumi)
- Loose stitches:
- Problem: Gaps allow stuffing to peek out.
- Solution: Use a smaller hook or tighten the tension. Additionally, avoid splitting the yarn by keeping the hook tip centered in each strand.
- Skipping a round marker:
- Problem: Uneven shaping or accidental increases.
- Solution: Move the marker every round and count periodically. Consequently, shaping stays symmetrical.
- Overstuffing too early:
- Problem: Distorted head and difficulty adding safety eyes.
- Solution: Add filling gradually and finish eye placement before the final rounding. As a result, the face remains balanced.
- Misaligned fins:
- Problem: Lopsided silhouette.
- Solution: Pin both fins first, step back, and check symmetry before sewing. Therefore, the body reads centered from every angle.
- Knots on the outside:
- Problem: Messy appearance and potential unraveling.
- Solution: Bury knots deep inside and weave ends through several stitches to anchor them securely.
- Sharp accessories near children:
- Problem: Safety risk.
- Solution: Replace safety eyes with embroidered eyes and omit beads for baby-safe toys. Consequently, the toy remains cuddly and secure.
Variations & Customization Ideas for (Crochet Deepsea Fish Amigurumi)
- Color stories:
- First, try a gradient from deep navy to turquoise for an ombré ocean effect. Alternatively, pair coral with mint for a tropical vibe or graphite with neon accents for a futuristic deep-sea glow. In every case, contrast helps the features pop.
- Bioluminescent theme:
- Next, use glow-in-the-dark yarn for the back flower or fin edges. Consequently, the fish gleams softly in dim light and becomes a playful night buddy.
- Striped belly:
- Then, alternate two rounds of contrast color with two rounds of main color along the lower torso to simulate scales. With consistent counting, the stripes appear even and refined.
- Micro keychain:
- Afterward, switch to sport-weight yarn and a 2.25 mm hook for a tiny version perfect for backpacks or zipper pulls. Because the proportions remain the same, the look stays balanced.
- Jumbo cuddle fish:
- Meanwhile, use worsted/aran yarn with a 3.5–4.0 mm hook and scale up the stuffing. Consequently, the body becomes a squeezable plush perfect for reading nooks and cozy corners.
- Expressive faces:
- Later, change eye size to alter mood. Larger eyes feel whimsical; smaller eyes feel calm and classic. For extra personality, add embroidered eyebrows or freckle dots.
- Themed sets:
- Finally, create a school of fish in coordinated colors for nursery mobiles, party favors, or shelf décor. By mixing back flowers and dorsal fins, the set stays visually lively and varied.
Tutor Suggestions for (Crochet Deepsea Fish Amigurumi)
- Start with confidence:
- First, begin slowly and choose a hook that makes the stitches feel firm yet comfortable. If hands tense up, move up a quarter size to find a relaxed sweet spot.
- Count in small groups:
- Next, count in sets of five or ten and move the marker every round. Because counting can drift, frequent checks prevent later frustration.
- Shape while stuffing:
- Then, pinch the sides gently as the body closes to guide the oval silhouette. Adding tiny tufts of stuffing rather than big handfuls ensures smooth curves without bumps.
- Test fit before sewing:
- Afterward, pin all parts, check the balance, and only then commit to stitches. Consequently, symmetry improves, and unpicking becomes unnecessary.
- Embrace color play:
- Meanwhile, lay out several yarns together before starting; audition combinations in natural light. Therefore, the final fish feels cohesive and intentional.
- Keep finishing simple:
- Later, use matching yarn for sewing, keep knots inside, and take tidy, short stitches. With these habits, the final look elevates instantly.
- Celebrate progress:
- Finally, notice each milestone: a finished body, a well-placed eye, a neatly sewn tail. Step by step, skills grow, and creativity blooms, and the ocean-inspired amigurumi becomes a handmade treasure ready to delight.
Conclusion for (Crochet Deepsea Fish Amigurumi)
From the first chain to the final stitch, this Unique Crochet Deep-Sea Fish Amigurumi Pattern Ocean Toy offers an easy, joyful journey. Because the steps are clear and the pieces are quick, beginners progress smoothly while enjoying creative freedom. Moreover, the optional back flower, tiny heart, and keychain hardware invite endless personalization for gifts and décor. Therefore, finish one for a loved one, display it in a nursery, or perch it on a work desk where it sparks daily smiles. With thoughtful shaping, careful finishing, and just a splash of color, this deep-sea friend turns simple yarn into a keepsake that feels lively, huggable, and wonderfully one of a kind.