Cutest Crochet Cocoa Cup Marshmallow Gift Amigurumi Pattern
Cold weather calls for warm things even if they’re made of yarn. This little crochet cocoa cup, along with its fluffy marshmallow friends, is the coziest handmade huggable piece around.
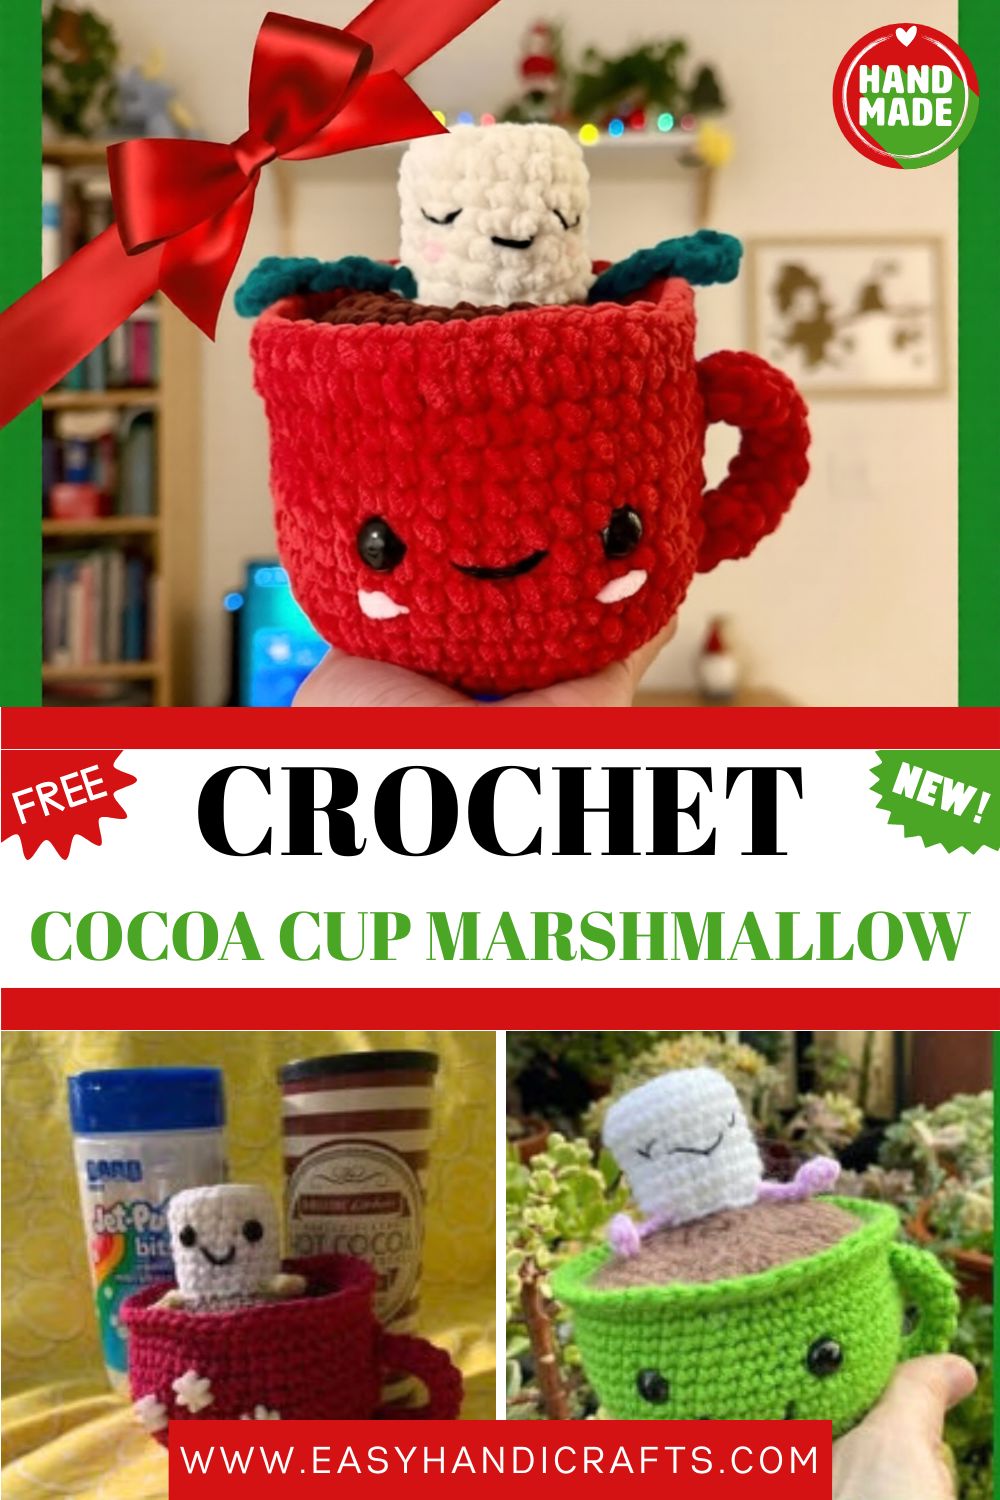
This crochet cocoa cup marshmallow gift is one of those projects that makes people smile the moment they see it. With a smiling mug, a fluffy marshmallow friend, and warm winter colors, it works as a sweet keychain, a shelf buddy, or a cozy little handmade present for someone special.
Pattern Overview
Here’s a quick look at what you’re making before you grab your hook:
- This is a two-part amigurumi: a smiling cup of hot cocoa and a little marshmallow character that sits on top.
- The whole thing is worked in super bulky chenille yarn, so it stitches up fast and feels soft and squishy.
- The cup, the cocoa, the marshmallow, the arms, and the handle are each made as separate pieces, then joined together.
- The finished size stays small and palm-friendly, which makes it perfect as a gift, a keychain, or a desk buddy.
- Safety eyes plus a bit of simple embroidery give both the cup and the marshmallow their adorable faces.
Skill Level
This pattern sits at an easy beginner level. If you can make a magic ring, single crochet, and increase, you already have every skill this cute project really needs.
Materials You’ll Need
- Super bulky chenille yarn in green, white, brown, red, and pink. You only need a small amount of the green and pink, so scrap yarn will work just fine.
- Black worsted-weight scrap yarn for the face details.
- 5mm crochet hook.
- Stitch marker.
- 14mm safety eyes.
- Poly-fil stuffing.
- Darning needle.
Abbreviations
- R# – round number
- ch – chain
- st – stitch
- sc – single crochet
- MR – magic ring
- inc – increase (2 sc in the same st)
- FLO – front loop only
- FO – fasten off
- [x] – Repeat the instructions inside the brackets the number of times indicated
- (#) – the number of stitches you should have at the end of each round
Special Techniques to Know
Don’t let these names scare you. They’re all simple once you try them.
- Magic ring (MR): starts each rounded piece neatly with no hole left in the center.
- Continuous rounds: you don’t join or chain up at the end of a round. You just keep spiraling, which is why a stitch marker matters so much here.
- Back loop only (BLO): worked into the back loop of each stitch to create a clean fold and a flat base.
- Front loop only (FLO): included in your abbreviations for any front loop detail you’d like to add.
- Joining two pieces as you go: on the marshmallow you crochet the arms right into the round, and on the cup you attach the cocoa by stitching through both layers at once.
- Faces: safety eyes and embroidery work together to give each piece its expression.
How to Crochet the Cocoa Cup Marshmallow
A quick note before you start: every rounded piece is worked in continuous rounds. Mark the last stitch of each round with your stitch marker so you never lose your place.
Marshmallow
Arms (make 2, in green):
- Ch 3 to start.
- R1: 2 sc, turn the chain, and complete 2 sc on the other side (4)
- R2: ch 4, FO and weave in the ends.
Body (in white):
- R1: 6 sc in MR (6)
- R2: [inc] x 6 (12)
- R3: [1 sc, inc] x 6 (18)
- R4: BLO sc around (18)
- R5–9: sc around (18)
- R10: Now you’ll crochet the arms into the round. Place an arm on top and work 1 sc through both the arm and the body at each arm point. Work as follows: sc 4, sc 1 (with arm), sc 6, sc 1 (with arm), sc 6 (18)
FO leaving a long tail for sewing. Embroider the face details (eyes, mouth, blush) and/or add safety eyes here. I embroidered my eyes between R6 and R7, about 5 visible stitches apart. Stuff lightly.
Cup and Cocoa
Cocoa (in brown):
- R1: 6 sc in MR (6)
- R2: [inc] x 6 (12)
- R3: [1 sc, inc] x 6 (18)
- R4: [2 sc, inc] x 6 (24)
- R5: [3 sc, inc] x 6 (30)
- R6: [4 sc, inc] x 6 (36)
- R7: [5 sc, inc] x 6 (42)
- R8: [6 sc, inc] x 6 (48)
FO and weave in the end.
Cup (in red):
- R1: 6 sc in MR (6)
- R2: [inc] x 6 (12)
- R3: [1 sc, inc] x 6 (18)
- R4: [2 sc, inc] x 6 (24)
- R5: [3 sc, inc] x 6 (30)
- R6: [4 sc, inc] x 6 (36)
- R7: BLO sc around (36)
- R8: [5 sc, inc] x 6 (42)
- R9: [6 sc, inc] x 6 (48)
- R10–17: sc around (48)
Place the 14mm safety eyes between R13 and R14, about 6 visible stitches apart.
- R18: On this round you’ll attach the cocoa. Hold the cocoa piece against the top of the cup and sc around through both pieces. You’ll have 4 loops on your hook as you go (48). Add stuffing before you get too close to the end, but be careful not to overstuff.
- R19: sc around (48)
FO and weave in the end. With a new piece of brown yarn, weave through the bottom center of the cup and come out through the middle of the cocoa piece on top. Go over 2 stitches in the center, then weave back down to the bottom of the cup. Pull the two ends to tighten, tie a knot, and weave in the ends. This flattens the top and bottom of the cup into a proper mug shape.
Handle (in red)
- R1: 5 sc in MR (5)
- R2–11: sc around (5)
FO leaving a long tail, then sew the handle to the side of the cup, between R8 and R16.
Assembly
Here’s how all the pieces come together:
- Finish all of your pieces first: the cup, the cocoa, the marshmallow body with arms, and the handle.
- Join the cocoa to the cup by working R18 through both layers, then stuff and close as directed.
- Flatten the cup using the brown yarn weaving step, going over the two center stitches and back down before tying off.
- Sew the handle to the side of the cup, between R8 and R16.
- Sew the bottom of the marshmallow onto the cocoa at the top of the cup.
- If the marshmallow looks too round, flatten it the same way you flattened the cup, using a new piece of white yarn this time.
- Add the final face details on the cup with your black scrap yarn, and you’re finished.
Common Mistakes and How to Avoid Them
- Losing your place in continuous rounds. Without a marker, the spiral hides where each round ends. Mark the last stitch every single round.
- Overstuffing. Chenille shows lumps easily, so stuff lightly and evenly. The marshmallow especially needs a soft touch.
- Miscounting increases. The cup grows by 6 stitches per round. If your count drifts, the shape warps, so check the number in brackets after each round.
- Adding the eyes too late. Safety eyes lock once snapped, so place them before you stuff and close the piece.
- Pulling chenille too tight. This yarn can shred or “worm” under tension. Keep your stitches relaxed and even.
- Skipping the flattening step. Without it, the cup and marshmallow stay too rounded and lose that classic mug look.
Important Remarks
- You only need a small amount of green and pink, so dig through your scrap basket for those.
- Keep your tension consistent so both faces line up evenly.
- Feel free to swap colors. Pastel mugs, white “milk” cocoa, or seasonal shades all look adorable.
- Weave in every end securely, since chenille can slip loose over time.
- This pattern is written using US crochet terms.
- Always test the eye placement before you snap the safety backs into place.
Final Thoughts
And that’s your very own crochet cocoa cup marshmallow gift, made completely by hand. It’s quick, it’s beginner-friendly, and it’s the kind of cozy little amigurumi that people genuinely love to receive. Make one for yourself, then make a few more for friends. If you stitch this pattern, you’ve earned every bit of that warm, finished glow.