Mesmerizing Crochet Baby Fox Keychain Small Amigurumi Pattern
Fall for this mesmerizing crochet baby fox keychain: a speedy, beginner-friendly amigurumi that adds cute flair to backpacks, gifts, and everyday carry.
Small in size, huge on charm, this Mesmerizing Crochet Baby Fox Keychain Small Amigurumi Pattern turns scraps of yarn into a pocket-ready companion. Designed with beginners in mind, it works up quickly, features simple stitches, and invites playful color swaps from classic ginger to frosty white. 
Crisp ears, a tiny snout, and a fluffy tail give it an irresistible personality, while sturdy construction makes it perfect for daily carry. Follow the clear steps to stitch, stuff, and assemble your foxy friend in an evening, then clip, gift, and go.
Perfect for:
- Bag charm or backpack zipper pull
- Everyday keyring for quick ID
- Sweet handmade gift or party favor
Graceful, Mesmerizing Crochet Baby Fox Keychain Small Amigurumi Pattern
Firstly, welcome to your next irresistible make: a graceful and mesmerizing crochet baby fox keychain that is tiny, squishy, and adorably expressive. Secondly, this beginner-friendly small Amigurumi pattern works up quickly, travels easily, and makes a thoughtful handmade gift. Moreover, you will love the simple stitches, the clear steps, and the playful details that bring this little fox to life. Consequently, whether you choose fluffy chenille for a plush look or standard acrylic for a compact charm, this pocket pal will look fantastic. Finally, let’s gather materials, prepare our tools, and start stitching a foxy friend you will clip, gift, and love.
Finished Size, Skill Level, and Total Time
- Firstly, finished size with plush chenille (6.5 mm hook): approximately 7–8 cm tall (2.75–3.15 in) without hardware.
- Secondly, finished size with worsted acrylic (3.5 mm hook): approximately 5–5.5 cm tall (2–2.2 in) without hardware.
- Moreover, skill level: confident beginner (single crochet, increase, decrease, color change, sewing).
- Finally, total time: approximately 1.5–2 hours, depending on pace and yarn choice.
Materials and Exact Measurements
- Firstly, yarn option A (fluffy look): super bulky plush/chenille yarn, weight category 6.
- Additionally, Color A (fox body orange): 20–25 g.
- Moreover, Color B (contrast tip black): 2–3 g.
- Furthermore, optional Color C (muzzle/cheek white or cream felt instead of yarn).
- Secondly, yarn option B (compact look): worsted/aran acrylic, weight category 4.
- Additionally, Color A (orange): 12–15 g.
- Moreover, Color B (black): 1–2 g.
- Thirdly, crochet hooks:
- Additionally, for plush yarn: 6.5 mm hook (as in the source tutorial).
- Moreover, for worsted yarn: 3.25–3.75 mm hook (choose 3.5 mm for tighter stitches).
- Fourthly, safety eyes: 6 mm for worsted yarn or 8–10 mm for plush yarn (2 pieces).
- Fifthly, felt pieces (optional):
- Additionally, muzzle: white or cream oval, approximately 18 × 14 mm for plush or 12 × 9 mm for worsted.
- Moreover, cheek blush circles: pink felt, two circles of 6–8 mm diameter (or embroider instead).
- Sixthly, nose: 6–8 mm plastic safety nose, or a tiny felt triangle (6–7 mm side), or embroidered satin stitch.
- Seventhly, stuffing: premium polyester fiberfill, approximately a handful (8–12 g).
- Eighthly, stitch markers: at least 1 locking marker.
- Ninthly, tapestry (yarn) needle: blunt tip, eye large enough for your yarn.
- Tenthly, scissors: sharp tip for trimming.
- Eleventhly, fabric glue or hot glue: for felt and safety eyes reinforcement (optional).
- Twelfthly, keychain hardware:
- Additionally, a 25 mm split key ring.
- Moreover, a 30–35 mm chain with a 10–12 mm lobster clasp (optional but recommended).
- Furthermore, an 8–10 mm jump ring (if you prefer a movable clip).
- Thirteenthly, optional extras:
- Additionally, black embroidery thread for eyelashes or brows.
- Moreover, a tiny bow or mini scarf yarn scrap for accessorizing.
Abbreviations and Notes (US Terms)
- Firstly, MR = magic ring.
- Secondly, sc = single crochet.
- Thirdly, inc = increase (2 sc in the same stitch).
- Fourthly, dec = invisible decrease (sc 2 stitches together using front loops only).
- Fifthly, sl st = slip stitch.
- Sixthly, st(s) = stitch(es).
- Seventhly, FO = fasten off.
- Eighthly, continuous rounds = do not join; instead, spiral with a stitch marker.
- Ninthly, gauge = not critical; however, keep stitches firm so stuffing does not show.
- Finally, counts at the end of rows are in parentheses.
Pattern Overview
Firstly, the fox is worked as a neat sphere that forms the head-and-body together, which keeps the project simple and solid. Secondly, the ears are made separately with a black tip and orange base for an instant foxy character. Moreover, the facial details (eyes, nose, cheeks) are added after crocheting, which allows easy placement and adjustment. Additionally, the keychain loop is secured at the crown for durability. Consequently, you will enjoy a clean finish and a sturdy carry charm.
Step-by-Step Instructions with Time Estimates
Step 1: Crochet the Fox Head-Body Sphere (30–40 minutes)
- Firstly, start with Color A (orange) and work in continuous rounds.
- Secondly, Round 1: MR, 6 sc into ring (6). Additionally, pull the ring tight and place a marker in the first stitch of the round.
- Thirdly, Round 2: inc in each stitch around (12).
- Fourthly, Round 3: (1 sc, inc) repeat around (18).
- Fifthly, Round 4: (2 sc, inc) repeat around (24).
- Sixthly, Round 5: (3 sc, inc) repeat around (30).
- Seventhly, Rounds 6–7: sc around (30 each round).
- Eighthly, Round 8: (3 sc, dec) repeat around (24).
- Ninthly, Round 9: (2 sc, dec) repeat around (18).
- Tenthly, Round 10: (1 sc, dec) repeat around (12).
- Eleventhly, pause for stuffing: firmly fill with fiberfill, shaping into a smooth ball; additionally, add a little more stuffing than you think you need for a plump, resilient finish.
- Twelfthly, Round 11: dec around (6).
- Thirteenthly, close: cut a long tail, thread your tapestry needle, and weave through the front loops of the remaining 6 stitches; additionally, pull tight to close and secure with a small knot inside.
Tip inside Step 1:
- Firstly, if you prefer a slightly taller fox, optionally add Round 8.5 as another plain round of 24 sc before decreasing; however, this is optional and not essential.
- Secondly, if using plush yarn, keep your tension firm so the sphere stays compact; moreover, avoid over-stuffing at the very top to keep the crown smooth.
Step 2: Crochet the Ears with Black Tips (Two Pieces) (10–12 minutes each)
- Firstly, begin with Color B (black) for a classic fox tip; alternatively, choose dark brown for a softer look.
- Secondly, Ear Round 1: MR, 3 sc into ring (3).
- Thirdly, Ear Round 2: inc in each stitch (6).
- Fourthly, color change: switch to Color A (orange) at the end of Round 2 by completing the last stitch with the new color; moreover, carry the old yarn neatly or cut and weave ends later.
- Fifthly, Ear Round 3: (1 sc, inc) repeat around (9).
- Sixthly, Ear Round 4: (2 sc, inc) repeat around (12).
- Seventhly, finish: sl st to the next stitch to flatten the edge, leave a long tail for sewing, and FO; additionally, pinch the base slightly to shape the ear into a triangle.
Placement planning:
- Firstly, plan to sew ears across the top of the sphere, roughly spanning between the visual rows that would align with Round 2 and Round 5 from the crown; additionally, angle them slightly outward for a lively expression.
Step 3: Add Eyes, Nose, and Cheeks (10–15 minutes)
- Firstly, choose your style: safety eyes, felt eyes, or embroidered eyes.
- Secondly, for safety eyes, place them approximately at the horizontal midline of the sphere, about 5–6 stitches apart for worsted yarn or 7–8 stitches apart for plush yarn; moreover, test positions with pins before attaching.
- Thirdly, for felt or embroidered eyes, cut small ovals (5–7 mm) and secure with fabric glue or stitch around the edge; additionally, add tiny stitches for eyelashes if desired.
- Fourthly, add a small safety nose or felt triangle centered slightly below the eyes, approximately between where Rounds 5 and 6 would sit from the top down; moreover, secure firmly for daily carry.
- Fifthly, add cheeks: glue or stitch two tiny pink felt circles just below and to the outside of each eye; additionally, lightly blush with fabric-safe pastel if you prefer a softer tint.
Note on placement:
- Firstly, try the face pieces temporarily with pins; secondly, step back and adjust the spacing until it feels balanced; moreover, symmetry matters for cuteness.
Step 4: Sew Ears to the Head (8–10 minutes)
- Firstly, thread the orange tail on your tapestry needle and position the first ear.
- Secondly, stitch the base of the ear to the sphere with small, secure whip stitches; moreover, catch both the ear edge and a sturdy stitch on the head to prevent wwobbles
- Thirdly, repeat for the second ear, mirroring the angle so both ears point outward evenly; additionally, lightly pinch and tack the front of each ear if you want a sharper tip.
- Finally, weave in tails inside the head and trim neatly.
Step 5: Attach Keychain Hardware (5–7 minutes)
- Firstly, decide between a top-centered or slightly offset attachment.
- Secondly, for a sewn loop, cut a 10–12 cm strand of matching yarn and create a small loop at the crown; moreover, stitch the loop through the crown with several passes to lock it in place.
- Thirdly, for a jump ring, insert the ring through the sewn loop and close it with pliers; additionally, add the chain and split ring or lobster clasp.
- Finally, tug-test the hardware to confirm strength, because keychains requirea durable attachment.
Optional Step 6: Add White Muzzle Detail (5–8 minutes)
- Firstly, cut a small oval of white felt sized to your fox (see exact measurements above).
- Secondly, glue it centered below the eyes with a tiny overlap under the nose for a sweet snout; moreover, press gently and allow it to dry fully.
- Finally, outline with a few small stitches if this will receive heavy use.
Customization Time-Saver
- Firstly, if you are batch-making these for gifts or markets, prepare multiple ear sets at once; secondly, pre-cut felt shapes and pre-attach jump rings to speed assembly; moreover, this assembly-line approach significantly reduces total time.
Placement Guide and Row Landmarks
- Firstly, when the sphere is finished, think of the top closure as Round 11 and count downward to estimate where features land.
- Secondly, place the nose roughly between the equivalent of Rounds 5–6 from the top; moreover, place the eyes at about the equivalent of Round 5, spaced evenly.
- Finally, anchor ears so their bases sit just behind the eye line for a naturally foxy silhouette.
Basic Tips for Success
- Firstly, keep tension consistent; secondly, use a hook slightly smaller than usual for your yarn to prevent stuffing from peeking out; moreover, for plush yarn, pinch the fabric to feel the stitch “V” when visibility is low.
- Secondly, use a locking stitch marker in the first stitch of every round; additionally, move it up each round to avoid losing count.
- Thirdly, stuff in small tufts; moreover, distribute evenly to avoid lumps and to maintain a round, cute profile.
- Fourthly, use invisible decrease for smoother shaping; additionally, insert hook under the front loops of the next two stitches, yarn over, pull through both, yarn over, and pull through.
- Fifthly, test the face before attaching the pit permanently; moreover, small changes in eye spacing dramatically change the expression, so experiment first.
- Sixthly, secure the keychain loop with multiple passes; additionally, tug-test to ensure daily durability.
Common Mistakes and How to Avoid Them
- Firstly, skipping the marker leads to miscounts; therefore, always mark the first stitch and recount at the end of each round.
- Secondly, loose stitches expose stuffing; consequently, size down your hook or tighten your grip, especially with plush yarn.
- Thirdly, uneven stuffing creates dents; therefore, add small bits as you go and massage the sphere into shape.
- Fourthly, rushed color changes leave gaps; consequently, complete the last step of the previous stitch with the new color for a neat transition.
- Fifthly, misaligned ears look off-balance; therefore, pin both ears before sewing and check from multiple angles.
- Sixthly, weak hardware attachments fail; consequently, stitch a reinforced loop through several stitches at the crown and knot securely inside.
Variations to Try
- Firstly, Arctic Fox: swap orange for pure white, keep black ear tips, and add a pale gray nose for contrast.
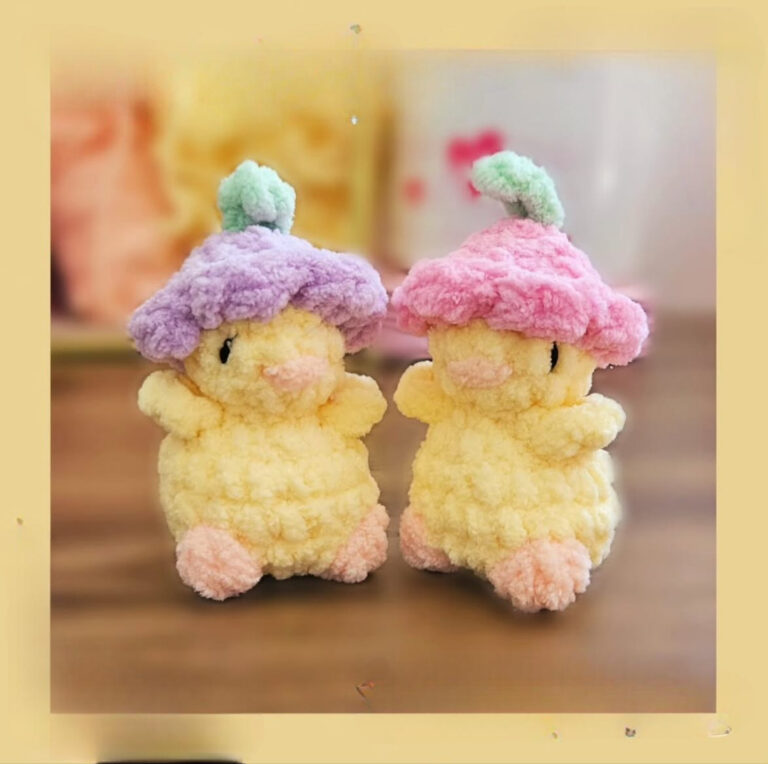
- Secondly, Pastel Fox: choose blush pink, mint, or lavender for Color A; moreover, pair with cream ear bases and a tiny satin bow.
- Thirdly, Forest Fox: mix a heathered rust with chocolate tips; additionally, embroider a few freckles over the muzzle.
- Fourthly, Mini Size: use sport/DK yarn with a 2.75–3.0 mm hook; consequently, expect a 4–4.5 cm charm and 6 mm eyes.
- Fifthly, Max Fluff: use extra-plush yarn and a 7 mm hook; moreover, lightly brush the ears with a soft bristle brush for fluff.
- Sixthly, Embroidered Face: skip safety eyes and stitch sleepy eyes with black thread; additionally, add tiny brows for personality.
- Seventhly, Seasonal Sets: add a tiny scarf, leaf charm, or holiday bell; moreover, coordinate colors for gift bundles.
- Eighthly, Letter-Themed Gifts: add an initial charm on the chain; additionally, pair with a matching gift tag for personalization.
Care and Safety Notes
- Firstly, for children under three, replace safety eyes and noses with embroidered details to eliminate choking hazards.
- Secondly, spot clean with a damp cloth; moreover, avoid machine washing if you used felt or hardware.
- Thirdly, keep away from high heat or direct glue gun residue; additionally, test glue on a scrap first to avoid discoloration.
Troubleshooting Quick Answers
- Firstly, my sphere is lumpy: redistribute stuffing and roll it between your palms; moreover, add tiny tufts to low areas.
- Secondly, my stitches are hard to see with plush yarn: feel for the “V” and count by touch; additionally, work under a bright light and slow your pace.
- Thirdly, my eyes look uneven: remove and reinsert using pins to preview placement; moreover, measure the gap in stitches between them for symmetry.
- Fourthly, my ears won’t stand: add one or two tacking stitches along the front edge; furthermore, pinch the base as you sew to create structure.
Summary for Quick Reference
- Firstly, this graceful, mesmerizing crochet baby fox keychain small amigurumi pattern is beginner-friendly, fast, and irresistibly cute.
- Secondly, the step-by-step tutorial covers a magic ring sphere, increasing and decreasing shaping, color-tipped ears, and secure keychain attachment.
- Thirdly, the materials include plush or worsted yarn, a 6.5 mm or 3.5 mm hook, safety eyes, felt accents, and keychain hardware.
- Fourthly, the project makes perfect gifts, bag charms, and party favors; moreover, it stitches up in about 1.5–2 hours.
Complete Row Recap (Head-Body)
- Firstly, R1: MR, 6 sc (6).
- Secondly, R2: inc around (12).
- Thirdly, R3: (1 sc, inc) around (18).
- Fourthly, R4: (2 sc, inc) around (24).
- Fifthly, R5: (3 sc, inc) around (30).
- Sixthly, R6–R7: sc around (30, 30).
- Seventhly, R8: (3 sc, dec) around (24).
- Eighthly, R9: (2 sc, dec) around (18).
- Ninthly, R10: (1 sc, dec) around (12).
- Tenthly, stuff firmly.
- Eleventhly, R11: dec around (6), close and weave off.
Estimated Timeline at a Glance
- Firstly, Step 1 sphere: 30–40 minutes.
- Secondly, Step 2 ears: 20–24 minutes total.
- Thirdly, Step 3 face: 10–15 minutes.
- Fourthly, Step 4 ear sewing: 8–10 minutes.
- Fifthly, Step 5 hardware: 5–7 minutes.
- Sixthly, Step 6 muzzle (optional): 5–8 minutes.
Why This Pattern Works for Beginners
- Firstly, the sphere uses only single crochet, increases, and invisible decreases; moreover, the stitch pattern is repetitive and relaxing.
- Secondly, the ear construction is small and quick, which builds confidence and teaches color change cleanly.
- Thirdly, the assembly is minimal, and the keychain attachment is straightforward; additionally, the face details allow creative expression without complex techniques.
Crochet Baby Fox Keychain Final Encouragement
- Firstly, you did it: a mesmerizing Crochet Baby Fox Keychain that is graceful, charming, and perfectly pocket-sized. Secondly, whether you followed the plush path or the classic acrylic route, your foxy friend is ready to clip onto keys, backpacks, or gift bags. Moreover, remember that slight differences in tension, eye spacing, and ear angle create delightful personality variations, so every fox is uniquely yours. and then keep experimenting with colors, accessories, and sizes for a whole fox family.