Inspiring Crochet Mini Kitty Keychain Amigurumi Pattern for Beginners
Looking for a quick and cute crochet project that’s perfect for beginners? This mini kitty keychain amigurumi pattern is just what you need! It’s small, simple, and fast to make, yet the result is irresistibly adorable, a tiny kitty keychain that’s perfect for clipping onto your keys, backpacks, or purses.
Ideal for those just starting, this pattern features easy rounds, simple shaping, and a touch of embroidery to create the kitty’s face. Plus, it’s highly customizable. Choose your favorite colors, add your personal flair, and before you know it, you’ll have a whole army of adorable mini kitties!
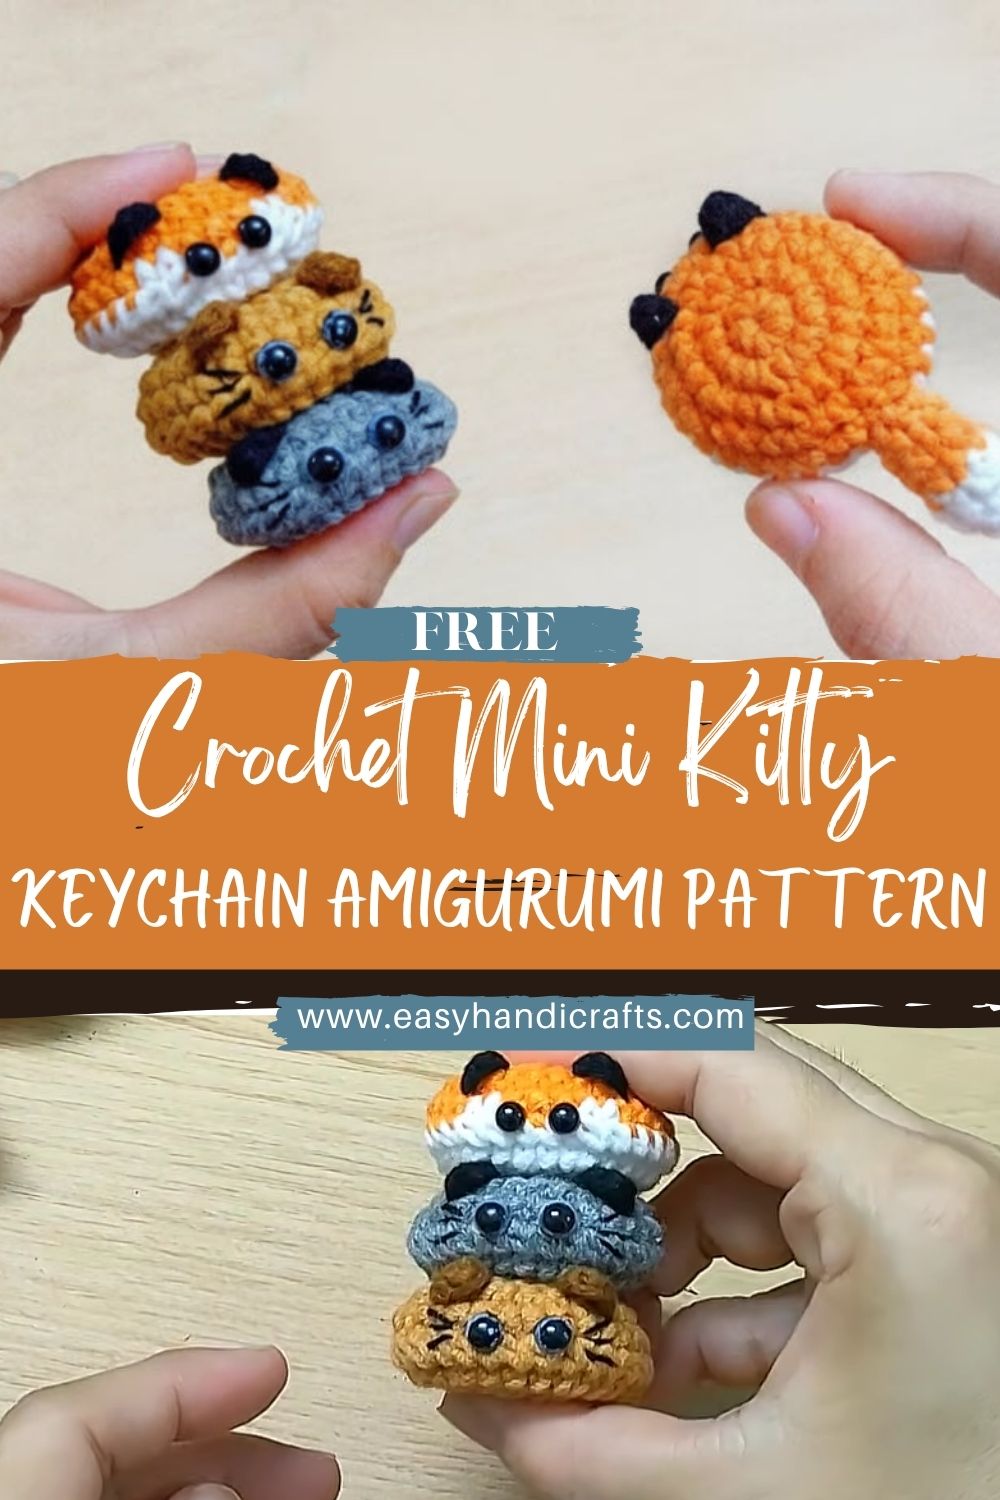
Materials Needed (Exact Measurements):
- Yarn (medium weight/cotton or acrylic)
- Main color (cat body): approx. 20–30 g
- Contrast colors (ears, nose, details): approx. 2–8 g total
- Crochet hook: 2.5mm – 4mm (depending on yarn; smaller hooks make tighter stitches)
- Safety eyes: 6–10mm (or black thread for embroidered eyes)
- Polyester stuffing: approx. 5–15 g
- Stitch markers: 1–2
- Yarn needle
- Scissors
- Keychain ring (plus optional jump ring)
Skill Level:
Beginner / Easy
Making Time (Overview):
Approximately 1–2 hours (quick and beginner-friendly project)
Step-by-Step Instructions
Body (Cat Head & Shape) (Making time: 40–70 minutes)
Before starting, pick a hook that makes tight stitches with the chosen yarn. Meanwhile, place a stitch marker in the first stitch of each round, because a tiny project becomes much easier when the round start is always clear.
- Start with a magic ring:
First, make a magic circle using the main yarn color. Next, crochet 6 single crochet (sc) into the ring. After that, pull the tail to close the circle tightly, and then mark the first stitch. - Increase rounds:
Next, increase gradually to form a rounded head. Because this is a mini plush, even slight increases make the shape look smooth and professional. Use this beginner-friendly increase guide:- Round 1: 6 sc in magic ring (6)
- Round 2: inc in each stitch (12)
- Round 3: (sc, inc) repeat around (18)
- Round 4: (2 sc, inc) repeat around (24)
- Round 5: (3 sc, inc) repeat around (30)
After that, crochet 2–4 rounds, working 1 sc in each stitch to build height. Meanwhile, the circle will start to turn into a bowl shape, which is exactly what creates a cute, chubby head.
- Shape the body:
After that, continue crocheting evenly for a short section to create the little “body” beneath the head. If a clear head-and-body look is desired, keep the next few rounds slightly narrower by skipping one increase round or by adding a gentle decrease round. Easy shaping option (very beginner-friendly):- First, crochet 1 round of sc evenly.
- Next, crochet 1 round with a few spaced-out decreases (for example, 3–4 decreases total).
- After that, crochet 1–2 rounds of sc evenly again.
Later, the body will look naturally rounded once it is stuffed, so perfection is not required at this stage.
- Stuff and close:
Finally, begin decreasing to close the bottom. Before the stuffing gets too small, add stuffing little by little and gently shape the plush with your fingertips. Simple decrease guide:- Next round: (3 sc, dec) repeat around
- After that: (2 sc, dec) repeat around
- Later: (sc, dec) repeat around
- Finally: dec around until closed
When the last hole is small, add a final pinch of stuffing if needed. Finally, fasten off, weave the yarn tail through the last stitches, pull snug, and hide the end inside.
Additional Parts
Ears (Making time: 10–15 minutes total)
Ears are the easiest way to make the kitty instantly recognizable. First, keep them small so the cat stays “mini,” and then place them symmetrically for a balanced look.
Make 2 ears (small triangles):
- First, make a magic ring and crochet 3 sc into it (3).
- Next, (inc, sc, inc) (5).
- After that, crochet 1 round of sc evenly (5).
- Finally, fasten off, leave a sewing tail, and flatten the seam.
Sew the ears on:
First, pin the ears on top of the head, slightly toward the front. Next, check that both ears sit at the same angle. After that, sew securely around the base of each ear, then weave the ends inside.
Tail (Making time: 5–10 minutes)
A tiny tail adds charm and also helps the keychain kitty look complete from every angle.
Simple cylindrical tail:
- First, make a magic ring with 6 sc (6).
- Next, crochet 4–7 rounds of sc evenly, depending on the desired tail length.
- After that, add a tiny bit of stuffing if preferred (optional for a firmer tail).
- Finally, flatten the opening and sew it closed, leaving a tail for attaching.
Attach the tail:
First, place the tail on the back of the body, slightly low. Next, stitch it firmly through multiple stitches so it can handle daily use. Finally, weave in the end securely.
Face & Details (Making time: 10–20 minutes)
The face brings the kitty to life, so slow down slightly here for a clean finish.
- Insert safety eyes evenly:
First, decide the “front” of the face. Next, place the eyes between the mid rounds, spaced about 4–7 stitches apart, depending on the head and eyesize. After that, check the expression by looking straight on, and then secure the backs inside. - Embroider nose and whiskers:
Next, use a contrast yarn or embroidery thread to stitch a tiny triangle or little “V” nose. After that, embroider whiskers with 2–3 short lines on each side. Meanwhile, keep whiskers short, because long whiskers can snag on bags and pockets. - Add blush or small details (optional):
Finally, add small blush dots using pink yarn, soft embroidery thread, or a gentle touch of fabric crayon. If desired, add tiny eyebrow stitches for extra personality.
Face & Assembly
First, attach the ears before finalizing the face if placement needs adjusting. Next, position the eyes before fully closing the body, because adjusting is easier with access to the inside. After that, stitch all parts securely, especially for a keychain, since it will get handled often. Finally, weave in every end thoroughly to prevent unraveling over time.
Special Features
- Cute, chubby mini cat shape that looks adorable in any color
- Lightweight and portable, so it never feels bulky on keys
- Perfect as a keychain or bag charm, and also great for party favors or small gifts
Sizing Tips
- Smaller hook = tighter and smaller cat:
First, choose a 2.5–3.0mm hook for a compact keychain size with tight stitches. Next, keep tension steady so stuffing does not peek through. - Thicker yarn = bigger plush result:
After that, switch to a thicker yarn to create a larger charm. Later, increase one extra round (or add an extra even round) to keep the body proportional.
Finishing Tips
- Keep stitches tight to avoid gaps:
First, use the smallest hook that still feels comfortable. Next, tighten slightly during decreases, since those stitches can open up. - Stuff evenly for a smooth shape:
Meanwhile, add the stuffing in small pieces rather than one big clump. After that, gently roll the plush between your hands to smooth out lumps. - Hide yarn ends neatly:
Finally, run yarn tails through several stitches inside, change direction once, and then trim. This gives a cleaner finish and helps ends stay hidden.
Common Mistakes to Avoid
- Loose tension causing holes:
First, size down the hook. Next, keep the yarn tension consistent, especially around decreases. - Uneven increases:
After that, count stitches every round so the shape stays symmetrical. Meanwhile, keep increases evenly spaced to prevent a lopsided head. - Misplaced eyes:
Next, test placement using pins or stitch markers before committing. After that, step back and check the face straight on for the cutest expression. - Overstuffing or understuffing:
Finally, avoid overstuffing, as it stretches the stitches and can push the eyes outward. On the other hand, avoid understuffing because the kitty can look wrinkly. Instead, aim for a firm but squeezable feel.
Variations & Customization Ideas
- Make different cat colors:
First, try white for a clean classic kitty. Next, use orange for a playful tabby vibe, or grey for a soft, cozy look. - Add stripes or patterns:
After that, stitch simple stripes with surface crochet or embroidery. Later, add a tiny chest patch or a little “sock” color to the paw area (even if the paws are not separate). - Turn it into a charm or mini plush:
Next, skip the keychain ring and leave it as a mini desk buddy. Finally, add a small bow, heart, or tiny bell for extra cuteness (if the charm will not be handled roughly). - Create matching sets:
Finally, make two or three in coordinating colors for best-friend gifts, backpack charms, or cute “family” sets.
Tutor Suggestions
- First, always use a stitch marker when working in rounds to prevent accidental extra stitches.
- Next, practice the magic ring once or twice before starting if it feels tricky.
- Meanwhile, keep tension consistent, especially on small parts like ears and tail.
- After that, take time shaping tiny pieces, since small adjustments make a big difference in a mini project.
- Finally, stitch parts securely for durability, because keychains get pulled, bumped, and tossed around daily.
Conclusion
This Crochet Cat Amigurumi Keychain is a cozy beginner project that quickly turns into a useful handmade accessory. First, the simple rounds build confidence, and next, the ears, tail, and face details add that unmistakable kitty charm. Finally, once the keychain ring is attached, the mini cat becomes a cute everyday companion perfect for practicing amigurumi basics while creating something practical, personal, and gift-ready.