Amazing Free Crochet Watering Can Pattern Toy
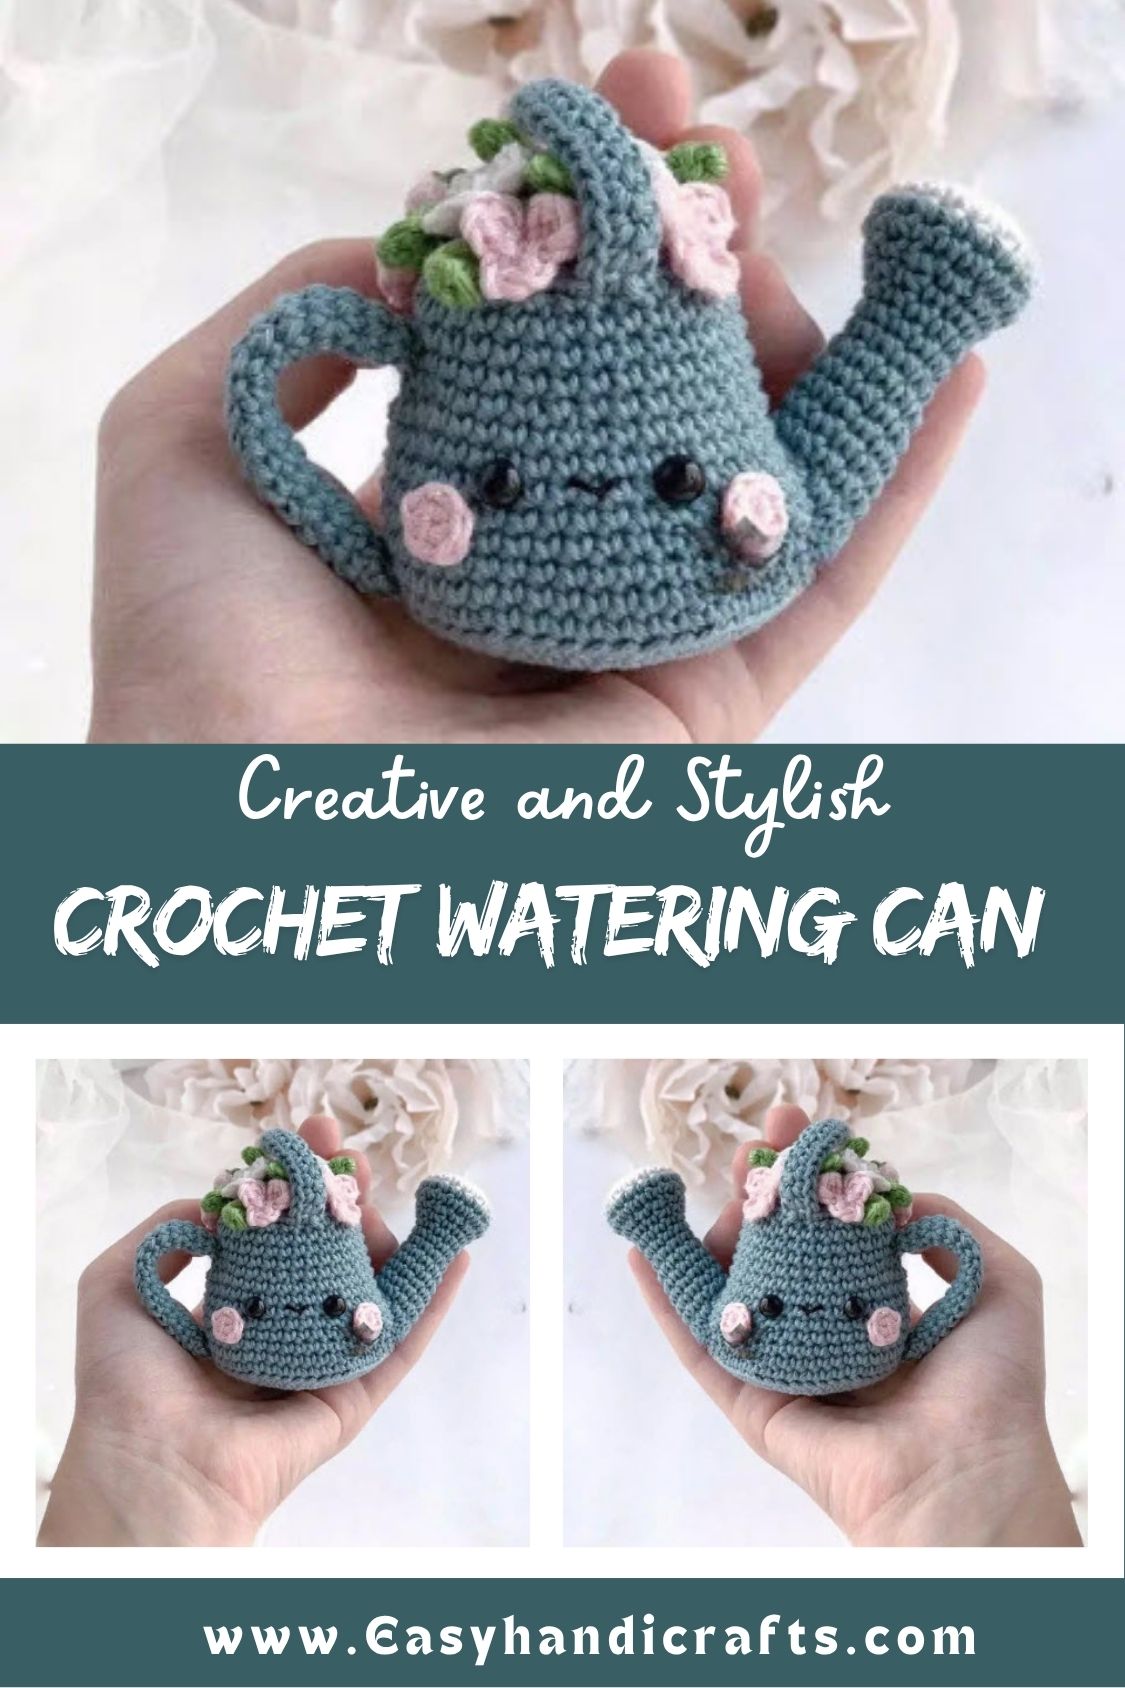
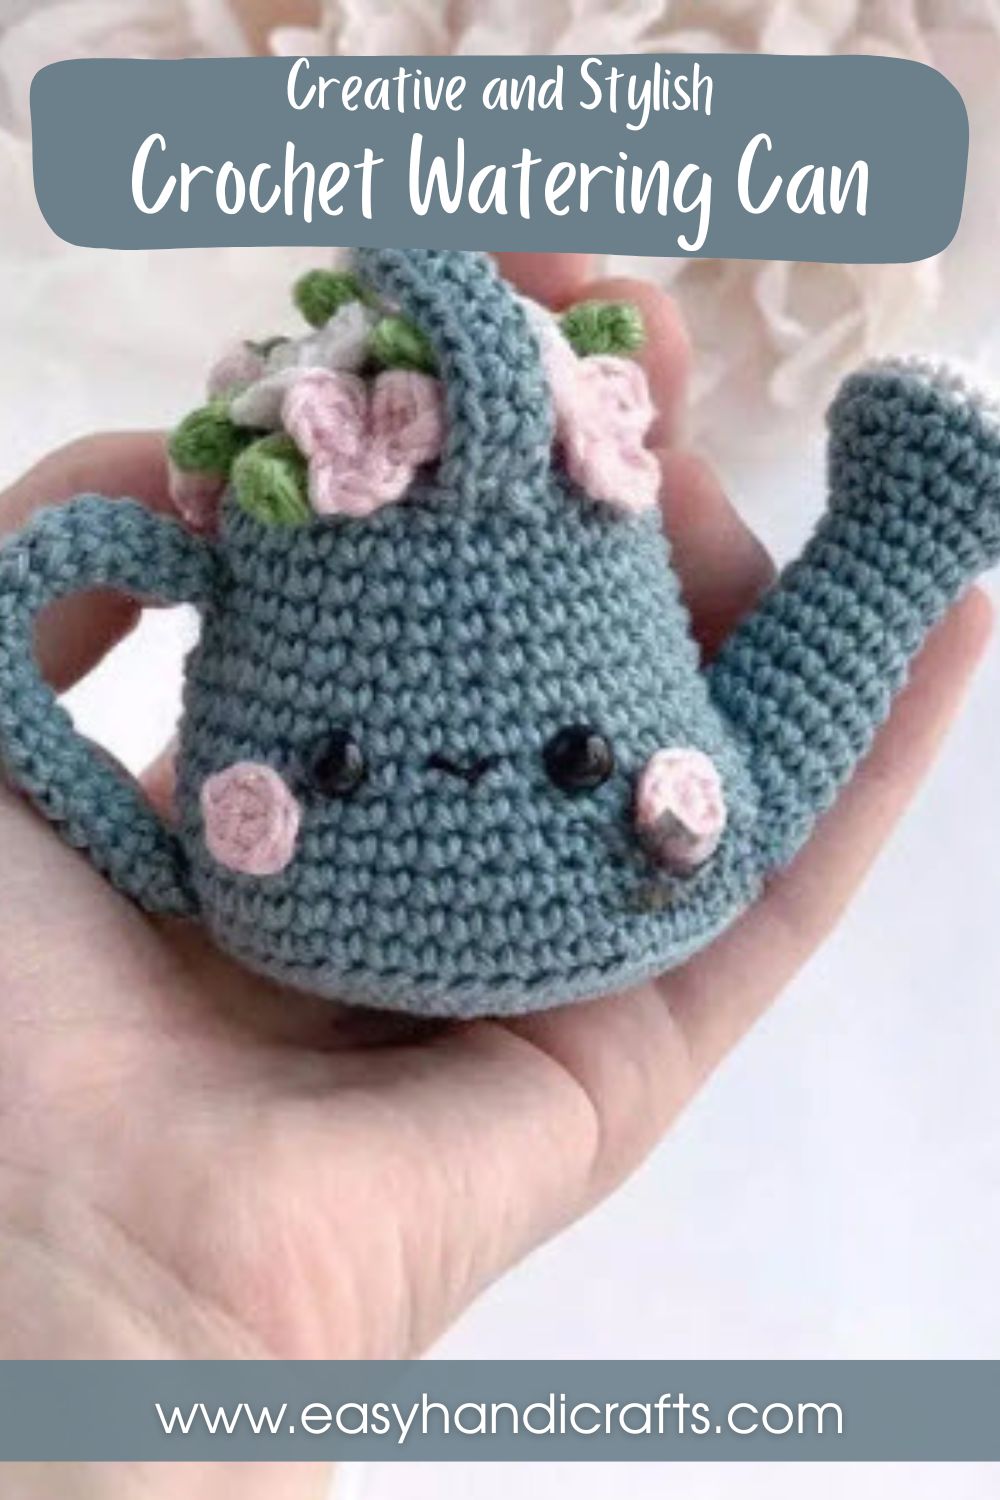
This Free Crochet Watering Can toy brings a playful garden touch to nursery shelves. Amigurumi-style shaping, cheerful flowers, and a curved spout make it a charming beginner project worth trying today.
Little Free Crochet Watering Can like this one turn simple single crochet shapes into a sweet toy full of personality. Honestly, the vessel builds through steady increases and decreases, while a spout, handles, and flower details finish the look. Once assembled, it becomes a soft, huggable piece perfect for gentle, imaginative play.
Skill Level
Beginner and confident crocheters can handle this watering can toy, since it relies on basic single crochet stitches, simple increases, decreases, and small pattern pieces like flowers and leaves.
Tools AND Supplies
- Hook #2
- Cotton yarn – pink, blue, white, green
- Fiber fill
- Eyes 2 pieces
- Needle and thread
- Some black floss
Abbreviations
- MR – Magic ring
- STS – Stitches
- CH – Chain
- SL ST – Slip stitch
- SC – Single crochet
- INC – Increase (2 sc in one)
- DEC – Decrease (2 sc together)
- DC – Double crochet
Pattern Overview
- The toy is built from several small pieces: a rounded vessel body, a spout with rose detail, two handle styles, flowers, leaves, and cheeks.
- The vessel body shapes through a steady round of increases up to 48 stitches, then decreases back down to close at the top.
- Back loop only rounds mark the transition points where the body’s curve shifts from wide to narrow.
- The spout starts in white, switches to blue partway through, and finishes with a mix of slip stitches and double crochets to form its curved tip.
- Small crochet flowers and leaves are made separately, then sewn onto the vessel and handle for the finishing garden look.
- Two handle options are included, letting you pick a flat strap-style handle or a rounded loop handle.
- Pink cheeks add a soft, rosy finishing touch to the toy’s face once the eyes and floss details are in place.
Special Techniques
- Magic ring starts: Each rounded piece (vessel, spout, cheeks) begins in a magic ring, which keeps the center tight with no visible hole.
- Back loop only rounds: Working into the back loop only on specific rounds creates a visible ridge, giving the vessel body its subtle shaping line.
- Mixed stitch spout tip: The spout’s final round combines slip stitches, single crochet, and double crochet in one row, which shapes the curved rose-like tip without extra pieces.
- Small flower assembly: The flowers use short chain-and-double-crochet petals rather than worked rounds, so they finish quickly and sew on flat.
Customization and Variation
- Swap the pink, blue, white, and green palette for pastel tones if a softer nursery look is preferred.
- Add extra flowers or leaves along the handle for a fuller garden effect.
- Use a slightly larger hook with thicker yarn for a bigger, huggable version of the toy.
- Try both handle styles on the same piece for a mixed, asymmetric design.
- Embroider a simple face instead of using safety eyes for a softer, more toddler-safe finish.
- Add a small ribbon bow near the handle base for an extra decorative detail that suits gift-giving.
Common Mistakes
- Losing track of the stitch count during the vessel’s increase rounds, which throws off the rounded shape.
- Forgetting to switch to back loop only on the marked rounds, leaving the body looking flat instead of curved.
- Attaching the spout before double-checking its color change placement, which can shift the rose detail out of position.
- Sewing the flowers on with thick yarn instead of thin thread, making the petals look bulky rather than delicate.
- Skipping the stitch marker removal step on the spout, which can cause confusion about where the round actually starts.
- Rushing the leaf and flower count, ending up with too few pieces to fill out the finished garden look evenly.
Full Pattern
Flowers
- Ch 3, 1 dc into third loop, ch 2, 1 sl st
- Ch 2 in the middle, 1 dc, ch 2, 1 sl st
- Ch 2, 1 dc, ch 2, sl st. Fasten off and cut the ends. Make 4 pink flowers and 4 white flowers.
Leaf
- Ch 4, 1 sc into the 2 loop from the hook, hdc, sl st into the last loop. Fasten off and cut the ends. Make 5-8 leaves. Sew the flowers on top using thin thread and needle.
Handle
- Ch 22 2-3) 22 sc. Fasten off, leave a long tail for sewing.
2 Handle
- Ch 5. Join into a circle. 2-19) 5 sc around. Fasten off, leave a long tail for sewing.
Cheeks
Make two pieces in pink color.
- 6 sc into MR
Vessel
- 6 sc into MR (6)
- 6 inc (12)
- (1 sc, inc)*6 (18)
- (2 sc, inc)*6 (24)
- (3 sc, inc)*6 (30)
- (4 sc, inc)*6 (36)
- (5 sc, inc)*6 (42)
- (6 sc, inc)*6 (48)
- 48 sc back loop only 10-11) 48 sc
- (6 sc, dec)*6 (42) 13-16) 42 sc
- (5 sc, dec)*6 (36) 18-21) 36 sc
- (4 sc, dec)*6 (30)
- 30 sc back loop only
- (3 sc, dec)*6 (24)
- 24 sc
- (2 sc, dec)*6 (18)
- (1 sc, dec)*6 (12)
- 6 dec (6)
Spout & Rose
Start with white color.
- 6 sc into MR (6)
- 6 inc (12)
- (1 sc, inc)*6 (18)
- 18 sc
Change to blue color. 5-6) 18 sc 7) (1 sc, dec)*6 (12) 8-11) 12 sc 12) 1 inc, 11 sc (13) 13-16) 13 sc
Remove the marker at the beginning of the row. 17) 1 inc, 5 sc, 4 sl st, 2 sc, 4 dc, 1 sc, sl st. Cut the end, leaving a long tail for sewing.
Finishing Tips
- Stuff the vessel body firmly but evenly, pushing filling into the base first so the toy stands upright on its own.
- Pin the spout in place before sewing so you can check the angle against the vessel’s front curve.
- Sew the handle ends securely to both sides of the vessel, reinforcing the stitch a second time for a toy that gets picked up often.
- Attach the safety eyes before closing the final rounds, since it’s much harder to position them once the piece is fully stuffed.
- Use black floss sparingly for the mouth or face details, keeping the stitches small and even.
- Weave in every yarn tail through several stitches rather than just one, so nothing works loose with regular handling.
- Steam-block the flowers lightly before sewing them on, so the petals lie flat instead of curling at the edges.
Gifting Ideas
- Pair the finished watering can toy with a small crochet flower bouquet for a matching garden-themed gift set.
- Wrap it inside a canvas tote alongside a children’s gardening book for a thoughtful toddler present.
- Add a name tag or small embroidered initial to the vessel for a personalized baby shower gift.
- Include it in an Easter or spring gift basket alongside pastel-colored accessories.
- Offer it as a soft photo-prop piece for spring or garden-themed newborn photoshoots.
- Present it alongside a handwritten card for a grandparent-to-grandchild keepsake that feels personal and lasting.
Conclusion
A Free Crochet Watering Can toy like this one takes basic single crochet shaping and turns it into something genuinely charming for a nursery shelf or a little one’s toy basket. Between the rounded vessel, the curved spout, and the small sewn-on flowers, there’s enough detail to keep the project interesting while staying approachable for beginner and intermediate crocheters alike. No joke, once the pieces come together, this little garden-themed toy makes a gift that feels both handmade and genuinely thoughtful.