Free Crochet Mushroom Amigurumi Pattern with Red Polka Dot Cap
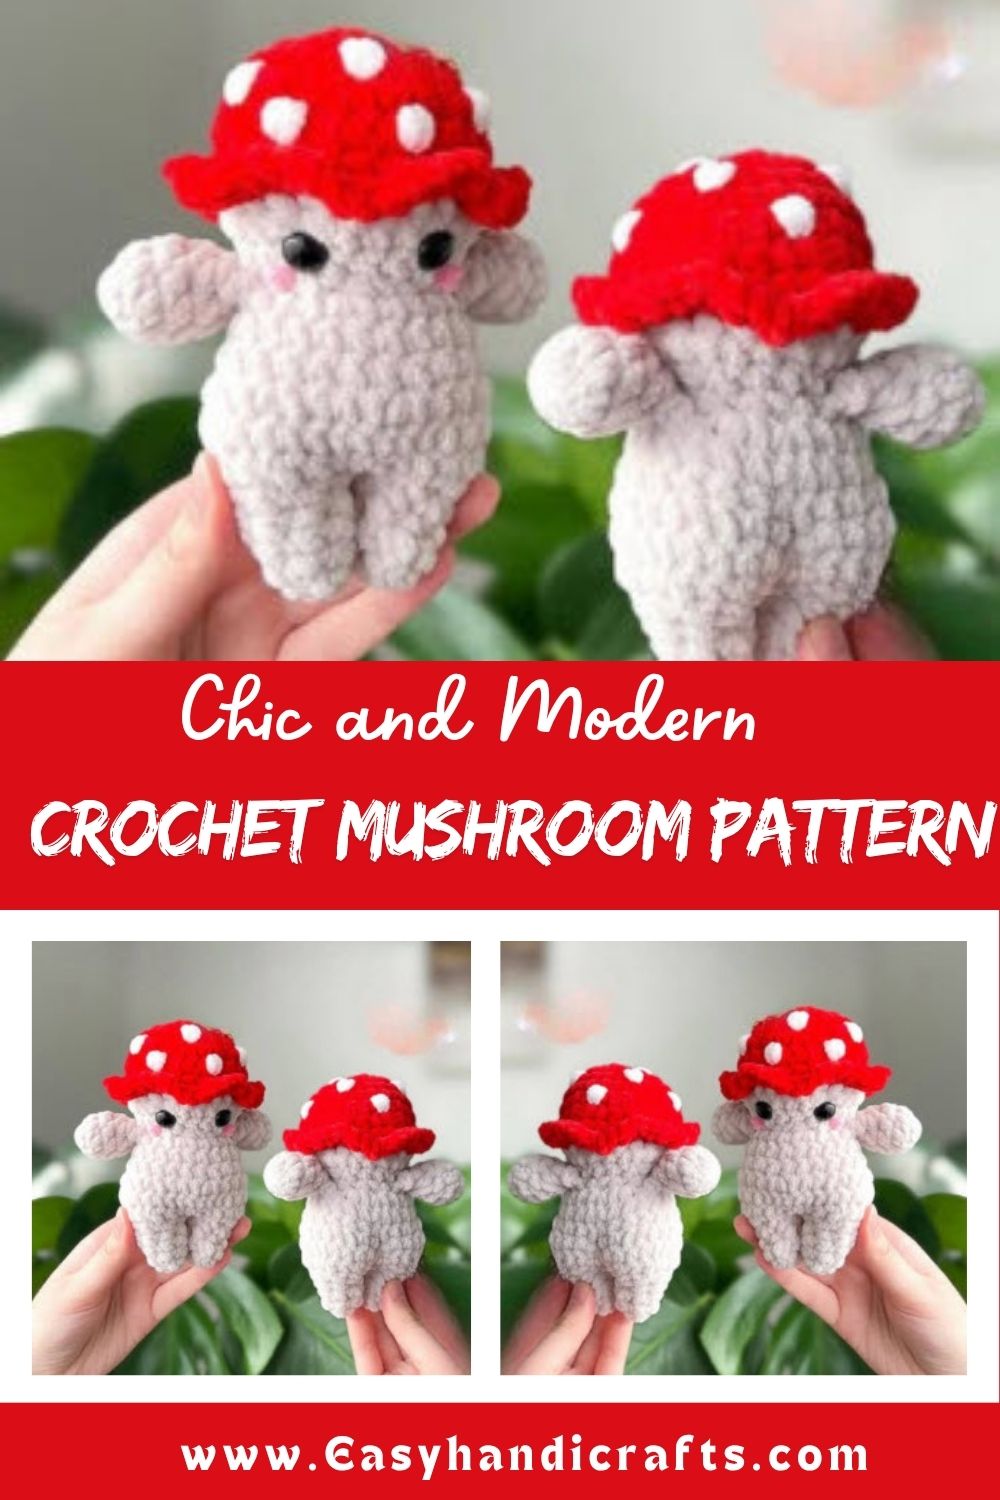
Tiny mushrooms with rosy cheeks and a spotted cap make one of the sweetest amigurumi projects around. This Free Crochet Mushroom Amigurumi pattern turns a few skeins of chenille yarn into a shelf-ready character in an afternoon.
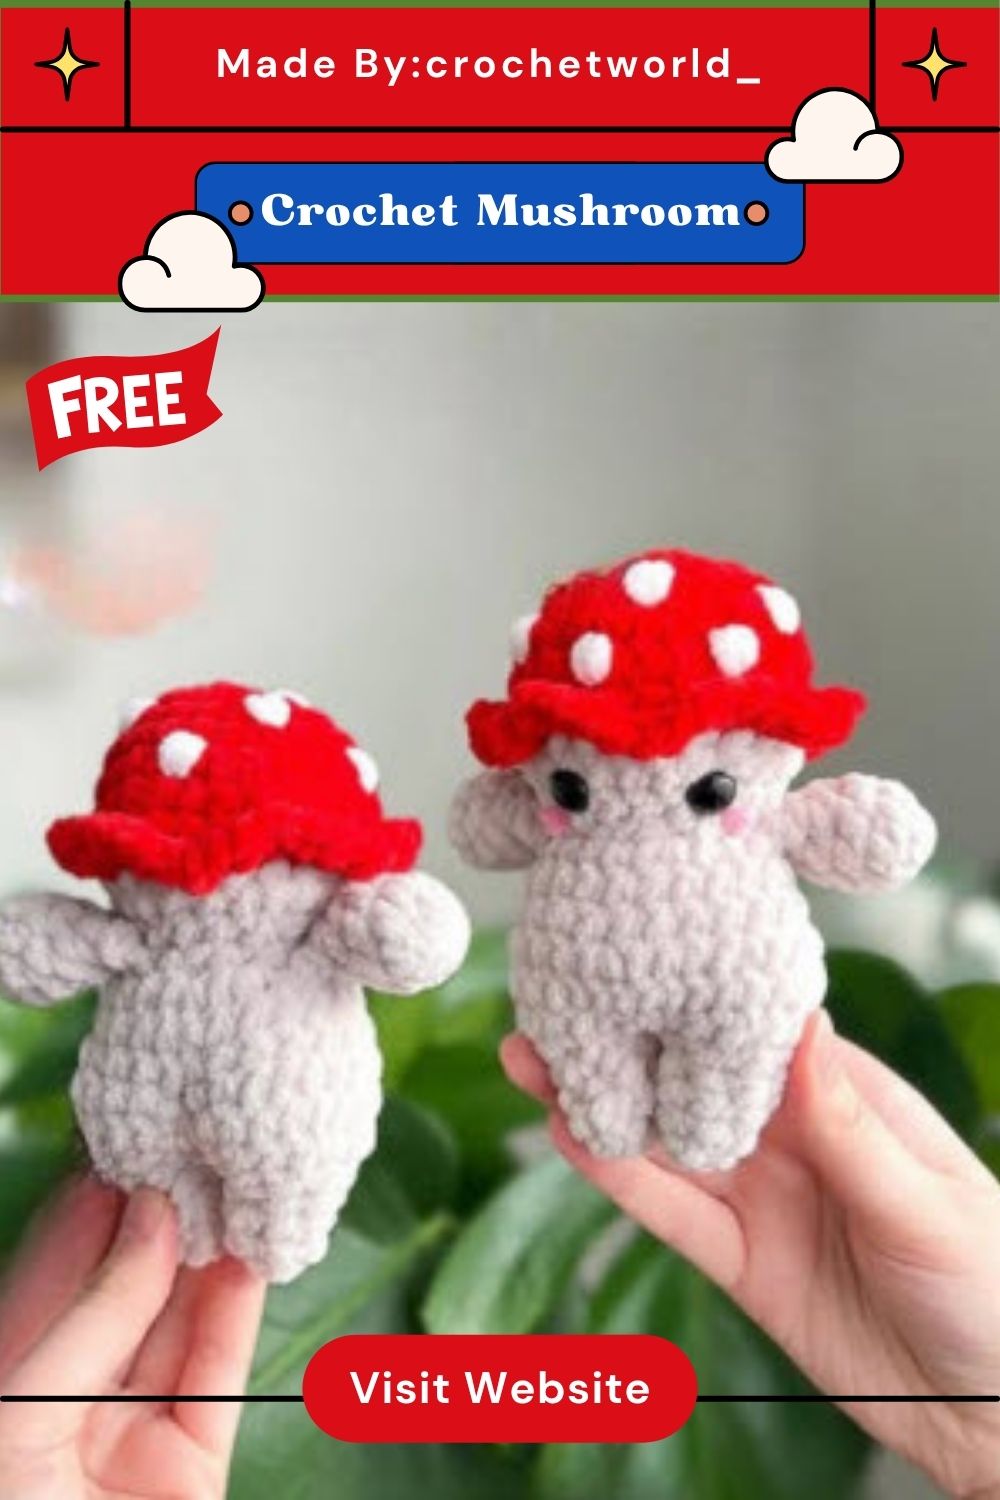
Soft folds, a rounded cap, and stubby little legs give this crochet mushroom amigurumi its charm from every angle. Beige and red chenille yarn blend into a plush texture that feels almost like a stuffed toy rather than a typical amigurumi. Safety eyes and a dusting of blush pull the face together, while the white polka dots scattered across the cap finish the look. Nursery shelves, gift boxes, and craft fair tables all suit this little guy well.
Skill Level
Trust me, this pattern sits comfortably in beginner-to-intermediate territory. Basic single crochet, increases, decreases, and front/back loop work carry the whole project. A few shaping tricks for the legs and bum add a light challenge without overwhelming newer crocheters.
Materials You’ll Need
- 5mm crochet hook
- Super bulky chenille yarn (size 6) in red, white, beige, and pink
- 12mm safety eyes
- Scissors
- Polyester stuffing
- Stitch markers
- Sewing needle
Abbreviations Used: Ch (chain), Rnd (round), st(s) (stitch/stitches), MR (magic ring), Sc (single crochet), Inc (increase, two sc in the same stitch), Dec (invisible decrease), FLO (front loops only), BLO (back loops only), Sl st (slip stitch), FO (fasten off).
Pattern Overview
Four main pieces come together for this crochet mushroom amigurumi: the arms, the mushroom cap, the head-and-body section, and the legs. Assembly happens gradually rather than all at once, since the arms attach mid-pattern and the legs form directly from the base of the body. No joke, working the pieces in this order keeps the shaping accurate and saves a good bit of extra sewing later.
Special Techniques
Front Loops Only (FLO) Transitions
Two spots in this pattern rely on FLO work: the last round of the mushroom cap and the round where the arms join the body. Crocheting into the front loops only leaves the back loops exposed, which is exactly what makes the layered cap-and-stem look possible.
Building the Mushroom Cap
Start the cap in red yarn with a magic ring of 7 single crochets, then increase steadily over the next few rounds:
- Rnd 1: 7sc in MR (7)
- Rnd 2: Inc around (14)
- Rnd 3: (1sc, inc) x7 (21)
- Rnd 4: (2sc, inc) x7 (28)
- Rnd 5–6: Sc around, 2 rounds (28)
- Rnd 7: In FLO, inc around (56)
- Slip stitch and weave in the end.
Real talk, that final FLO increase round is what gives the cap its flared, dome-like edge.
Shaping the Arms (Make 2)
Crochet both arms in beige yarn:
- Rnd 1: 8sc in MR (8)
- Rnd 2–3: Sc around, 2 rounds (8)
- Rnd 4: (2sc, dec) x2 (6)
- Stuff lightly.
- Rnd 5: Sc around (6)
Fold each arm flat and single crochet three stitches through the folded edge to seal it shut. Leave a short tail on each one, since they’ll attach to the body a bit later rather than right away.
Head and Body Construction
Attach beige yarn with a slip stitch into the visible back loops left from Rnd 6 of the cap, then continue:
- Rnd 8: In BLO of Rnd 6, (5sc, dec) x4 (24)
- Rnd 9: Sc around (24)
- Rnd 10: (2sc, dec) x6 (18)
- Rnd 11: (1sc, dec) x6 (12)
Feel free to nudge the arm placement slightly so both sides line up evenly before attaching them.
- Rnd 12: In FLO, attach arm with 3 inc, 4 inc, attach second arm with 3 inc, 2 inc (24)
Insert the safety eyes between Rnd 9 and Rnd 10, spacing them four stitches apart, then stitch a small patch of blush underneath each eye. Stuff the head firmly before moving forward.
- Rnd 13–14: Sc around, 2 rounds (24)
- Rnd 15: (3sc, inc) x6 (30)
- Rnd 16: Sc around (30)
- Rnd 17: (3sc, dec) x6 (24)
- Rnd 18: (1sc, dec) x8 (16)
Stuff the body before splitting off into the legs.
Legs (Make 2)
Fold the body flat to divide it into two leg openings, then mark the center point with a stitch marker (white works well) and the starting point of the right leg with a second marker (orange, for example).
Right Leg:
- Rnd 1: Sc around, skipping the stitches marked by the white marker (7)
- Rnd 2–3: Sc around, 2 rounds (7)
- Stuff the leg and body together.
- Rnd 4: 3 dec, 1 sc (4)
- Fasten off and weave in the ends.
Left Leg: Join with a slip stitch near the white marker.
- Rnd 1: Sc around, skipping the marked stitches (7)
- Rnd 2–3: Sc around, 2 rounds (7)
- Finish stuffing both legs and the body.
- Rnd 4: 3 dec, 1 sc (4)
- Fasten off, leaving a long tail for sewing.
Sew the gap between the legs closed. Using the same tail, bring the needle up from the bottom center to a point three or four rounds higher on the back of the body, then repeat the same path a few times to shape a rounded little bum. Fasten off and weave in the end once the shape looks even.
Common Mistakes to Avoid
- Skipping the FLO steps: Working full stitches instead of front loops only flattens the cap’s edge and hides the stem shaping.
- Under-stuffing the legs: Loose stuffing makes the mushroom wobble instead of sitting upright.
- Uneven arm placement: Low-key, measuring the gap before attaching each arm saves a lot of frustration during assembly.
- Rushing the eye spacing: Placing the safety eyes too close together changes the whole expression.
Assembly Tips
Attaching pieces in order matters more than it seems. Working the arms into the body during Rnd 12, rather than sewing them on afterward, keeps the shoulders looking seamless. Legs formed directly from the folded body avoid visible seams altogether, which gives the finished mushroom a smoother silhouette than sewn-on legs typically allow.
Customization & Variations
- Swap the red cap for orange, brown, or even purple chenille for a whole mushroom family.
- Use smaller safety eyes for a more subtle, sleepy expression.
- Add a tiny crocheted hat or scarf for a seasonal twist.
- Try a solid cap without spots for a simpler, cleaner look.
Mushroom Spots (Finishing Detail)
Thread a long piece of white yarn onto a sewing needle. Choose a spot on the cap roughly one stitch wide, then pass the needle through it and down one stitch below, returning through the same starting point. Repeat that same path three or four times per spot to build up a raised dot. Scatter the spots randomly across the cap until the coverage feels balanced, then fasten off and weave in every end.
Gifting Ideas
Small mushroom amigurumi pieces work well as stocking stuffers, woodland-themed nursery gifts, or add-ons tucked into a larger craft bundle. A trio in different cap colors makes a charming little grouping for a shelf or windowsill.
Frequently Asked Questions
What yarn weight works best for this Free Crochet Mushroom Amigurumi?
Super bulky chenille (size 6) gives the mushroom its soft, plush texture and quick stitch count.
Can beginners complete this Free Crochet Mushroom Amigurumi pattern?
For real, yes. Basic stitches carry most of the project, with only a few shaping techniques to learn along the way.
Why does the cap use FLO stitching?
Front loops only leave the back loops exposed, which lets the cap flare out into its rounded shape.
How much stuffing does the mushroom need?
Firm stuffing throughout the head, body, and legs keeps the mushroom standing upright and holding its shape.
Conclusion
A finished Free Crochet Mushroom Amigurumi brings together soft chenille texture, a playful spotted cap, and a rounded little body that sits happily on any shelf. Each component, from the FLO-shaped cap to the sewn-in bum shaping, adds a small technique worth practicing for future projects. Beginners can finish it in a weekend, while more experienced crocheters might knock it out in a single sitting. Whether it becomes a gift, a nursery accent, or the start of a mushroom collection, this pattern delivers a genuinely satisfying make from start to finish.