Cute Crochet Plush Toy in Nature | Handmade Aesthetic Soft Toy Photography
He’s standing there with his blush cheeks and sleepy eyes, looking like he has never stressed about a single thing in his life, and honestly, I want to be him. This handmade crochet bear is chunky, calm, and everything the internet loves about bears now in plush form.
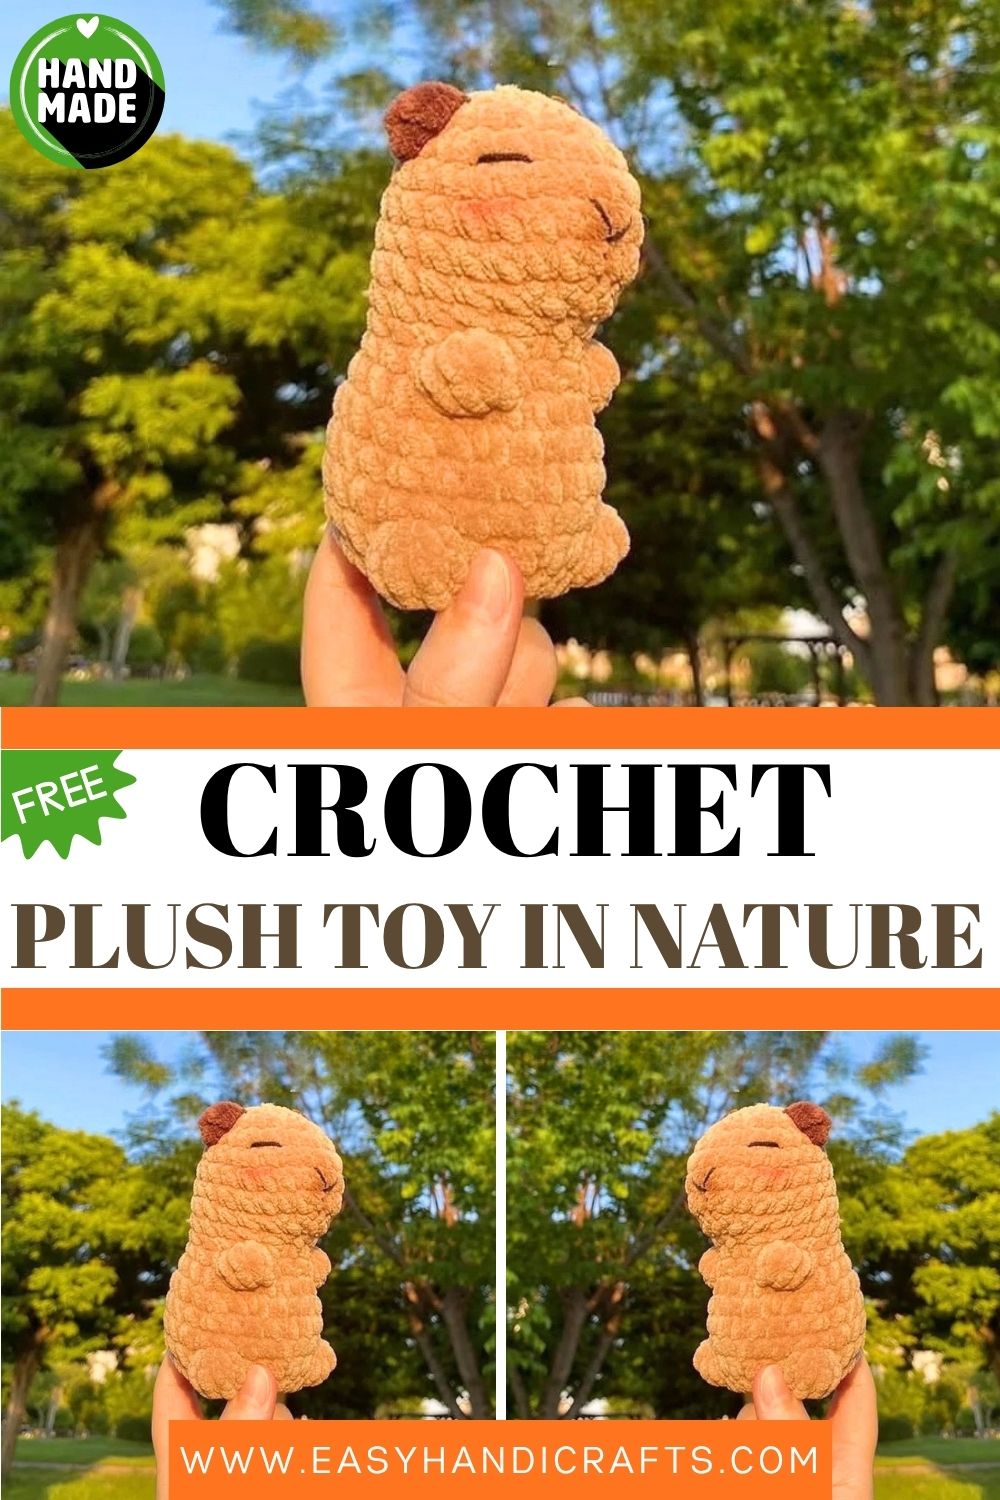
There is something deeply comforting about a handmade bear. This pattern creates a soft, round bear plush worked entirely in warm brown and light brown chenille yarn. The head and body are made as one seamless piece from top to bottom. Furthermore, the bobble stitch paws add a charming three-dimensional texture that gives the bear a lifelike, sculptural quality. In addition, the small brown ears are crocheted separately and sewn on at precisely the right position to create the most natural bear silhouette imaginable. The black cotton yarn embroidery for the eyes and nose completes the face with a warmth and simplicity that feels genuinely handcrafted rather than manufactured. Moreover, this bear photographs beautifully in natural settings, nestled in moss, resting against bark, or sitting beside wildflowers. Whether you make this bear as a gift, a keepsake, or a prop for aesthetic photography, the finished result is a soft toy that carries a real handmade soul in every single stitch.
Skill Level
Beginner to intermediate. Single crochet in continuous rounds is the main technique throughout. Additionally, the bobble stitch paw detail introduces a satisfying new skill that is easy to master with one short practice attempt.
Materials You Will Need
Yarn:
- Himalaya Dolphin Baby in light brown for the head and body
- Himalaya Dolphin Baby in brown for the ears
- Black cotton yarn for embroidered eyes and nose details
Other Supplies:
- Crochet hook — 4.5mm
- Polyfill fiber stuffing
- Sewing needle
- Scissors
Abbreviations
- MR — Magic Ring
- SC — Single Crochet
- INC — Increase (2 sc in same stitch)
- DEC — Decrease (invisible)
- BOBBLE — 5 double crochet in one stitch
- FO — Fasten Off
Pattern: Head and Body
Using light brown yarn throughout
R1: 6 sc in MR (6) R2: 6 inc (12) R3: (sc, inc) x6 (18) R4: (2sc, inc) x6 (24) R5–7: 24 sc for 3 rounds (24)
Face Placement
Add safety eyes or embroider eyes using black cotton yarn between R4 and R5. Embroider the nose between R5 and R6 using the same black cotton yarn. Use pins to mark the exact position of both eyes and the nose before committing to any stitches. The face placement at this stage defines the entire finished expression of the bear.
Head Shaping
R8: 8 sc, 4 dec, 8 sc (20)
R9: 8 sc, 2 dec, 8 sc (18)
R10: 18 sc (18)
Paws and Body
R11: 6 sc, bobble, 4 sc, bobble, 6 sc (18)
The two bobble stitches in R11 form the bear’s front paws. Each bobble is worked as 5 double crochet into one single stitch. They should sit raised and round on the front of the body. Keep your tension relaxed while working each bobble so the finished stitch sits fully rounded rather than flattened.
R12: (2sc, inc) x6 (24)
R13–14: 24 sc for 2 rounds (24)
R15: 8 sc, bobble, 6 sc, bobble, 8 sc (24)
The two bobble stitches in R15 form the bear’s back paws. They are positioned further apart than the front paws and sit lower on the body for a natural four-paw silhouette.
R16: 24 sc (24)
Stuff the bear firmly at this point. Add filling gradually from the head downward and make sure the body feels evenly round before continuing.
R17: 12 Dec (12)
R18: 6 dec (6)
Fasten off and close the hole securely.
Pattern: Ears Make 2
Using brown yarn
R1: 3 sc in MR (3)
Fasten off and leave a long tail for sewing.
Sew each ear between R2 and R3 of the head. Position the ears on the upper sides of the head with equal spacing from the center top. Pin both ears in place simultaneously before sewing either one down to ensure perfect symmetry.
Face Embroidery Details
Eyes
Using black cotton yarn and a fine sewing needle, embroider two small oval or round eye shapes between R4 and R5. Work each eye with 3 to 4 tight horizontal stitches layered over each other. Pull each stitch to the same tension for a clean, symmetrical result.
Nose
Using the same black cotton yarn, embroider a small inverted triangle shape between R5 and R6 at the center of the face. Work 3 to 4 horizontal stitches across the top of the nose and bring a single vertical stitch down from the center to complete the shape. This simple embroidery technique creates the most natural and expressive bear nose imaginable.
Customization and Variation Ideas
- First, use a honey gold chenille yarn instead of light brown for a warm, sun-kissed bear that photographs beautifully against autumn leaves and golden natural settings.
- Additionally, add a tiny crocheted bow between the ears using scrap ribbon yarn. This single detail transforms the finished bear into an instantly giftable boutique piece.
- Moreover, make the bear in cream and white chenille for a polar bear variation. Use the same pattern and simply swap the yarn colors throughout.
- Furthermore, try adding a small crocheted scarf around the neck using a contrasting color. A simple chain of 30 stitches tied in a loose knot creates a charming accessory without any complicated construction.
- Also, experiment with the bobble placement in R11 and R15. Moving the bobbles slightly closer together creates a more cuddled, compact paw position, while spacing them further apart gives the bear a wider, more open stance.
- Finally, make a mother and baby set by working the same pattern in two different yarn weights:s bulky for a large bear and fingering weight for a tiny cub sitting beside it.
Common Mistakes to Avoid
- First, placing the face details too late: The eyes and nose must be embroidered between R4–6 while the head is still fully accessible. Waiting until the body is closed makes precise face placement extremely difficult.
- Additionally, pulling bobble stitches too tight: Each bobble needs relaxed tension to sit fully raised and rounded. A tight bobble flattens against the body and loses its three-dimensional paw appearance.
- Also, skipping the stuffing step before R17: The body must be stuffed firmly at R16 before the closing decreases begin. Waiting until R17 or R18 makes it nearly impossible to add enough filling through the shrinking opening.
- Furthermore, sewing ears one at a time without checking symmetry: Always pin both ears simultaneously and step back to check the placement from directly in front before sewing either one permanently.
- Moreover, using thick yarn for the face embroidery: The black cotton yarn for the eyes and nose should be fine and smooth. Thick or textured yarn creates blurry, imperfect, precise face details that overwhelm the small embroidery area.
- Finally, closing the magic ring too loosely on the ears: The ears are only 3 stitches and need a firmly closed center. A loose ring creates a visible hole at the base of each ear that shows clearly against the head.
Finishing Tips
- First, after closing the body, give the bear a firm overall squeeze and reshape it into a round, even form before the stuffing settles permanently into position.
- Additionally, use a tapestry needle to gently lift any bobble stitches that flattened slightly during the closing rounds. A light outward nudge from behind each stitch restores the full, rounded paw shape.
- Moreover, trim the black embroidery thread tails very close to the surface after knotting. Loose thread tails against chenille yarn are immediately visible and difficult to hide after the fact.
- Furthermore, when sewing on the ears, anchor each one at both the front and back edge of the ear base. A double-anchor attachment prevents the ears from flopping forward or backward with handling.
- Aedess photographs the finished bear in natural settings for the most beautiful results. Soft moss, fallen leaves, rough bark, and dried flowers all create backdrops that complement the warm brown chenille perfectly.
- Finally, weave in every yarn end through at least three direction changes before trimming. Dolphin Baby chenille is fluffy and forgiving, ng but needs proper anchoring to prevent ends from working loose over time.
Gifting Ideas
- First, place the finished bear inside a small kraft paper bag tied with twine and a sprig of dried lavender for a natural, handmade gift presentation that requires almost no extra effort.
- Additionally, pair the bear with a small jar of local honey for a themed gift set that is warm, personal, and completely charming from start to finish.
- Moreover, these bears make wonderful newborn gifts. The soft chenille texture is gentle against delicate skin, and the simple, classic bear shape feels timeless and safe.
- Furthermore, photograph the finished bear in a natural outdoor setting and print the photo as a small card to include with the gift. A beautiful image of the handmade bear in nature makes the whole presentation feel genuinely artistic.
- Also, make a set of three bears in differshades off es light brown, honey, and cream, and present them together on a small wooden tray as a complete bear family collection.
- Finally, these bears sell consistently well at craft markets and handmade shops. The Dolphin Baby chenille texture catches attention immediately and the simple, expressive face makes them irresistible to anyone who sees them displayed.
Conclusion
This soft brow,n crochet bear is one of those patterns that feels completely right from the very first magic ring. The seamless head-to-body construction keeps the rhythm steady and satisfying. Furthermore, the bobble stitch paws add just enough texture to make the finished bear feel genuinely detailed without requiring advanced skills. Therefore, embroider the face carefully, stuff the body firmly, and take your time pinning the ears before sewing. In addition, do not underestimate the power of the natural setting when photographing the finished bear. Chenille yarn glows in soft outdoor light in a way that studio photography simply cannot replicate. In conclusion, this little bear is ready to be made, photographed, and loved completely.