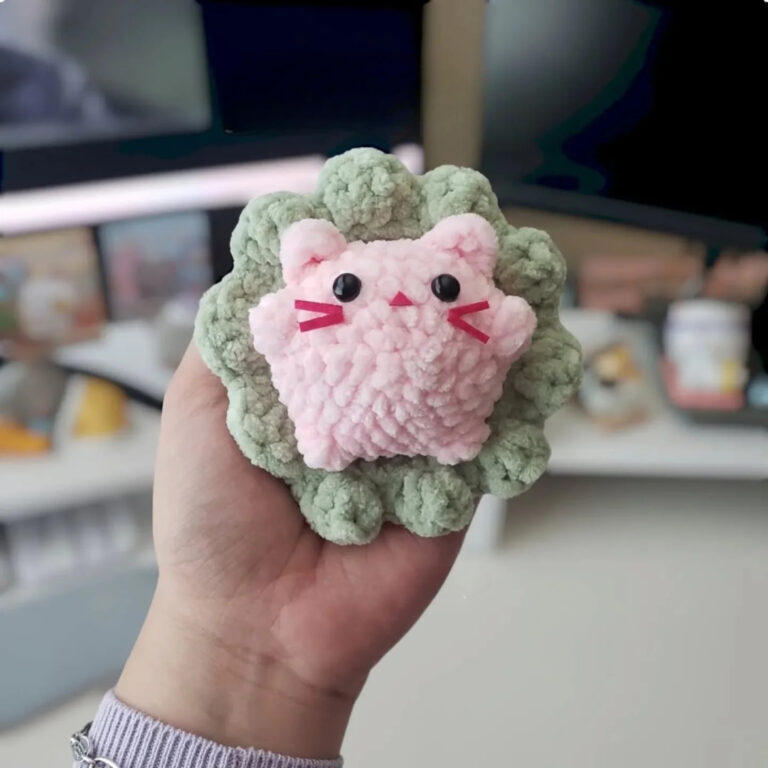
Stunning Crochet Purrfect Paw Print Coaster Amigurumi Pattern
From cuddle-core vibes to coffee-table charm, the Stunning Crochet Purrfect Paw Print Coaster Amigurumi Pattern delivers quick, beginner-bright wins and totally paw-some gift potential.
Celebrate your love for pets and cozy makes with the Stunning Crochet Purrfect Paw Print Coaster Amigurumi Pattern. This playful, beginner-friendly design works up fast, uses minimal yarn, and shines in any color combo. Clear step-by-step guidance, helpful photos, and sizing tips make every paw print crisp and cute, whether you’re crafting a single set or a whole litter.

Mix textures, try scraps, and personalize each pad with your favorite hues. Perfect for weekend projects, last-minute gifting, and adding a whimsical, pet-chic pop to everyday spaces.
- Protect coffee tables and desks under steaming mugs and icy glasses.
- Make heartfelt, pet-lover gifts for birthdays, housewarmings, or thank-yous.
- Stock your craft fair booth with cute, quick bestsellers.
Materials Needed (Exact Measurements)
Before starting, gather the essentials for smooth stitching and tidy results.
- Yarn: 100% cotton, worsted weight (Category 4) for absorbency and shape
- Main pad color: approx. 15–18 g (27–33 m / 30–36 yd)
- Toe-bean contrast color: approx. 8–10 g total (14–18 m / 15–20 yd)
- Hook: 3.5 mm (E-4) for a dense, flat coaster; 4.0 mm (G-6) for a slightly softer fabric
- Stitch marker: 1 (to mark the first stitch of each round)
- Yarn needle (tapestry needle) and scissors
- Optional backing: 8–10 cm (3.25–4 in) felt or cork circle, or thin non-slip shelf liner.
- Fabric glue or sewing needle and matching thread (optional, for backing)
- Keychain ring or split ring (25 mm) if making a bag charm instead of a coaster (optional)
- Safety eyes: not required
- Stuffing: not required
Skill Level
Overall: Beginner / Easy. Because the pattern uses only basic stitches and simple increases, it’s approachable and relaxing from start to finish.
Making Time (Overview)
Typically, one coaster takes 45–70 minutes.
- Main pad: 25–35 minutes
- Toe beans (4): 15–25 minutes total
- Assembly and finishing: 5–10 minutes
Step-by-Step Instructions
Notes:
- US crochet terms are used.
- Stitches: ch (chain), sl st (slip stitch), sc (single crochet), inc (increase = 2 sc in same stitch), BLO (back loop only), optional for a neat ridge.
- For clarity, work in a continuous spiral unless otherwise noted, and move the stitch marker up each round.
Body (Main Pad) — Making time: 25–35 minutes
To begin, create a flat circle that becomes the large paw pad.
- Foundation and growth
- Round 1: Magic ring, 6 sc into ring (6).
- Round 2: inc in each stitch around (12).
- Round 3: (sc 1, inc) repeat around (18).
- Round 4: (sc 2, inc) repeat around (24).
- Round 5: (sc 3, inc) repeat around (30).
- Round 6: (sc 4, inc) repeat around (36).
- Round 7: (sc 5, inc) repeat around (42).
- Round 8: (sc 6, inc) repeat around (48).
- Round 9 (optional, for a slightly larger coaster): (sc 7, inc) repeat around (54).
At this point, the pad should measure about 9–10.5 cm (3.5–4.25 in). If it’s curling, gently steam and flatten; if it’s wavy, tighten the tension or remove the last increase round.
- Edge control and neatness
Next, refine the outline for a polished look.
- Optional ridge: Work one round BLO sc around to form a slim, structured edge.
- For a tidy finish, sl st to the next stitch and fasten off, then weave in the tail securely.
- Optional double-layer pad
If extra thickness is desired, make a second pad. Then, place wrong sides together and sc around through both layers to join, adding 1–3 chains at the top-center to form a hanging loop if preferred. Finally, fasten off and weave in ends.
Additional Parts — Toe Beans (4 pieces) — Making time: 15–25 minutes total
Meanwhile, prepare the toe beans in the contrasting color. For balanced proportions, use two small and two medium beans; however, matching all four beans also works beautifully.
- Small toe bean (make 2):
- Round 1: Magic ring, 6 sc (6).
- Round 2: inc around (12).
- Round 3: (sc 1, inc) repeat around (18).
- Sl st to finish, then fasten off, leaving a 15–20 cm (6–8 in) tail for sewing. Diameter: about 3.5–4 cm (1.4–1.6 in).
- Medium toe bean (make 2):
- Round 1: Magic ring, 6 sc (6).
- Round 2: inc around (12).
- Round 3: (sc 1, inc) around (18).
- Round 4 (optional for slightly larger beans): sc around (18) or (sc 2, inc) around (24) if a bigger size is preferred.
- Sl st to finish, then fasten off,f leaving a 15–20 cm (6–8 in) tail for sewing. Diameter: about 4–4.5 cm (1.6–1.8 in).
Tip: For faster assembly, first make all beans, then arrange and sew them in one sitting.
Heart / Accessories / Details (optional) Making time: 5–10 minutes
If a decorative accent is wanted, add a tiny heart, bow, or loop.
- Simple flat heart applique (into a magic ring):
- Into MR: ch 2, 3 tr, 3 dc, ch 1, 1 tr (point), ch 1, 3 dc, 3 tr, ch 2. Tighten the ring. Then, sl st into the center to close. Fasten off and leave a tail for sewing.
- Tiny bow: First, ch 20; next, tie in the center to form a bow; then, wrap yarn a few times around the middle and secure.
- Hanging loop: When edging the main pad, ch 8 and sl st back into the same stitch to form a neat hanger.
Face & Assembly Making time: 5–10 minutes
Since this is a coaster, facial features aren’t needed; instead, focus on accurate placement and clean seams.
- Plan the layout
First, place the main pad on a flat surface. Next, arrange the four toe beans along the top edge in a gentle arc. The two smaller beans sit at the top corners, while the two medium beans sit just below, slightly overlapping the pad by 2–5 mm for a cohesive silhouette. Then, pin or clip the pieces to prevent shifting. - Sew neatly and invisibly.
After positioning, use the long tails and a yarn needle to whip stitch or mattress stitch around each toe bean, catching only the top loops of both layers for nearly invisible joins. After each bean, weave in the tail and secure with a tiny backstitch before trimming. Consequently, the seams look clean and durable. - Add backing (optional)
Finally, for extra grip or a polished reverse side, sew or glue a felt or cork circle to the back of the pad. Before use, allowthe glue to dry completely and check that the edges align smoothly.
Beginner-friendly tips:
- First, keep stitches snug (not tight) to avoid puckering.
- Next, check alignment from a distance before final stitching.
- Finally, place a small heart applique along the bottom curve, slightly off-center, for a charming accent.
Special Features
Moreover, this pattern balances charm and practicality in several ways:
- Toe-bean definition: Rounded beans create a clear, adorable paw silhouette.
- Flat and functional: Cotton yarn with dense stitches absorbs moisture and softens heat.
- Clean borders: A BLO ridge, crab-stitch, or slip-stitch edging adds structure and polish.
- Durable finish: With neat joins and optional backing, the coaster holds shape through frequent use.
Sizing Tips
To customize fit and function, adjust yarn and hooks thoughtfully.
- Yarn weight:
- If using DK (Category 3) with a 3.0–3.25 mm hook, the coaster becomes smaller—great for espresso cups or key fobs.
- If switching to bulky (Category 5) with a 5.5–6.0 mm hook, the piece scales up into a hot pad or plant mat.
- Hook size:
- A smaller hook yields a tighter fabric that resists curling; therefore, it’s ideal for coasters.
- A larger hook feels softer; however, an extra increase round may be needed to keep the circle flat.
- Toe-bean scale:
- Keep beans proportional to the main pad; otherwise, the paw can look either crowded or faint.
Finishing Tips
To achieve a crisp, professional look, finish with care.
- First, block lightly: Hover steam or pat flat under a damp cloth, and allow to dry completely.
- Next, weave ends twice: Anchor with a tiny backstitch, then weave in another direction for security.
- Then, refine edges: If edges ruffle, adjust the last increase round or add a final slip-stitch round.
- Finally, add non-slip: A few dots of clear fabric paint on the back improve grip without adding bulk.
Common Mistakes to Avoid
Understanding pitfalls upfront prevents frustration.
- Skipping increases: Often, missed increases cause cupping. Therefore, count stitches at the end of each round.
- Loose tension: Too-loose stitches create gaps and reduce absorbency. Instead, choose a slightly smaller hook.
- Uneven toe placement: Before sewing, mark guide points and view from multiple angles to keep symmetry.
- Excess overlap: Because too much overlap reduces usable surface, aim for a slim, readable outline.
- Using acrylic: Since acrylic repels moisture and may curl with heat, cotton remains the practical choice.
Variations & Customization Ideas
For creative sets and seasonal fun, try the following:
- Color play:
- Classic: Cream pad with chocolate beans for a natural look.
- Bold: Black pad with neon beans for high contrast.
- Pastel: Soft pad with candy-colored beans for spring charm.
- Speckles: Variegated pad with solid beans for focus and definition.
- Theme sets:
- Holiday: Red pad with white beans for festive cheer.
- Team colors: School or club hues for spirited gifts.
- Pet-inspired: Match a favorite pet’s fur color for a personalized set.
- Textures:
- For a rope-like edge, try a crab-stitch border.
- For extra plushness, swap sc to hdc on the main pad and adjust increases as needed.
- Sizes:
- Mini paw charms: Stop after Round 7 and attach a key ring.
- Pot holder: Double-layer the pad in thicker yarn, then add a loop for hanging.
- Embellishments:
- Embroider a tiny heart or initials on the pad.
- Add a small bell or wooden tag to the hanging loop for gift-ready flair.
Tutor Suggestions
For smooth progress and confidence from the first stitch to the last, follow these friendly pointers.
- To start, place a stitch marker at the first stitch of every round and move it up; this keeps counts accurate.
- As you work, check flatness early; if curling, add an increase round or steam lightly; if wavy, remove an increase round or tighten tension.
- When preparing to seam, leave 15–20 cm tails on toe beans so stitching is easier and stronger.
- For speed, batch tasks: First make all beans, then assemble several coasters at once. Consequently, consistency improves.
- During blocking, hover steam only,y do not press directly to avoid warping.
- For gifting, tie sets of four with twine and a tag; additionally, include care notes (“Handwash cool, lay flat to dry”) for a professional finish.
- Most importantly, start with high-contrast colors so stitches are easy to see, and alignment stays crisp.
Care Instructions (Quick Guide)
For lasting beauty and shape retention:
- Handwash in cool water with mild detergent.
- Reshape while damp and lay flat to dry.
- Avoid bleach and high heat.
- If backed with cork or felt, spot-clean to preserve the backing.
Estimated Measurements
Typically, with worsted cotton and a 3.5–4.0 mm hook:
- Single-layer coaster: Pad diameter 9–10.5 cm (3.5–4.25 in); overall height with toe beans 11–13 cm (4.25–5.1 in).
- Double-layer coaster: Similar diameter but thicker and more heat protective.
Quick Reference Pattern Summary
In short:
- Main pad: MR 6; increase evenly to 48–54 sc; optional BLO ridge round; finish neatly.
- Toe beans: 2 small to 18 sc; 2 medium to 18–24 sc; sl st and leave tails for sewing.
- Assembly: Arrange beans in an arc; sew with invisible joins; add backing if desired; block flat and weave in ends.
- Optional extras: Tiny heart applique, bow, or hanging loop.
Troubleshooting
If something looks off, adjust promptly for best results.
- If the coaster curls upward like a bowl, check for missed increases; otherwise, try a slightly larger hook next time and steam flat.
- If edges look wavy, there may be too many increases; therefore, remove the last increase round or tighten the tension.
- If toe beans don’t match, recount final stitch totals and measure diameters; then, rematch pairs before sewing.
- If seams show, use color-matched tails and pick up only the top loops on both layers for nearly invisible joins.