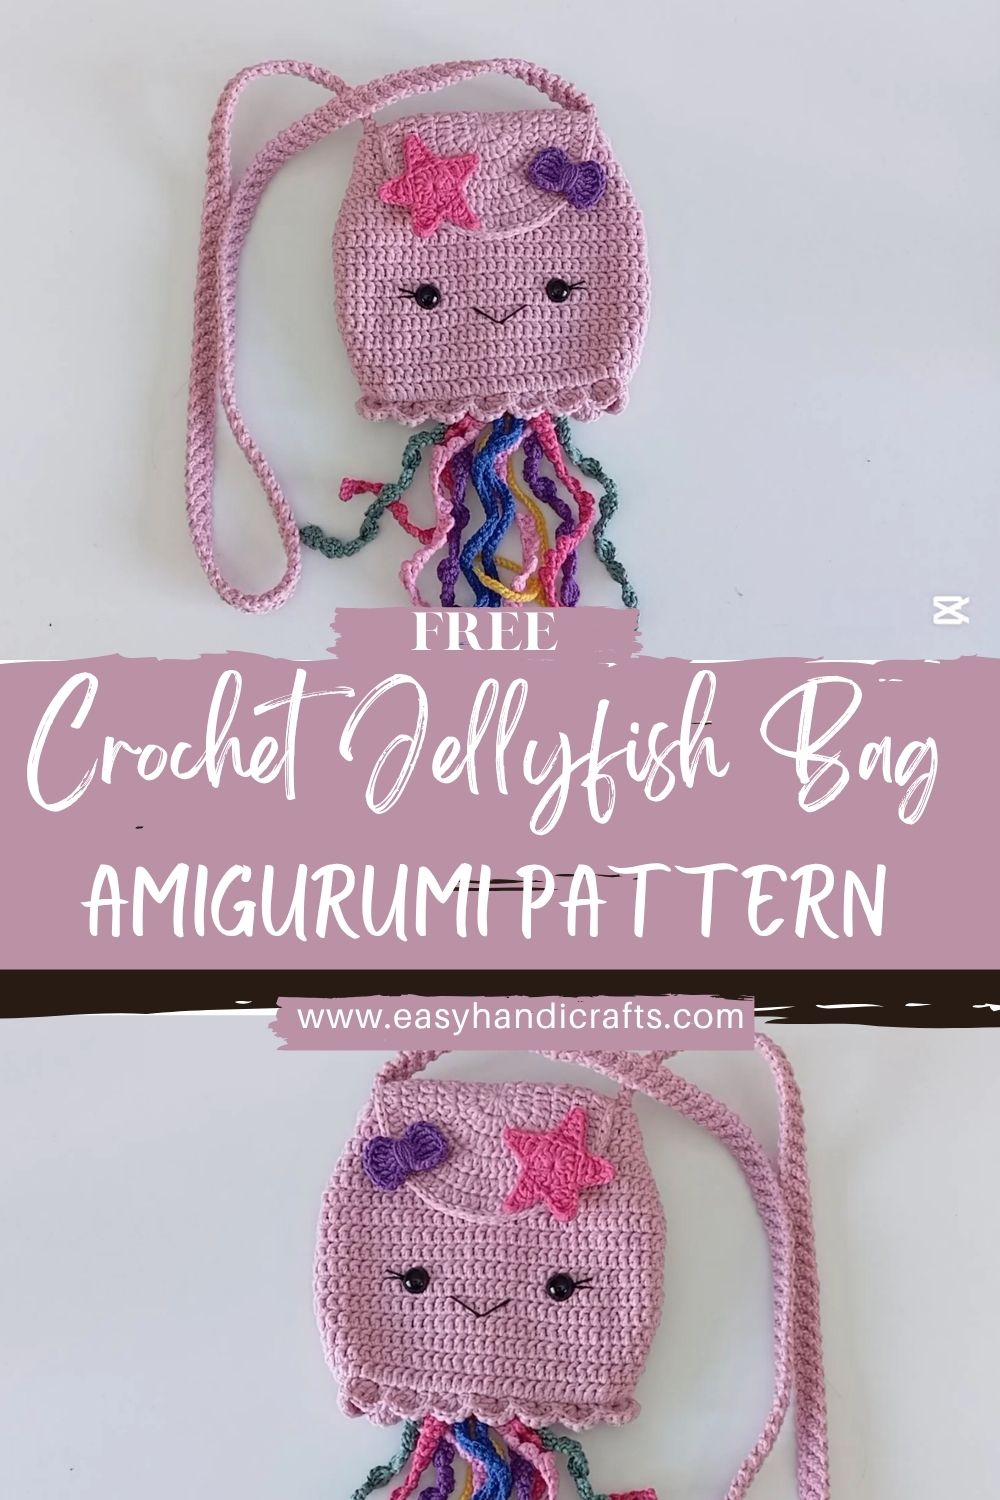
Awesome Cute Crochet Jellyfish Bag Amigurumi Pattern Step‑by‑Step
Looking for a fun and colorful crochet project? This Crochet Jellyfish Bag Amigurumi Pattern is the perfect blend of creativity and practicality! Whether you’re a beginner or a seasoned crocheter, this bag is easy to make and incredibly cute. Follow this step-by-step guide to create your own adorable jellyfish bag.
Crocheting a jellyfish bag is a delightful and rewarding project, especially if you love working with vibrant colors and unique designs. This amigurumi crochet pattern will guide you through making a playful bag that features the characteristic tentacles of a jellyfish and a sweet, smiling face.
Materials List (Checklist)
Yarn (choose a sturdy, smooth yarn for a usable bag):
- Main body color: worsted (4) cotton or cotton‑blend (recommended for structure)
- Contrast color for base/body accents (optional)
- Tentacle colors: 3–6 bright colors (scraps work great)
- Face details: black + pink (or embroidery floss)
Tools & Notions
- Crochet hook: 4.0–5.0 mm for worsted cotton (use smaller for tighter fabric)
- Stitch markers (at least 2)
- Tapestry needle (for sewing and weaving ends)
- Scissors
- Measuring tape
- Safety eyes (8–12 mm) or black yarn/embroidery thread for embroidered eyes
- Optional: fabric lining, magnetic snap/button, small amount of stuffing (only if you want a puffier face)
Abbreviations & Stitch Guide
- ch = chain
- sc = single crochet
- hdc = half double crochet
- dc = double crochet
- sl st = slip stitch
- st(s) = stitch(es)
- inc = increase (2 stitches in the same stitch)
- dec = decrease (single crochet 2 together; invisible decrease recommended)
- BLO = back loop only
- FLO = front loop only
- RS/WS = right side / wrong side
Helpful stitch notes
- For bags, aim for a dense fabric: use tight tension and consider a slightly smaller hook.
- Use a stitch marker to track the start of rounds/rows to keep shaping accurate.
Step‑by‑Step Jellyfish Bag Crochet Pattern
Size note: This pattern is intentionally beginner-flexible. If you want a larger bag, add more increase rounds to the body circle and crochet more height.
Base / Bag Body (Front + Back Panels)
This bag is made from two flat circles (front and back) that are joined together, with tentacles caught in the seam.
A. Crochet the Front Panel (Circle)
- Rnd 1: Make a magic ring, ch 1, 8 sc into the ring. Join with sl st. (8)
- Rnd 2: ch 1, inc in each st around. Join. (16)
- Rnd 3: ch 1, (sc, inc) around. Join. (24)
- Rnd 4: ch 1, (sc 2, inc) around. Join. (32)
- Rnd 5: ch 1, (sc 3, inc) around. Join. (40)
- Rnd 6: ch 1, (sc 4, inc) around. Join. (48)
- Stop here for a smaller bag, or continue increasing:
- Rnd 7: (sc 5, inc) = (56)
- Rnd 8: (sc 6, inc) = (64)
Tip: Your circle should lie flat. If it starts ruffling, reduce increases; if it cups, add an increase evenly.
B. Crochet the Back Panel
Repeat the same rounds as the front panel so they match in size.
C. Add a Clean Edge (Optional but recommended)
On both panels, crochet:
- 1 round of sc evenly around (no increases), joining with sl st.
This makes joining easier and gives a tidy border.
Face Detail (On the Front Panel)
A. Eye Placement
- Find the center of the front circle.
- Place the eyes roughly 1–2 rounds above the center line.
- Keep spacing even—about 6–10 stitches apart, depending on circle size.
Safety eyes option:
- Insert before assembly (easiest now), and secure the backs firmly.
Embroidered eyes option (great for kids’ bags):
- Stitch two small ovals/dots with black yarn or embroidery thread.
B. Smile
- Thread black (or dark) yarn onto a tapestry needle.
- Stitch a small curved smile centered below the eyes.
- Optional: add tiny pink blush stitches on each cheek.
Beginner tip: Lightly mark placement with pins or removable markers before stitching.
Tentacles (Colorful Strands)
You’ll crochet multiple tentacles and attach them along the bottom edge during assembly.
A. Simple Curly Tentacle (Great for beginners)
- With a tentacle color, ch 36–56 (shorter for small bag, longer for dramatic tentacles).
- Work 2 sc in each chain starting in the 2nd ch from the hook (this creates a curl).
- Fasten off, leave a tail if you want to sew it later (optional).
Make 10–18 tentacles in different colors.
B. Textured Tentacle Variation (Twisty look)
- ch 40
- Work (sc, hdc) repeating across the chain, then fasten off.
This adds a less uniform curl and more texture.
Tentacle Tips (Length + Variety)
- Mix lengths (some ch-30, some ch-55) for a playful fringe.
- Repeat a few body colors among brights so the palette looks intentional.
- If the tentacles feel too thick, use a lighter yarn weight for them.
Strap (Sturdy and Comfortable)
Choose a strap style:
Option A: Simple Single Crochet Strap (Durable)
- Ch 140–180 (adjust to desired length: shoulder or crossbody).
- Row 1: sc in 2nd ch from hook and across.
- Row 2: ch 1, turn, sc across.
- Repeat 2–4 rows total (wider strap = more comfort, less stretching).
- Fasten off, leave long tails for sewing.
Option B: Cord Strap (Fast + neat)
- Crochet an I-cord or make a long chain, then reinforce it with a slip-stitch pass-back along the chain.
Strap tip: Cotton yarn and a firm stitch pattern help prevent stretching over time.
Assembly (Join Panels, Add Tentacles + Strap)
A. ArranStrapntacles
- Lay the back panel flat.
- Pin or clip the petals around the lower half of the edge (or all around if you want a full fringe).
- Keep the curls facing outward and the tops aligned with the edge.
B. Join Front and Back Panels
- Place the front panel on top (right sides facing out).
- Using the main body yarn, join with sc around through both panels:
- As you crochet, catch the top of each tentacle between the panels to lock it into the seam.
- Leave an opening at the top wide enough to use as the bag opening.
Stronger seam option: Use sl st to join for a tighter edge, then add one sc edging round.
C. Attach the Strap
- Mark two attachment points on the top left and top right (evenly spaced).
- Sew Strap ends secuStrap
- Stitch through multiple layers, making several passes.
- Weave ends back and forth to lock them in.
D. Finishing Touches
- Weave in all ends securely (especially tentacle tails).
- Optional: add a lining to prevent stretching and keep items from poking through stitches.
- Optional: add a small magnetic snap or button closure at the top.
Tips & Tricks
- Even tension = cleaner circles: If your panels warp, slow down and count stitches each round.
- Use contrasting colors: A pastel body with neon tentacles (or the reverse) makes the jellyfish design pop.
- Personalize it: Add a bow, tiny crochet flower, star appliqués, or embroidered “sparkles” near the eyes.
- Make it more kid-friendly: Embroider eyes instead of using safety eyes, and keep tentacles shorter.
- For a sturdier bag: Use cotton yarn, a smaller hook, and consider adding a simple fabric lining.
Conclusion
You just made a cute, functional accessory from the Jellyfish Bag Crochet Pattern. Well done! Try variations with consistent tactile textures or color themes (pastel kawaii, ocean blues, rainbow brights). If you share your finished crochet jellyfish bag on social media, tag it with your favorite crochet hashtags and show off your color combo. This project is a total conversation starter.