Free Crochet Fluffy Yarn Kodama Amigurumi Pattern
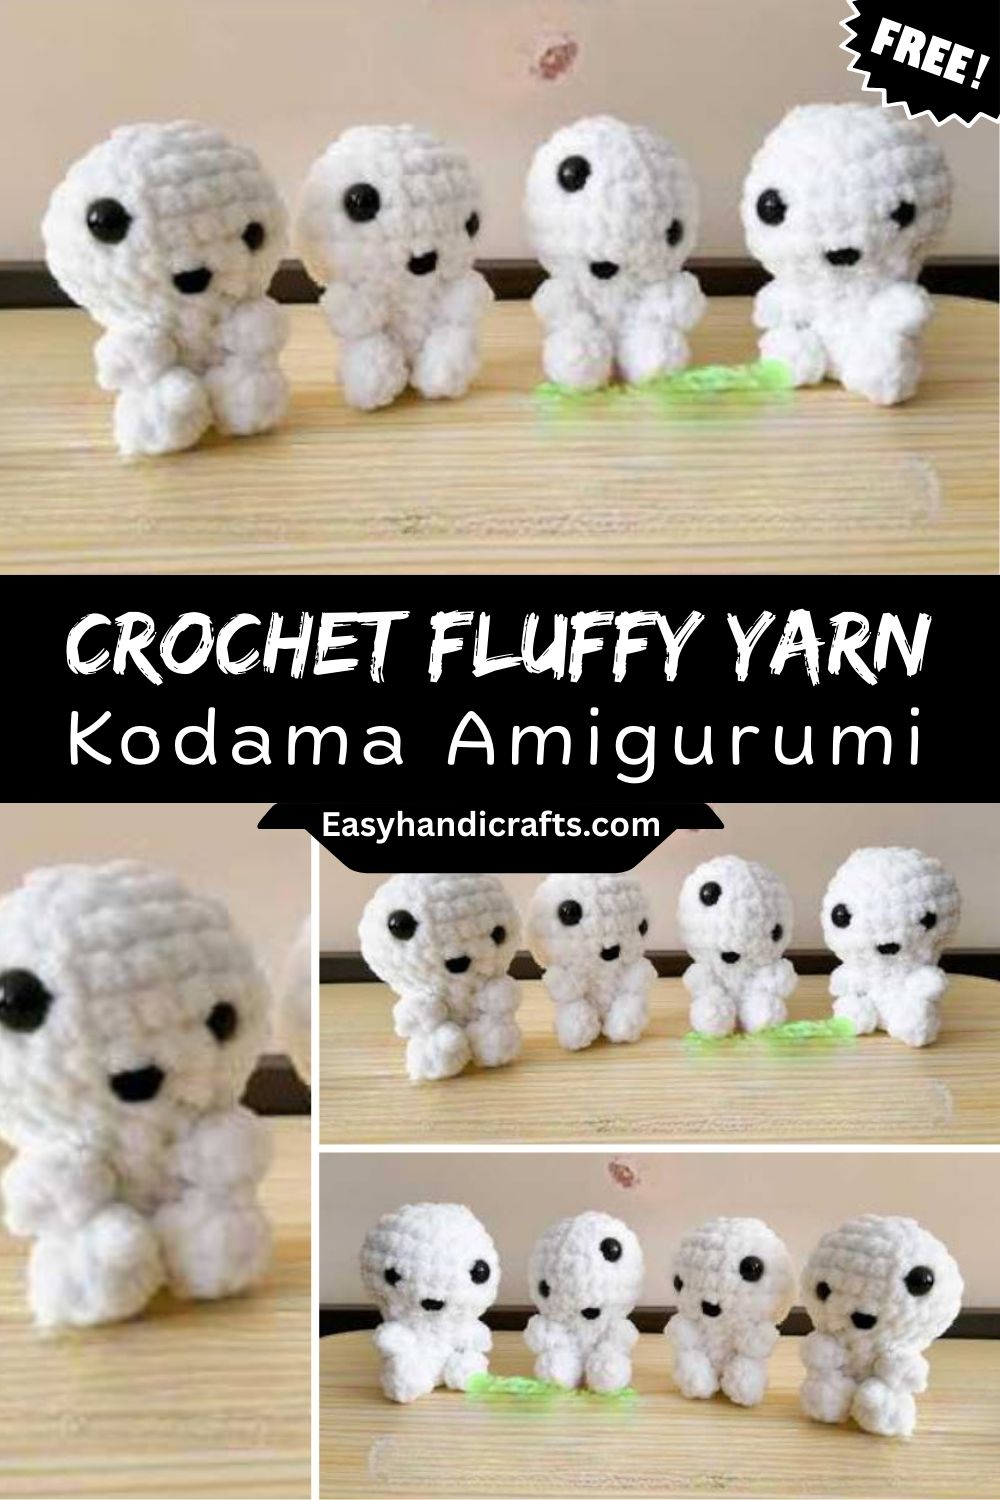
Nothing about this design demands advanced skills. Basic single crochet and simple shaping carry the entire body, so the challenge lies more in managing fluffy yarn than in following complicated stitch patterns. Once the texture cooperates, the shape comes together almost on its own.
Project Details
- Skill Level: Beginner to Beginner-Intermediate
- Finished Size: Approximately 4–5 inches tall
- Estimated Time Required: 2–3 hours
- Recommended Yarn Weight: Bulky or Chunky (fluffy/eyelash yarn blended with a smooth worsted-weight base is ideal)
- Crochet Hook Size: 4.5mm–5mm (adjust based on your yarn thickness)
Materials Needed
- Fluffy or eyelash yarn in white or off-white
- A small amount of smooth worsted-weight yarn in the same color (helps stitches stay visible while working)
- Crochet hook sized to your yarn (4.5mm–5mm recommended)
- Small black safety eyes or embroidery thread for the face
- Fiberfill stuffing
- Tapestry needle
- Stitch markers
- Scissors
- Optional: light brown or black yarn scraps for tiny facial markings
Crochet Stitches & Techniques
- Magic Ring
- Single Crochet (sc)
- Increase (inc)
- Invisible Decrease (dec)
- Fastening Off
- Sewing Pieces Together
Fluffy yarn hides stitch definition, so a few of the more advanced amigurumi techniques aren’t necessary here; simplicity is part of the charm.
Pattern Instructions
Creating the Main Piece
Start with a magic ring and work 6 single crochets into it, then pull the ring closed and place a stitch marker at the start of each round fluffy yarn makes stitches hard to count, so this step saves real frustration later.
Round 2: increase in every stitch (12 sts) Round 3: sc 1, inc 1 repeat around (18 sts) Round 4: sc 2, inc 1 repeat around (24 sts) Round 5: sc 3, inc 1 repeat around (30 sts) Rounds 6–12: sc around without increasing (30 sts each round)
Working several rounds even keeps the body from looking lopsided, so take it slow through this stretch and check the shape periodically against a flat surface.
Shaping the Head and Body Taper
Begin decreasing gradually once the body reaches its desired height, since a soft, tapered top mimics the rounded, slightly uneven shape found in nature.
Round 13: sc 3, dec 1 repeat around (24 sts) Round 14: sc 2, dec 1 repeat around (18 sts)
Stuff firmly at this point, packing the fiberfill evenly so no lumps or hollow spots form.
Round 15: sc 1, dec 1 repeat around (12 sts) Round 16: dec around (6 sts)
Fasten off, leaving a long tail for closing the opening and weaving in later.
Facial Features
Small safety eyes, placed close together near the upper-middle portion of the face, give the piece its quiet, watchful expression. Embroidered dots or short stitches work just as well for crafters who prefer a no-hardware approach, especially useful if the amigurumi is intended for a young child.
A tiny embroidered mouth just two or three short stitches adds personality without overpowering the simple design. Restraint matters here; too much detail competes with the fluffy texture instead of complementing it.
Final Assembly
Weave in all loose ends securely, tucking them deep into the stuffing so nothing pokes through the fluffy surface later. Brush the yarn lightly with a soft-bristled pet brush or a toothbrush if it needs extra volume, since fluffy yarn sometimes flattens during stitching and benefits from a gentle fluff-up at the end.
Tips for Success
- Keep stitch markers on every round; fluffy texture buries stitch definition almost completely.
- Work stitches a touch tighter than usual, since loose stitches let stuffing peek through the fuzzy strands.
- Stuff in small amounts gradually rather than one large handful, which prevents uneven bulges.
- Trim any unusually long fluffy strands after finishing to keep the silhouette tidy.
- A pair of small, sharp scissors makes trimming stray fibers much easier than standard craft scissors.
Personalization Ideas
Pale green or moss-toned yarn creates a mossier, more woodland-camouflaged version, while a soft gray gives an eerie, moonlit feel perfect for autumn decor. Adding a tiny embroidered leaf or acorn to the head introduces a playful seasonal touch without altering the base pattern.
Mini versions made with fingering-weight fluffy yarn turn beautifully into keychains or ornaments, and a jumbo edition worked in super bulky yarn makes a cuddly plush ideal for gifting. Swapping the expression wide eyes, sleepy eyes, or a small curved smile — lets each one feel like its own individual character.
Common Mistakes to Avoid
Rushing through stitch counting ranks among the most common pitfalls, since fluffy yarn conceals mistakes until several rounds later. Skipping stitch markers compounds this problem quickly, so resist the urge to skip them even on familiar rounds.
Overstuffing can distort the gentle, rounded taper this design relies on, while understuffing leaves the piece looking soft and shapeless rather than firm and huggable. Aim for a balance where the shape holds firmly but still feels plush to the touch.
Placing safety eyes too far apart is another frequent misstep; keeping them close together preserves the sweet, slightly otherworldly expression that defines this design.
Frequently Asked Questions
Can I use regular yarn instead of fluffy yarn?
Smooth yarn works fine structurally, though the finished piece loses much of its signature soft, cloud-like texture.
Why is my Crochet Fluffy Yarn Kodama hard to work with?
Fluffy strands obscure stitch definition, so working under brighter light and using stitch markers on every round makes the process far more manageable.
What size hook works best for eyelash yarn?
A hook one size larger than the yarn label suggests often produces cleaner, more even stitches with fluffy fibers.
Do I need safety eyes, or can I embroider the face instead?
Either option works well; embroidery is safer for very young children, while safety eyes give a slightly more polished, defined look.
How much yarn do I need for one Crochet Fluffy Yarn Kodama?
A single small skein of fluffy yarn (around 50 grams) typically completes one full-sized figure with yarn to spare.
Can this pattern be scaled up or down?
Yes adjusting hook size and yarn weight easily produces mini or jumbo versions without changing the stitch counts significantly.
How do I keep the fluffy texture from flattening while I work?
Handling the yarn gently and brushing the finished piece lightly at the end restores volume that stitching tends to compress.
Conclusion
Stitching this fluffy forest spirit offers a relaxing way to practice basic amigurumi shaping while working with a fun, textural yarn that feels different from typical smooth-yarn projects. Give the pattern a try, experiment with color and expression, and don’t hesitate to share a photo of your finished Kodama; seeing everyone’s unique take on this little woodland charmer is always the best part.