Precious Crochet Easter Basket Pepe Chick Amigurumi Pattern
Hop into spring with our Precious Crochet Easter Basket Pepe Chick Amigurumi Pattern, an adorable, beginner-friendly make. Whip up a cheerful chick and mini basket in pastel hues, perfect for festive decor, egg hunts, and sweet handmade gifts.
Celebrate spring with the Precious Crochet Easter Basket Pepe Chick Amigurumi Pattern, a charming, beginner-friendly make that stitches up fast and shines in pastel hues. With clear steps and simple shaping, this petite chick and mini basket are perfect for mindful making and quick gifts.

Customize colors, add bows or tiny flowers, and scale the size for adorable sets. Whether you’re decorating a brunch table or filling treat bags, this cheerful duo brings seasonal joy and handmade warmth.
- Easter decor
- Egg-hunt prizes
- Gift toppers
Precious Crochet Easter Basket Pepe Chick Amigurumi Pattern
Welcome spring with a smile and stitch up the sweetest duo: the Precious Crochet Easter Basket Pepe Chick Amigurumi Pattern. Moreover, this beginner-friendly make is quick, cheerful, and wonderfully customizable. Additionally, the tiny chick nestles inside a pastel basket, which makes it perfect for decor, egg hunts, and gifting. Consequently, you’ll enjoy clear, simple rounds, helpful timing for each step, and gentle tips that keep your stitches neat. Furthermore, you can personalize colors, add a bow, or tuck in mini eggs for extra charm. Finally, let’s gather your tools, wind your yarn, and begin.
What you’ll make
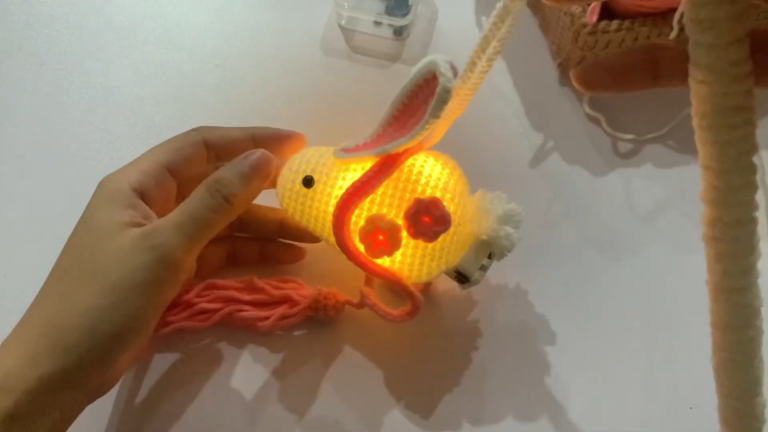
- A palm-sized Pepe Chick with a cute beak, wings, and a little top tuft.
- A petite Easter basket with a sturdy base, tidy sides, and a comfy handle.
Skill level
- Beginner to confident beginner. Additionally, the pattern uses basic stitches and works mostly in continuous rounds.
Estimated total time
- 3 to 4 hours, depending on experience and pace. Moreover, each step includes a time estimate so you can plan your session.
Materials and exact measurements
- Yarn (DK/Light-3, cotton or cotton-blend recommended for stitch definition):
- Chick main color (yellow): approximately 25 g (≈70–80 m / 75–88 yd).
- Beak/feet (orange): approximately 5 g (≈15–18 m / 16–20 yd).
- Tuft/bow/accent (any color): scraps (≈2–3 g).
- Basket color (pastel pink, lilac, mint, or beige): approximately 20 g (≈55–65 m / 60–70 yd).
- Optional “grass” insert (green): approximately 5–8 g.
- Hook: 2.75 mm (US C/2). Alternatively, use 3.0 mm if you crochet tightly. Additionally, choose a hook that gives you a firm fabric with no stuffing showing.
- Safety eyes: 6 mm round (1 pair). Alternatively, embroider eyes for babies under 3.
- Stuffing: Polyester fiberfill, roughly a handful (≈15–20 g).
- Tapestry needle: Size 16 or 18 for sewing pieces and weaving ends.
- Stitch markers: 1–2 locking markers.
- Scissors: Small, sharp pair.
- Optional felt and fabric glue: Orange felt for flat feet if preferred.
- Measuring tape: To confirm finished size and basket diameter.
Finished size (approximate)
- Chick: 8–9 cm tall x 6–7 cm wide (3.25–3.5 in x 2.5–2.75 in).
- Basket: 6–7 cm diameter x 4.5–5 cm tall without handle (2.5–2.75 in x 1.75–2 in).
- Handle height adds ≈3–4 cm (≈1.25–1.5 in).
Gauge
- Not strictly critical for amigurumi. However, aim for a tight fabric:
- 16–18 sc x 18–20 rows = 5 cm x 5 cm (2 in x 2 in) with 2.75 mm hook in the round.
- If stuffing peeks through, switch to a smaller hook. Conversely, if the fabric feels too stiff, switch up 0.25 mm.
Abbreviations (US terms)
- MR = Magic ring
- ch = chain
- sc = single crochet
- hdc = half double crochet
- dc = double crochet
- inc = increase (2 sc in the same stitch)
- dec = invisible decrease (sc 2 sts together through front loops)
- sl st = slip stitch
- BLO = back loop only
- FLO = front loop only
- st(s) = stitch(es)
- rep = repeat
- FO = fasten off
Before you start
Firstly, read through the entire pattern once to understand the flow. Secondly, gather all materials so you can crochet without stopping. Thirdly, place a stitch marker in the first stitch of each round to avoid losing count. Additionally, stuff in small pinches to avoid lumps. Moreover, keep your tension even for a smooth look. Finally, secure safety eyes firmly and embroider eyes if gifting to a baby.
Pattern Overview and Order
- Pepe Chick: Head–Body (one piece), Wings (2), Beak, Feet (2), Tuft on top.
- Easter Basket: Base, Side Wall, Rim/Edging, Handle, Optional Grass/Bow/Eggs.
- Assembly: Sew features, attach wings/feet, secure handle, and style.
Pepe Chick — Head and Body (one piece)
Time: 60–75 minutes
- R1: MR, 6 sc into ring (6). Additionally, tighten the ring firmly.
- R2: inc around (12).
- R3: (sc, inc) x6 (18).
- R4: (2 sc, inc) x6 (24).
- R5: (3 sc, inc) x6 (30).
- R6–R7: sc around (30). Moreover, keep your stitch marker moving each round.
- Place safety eyes: Between R6 and R7, 6–7 sts apart. Additionally, test spacing before locking washers.
- R8: (3 sc, dec) x6 (24). Consequently, this shapes a gentle head curve.
- R9: (2 sc, dec) x6 (18). Additionally, lightly stuff the head so it holds its shape.
- R10: (2 sc, inc) x6 (24). Moreover, this starts widening into the body.
- R11: (3 sc, inc) x6 (30).
- R12–R14: sc around (30). Additionally, stuff the body gradually for smooth firmness.
- R15: (3 sc, dec) x6 (24).
- R16: (2 sc, dec) x6 (18).
- R17: (sc, dec) x6 (12).
- R18: dec x6 (6). Finally, FO and close the opening neatly. Additionally, weave in the end.
Tip: If you prefer a rounder belly, add one more plain round at 30 sts before decreasing. Conversely, if you want a smaller chick, stop increases at 24 sts and adjust the length by one fewer plain round.
Chick Wings (make 2)
Time: 15–20 minutes total
- R1: MR, 6 sc (6).
- R2: (inc, sc) x3 (9).
- R3: sc around (9).
- R4: sc around (9). Additionally, slightly flatten as you go.
- Flatten the wing and sl st across the top edge to close. Finally, FO with a long tail for sewing.
Placement: Position each wing at approximately R11–R13 on the body sides. Additionally, pin before sewing to check symmetry.
Chick Beak
Time: 5–7 minutes
Option A (rounded beak):
- R1: MR, 4 sc (4).
- R2: sc around (4).
- FO with tail. Additionally, pinch gently into a tiny cone and stitch under the eyes centered between them.
Option B (flat triangle beak):
- ch 3, sc in 2nd ch from hook, hdc in next ch, FO with tail. Moreover, shape into a tiny triangle and sew between the eyes.
Tip: For extra definition, add one tiny stitch line across the beak’s midpoint in matching orange. Additionally, avoid overstuffing a tiny beak if using Option A.
Chick Feet (make 2)
Time: 20–25 minutes total
Beginner Option (flat felt feet):
- Cut two small foot shapes from orange felt (about 1.5 cm wide). Additionally, glue carefully or stitch on for security.
Crochet Option (simple feet with picot toes):
- R1: MR, 6 sc (6).
- R2: (inc, sc) x3 (9).
- Flatten the piece. Then, [ch 3, sl st in next st] x3 to form three tiny toes across the edge. Finally, FO with a tail and sew at the bottom front of the body.
Tip: Position the feet so the chick balances inside the basket. Additionally, use small stitches and secure knots hidden under the body.
Chick Top Tuft
Time: 5 minutes
- Attach accent yarn to the very top center. Then, ch 5, sl st back to base, ch 4, sl st back, ch 3, sl st back to base for a three-sprig tuft. Finally, FO and weave ends inside.
Alternative: Create a mini pom or embroider a small heart on the belly instead. Additionally, you can add a tiny bow under the beak for a sweet touch.
Easter Basket — Base
Time: 20–25 minutes
- R1: MR, 6 sc (6).
- R2: inc around (12).
- R3: (sc, inc) x6 (18).
- R4: (2 sc, inc) x6 (24).
- R5: (3 sc, inc) x6 (30).
Size check: The base should measure approximately 6–7 cm in diameter. Additionally, stop at 24 sts for a smaller basket or add R6: (4 sc, inc) x6 (36) for a larger basket. Finally, keep your circle flat by counting carefully and placing increases evenly.
Easter Basket — Side Wall
Time: 30–35 minutes
- R6: BLO sc around (same stitch count as your final base round). Additionally, this BLO round creates a crisp turn for the wall.
- R7–R10: sc around. Moreover, keep even tension so the sides stand up nicely.
Optional shaping: If the wall flares outward, switch to a smaller hook for the final wall round. Conversely, if the wall pulls inward, relax your tension or switch up 0.25 mm.
Easter Basket — Rim/Edging
Time: 8–10 minutes
Option A (crab stitch/Reverse sc):
- Work 1 round of reverse sc around the top for a sturdy, decorative rim. Additionally, keep movements slow and even for consistency.
Option B (simple finish):
- Work 1 round of sc FLO for a subtle ridge, then sl st to finish. Finally, FO and weave in the end inside the wall.
Easter Basket — Handle
Time: 8–12 minutes
- Attach yarn to the inside of the rim at one side point. Then, ch 28 (or length needed for your desired arch). Next, sc in 2nd ch from hook and across (27 sc). Finally, attach the handle to the opposite rim point with sl sts or by sewing both ends securely.
Structural tip: For extra strength, work the handle in BLO only or add a second strap and stitch them together. Additionally, block the handle lightly with steam (no touching acrylic directly) to reduce twist.
Optional Grass Insert
Time: 10–15 minutes
- With green yarn, ch 18 (or the inner circumference minus 1–2 cm). Then, hdc in 2nd ch from hook and across. Next, turn, and work a decorative top: [sl st, ch 3, sl st in next st] to create little “blades.” Finally, place the strip into the basket like a ring and tack with a couple of stitches.
Alternative: Work a small circle in green (R1–R3 of the base) and add tiny picots around the edge. Additionally, a fabric scrap works if you prefer a no-crochet liner.
Optional Mini Eggs (make 1–3)
Time: 15–20 minutes total
- R1: MR, 6 sc (6).
- R2: (sc, inc) x3 (9).
- R3: (2 sc, inc) x3 (12).
- R4–R5: sc around (12).
- R6: (sc, dec) x4 (8). Additionally, lightly stuff.
- R7: dec x4 (4). Finally, FO and close. Moreover, embroider tiny speckles with contrasting yarn.
Assembly and Finishing
Time: 20–30 minutes
- Pin wings to the chick’s sides at R11–R13. Then, sew with small, neat stitches. Additionally, tug gently to sink them into the body for a seamless look.
- Center the beak between the eyes and stitch securely. Moreover, add a single vertical stitch under the beak for a “smile,” if desired.
- Attach feet to the bottom front so the chick sits securely. Additionally, test placement inside the basket before final knots.
- Place the tuft on top and weave ends inside. Furthermore, hide all yarn tails within the body.
- Set the chick inside the basket. Then, adjust the handle arch and tighten anchor stitches if needed. Finally, add ga rass insert and mini eggs or a bow for extra charm.
Safety note: For children under 3, replace safety eyes with embroidered eyes and secure every seam thoroughly. Additionally, avoid small detachable parts.
Basic tips for success
- Count consistently. Moreover, place a marker and move it each round to prevent drift.
- Stuff gradually. Additionally, use small pinches of fiberfill for an even finish and a round, cuddly shape.
- Keep tension tight. Consequently, the stuffing won’t peek through, and the chick holdsits shape nicely.
- Use invisible decrease. Furthermore, sc2tog through front loops gives smooth shaping without bumps.
- Steam-block lightly. Additionally, shape the basket rim and handle carefully to set curves (avoid direct heat on acrylic).
Common mistakes and easy fixes
- Uneven circle or a wavy base: You may be adding extra or missing increases. Therefore, recount each round and ensure the increase pattern repeats correctly. Additionally, use a flat surface to check.
- Gaps between stitches: The hook might be too large. Consequently, switch down 0.25–0.5 mm and maintain even tension. Moreover, avoid overstuffing early.
- Lopsided eyes: The insertion points may be off by a stitch. Therefore, always pin eyes first and measure the spacing. Additionally, lock washers only after you love the placement.
- Basket sides leaning: Tension could be inconsistent. Consequently, slow down and keep your hands relaxed. Additionally, add one more plain round or a crab-stitch rim for firmness.
- Visible color changes: Sew pieces instead of switching colors mid-round for accents. Alternatively, use a faux seam by surface slip-stitching a detail after the fact.
Variations and customizations
- Color play: Use speckled yarn for the chick or try pastel gradients for the basket. Additionally, add stripes to the basket wall by changing color on R8–R9.
- Accessories: Tie a tiny bow at the chick’s neck (ch 16, hdc back, wrap center). Furthermore, embroider a tiny flower on the basket with lazy-daisy stitches.
- Size changes: For a miniature set, stop basket at 24 sts and chick body at 24 max rounds. Conversely, for a bigger set, add one more increase round to both and extend plain rounds equally.
- Texture options: Work the basket wall in BLO for a crisp ridge or alternate BLO/FLO every other round for a subtle rib. Additionally, replace the rim with picots for a frilly edge.
- Baby-safe version: Embroider eyes, skip small eggs, and sew the handle ends thoroughly with multiple passes. Moreover, consider stitching the chick to the basket for a one-piece toy.
Care and gifting
- Hand wash gently in cool water with mild detergent. Additionally, reshape while damp and air-dry flat.
- Pack as an Easter brunch favor, teacher gift, desk buddy, or craft-fair mini. Moreover, wrap in a cellophane bag with paper grass and a tag for instant presentation.
Quick troubleshooting FAQ for (Crochet Easter Chick Amigurumi)
- My magic ring loosens: Wrap the tail twice before tightening, or start with ch 2 and work into the first chain as a secure alternative. Additionally, weave the tail back through the first round to lock it.
- The handle twists: Work the handle as a short I-cord (3 sc tube) for extra structure. Alternatively, make two flat straps and whip-stitch them together for a firm band.
- The chick tilts: Reposition feet slightly forward and add a pinch more stuffing at the bottom front. Additionally, nestle it into the grass insert for stability.
Step-by-step timeline (at a glance)
- Chick head–body: 60–75 min
- Wings (2): 15–20 min
- Beak: 5–7 min
- Feet (2): 20–25 min
- Top tuft: 5 min
- Basket base: 20–25 min
- Basket side wall: 30–35 min
- Basket rim/edging: 8–10 min
- Handle: 8–12 min
- Optional grass/eggs/bow: 15–30 min
- Assembly and finishing: 20–30 min
Final notes and call to action for (Crochet Easter Chick Amigurumi)
You did it, your Precious Crochet Easter Basket Pepe Chick Amigurumi is ready to brighten the season. Moreover, you can make a whole rainbow of baskets and cheerful chicks for gifting, decorating, and selling at craft fairs. Additionally, remember to note your hook size and stitch counts for your next set so your collection stays consistent.