Luxurious Cute Crochet Duck Keychain Easy Beginner Amigurumi Pattern
If you love crochet amigurumi, you’re going to adore this duck keychain. It’s small, quick, and beginner‑friendly perfect for practicing simple shaping while making something you can clip onto your bag, keys, or backpack. This tutorial uses basic amigurumi crochet stitches and includes cute details like a tiny beak and sweet little wings.
This crochet duck keychain amigurumi project is designed for beginners who want a fun, low‑stress make that still looks polished and gift‑worthy.
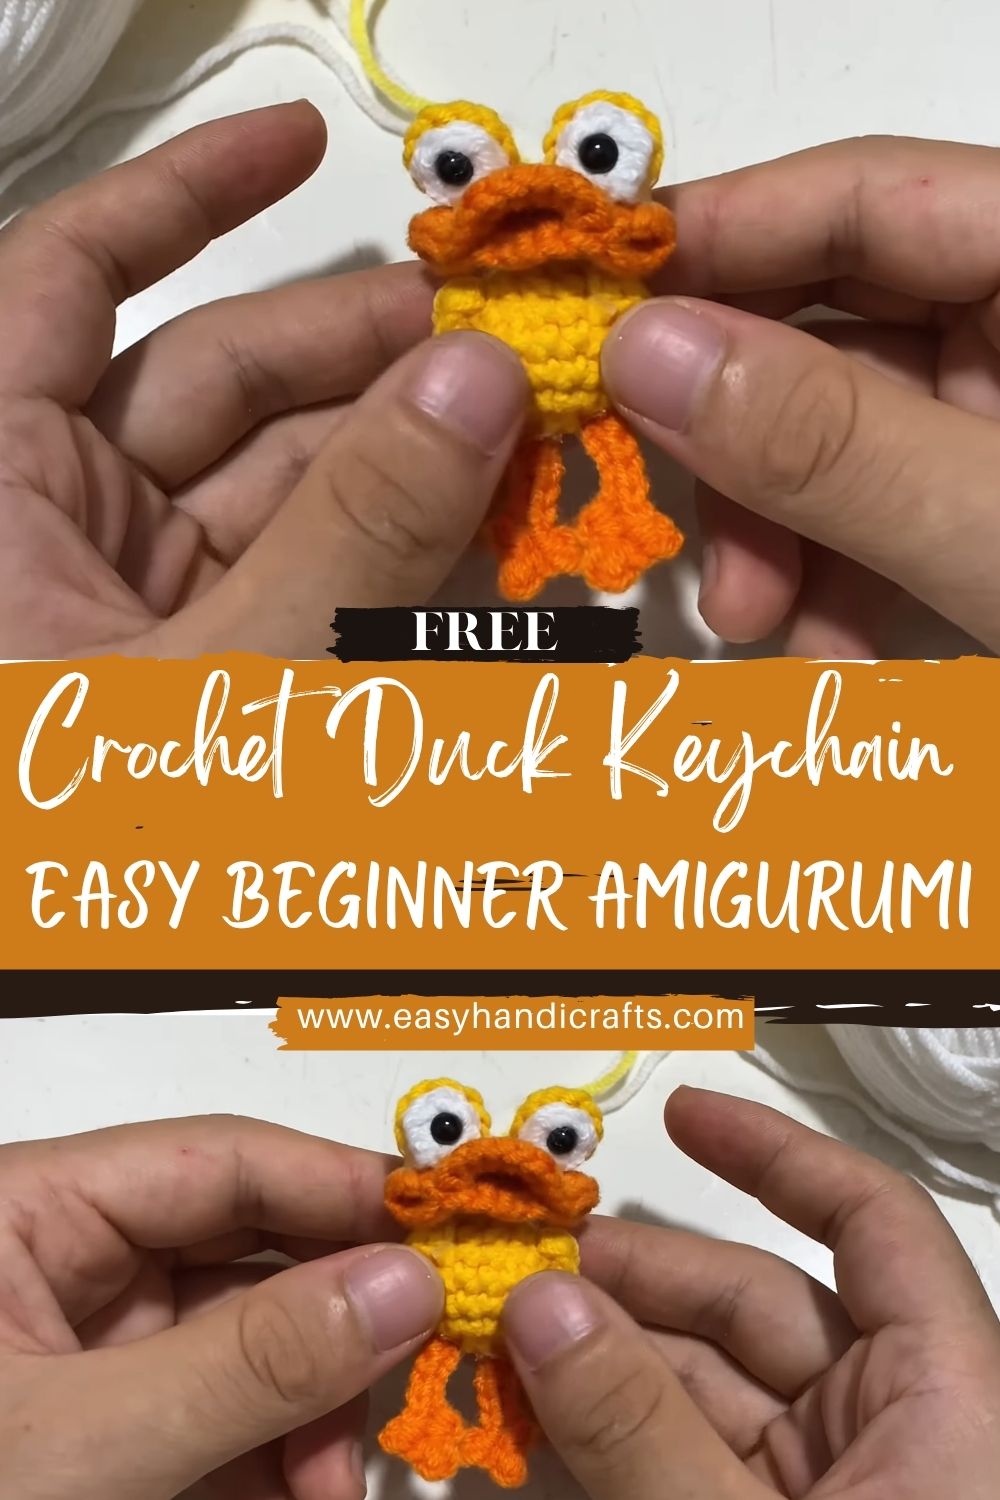
You’ll learn how to crochet a neat ball shape for the body, add easy mini pieces (beak, wings, legs), and assemble everything with clean, secure stitching. By the end, you’ll have a sturdy, adorable amigurumi keychain that’s perfect for gifts, craft fairs, or just cheering up your everyday essentials.
Materials Needed (Exact Measurements)
- Yarn (Type & Weight): Worsted / Aran (Medium, #4) acrylic or cotton
- Body color (yellow): ~20 g / 35–40 m
- Beak (orange): ~3 g / 5–6 m
- Optional accents (white/black): ~2 g
- Hook Size: 3.5 mm (tight fabric for amigurumi)
- Safety Eyes: 6 mm (1 pair)
Optional: 8 mm for a more “baby duck” look - Stuffing: Polyester fiberfill ~10–15 g
- Stitch Marker: 1 (or a scrap of yarn)
- Needle: Yarn/tapestry needle
- Keychain Ring: 25–30 mm split ring (or lobster clasp keychain)
- Optional: Small jump ring or a short chain for extra hanging length
Skill Level
Beginner / Easy (must know: single crochet, increase, decrease)
Making Time (Overview)
About 60–90 minutes total, depending on your speed and how neatly you sew.
Step‑by‑Step Instructions
Crochet Notes (Beginner Friendly)
- Work in continuous rounds (no joining), unless noted.
- Use a stitch marker to mark the first stitch of each round.
- Abbreviations:
- MR = Magic Ring
- sc = single crochet
- inc = 2 sc in the same stitch
- dec = invisible decrease (recommended)
- sl st = slip stitch
Body (Main Piece)
Making time: ~25–35 minutes
Step 1: Start the round base (smooth and sturdy)
- R1: MR, 6 sc (6)
- R2: inc x6 (12)
- R3: (sc, inc) x6 (18)
- R4: (2 sc, inc) x6 (24)
Tip: Keep your tension snug. This helps stuffing stay hidden.
Step 2 — Build the belly shape (easy “chubby duck” look)
- R5: (3 sc, inc) x6 (30)
- R6: (4 sc, inc) x6 (36)
- R7–R10: sc around (36)
This creates that classic rounded amigurumi body without making it too large for a keychain.
Step 3 — Decrease and close (stuff as you go)
- R11: (4 sc, dec) x6 (30)
- R12: (3 sc, dec) x6 (24)
- R13: (2 sc, dec) x6 (18)
- R14: (sc, dec) x6 (12)
Stuff firmly now (don’t overstuff—aim for bouncy, not stretched).
- R15: dec x6 (6)
Fasten off, leave a long tail, and sew the hole closed.
Additional Parts
Beak (Small + Cute)
Making time: ~5–8 minutes
With orange yarn:
- R1: MR, 4 sc (4)
- R2: (sc, inc) x2 (6)
- R3: sc around (6)
Fasten off, leave a tail for sewing. Lightly stuff (or leave unstuffed for a flatter beak).
Shape tip: Pin it first; most ducks look cutest with the beak sitting slightly low on the face.
Wings (Make 2)
Making time: ~8–12 minutes total
With yellow yarn:
- R1: MR, 6 sc (6)
- R2: (sc, inc) x3 (9)
- R3: sc around (9)
Fasten off, leave a tail for sewing. Don’t stuff.
Optional: Flatten and stitch the opening closed for a neat “leaf” shape.
Legs/Feet (Make 2)
Making time: ~8–10 minutes total
With orange yarn:
- R1: MR, 6 sc (6)
- R2: sc around (6)
Fasten off, leave a sewing tail. Lightly stuff (optional) or keep flat.
Beginner note: Tiny parts can be fiddly, but flat feet still look adorable and are easier to attach.
Eyes (Safety Eyes Placement)
Making time: ~2 minutes
- Insert 6 mm safety eyes between Rounds 8 and 9 of the body (counting from the top).
- Space them about 6–7 stitches apart.
Safety tip: If this is for a child under 3, skip safety eyes and embroider eyes with black yarn instead.
Face & Assembly (Pastel, Beginner‑Friendly)
Making time: ~20–30 minutes
- Find the “front.”
Place the body so the decreases look like the bottom/back. The neatest area becomes the face. - Attach the beak.
Sew the beak centered 1–2 rounds below the eyes.
Take small stitches around the edge, then gently tug to shape it slightly outward. - Sew on the wings.
Place wings on the sides, slightly toward the back (this helps the duck look “hug‑able”).
Stitch them on around the outer edge. - Attach the feet.
Sew feet to the bottom front area. A slightly wide stance makes it look stable and extra cute. - Add a tiny expression (optional but charming).
With black embroidery thread or thin yarn, add a small curved stitch for a smile under the beak, or tiny “cheek” stitches with pink. - Add the keychain ring.
Easiest method: pull the yarn through the top of the head/body, form a tight, reinforced loop, and attach the split ring.
Even sturdier: stitch a small hanging loop (chain 8–12, then slip stitch back) and sew it firmly to the top.
Special Features (Why This Duck Looks Extra Cute)
- Chubby, round body that holds its shape nicely
- Tiny beak + wide‑set eyes for a sweet, friendly expression
- Simple wings and feet that add personality without complicated shaping
- Keychain‑ready size, quick, giftable, and fun to make in batches
Sizing Tips (Hook Size + Yarn Choice)
- Smaller hook (3.0–3.25 mm): tighter stitches, slightly smaller duck, firmer finish
- Larger hook (4.0 mm): larger duck, but stitches may loosen, and stuffing could show
- Cotton yarn: crisp stitch definition, sturdy keychain
- Acrylic yarn: softer look, slightly puffier body
If you change the yarn weight while keeping the same stitch count, your duck will simply scale up or down.
Finishing Tips (Neat + Secure)
- Use invisible decreases for smoother shaping.
- Stuff in small pieces and push stuffing into curves (especially near the face).
- Weave in ends by running the yarn tail through several stitches, then trimming.
- For a keychain, reinforce the hanger area with extra passes of yarn. This is the part that gets tugged most.
Common Mistakes to Avoid (Beginner Friendly)
- Loose tension: creates gaps where stuffing shows
Fix: go down a hook size or tighten your grip slightly. - Eyes placed too high: can make the face look surprised
Fix: place eyes around the midline (Rounds 8–9 is a sweet spot). - Not pinning parts before sewing leads to crooked beaks/wings
Fix: Use pins or stitch markers to hold placement first. - Weak keychain attachment: may tear over time
Fix: stitch the loop firmly and reinforce with multiple passes.
Variations & Customization Ideas
- Color swaps: white duck with yellow beak, pastel pink duck, or a “rubber duck” bright yellow
- Accessories: tiny scarf, mini bow, little bucket hat
- Themes:
- Bee duck (add black stripes)
- Sleepy duck (embroidered closed eyes)
- Spring duck (tiny flower on the head)
Tutor Suggestions
- Practice invisible decrease on a small swatch first; it makes amigurumi look instantly cleaner.
- Keep a simple round counter (paper or phone) so you don’t lose your place.
- Make two ducks at once if you can; your second one always turns out even neater.
Conclusion
You just made a sweet little crochet duck keychain amigurumi, and that’s something to be proud of—especially if you’re a beginner. Take your time with the sewing, trust the process, and remember: tiny handmade quirks are part of what makes amigurumi feel so lovable. If you try a new color or add a cute accessory, your duck will instantly become its own little character.