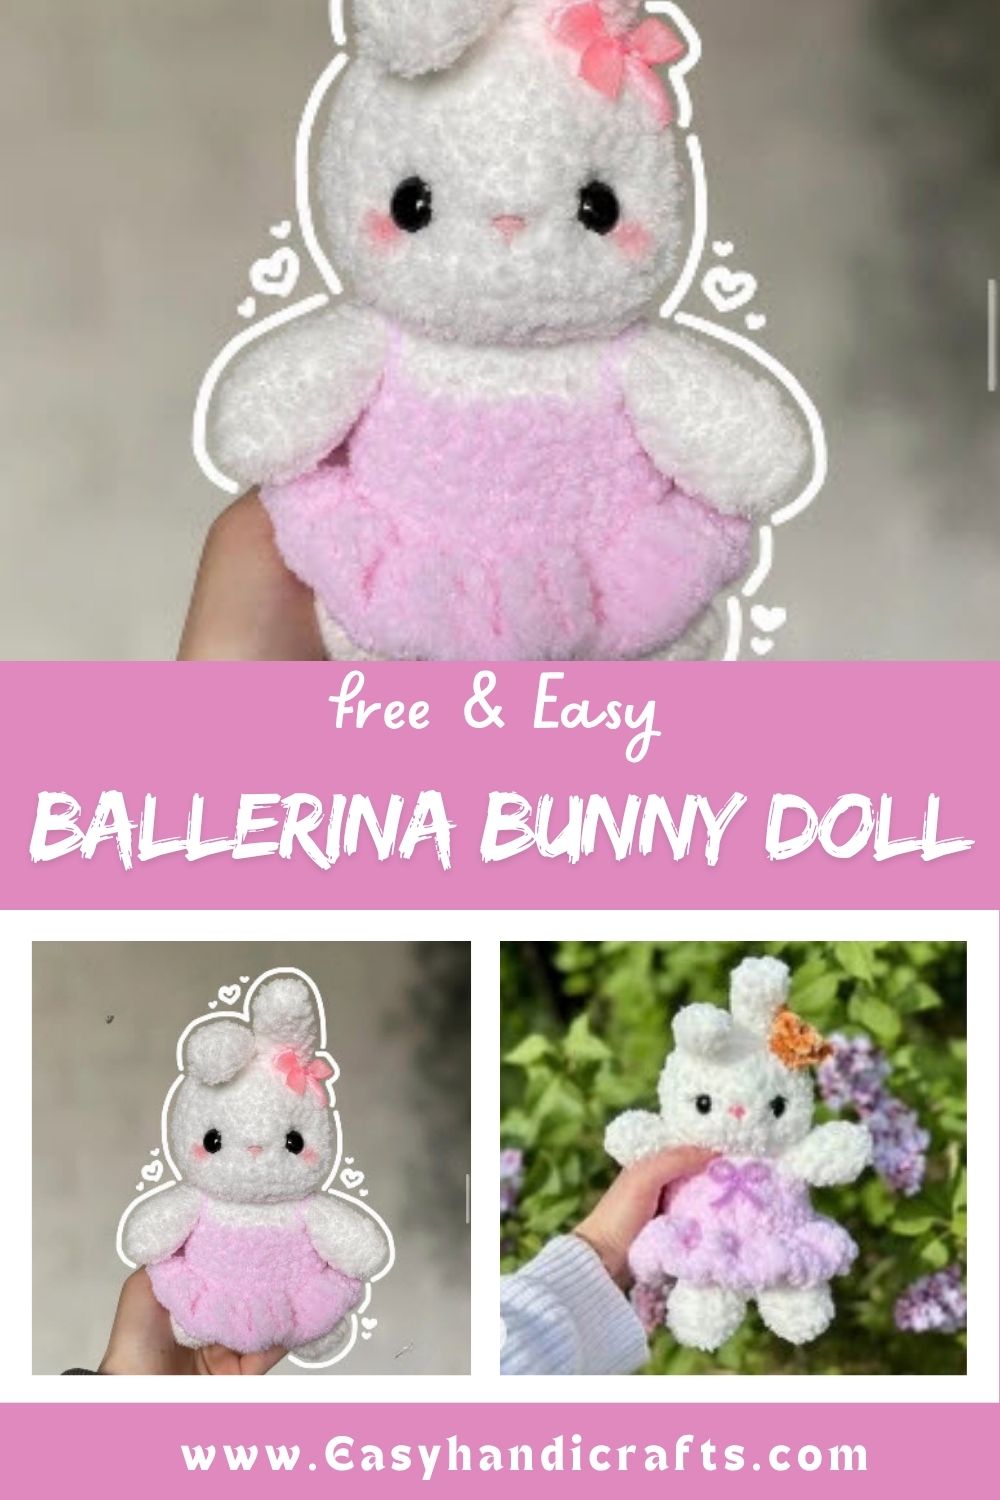
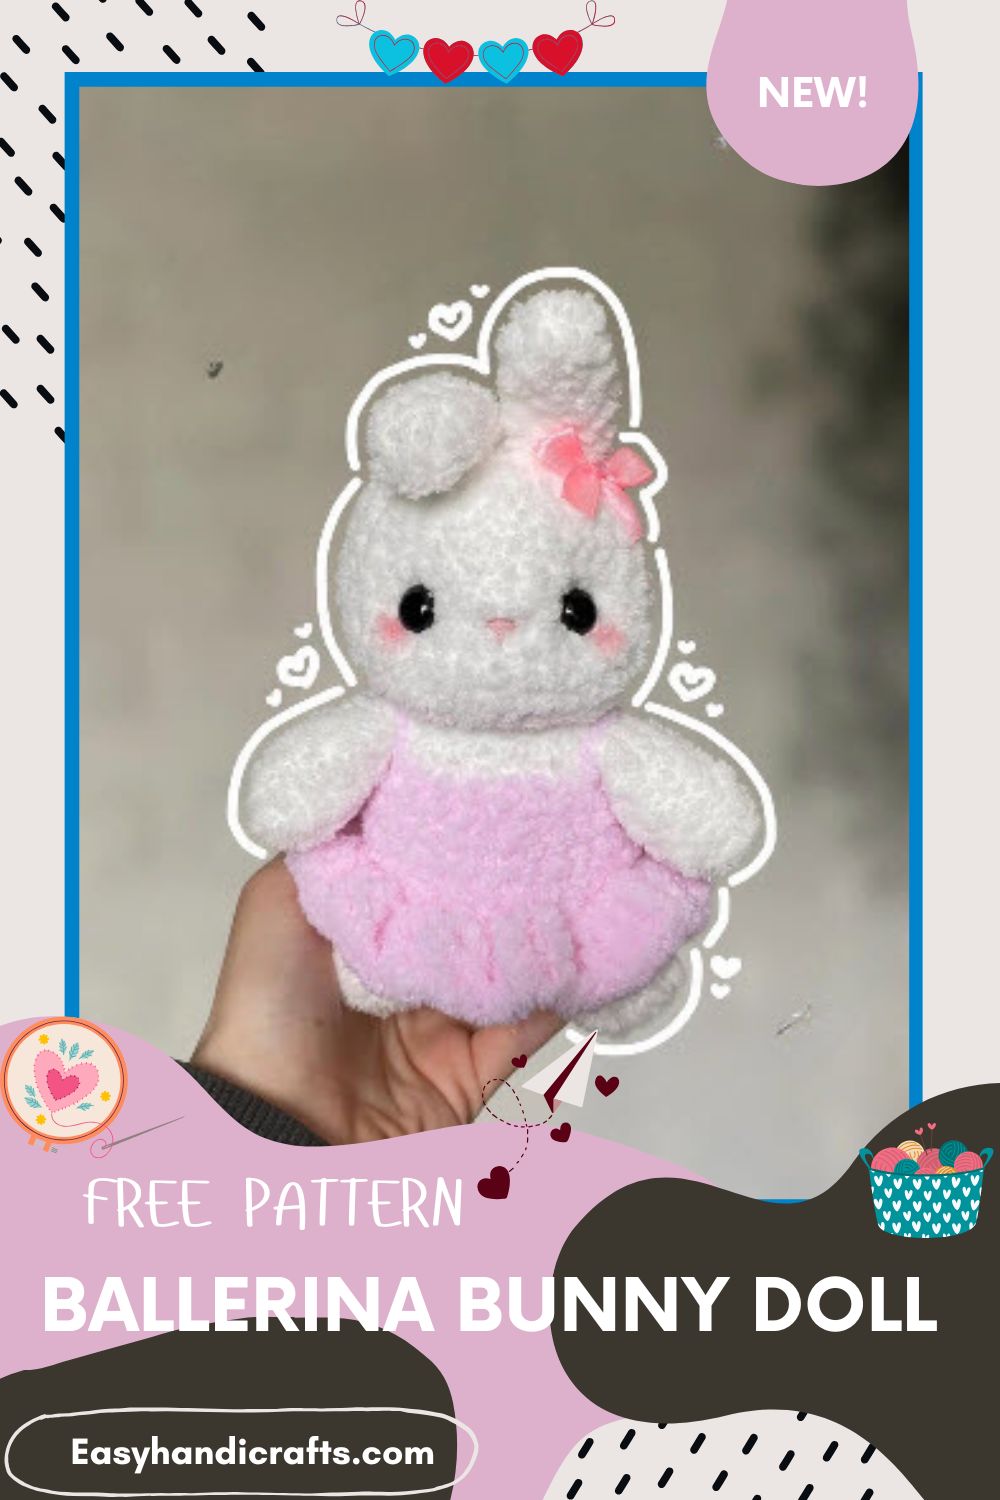
Easy Crochet Chubby Ballerina Bunny Doll Amigurumi Pattern
Honestly, this Crochet Chubby Ballerina Bunny might be the cutest amigurumi you make all year. She rocks a sweet tutu skirt and tiny dress straps. Grab your hook and yarn, and let’s bring this little dancer to life together.
This crochet ballerina bunny doll pattern combines a round, huggable body with a delicate tutu skirt for extra charm. Trust me, the tutu detail looks way harder than it actually is. You’ll work the body, arms, tail, ears, and legs separately, then assemble everything into one adorable plushie. Safety eyes and optional eye shaping give her a soft, expressive face. This pattern suits crocheters who enjoy amigurumi projects with a little added flair, and the finished bunny makes a lovely handmade gift or nursery decoration.
Skill Level
This pattern fits intermediate crocheters comfortable with magic rings, increases, decreases, and front/back loop stitches. Beginners with amigurumi experience can manage it too. The tutu and eye shaping steps need a bit of patience and steady hands.
Pattern Overview
This Crochet Chubby Ballerina Bunny amigurumi comes together in several small pieces before final assembly. Here’s what you’ll crochet:
- Body-Head – worked in one continuous piece with a color change for the dress section
- Arms – two small pieces attached during the body rounds
- Legs – two stuffed pieces sewn on after the body is done
- Ears – two long, unstuffed pieces for a floppy bunny look
- Tail – a lightly stuffed round pom sewn to the bottom
- Tutu – a treble crochet skirt worked directly into the body
- Straps – simple yarn loops that mimic a dress strap
Each part uses basic amigurumi stitches, so no fancy techniques are required beyond the ones listed below.
Special Techniques
- Magic Ring (Mr) – creates a tight, hole-free start for round pieces like the head, arms, and ears.
- BLO/FLO (Back/Front Loop Only) – shifts stitch texture to define the dress and tutu attachment line. Skipping this step changes the whole silhouette.
- Color Change (CC) – switches yarn color mid-round without leaving a visible jog, used to separate the body from the dress.
- Eye Shaping – an optional needle-sculpting technique that pulls the safety eyes into a rounder, cuter shape using extra yarn strands.
- Attaching Limbs Mid-Round – arms get crocheted directly into the body rounds instead of sewn on later, which saves time and keeps them secure.
Materials
- Crochet hook (4.5mm used)
- Yarn needle
- Stitch marker
- Scissors
- Safety eyes (12mm used)
- Fiberfill stuffing
- 2 colors of yarn (Alize Softy Plus used, but any worsted-weight yarn works)
- Pink acrylic yarn for embroidering the nose
- White acrylic yarn for eye shaping
Abbreviations
- R – round/row
- Mr – magic ring
- sc – single crochet
- inc – increase
- dec – decrease
- tr – treble crochet
- sl st – slip stitch
- FO – fasten off
- CC – color change
- (…) x? – repeat a given amount of times
- (…) – work in the same stitch
Pattern Instructions
Arms (make first)
R1: Mr6 (6) R2: (sc, inc) x3 (9) R3-5: sc around (9) (3 rounds) Stuff very lightly or do not stuff. R6: (2sc, dec) x2, sc (7) R7: sc around (7) Fold the top flat and make 3sc through both sides. FO, no need to leave a tail, since the arms attach directly to the body.
Note: This Crochet Chubby Ballerina Bunny pattern works in continuous rounds.
Tail
R1: Mr6 (6) R2: (2sc, inc) x2 (8) R3: sc around (8) R4: (2sc, dec) x2 (6) Stuff lightly. Sl st, FO, and leave a long tail for sewing.
Body-Head
Start with the body color. R1: Mr6 (6) R2: 6inc (12) R3: (sc, inc) x6 (18) R4: (2sc, inc) x6 (24) R5: (3sc, inc) x6 (30) R6-8: sc around (30) (3 rounds) CC to dress color R9: BLO: sc around (30) R10-11: sc around (30) (2 rounds) R12: (4sc, dec) x5 (25) R13: sc around (25) CC to body color R14: sc around (25) R15: 3sc, dec, 3sc with arm, dec, 3sc, dec, sc, 2sc with arm, dec with arm, 3sc, dec (20) R16: (sc, dec) x6, 2sc (14) Stuff the body firmly. R17: FLO: inc x14 (28) R18: (3sc, inc) x7 (35) R19-20: sc around (35) (2 rounds)
Note: You might need to adjust arm placement depending on your tension. Keep the color changes on the back of the plushie.
Body-Head Continued
R21: 13sc, 2dec, 4sc, 2dec, 10sc (31) Place safety eyes between rounds 20 and 21, about 5 or 6 stitches apart. Start stuffing the head. R22-24: sc around (31) (3 rounds) R25: (sc, dec) x10, sc (21) R26: 10dec, sc (11) Finish stuffing the head. Sl st, FO, and close the hole. Embroider a nose between the eyes, one row lower.
Shaping the Eyes (Optional)
Skip this step if you’re happy with the default look.
- Insert the needle at the bottom center of the head, then bring it out at the inner bottom corner of the right eye (front view).
- Insert the needle at the outer top corner of the same eye, then bring it out at the top corner of the left eye.
- Insert the needle at the inner bottom corner of that eye, then bring it back out at the bottom center of the head, at the original entry point.
- Direct the yarn into the inner sides of the eyes before pulling the strands.
- Gently pull both strands at the bottom of the head to shape the eyes, tie a knot, cut the ends, and hide the tail inside the plushie.
Ears (make two)
R1: Mr6 (6) R2-8: sc around (6) (7 rounds) Sl st and FO, leaving a long tail for sewing. Do not stuff.
Note: For thicker ears, add 1-2 extra sc into the magic ring.
Legs (make two)
R1: Mr8 (8) R2: (3sc, inc) x2 (10) R3-5: sc around (10) (3 rounds) Sl st and FO, leaving a long tail for sewing. Stuff firmly.
Tutu
Hold the bunny upside down with the back facing you. Insert the hook into the first FLO of R9, ch3, and make 2tr in each stitch around (60). Sl st to the first tr of the round and FO. Weave in the ends.
Straps for the Dress
Take a strand of dress-colored yarn and insert the needle at the top side of the dress, then bring it out at the same point on the back to form a loop around the arm. Secure the ends with a knot and hide them inside the body. Repeat on the other side.
Assembly
- Sew the ears to the top center of the head, right next to each other. Position one ear flat and the other upright for a playful look.
- Sew the legs to the body between R3-7, spacing them about 4 stitches apart. Avoid sewing directly on the FLO stitches.
- Sew the tail to the center of the bunny’s bottom, between rounds 3-6.
- Attach the straps last, once the tutu and body pieces are fully secure.
Common Mistakes
- Skipping the BLO/FLO instructions, which flattens the dress detail and throws off the tutu attachment.
- Overstuffing the arms, which makes them too stiff to fold flat for attaching.
- Placing safety eyes too early, before confirming spacing between rounds 20 and 21.
- Rushing the eye-shaping step, which can pull the arm unevenly and distort the face.
- Sewing legs directly onto the FLO stitches instead of the rows below them.
Important Remarks
- Safety eyes contain small, detachable parts, so this plushie isn’t suitable for children under three.
- Yarn tension varies between crocheters, so arm and leg placement may need slight adjustments.
- The eye-shaping step is fully optional and doesn’t affect the bunny’s structure.
- Any worsted-weight yarn works fine as a substitute for Alize Softy Plus.
- Stuff the head and body firmly for a rounder, more polished shape.
Conclusion
This Crochet Chubby Ballerina Bunny brings together simple amigurumi shapes and one standout tutu detail. Once you finish the assembly, low-key, she becomes an instant favorite on any shelf. Try swapping the dress color for a personalized twist, and enjoy your new handmade companion.