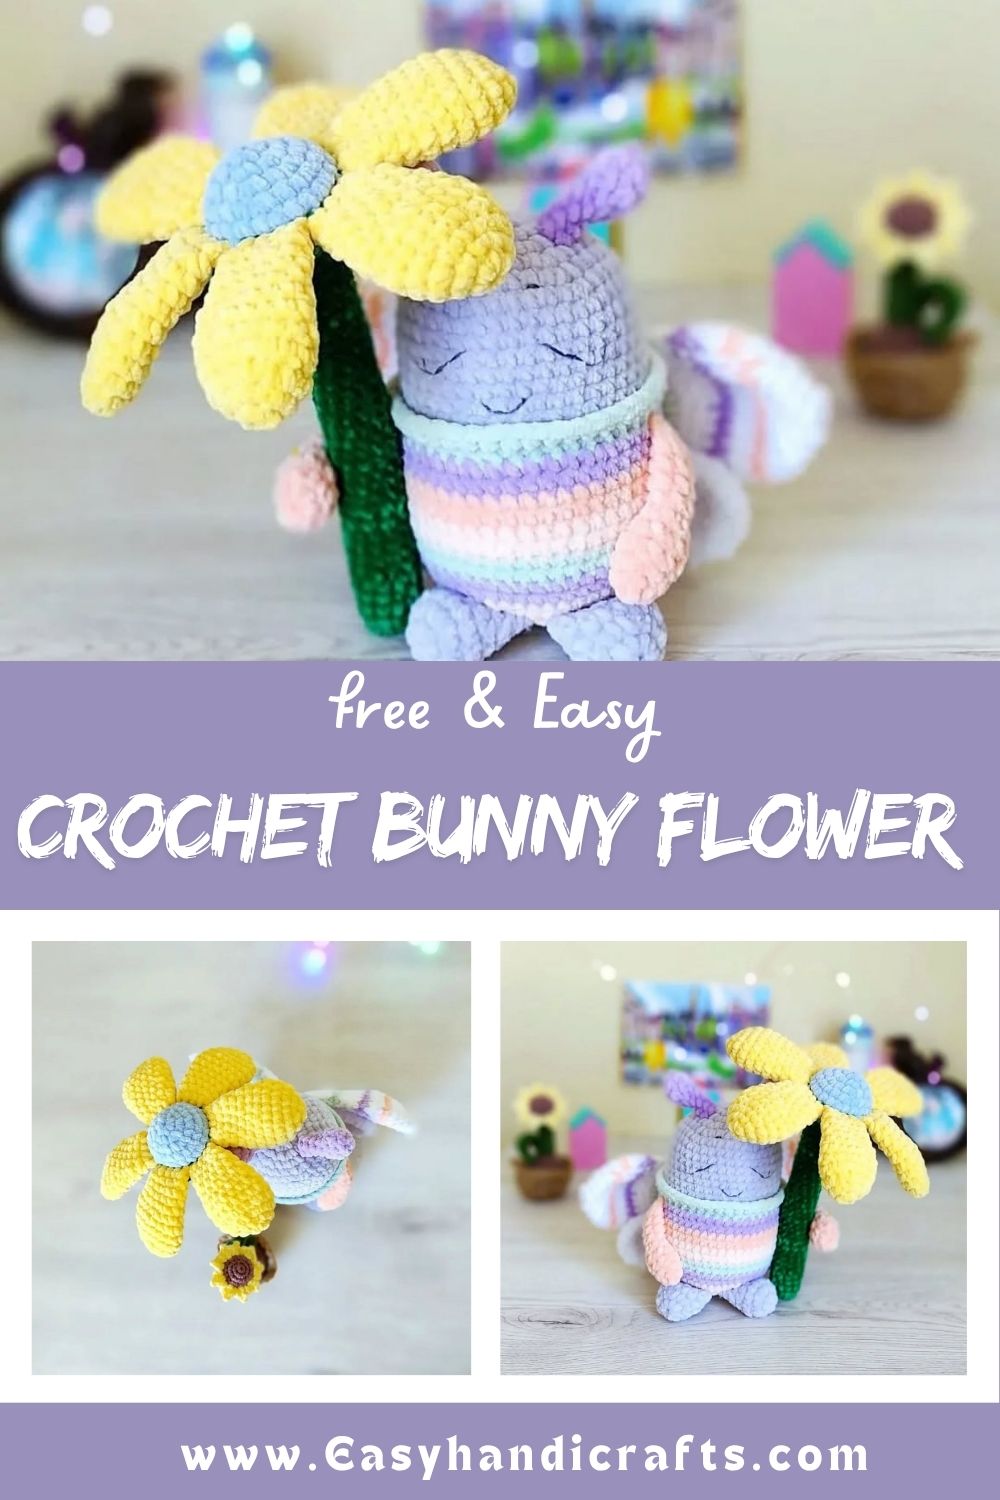
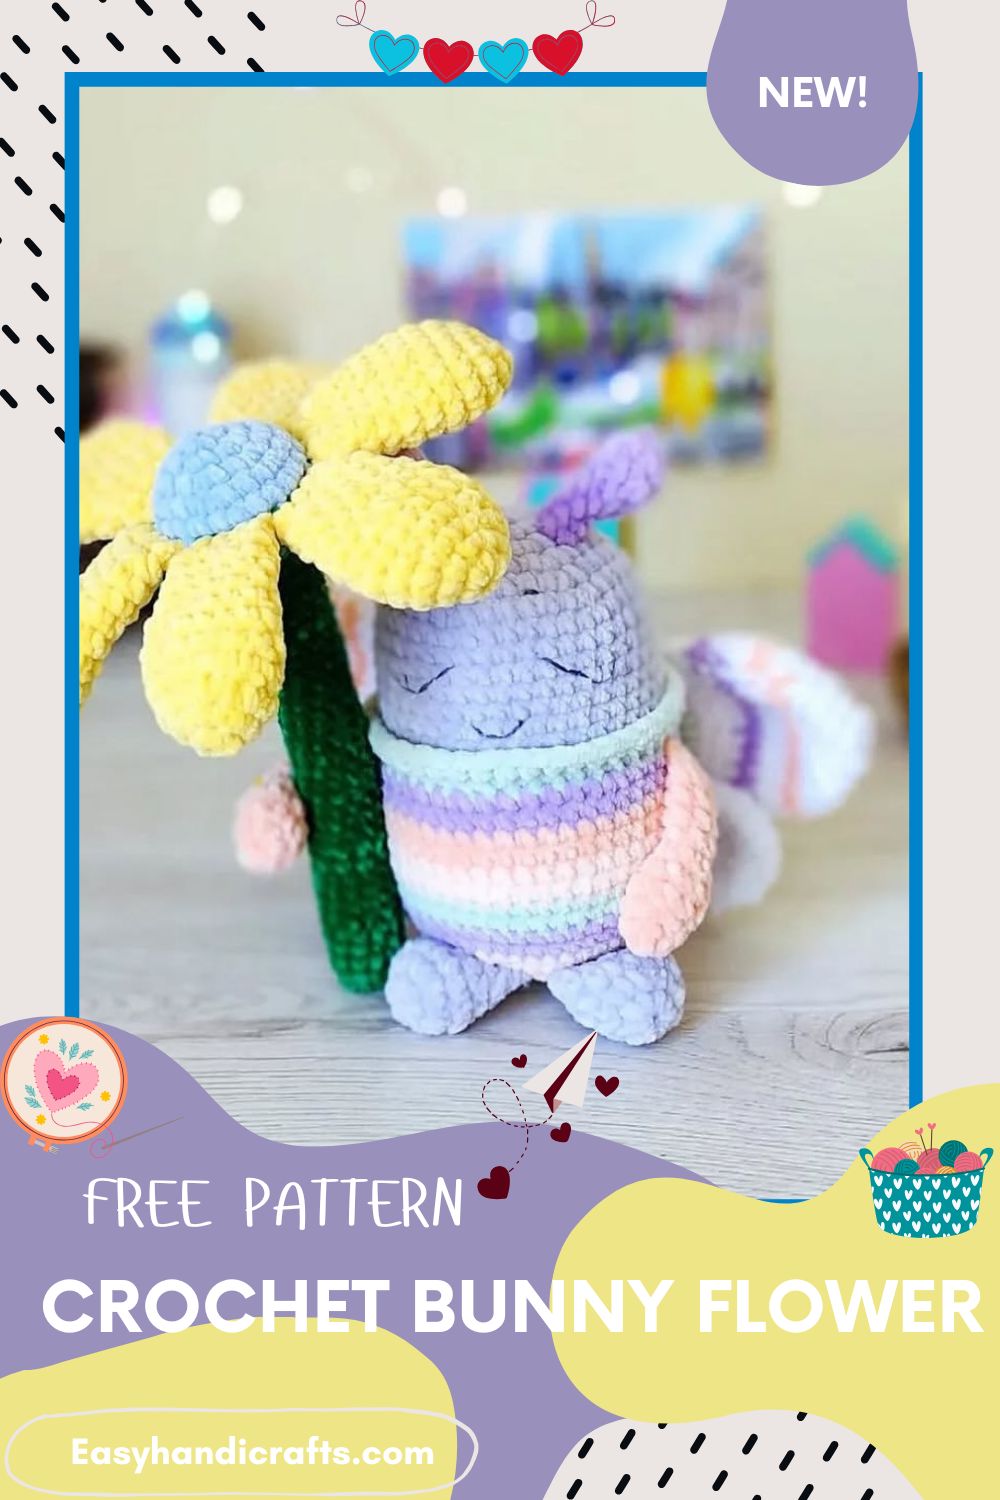
Polished Crochet Bunny Flower Amigurumi Pattern for Beginners
A cute Crochet Bunny Flower Amigurumi hides a bunny face inside a flower-shaped design, blending two adorable styles into one small project. Beginners can finish it quickly using simple stitches, two color changes, and a small crochet hook.
This Crochet Bunny Flower Amigurumi pairs a soft lavender bunny with a bright yellow-and-blue flower held between its paws. Striped mint, lavender, peach, and pink bands wrap the belly nicely. Honestly, the striped body is what makes this design stand apart. You only need one hook and a handful of colors.
Skill Level
This Crochet Bunny Flower Amigurumi pattern suits confident beginners who know single crochet, increases, and decreases well. Amigurumi ring starts, invisible decreases, and simple embroidery for the face matter here. Low-key, patience helps.
Materials and Abbreviations
- Lavender yarn for the bunny’s head, ears, body, arms, and legs
- Mint, peach, and pink yarn for the striped belly bands
- Yellow yarn for the flower petals
- Light blue yarn for the flower center
- Green yarn for the flower stem and trim
- Black embroidery thread for the sleepy eyes and small nose
- Crochet hook, size 3mm
- Fiberfill stuffing
- Yarn needle for weaving in ends and closing rounds
Abbreviations: KA (amigurumi ring), sc (single crochet), Pr (increase), Ub (invisible decrease).
Pattern Overview
- The bunny builds from five separate pieces: head, body, two ears, two arms, two legs, and a small tail.
- The flower builds from six petals plus a separate center piece, following the same construction logic as the bunny parts.
- All bunny pieces stuff firmly before joining, while the flower petals stay unstuffed for a soft, flat layer.
- Striped bands on the belly come from color changes worked directly into the body rounds, no separate pieces needed.
- The sleepy face uses simple embroidered lines instead of safety eyes, keeping the toy soft and child-friendly.
Special Techniques
- Amigurumi ring (KA) starts every piece without leaving a visible hole at the center point.
- Invisible decrease (Ub) keeps decrease rows smooth instead of leaving small gaps in the fabric.
- Color striping on the body means carrying or cutting yarn cleanly between rounds to avoid visible knots.
- Folding petals flat before closing joins both layers together with one combined stitch row.
- Embroidering closed eyes with a simple curved backstitch gives the bunny its sleepy, gentle expression.
Pattern Instructions
Bunny Head
Start with 6 sc into an amigurumi ring, then work 6 Prs on the next round (12 stitches). From here, repeat “1 sc, 1 Pr” six times (18 stitches), followed by “2 sc, 1 Pr” six times (24 stitches), and “3 sc, 1 Pr” six times (30 stitches). Work five full rounds even at 30 sc, embroidering the sleepy eyes and nose partway through this stretch. Shape the top by repeating “3 sc, 1 Ub” six times (24 stitches) and beginning to stuff firmly, then “2 sc, 1 Ub” six times (18 stitches), and “1 sc, 1 Ub” six times (12 stitches). Close with 6 Ubs, fasten off, and leave a long tail for attaching.
Ears (make 2)
Begin with 6 sc into an amigurumi ring, work 6 Prs (12 stitches), then repeat “1 sc, 1 Pr” six times (18 stitches). Work four rounds even at 18 sc. Finish by repeating “1 sc, 1 Ub” six times (12 stitches), folding the piece flat, and single crocheting through both layers to close. Leave a long tail for attaching.
Body
Start with 6 sc into an amigurumi ring, work 6 Prs (12 stitches), then repeat “1 sc, 1 Pr” six times (18 stitches), “2 sc, 1 Pr” six times (24 stitches), and “3 sc, 1 Pr” six times (30 stitches). Now build the stripes: one full round even at 30 sc in mint, one in lavender, one in peach, and one in pink. Switch back to lavender for four rounds even at 30 sc, stuffing gradually as you go. Shape the base by repeating “3 sc, 1 Ub” six times (24 stitches), then “2 sc, 1 Ub” six times (18 stitches) while stuffing firmly, and “1 sc, 1 Ub” six times (12 stitches). Close with 6 Ubs, fasten off, and hide the tail.
Arms (make 2)
Work 5 sc into an amigurumi ring, then 5 Prs (10 stitches). Continue four rounds even at 10 sc, fasten off, and leave a long tail for attaching.
Legs (make 2)
In peach yarn, work 6 sc into an amigurumi ring, then 6 Prs (12 stitches). Switch to lavender and work four rounds even at 12 sc, stuffing lightly. Flatten the last round, fasten off, and leave a long tail for attaching.
Tail
Work 6 sc into an amigurumi ring, then 6 Prs (12 stitches). Continue one round even at 12 sc, then close with 6 Ubs. Stuff lightly before closing, then fasten off.
Flower Petals (make 6, do not stuff)
In yellow, work 6 sc into an amigurumi ring, then 6 Prs (12 stitches), followed by “1 sc, 1 Pr” six times (18 stitches). Work two rounds even at 18 sc. Shape the tip by repeating “4 sc, 1 Ub” three times (15 stitches), then one round even at 15 sc, “3 sc, 1 Ub” three times (12 stitches), two rounds even at 12 sc, and finally “2 sc, 1 Ub” three times (9 stitches). Fold the petal flat and single crochet through both layers, closing four stitches per side. Fasten off and hide the tail.
Flower Center
In light blue, work 6 sc into an amigurumi ring, then 6 Prs (12 stitches), followed by “1 sc, 1 Pr” six times (18 stitches) and “2 sc, 1 Pr” six times (24 stitches). Work one round even at 24 sc. Switch to green, fold each petal against the center, and work “4 sc” six times through both layers to join all six petals (24 stitches). Working through the back loop only, repeat “2 sc, 1 Ub” six times (18 stitches) and begin stuffing firmly. Continue one round even at 18 sc, then repeat “1 sc, 1 Ub” six times (12 stitches). Work even at 12 sc for thirty-one rounds, adding stuffing as needed, then tighten the final hole with a needle and hide the loose ends.
Scallop Trim:
Attach fresh green yarn into the front loops left free on the seventh round of the flower center. Work “slip stitch in one stitch, skip one stitch, sc in the next” repeatedly around the edge. Fasten off and hide the tail.
Common Mistakes
- Skipping stitch counts after increase or decrease rounds often leads to a lopsided head or body shape.
- Forgetting to switch colors on the exact round listed throws off the striped belly pattern badly.
- Overstuffing the head before closing distorts the rounded shape and stretches the surrounding stitches unevenly.
- Attaching ears too low or too high on the head changes the bunny’s expression and overall proportions.
- Rushing the embroidered face without marking placement first often leaves the eyes uneven or off-center.
Assembly
- Crochet the head, body, ears, arms, legs, and tail first, stuffing each firmly except the ears and petals.
- Attach both ears to the top of the head, spacing them evenly on either side of center.
- Sew the head onto the top of the body, keeping the striped bands facing forward for the finished look.
- Attach both arms to the upper sides of the body, angling them slightly forward to hold the flower.
- Attach both legs to the bottom of the body so the bunny can sit upright on its own.
- Sew the tail onto the lower back of the body for a finished, rounded silhouette.
- Assemble the flower petals and center following the pattern instructions above, then set the flower aside.
- Position the flower stem between the bunny’s paws and stitch it securely into place at two points.
Important Remarks
- Use a soft, baby-weight yarn for the smoothest stitch definition across both the bunny and flower pieces.
- A 3mm hook keeps stitches tight enough that stuffing will not peek through the finished fabric.
- Stuff the head and body firmly, but avoid overstuffing, since that distorts the rounded proportions.
- Count stitches after every round, especially during color changes, to keep the striped pattern consistent throughout.
- Real talk, uneven ear placement is the most common mistake beginners make with bunny-style amigurumi.
Conclusion
This Crochet Bunny Flower Amigurumi rewards patience during the striping and assembly steps, then comes together quickly after that point. Ngl, the finished piece looks far more advanced than the actual stitch count suggests. Beginners get real practice with color changes, joining, and embroidery in one manageable project.