Free Crochet Seal Nigiri Amigurumi Pattern With Kawaii Sushi Plushie
Honestly, another tiny crocheted food on the shelf was the last thing I needed. Then this crochet seal nigiri amigurumi showed up, and that was that. A piece of sushi where the rice is a chubby, sleepy little seal? Instant yes.
Picture a classic nigiri that little oval of rice with a topping draped over it except the rice has two tiny eyes and a soft grey snout, like it dozed off mid-snack. The best part? You don’t need to be a crochet pro to make one. It’s a genuinely beginner-friendly project, and the full free Crochet Seal Nigiri Amigurumi pattern is right below. Grab some soft yarn and let’s get started.
Why you’ll love making these
A few reasons this little guy is worth your evening:
- It’s fast. One seal takes about an hour once you get going, less if you’re quick with a hook.
- It uses tiny amounts of yarn, so it’s perfect for those scraps you can’t bring yourself to bin.
- They make great gifts. I gave one to a friend who doesn’t even crochet and she nearly cried. People go a bit soft over them.
- They look complicated but they really aren’t. It’s two simple shapes and a face.
What you’ll need
Nothing fancy here. You probably have most of it already.
- Yarn: Soft chenille or velvet yarn works beautifully and gives that plush, squishy look (the kind in the photos). White for the seal body, plus a small amount of orange or cream for the topping, and a little grey for the snout. Regular worsted weight cotton or acrylic is totally fine too your seal will just be a touch smaller and less fluffy.
- Crochet hook: Match it to your yarn. For chenille I use a 4mm; for the recommended yarn weight check the label. Going a half size down keeps the stuffing from peeking through.
- Safety eyes: 6mm black ones. If you’re gifting to a small child, embroider the eyes instead with black yarn for safety.
- Polyester fiberfill for stuffing.
- Yarn needle, scissors, and a stitch marker (or a scrap of contrasting yarn).
A quick note on yarn: chenille is gorgeous but it’s a little slippery and it hides your stitches, which can be annoying when you’re counting. If this is your very first amigurumi, do yourself a favour and use cotton for your first one. You’ll thank me.
Abbreviations (US terms)
- MR – magic ring
- sc – single crochet
- inc – increase (2 sc in one stitch)
- dec – decrease (invisible decrease)
- st / sts – stitch / stitches
- sl st – slip stitch
Work in continuous spirals unless I say otherwise. Move your marker up as you go.
Heads up: The stitch counts below are a standard, beginner-friendly version. If you have your own tested pattern, swap in your numbers the construction and assembly steps still apply.
Step 1 – The seal body (the “rice”)
This is the big oval base. Use your white yarn.
R1: 6 sc in MR (6)
R2: inc x6 (12)
R3: (sc, inc) x6 (18)
R4: (2 sc, inc) x6 (24)
R5–R10: sc in each st around (24) that’s 6 rounds
R11: (2 sc, dec) x6 (18)
R12: (sc, dec) x6 (12)
Now pause and stuff it firmly. You want it plump but still a little squishable. Then:
R13: dec x6 (6)
Fasten off, leave a tail, and use your needle to close up the last hole. Give it a gentle squeeze into a slightly oval shape nigiri rice isn’t a perfect ball, it’s a little stretched out. Set it aside.
Step 2 – The topping (the “neta”)
This is the slice that sits on top. Orange reads as salmon or shrimp; cream looks like squid or egg. Honestly, pick whatever colour makes you happy.
R1: 6 sc in MR (6)
R2: inc x6 (12)
R3: (sc, inc) x6 (18)
R4–R6: sc in each st around (18)
Fasten off and leave a long tail for sewing. Don’t stuff this one you want it flat-ish so it drapes over the body. Press it down a bit with your fingers.
If you’re going for the salmon look, take a length of white or cream yarn and embroider one or two stripes across the top. Those little lines are what make it actually read as sushi instead of a blob, so don’t skip them.
Step 3 – The snout
The snout is small and you’ve got two options.
The easy way: just embroider it. Take your grey yarn and stitch a small rounded patch low on the front of the body, then add a tiny black nose and a little mouth line underneath. Done.
The slightly fancier way: make a mini piece 6 sc in MR, sl st to join, fasten off and sew it on as a raised snout, then add the nose on top.
Either works. The embroidered version is faster and looks just as sweet.
Step 4 – Putting your seal together
Here’s where it actually becomes a seal, and it’s the fun part.
- Eyes first. Decide where the face goes the front of the body, sitting fairly low and a bit wide apart. Place your safety eyes about 4 to 5 stitches apart and push the backs on firmly before you stuff (oops if you already stuffed, you can still squeeze them in, it’s just fiddlier). Embroider if you’re skipping safety eyes.
- Add the snout just below and between the eyes.
- Sew the topping on. Lay it across the top of the body, slightly toward the back so the face stays clear. Pin it if you have pins, then sew all the way around with that long tail you left. Tuck the ends inside.
- Fluff and adjust. If you used chenille, run your fingers over it to even out the pile and hide any stray stitches.
That’s it. You’ve got a sleepy little seal pretending to be lunch.
A few tips I learned the hard way
- Stuff firmly but don’t overdo the face area too much and the eyes pop at weird angles.
- Weave in ends as you go. I know nobody listens to this advice. Listen anyway.
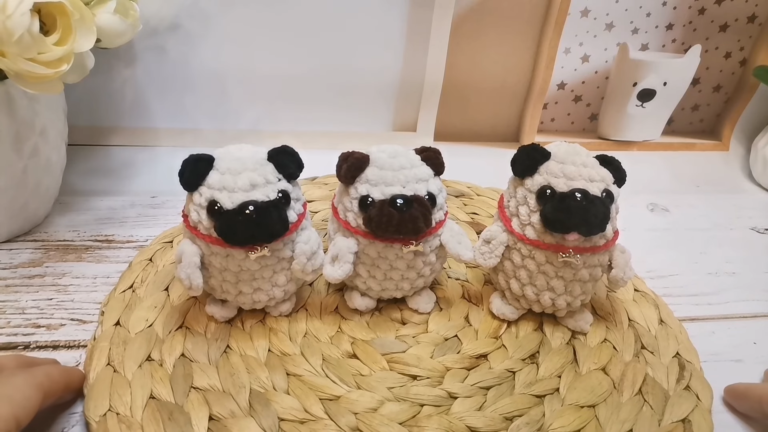
- Make a little batch. They look ten times cuter as a set of three on a tiny plate, and once you’ve made one your hands kind of know the pattern by heart.
Common mistakes and how to fix them
A few spots tend to trip people up. Here are the main ones and the quick fix for each.
- Loose stitches/gaps showing. Go down a hook size so the stitches stay tight and the stuffing can’t peek through.
- Losing count of your rounds. Use a stitch marker in the first stitch of each round chenille hides stitches, so don’t trust your eyes.
- Lopsided body. Spread your increases and decreases evenly around; “(sc, inc) x6” means repeat the group six times, not all in one spot.
- A face that looks “off.” Place the eyes loosely first, a little low and wide apart, and check from a distance before locking them in.
- Floppy topping. Don’t stuff it keep it flat so it drapes nicely over the body.
Frequently asked questions
How big is the finished seal?
With chenille yarn and a 4mm hook, mine come out around 7–8 cm long. Cotton and a smaller hook will give you a daintier 5–6 cm version.
Can I wash them?
Gently, by hand, in cool water, then squeeze out the water and let them air dry. Don’t wring them or chuck them in the machine, especially the chenille ones.
I’m a total beginner can I actually do this?
Yes. If you can make a magic ring, single crochet, increase, and decrease, you have everything you need. This is honestly a great second or third project.
What yarn did you use?
Soft chenille/velvet yarn for the plush look. Any worsted weight will work though.
Final thoughts
And that’s the whole Crochet Seal Nigiri Amigurumi pattern. Two simple shapes, a little face, and about an hour of your time is all it takes to make one of these sleepy seal nigiri.
Don’t stress about getting it perfect on the first try. The slightly wonky ones somehow always turn out to be everyone’s favourite, and every seal you make after the first will come out cleaner as your hands learn the rhythm.
If you do make a little plate of them, I’d love for you to share how they turned out. And if you’ve caught the amigurumi bug now, there are plenty more free patterns waiting for you to try next.