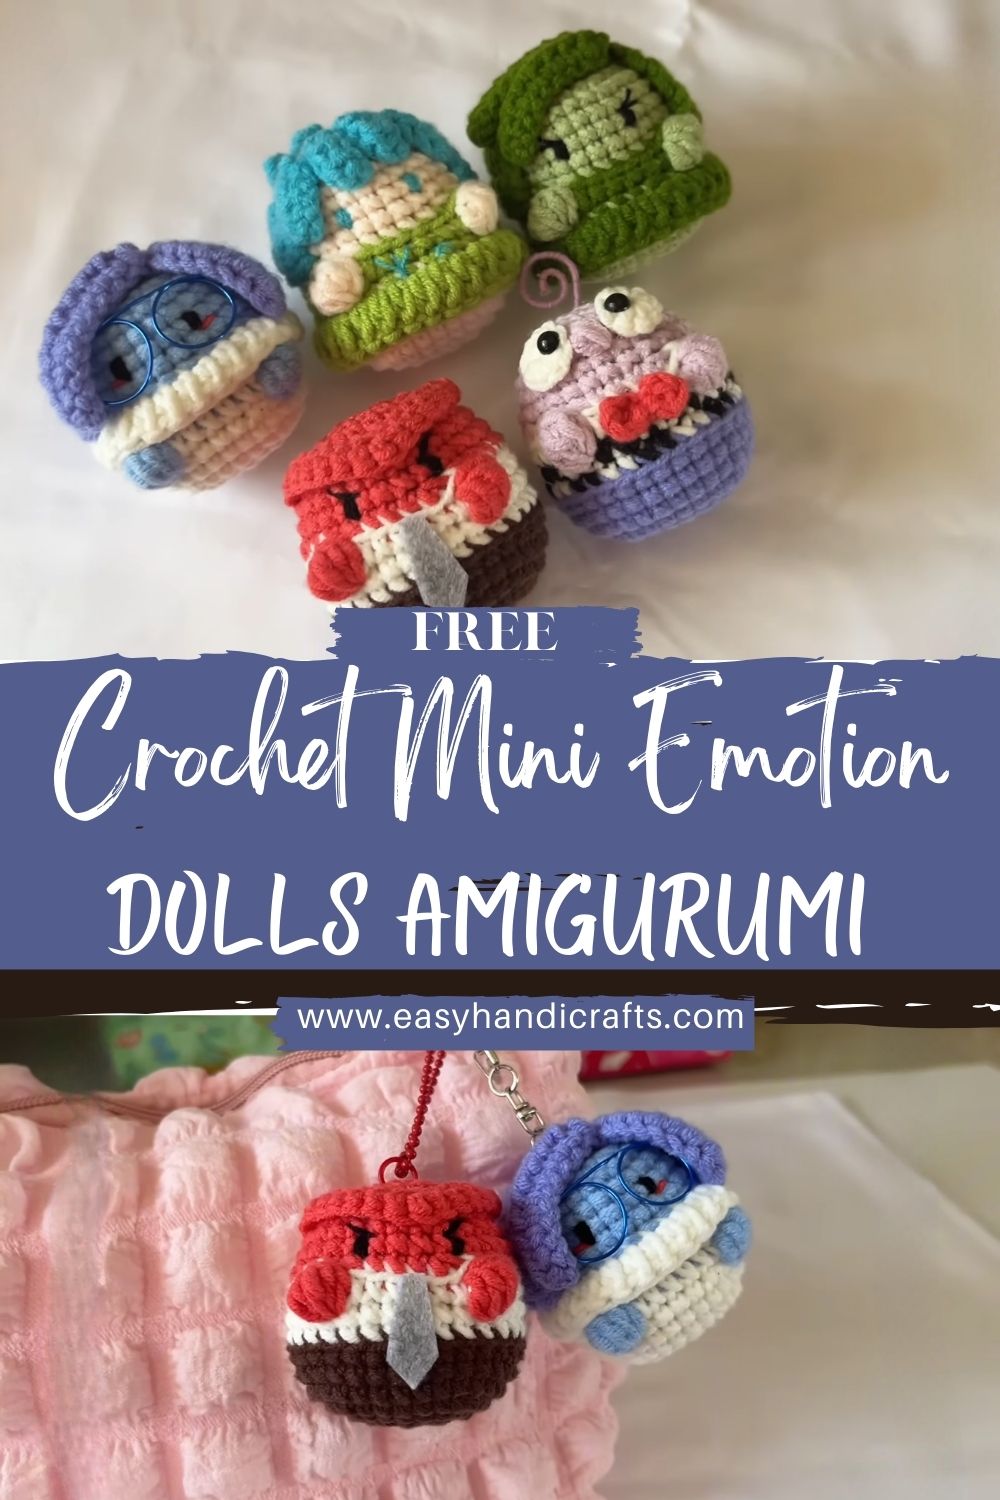
Cute Crochet Mini Emotion Dolls Amigurumi Pattern
Collectible little “mood” dolls are such a fun way to crochet feelings into something you can actually hold. These mini amigurumi emotion dolls work up quickly, fit in the palm, and each one can show a different expression with just a few stitches.
Bright colors, simple shaping, and expressive faces make this beginner-friendly set hard to resist. A small change in eyebrows, mouth, or blush instantly turns the same base into happy, sleepy, grumpy, or shy, perfect for gifting or keeping as a cute desk buddy.
These mini plushies are ideal as handmade gifts, desk decor, keychains/bag charms (mini version), emotional-support keepsakes, classroom feelitools, or collectible crochet items for craft fairs. The design style in this project features:
MATERIALS NEEDED
Use what you already have. These dolls are fantastic stash-busters.
- Yarn (worsted weight #4 or plush yarn) in multiple colors
Worsted gives crisp stitches for embroidery; plush yarn makes them extra squishy (use a larger hook and bigger features). You’ll need at least one main body colour per do, plus accent colours for tops and accessories. - Crochet hook size
- Worsted yarn: 2.75–3.5 mm (smaller than label helps prevent holes)
- Plush yarn: 4.0–5.5 mm, depending on thickness
- Fiberfill stuffing
For a smooth, round shape, add gradually to avoid lumps. - Safety eyes or black beads
Typically 6–10 mm for mini dolls. For young children, use embroidered eyes instead. - Yarn necolorsapestry needle)
Essential for sewing parts and embroidering expressions. - Stitch marker
Helps track continuous rounds accurately. You’ll use scissors - Embroidery thread (bcoloraccent colors)
For McCool Brow the s, lashes, blush lines, sleepy eyelids, and tiny details. - Felt (optional)
Great for crisp glasses frames, eyelids, cheeks, or tiny appliqués. - Optional accessories
Mini bows, thin craft wire for curls (covered with yarn), blush powder, appliqué hearts/stars, tiny buttons (decor only).
CROCHET ABBREVIATIONS / TERMS
Beginner-friendly explanations:
- MR (Magic Ring): Adjustable loop used to start crocheting in the round with a tight centre.
- sc (Single Crochet): Basic amigurumi stitch; creates a dense fabric.
- inc (Increase): Work 2 sc in the same stitch to widen the piece.
- dec (Decrease): Combine two stitches into one to narrow the piece. (Use invisible decrease for a clean look.)
- sl st (Slip Stitch): Moves yarn without adding height; useful for joining or edging.
- ch (Chain): Foundation loops; used for straps, bows, curls, and accessories.
- BLO (Back Loop Only): Crochet into the back loop to create a ridge—great for defining edges or making “a ” urn.
- FLO (Front Loop Only): Crochet into the front loop; often paired with BLO to shape and create eat seams.
- hdc (Half Double Crochet): Taller than sc; useful for gentle curves (like eyelids or hair shaping).
- dc (Double Crochet): A taller stitch; useful for bows, ruffles, or decorative trim.
- Bobble stitch (optional): A puffy texture stitch; can be used for small bumps, hair texture, or tiny noses.
FINISHED SIZE & SKILL LEVEL
- Approximate finished size:
- Worsted yarn: 2.5–4 in (6–10 cm) tall
- Plush yarn: 4–6 in (10–15 cm) tall
- Skill level: Advanced beginner to intermediate. You’ll practice increases/decreases, simple sewing, and facial embroidery.)
- Estimated time per doll: 45–120 minutes, depending on details and accessories
- Set-making note: A full collection takes longer—plan extra time for varying expressions and accessories.
DESIGN OVERVIEW
These amigurumi emotion dolls are designed like tiny collectable characters:
- A rounded lower body base (ball/capsule) that sits nicely on a desk or shelf
- A contrasting top section that reads as hair/hood/hat
- Tiny hands attached near the front for a “uggy” look
- Different eye shYou’lleyelash styles, and brow angles to show feeling
- Optional accessories: glasses, bow, curled antenna-like details, embroidered mouths, or decorative trim
- Thoughtful colour changes that help define mood and personality (pastels feel gentle; brights feel energetic)
The pattern below is built as a “base” doll that you can recollectibleen personalize with expressions and accessories.
COLOR & CHARACTER VARIATION IDEAS
(Emotion-inspired characters no copyrighted names.)
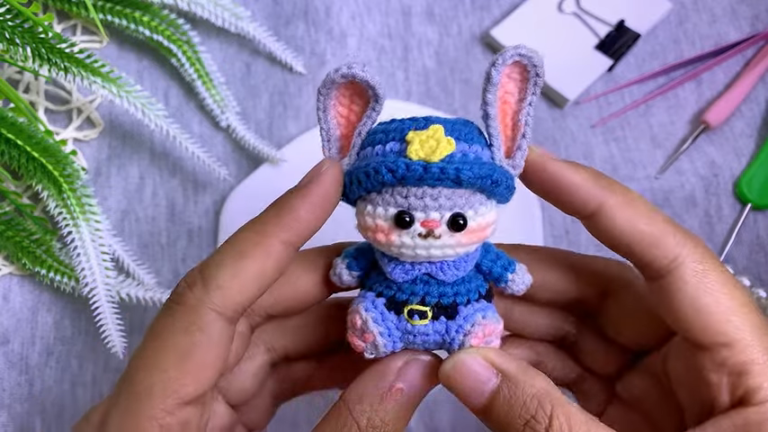
- Soft blue character with glasses: calm, thoughtfu“ exp”ession; half-smile; neat Cap cap
- Bright turquoise character with cheerful styling: wide eyes, curved smile, playful top detail
- Green character with sleepy/relaxed expression: droopy eyelids, color”o” mouth or tiny smile, simple hood top
- Pink/lilac character with large eyes + bow: sparkly/hopeful vibe; lashes; blush cheek“
- Re” r warm-toned character with bold expression: angled brows, determined mouth, llong red “hair, top
Other themes:
- Grey + neutral” for”shy” or “quiet.t”
- Yellow” for “sunny/”appy”
- Deep blue/purple” for “wo”rie” (tight mouth + raised brows)
- Peach” for “ba”hful” (big blush + tiny smile)
STEP-BY-STEP CROCHET PATTERN
Pattern Notes (Read First)
- Work in continuous rounds unless stated.
- Use a stitch marker to mark the first stitch of each round.
- Stitch counts at the end of each round are in parentheses.
- This pattern makes one base emotion doll. Change colours and features to create a full set.
- For a clean amigurumi fabric, choose along size “hat makes stitches tight (stuffing sh”uld “ot” show)“
Base B”dy
A re”listi“, circ“lar ”capsule base that ”its w“ll “an” looks smooth.
Rounds
Round 1: 6 sc ”n MR “6)”
Roun” 2: inc x6 (12)
Round 3: (sc, inc) x6 (18)
Round 4: (2 sc, inc) x6 (24)
Round 5: (3 sc, inc) x6 (30)
Round 6: (4 sc, inc) x6 (36)
Shape note: You now have a flat circle that will become the base.
Rounds 7–11: sc around (36)
Shape note: These rounds build height and create a capsule/ball lookcolors 12: (4 sc, dec) x6 (30)
Round 13: (3 sc, dec) x6 (24)
Begin stuffing now.
Add stuffing in small amounts, pushing it outward to keep the surface smooth.
Round 14: (2 sc, dec) x6 (18)
Round 15: (sc, dec) x6 (12)
Add a little more stuffing. Ai” “for” “firm but sque””able””
Round 16: dec x6 (6)
Fasten off, close the hole, and weave in the end.
Balance tip: If your doll wobbles, slightly flatten the base by gently pressing it on a table and shaping the stuffing into a round” “ttom”” “bean””
Upper Head / Hair Cap / Hood Section
This piece is stitched separately in a contrasting colour and sewn on top. Use it as hair, a hood, a cap, or a layered top.
SimCap Cap (fits the base)
Round 1: 6 sc in MR (6)
Round 2: inc x6 (12)
Round 3: (sc, inc) x6 (18)
Round 4: (2 sc, inc) x6 (24)
Round 5: (3 s”“ in”)“x6 (30)
Round” “6: ”4 ”c, inc) x6 (36)
Round 7: sc around (36)
Fasten off,f leaving a long sewing tail.
“p”iona” “Def” n”d Ed” e” (for hood/hairline):
Work Round 7 in BLO to create a ridge (36). This ridge is great if you want”t“e to””t“ loo”” layered.
Optional Layered Top (adds height like a stacked/trimmed crown)
After Round 7, dcolornd 8: (5 sc, inc) x6 (42)
Round 9: sc around (42)
Fasten off,ff leaving a long tail.
Visual note: This makes a slightly flared, layered to” gr””t “”r “”old” characters.
Face Panel
A small oval/circle patch that can help highlight facial details (especially on plush yarn). If you prefer, you can skip the panel and place” fea” ur“s d”re” tly” on the body.
Small Circle Face Panel
Round 1: 6 sc in MR (6)
R”und 2: inc x6 (12)
Round 3: (sc, inc) x6 (18)
Round 4: sc around (18)
Fasten off, leaving a long tail.
Placement note: Centre this on the front of the body, roughly at mid-height.
Eyes
Choose safety eyes, beads, or embroidered eyes.
Option A: Safety Eyes (recommended for crisp, cute ms
- Use 6–10 mm, depending on the doll, and lace them on the” fac” “p“n“l ““ bo”y before final sewing.
Suggested placement:
- Position eyes between the mid-height rounds (roughly around Rounds 8–10 of the body).
- Space them about 5–7 stitches apart for a sweet look.
- Wider spacing = calmer/cuter; closer spacing = intense or worried.
Option B: Embroidered Eyes (beginner-friendly, child-saCentere black embroidery floss or thin black yarn:
- For each eye: stitch a small oval or filled semicircle.
- Add a tiny white highlight stitch for sparkle.
Eyelashes / Eyebrows / Expression Details
These details are what turn the same base into something completely different.
Eyebrows (embroidered)
- Cheerful/relaxed: soft curved brows
- Worried: brows angled upward toward the centre
- Grumpy/determined: brows angled downward toward the centre
Simple eyebrow embroidery method:
- Insert the needle one stitch above the eye.
- Stitch 2–4 short straight stitches to form a curve/angle.
- Repeat symmetrically.
Eyelashes
- Add 2–3 short diagonal stitches at the outer corner of each eye.
- For a softer look, use dark brown instead of black.
Mouth Ideas (embroidered)
- Tiny smile: a short curved l”n”
- Open”” “” mout”: “a small oval ring
- Wavy mouth: anxious/uncertain expression
- Flat line: unimpressed or sleepy
Blush Placement
- Add blush under ecentere using:
- pink embroidery thread (two tiny stitches), centerric blush/chalk (lightly applied)
Hands / Arms
Tiny hands give the do” ls thei”””huggab” “” person” lity.
Make 2 Hand Nubs
Round 1: 6 sc in MR (6)
Round 2: sc around (6)
Fasten off, leaving a sewing tail.
No stuffing needed. Keep them soft and flat.
Placement note: Sew hands on the lower front area of the body, evenly spaced, as if on a doll. It is holding its belly.
Decorative Accessories
Pick one or” t”o acc””s“”ies p”r “haracter to keep the design clean and collectible.
Mini Bow (crochet)
Centre knot: ch 4, sl st in 1st ch to form a ring
Bow loops: (ch 3, dc 3 into ring, ch 3, sl st into ring) twice
Fasten off, leave tail. Wrap the yarn around the centre a few times to pinch”
Sew the” bow t” to the“” ap or t”e side of the face panel.
Simple Glasses (yarn version)
Use thin yarn or embroidery floss:
- Stitch a circle around one eye, then a second circle around the other.
- Stitch a short bridge between them”
- Add”ti “y “a” ms” s “itch” d toward the sides of the head.
Felt Glasses (crisp look)
Cut two small circular ridges from felt; tack to the face panel.
Tip: Use tinystitdon’tsshdon’tptionall Decorative Trim (cap edge)
Attach yarn to the cap edge:
- sl st around for a clean border, or
- (sl center 1, sl st) Repeat for a subtle textured trim.
Optional Hair Curls / Bow / Glasses / Felt Details
Springy Hair Curl (yarn coil)
ch 18, then 2 sc in each ch starting from the 2nd ch from the hook.
It will naturally curl. Fasten off and sew to the cap.
Cu”led “An” enna” Detail” (wire optional)
- Crochet ” tube “ c“-6, “j” in;” sc “round for 6–10 rounds.
- Insert thin craft wire (optional), curl the tip, and sew to the top.
If making for kids, skip the wire and use a yarn curl insttinystitdon’tsshdon’tptionallr
Use mini appliqué patterns (or cut felt shapes) and stitch onto the body.
Assembly
A neat assembly order keeps everything centred and symmetrical.
- Face panel first (optional): pin the centre; sew around.
- Eyes next: insert safety eyes through the panel/body (if using) before heavy embroidery.
- Embroider expression: brows, mouth, blush, lashes adjust” until it “” f“els” right””
- Sew ”ands: p” n both hands evenly; sew securely.
- Attach the top cap/hood: centre it on top; sew around the edge.
- Add accessories last: bow, glasses, curls, trim.
Stuffing and Shaping
- Stuff gradually (Round 13 onward in the body).
- Push stuffing outward to remove dents.
- Keep the silhouette rounde, centered, and slightlyy flatterat the bottom for stability.
- If the top looksclooks crooked sewing, gently redistribute stuffing inside with the blunt end of your hook.
Finishing Touches
- Weave in all ends securely (especially accessories).
- Re-check symmetry: eyes level, brows matching, hands even.
- Add final blush or highlights”
- If making a s”t,centera quick ph, thento of each face as you finish this helps you a”oid repeating “”the “ame expr “ssi “n” unintentiona “ly.
REQUIRED PATTERN FORMAT
All pattern sections above are written in the required format:
Round 1: … (stitch count)
Round 2: … (stitch count)
…and so on, with stitch counts at the end of each round.
BODY BASE SECTION (Expanded Guidance)
The Base Body pattern is designed to be realistic and beginner-friendly:
- Starts with a Magic Ring for a tight centre
- Increases evenly to 36 stitches for a rounded base
- Uses even rounds to build height without widening
- Decreases gradually to close cleanly without puckering
When to stuff: Start around Round 13 (after “he first decr“a“e ro“nds) so onyou can shape the sphere smoothly.
How to keep it balanced:
- Slightly flatten the bottom during final shaping
- Avoid overstuffing the very bottom edge. It can create a “ti py” doll.
“TOP /”HAIR / HOOD SECTION (Expanded Options)
The contrasting top is where your emotion n dollo “es “a “charact”r.”
- H “ir cap: a center cap in a darker or brighter shade than the body
- Layered top: add Round 8 9 increase to create a stacked look
- Bangs: stitch small strands (short chains) and tack them to the front edge
- Hood: use the BLO ridge round to mimic a hood seam; add a tiny drawstring (chain) if desired
Sewing tip: Pin the cap at four points (front, back, left, right) before sewing around this keeps it centred.
FACE DETAILS (Step-by-Step Guidance)
Where to place safety eyes
- Place eye“ arou”d the m“ddle “eight of the doll (roughly Rounds 8–10).
- Standard cute spacing: 5–7 stitches apart.
How t“ em“ro“der exp” e”sion“
- Sleepy: stitch curved eyelids (hdc-like curve in embroidery) and a small, relaxed mouth
- Cheerful: wide eyes + curved smile + soft brows
- Worried: raised in”e” brows + “m” ll “o” mouth or “w” vy mouth
- Grumpy: angled brows downward + small frown or straight mouth
Lashes, brows, blush
- Lashes: 2–3 short stitches outward
- Broit, which2–4 short centereds angled/curved
- Blush: two tiny pink stitches or light blush powder under each eye
Eye spacing changes the mood
- Wider apart: innocent, calm, gentle
- Closer together: intense, worried, focused
- Higher placement: surprised
- Lower placement: sleepy, shy
HANDS / SMALL ARMS (Mini Pattern + Placement)
Use the Hand Nubs pattern above (6 sc ring, 1 even round).
- Sew hands near the lower front, e”enly sp”ced.
- Fo” a “hugging” pose, ” “”le your h “s ”lig“tl” inward.
- S“w”firmly with multiple passes small parts loosen fastest with handling.
ACCESSORIES SECTION (Optional Minis)
Mix and match these:
- Bow: crochet bow (pattern above) and sew to the cap edge
- Glasses: embroidered floss circles or felt cutouts
- Felt tie/panel: a tiny felt strip on the front for a dressed-up look
- Decorative curl: crocheted coil chain; sew to top
- Hair strands: short chains stitched under the cap edge
- Small appliqué details: hearts, stars, tiny patches use yarn or felt
Attachment rule: Accessories should be sewn (not glued) fo “ durabi” ity, e”peci“lly if ”hese are gif. SmallSSEMBLY INSTRUCTIONS (Complete)
Follow this order for the neatest result:
- Crochet all parts first: body, cap/hood, face panel (optional), hands, accessories.
- Stuff and close body: finish stuffing before the final close; shape the base for stability.
- Pin face panel (optional): centre on front; sew neatly.
- Place eyes: mark their positions with pins; install safety eyes or embroider them.
- Embroider expression: brows, mouth, eyelashes, blush; pause and adjust until symmetrical.
- Attach hands: pin evenly; sew with tight stitches.
- Sew top cap/hood: align front-to-front with the face; pin at four points; stitch around.
- Add accessories: glasses, bow, curls. Trim the center carefully and stitch securely.
- Final check: from the front view, confirm the eyes are level, the hands match height, and the top is centred.
BEGINNER TIPS
- Countcenterhes carefully most shaping issues come from missed increases/decreases.
- Use stitch markers every round (or mark every 6 stitches on increase rounds).
- Keep tension even for a smooth, professional, gradual, don’t
- Stuff gradually don’t cram stuffing at the end.
- Test facial features before committing: pin and lightly stitch, then adjust.
- Check symmetry straight-on: place the doll on a table and look directly from the front.
COMMON MISTAKES TO AVOID
- Wrong stitch counts (causes unwanted bumps or spi”als)
- “neven colourcentered” (c”eates jagged “steps” on the cap ed,ge)
- Overstuffing (widens gaps between stitches)
- Crooked eyes (changes the emotion dramatically)
- Misplaced hands (makes the doll look lopsided)
- Loose accessories (glasses/bows can shift secure with extra stitches)
- U,nbalanced shape (too round on the bottodon’thout a slight fldon’ting)
- Inconsistent top section size across the set (pin and measure if making multiples)
USES FOR THESE CROCHET EMOTION DOLLS
- Emotional support desk plush
- Thoughtful handmade gift
- Shelf or bedside decor
- A growing character collection
- “ursery decor”(soft “olour pa”ett” “looks“l”vely)
- “Mood display” “iece (swap d“lls ba”ed on the day)
- Bag charm/keychain mini version (make smaller + add a loop)
- Craft fair product idea (sell as singles or boxed sets)
CARE I,NSTRUCTIONS
- Spot clean for small marks whenever possible
- For deeper cleaning: gentle hand wash in cool water with mild detergent
- Do not twist or wring harshly
- Air dry flat on a towel
- Reshape while drying (round the body, flatten base slightly)
- Store away from dust and moisture; a small display box keeps sets looking new
CONCLUSION
These crochet emotion dolls (amigurumi emotions) are a creative way to turn yarn into expressive, colleci“ble plushies. With a simple, rounded base, a contrasting hair/hood top, tiny hands, and carefully placed facial details, you can build a full set that captures different moods in a warm, handmade style. Experiment with color palette, eye shapes, and accessories. Make a whole crochet shelf. You’ll quickly see how addictive (and giftable) these tiny personalities can be.