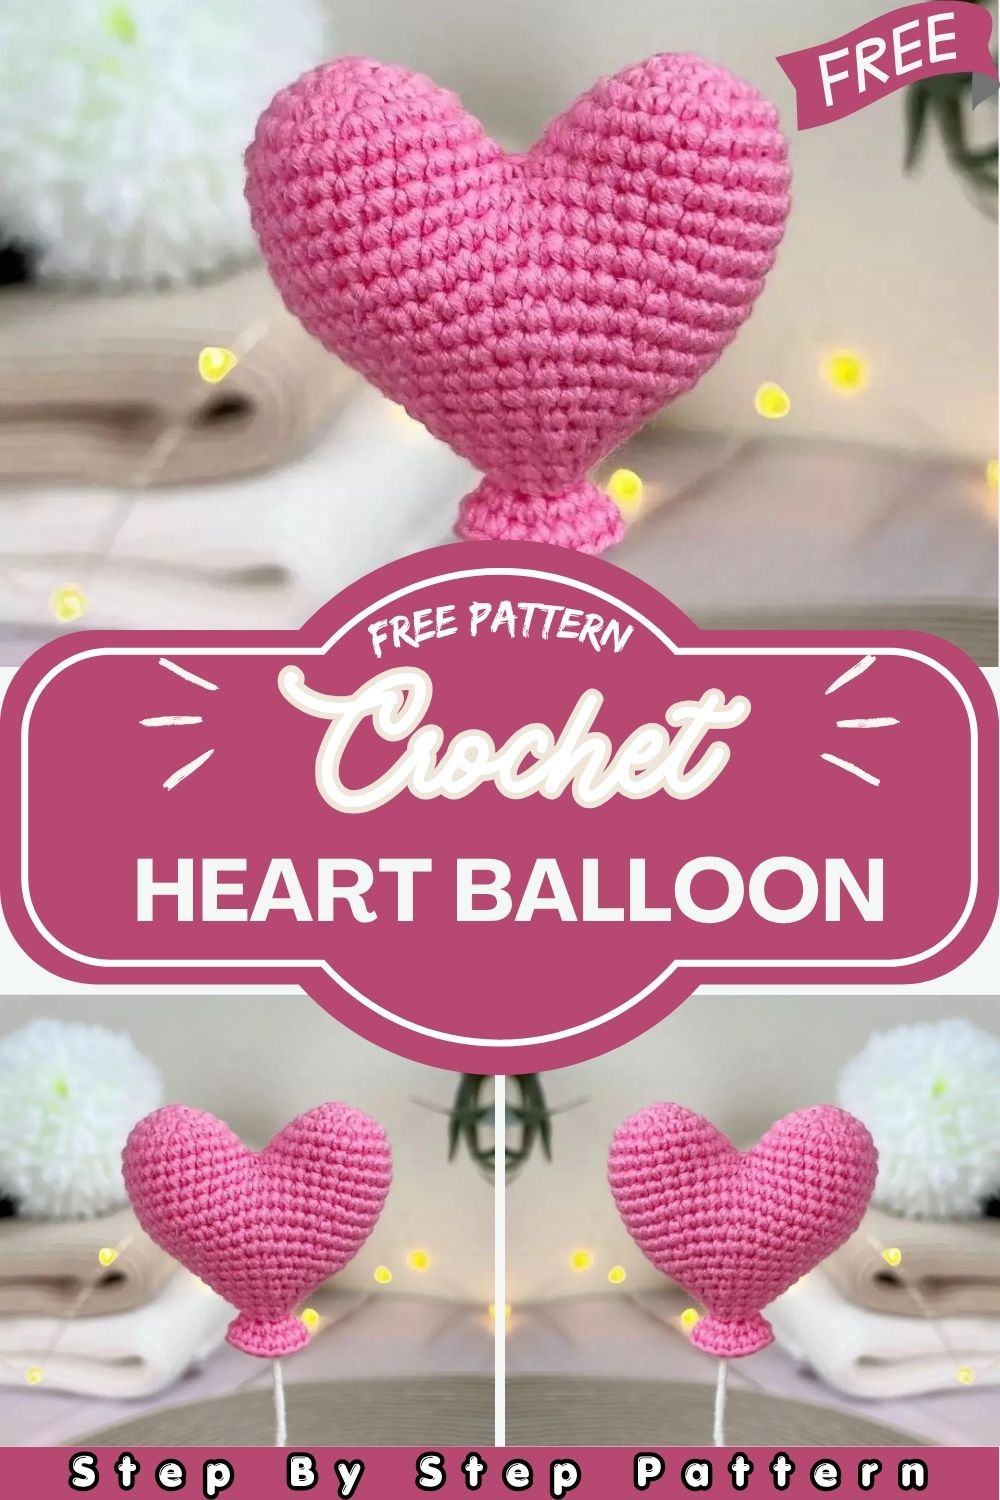
The Sweetest Crochet Heart Balloon Pattern – Perfect for Gifting & Home Decor
Pink yarn, a piece of wire, and one free afternoon are genuinely all it takes to make something that stops people in their tracks. This little crochet heart balloon looks boutique-bought, costs almost nothing, and takes only a few hours to finish.
There is a craft shop near my house that sells decorations I will never buy. Not because they are ugly they are actually quite pretty. But nothing in that shop has ever made someone stop mid-conversation and say “Wait, did you actually make that yourself?” This heart balloon does exactly that every single time. It sits on a shelf, catches the light, and people cannot figure out what it is at first. A balloon? A decoration? Something from a fancy boutique? When you tell them it is yarn and a wire and about three hours of your time, the look on their face is genuinely priceless. That reaction is what keeps me coming back to this pattern again and again.
Skill Level
Beginner to Intermediate. Single crochet, basic increases and decreases, and front loop only stitches are all you need here. The wire insert sounds intimidating at first. After trying it once, it feels completely straightforward.
What You Will Need
- Crochet hook size 1.75mm No. 0
- Baby pink yarn cotton blend works beautifully. Cotton Fair brand uses 52% cotton and 48% acrylic which gives a lovely soft finish
- Polyester stuffing
- Wire cut to 30cm length
- Electrical tape
- Scissors
- Needle
A note on wire length: If you switch to a different yarn weight or hook size, adjust the wire length accordingly. The wire needs to fit comfortably inside the finished heart.
Stitch Guide
- ch — Chain
- sc — Single Crochet
- dc — Double Crochet
- inc — Increase — two single crochets worked into the same stitch
- dec — Decrease — two stitches pulled together into one
- FLO — Front Loop Only
- ( )*… — Repeat the instructions inside the brackets the number of times stated
Before you begin: Work in a continuous spiral throughout. Do not join, slip stitch, or turn unless the pattern specifically tells you to. After each round, the number following the equals sign tells you the total stitch count for that round.
Preparing the Wire
Cut your wire to thirty centimeters. Make a small loop at one end using pliers or your fingers. Wrap that loop securely with electrical tape so no sharp edges are exposed. Wind yarn all the way along the wire from one end to the other until it is fully covered. Set it aside you will insert it into the heart later.
The Heart Pattern
Rounds 1 through 7 – Building the Base
Pull up a magic ring and place six single crochets into it. Pull the ring closed firmly.
Work two single crochets into every stitch around the next round. Twelve stitches total.
Alternate one plain single crochet with one increase six times around. Eighteen stitches reached.
Work one plain stitch, one increase, two plain stitches, then one increase. Repeat this four times around. Twenty-four stitches total.
Single crochet straight across all twenty-four stitches for the next round with no changes at all.
Work two plain stitches followed by one increase, repeated eight times around. Thirty-two stitches total.
Single crochet across all thirty-two stitches for one full round. No shaping needed here.
Rounds 8 through 14 – Shaping the Heart
This is where the heart shape begins to develop. Pay attention to stitch counts at the end of each round.
Work three plain stitches followed by one increase, repeated eight times around. Forty stitches total.
Single crochet across all forty stitches for one round straight.
Work four plain stitches then one increase, eight times around. Forty-eight stitches reached.
Single crochet across all forty-eight stitches for two full rounds with no changes.
Now begin the dip at the top of the heart. Work twenty-two single crochets, then one decrease, then two single crochets, then one decrease, then finish the remaining stitches around. Forty-six stitches remain.
Repeat the same shaping in the following round work to the center dip, decrease on each side of it, then finish the round. Forty-four stitches remain.
Rounds 15 through 22 – Closing the Heart
Begin stuffing the heart at this point. Continue adding stuffing as you progress through these rounds. Do not wait until the end or the opening will be too small to fill properly.
Work three plain stitches, one decrease, three plain stitches repeat four times around. Twenty-eight stitches remain.
Alternate one decrease with five plain stitches, four times around. Twenty-four stitches left.
Work two plain stitches, one decrease, two plain stitches repeat four times. Twenty stitches remain.
Alternate one decrease with three plain stitches, four times around. Sixteen stitches left.
Work one plain stitch, one decrease, one plain stitch repeat four times around. Twelve stitches remain.
Alternate one decrease with one plain stitch, four times around. Eight stitches left.
Insert the wire into the heart now before closing. Push the looped end up into the center of the heart. The straight end will extend downward to form the balloon stick.
For round twenty-one, work into the front loops only. Place two single crochets into every stitch around. Sixteen stitches total. This creates the small gathered neck of the balloon.
Single crochet across all sixteen stitches for one final round. Fasten off and weave in your end neatly.
Customization and Variations
This pattern is so simple to personalize. Small changes make each balloon feel completely different.
- Try different colors: Baby pink is classic but red makes a bold Valentine’s statement. Lavender, peach, or soft white all look stunning, depending on the occasion
- Make a bunch: Cluster three or five balloons together at different heights by using wires of varying lengths. The effect is genuinely gorgeous as a centerpiece
- Add embellishments: A tiny crocheted bow tied around the wire just below the heart adds the sweetest finishing touch
- Use sparkle yarn: A yarn with a slight shimmer gives the balloon a festive, celebratory feel perfect for birthdays and anniversaries
- Go miniature: Drop to an even finer hook and thread to create tiny heart balloon charms perfect for keychains or bag tags
- Change the wire covering: Instead of wrapping the wire with matching yarn, try a contrasting color for a two-tone balloon-on-a-stick look
- Create a garland: Make multiple hearts without the wire and string them together along a length of ribbon for a beautiful wall decoration
Common Mistakes to Avoid
A few things worth knowing before you begin so the process stays smooth and enjoyable.
- Forgetting to stuff as you go: The opening gets very small in the final rounds. Start stuffing from round fifteen and keep adding a little at a time rather than trying to cram it all in at the end
- Sharp wire edges: Always loop and tape the wire end before inserting. An exposed wire tip can work through the yarn over time and become a safety issue
- Losing the spiral: Use a stitch marker at the beginning of every round. Continuous spiral crochet is easy to lose track of without one
- Uneven wire wrapping: Take your time covering the wire with yarn. Gaps in the wrapping look untidy once the project is finished
- Skipping the front loop round: Round twenty one worked in front loops only is what creates that characteristic gathered balloon neck. Skipping it makes the bottom look flat and unfinished
- Overstuffing: Too much stuffing distorts the heart shape and causes the stitches to spread. Firm but gently squeezable is the sweet spot
- Rushing the fasten off: Weave the yarn end through several directions before trimming. A loose end on a finished gift piece is always disappointing
Finishing Tips
Taking a little extra care at the end makes the finished Crochet Heart Balloon Pattern look polished and professional.
- Trim yarn ends close but not flush: Leave just a tiny bit of length after weaving in so the end cannot pull back through to the surface
- Check the wire sits straight: Before the final rounds close up, make sure the wire is centered and sitting upright inside the heart. Adjusting it afterward is very difficult
- Smooth the neck stitches: The gathered neck at the bottom of the heart sometimes needs a gentle tug and reshape after fastening off to sit neatly
- Display on a small stand: A tiny floral foam block or a decorative pot filled with rice or sand holds the wire beautifully upright for display
- Mist and reshape if needed: A light spritz of water and gentle reshaping by hand before drying fixes any unevenness in the heart shape
- Use sharp scissors for yarn ends: Clean cuts sit flatter and are easier to tuck away neatly than ragged trimmed ends
- Gift wrap thoughtfully: Slide the finished balloon into a clear cellophane bag and tie with a ribbon for the most charming little handmade gift presentation imaginable
Gifting Ideas
This Crochet Heart Balloon Pattern is one of those rare handmade gifts that suits almost every occasion and every person.
- Valentine’s Day: An obvious choice but genuinely the most heartfelt one. A handmade heart says something a bought gift simply cannot
- Mother’s Day: Pair a pink heart balloon with a small potted plant or a handwritten letter for a gift that feels truly special
- Wedding decoration: A cluster of white or cream heart balloons arranged as a table centerpiece looks elegant and unique
- New baby gift: Soft pink or lilac works beautifully for a nursery decoration that doubles as a keepsake
- Friendship gift: Make one in your friend’s favorite color just because. No occasion needed sometimes that is the best kind of gift
- Birthday centerpiece: A bundle of balloons in birthday colors arranged together in a small vase makes a stunning and lasting alternative to real balloons
- Get well soon: Bright cheerful pink sitting on a bedside table carries more warmth than a card ever could
Conclusion
There is a reason this Crochet Heart Balloon Pattern keeps showing up all over craft blogs and Pinterest boards. It is quick enough to finish in a single sitting, pretty enough to display proudly, and personal enough to give as a gift that genuinely means something. The wire insert gives it that playful balloon-on-a-stick look that makes everyone smile the moment they see it. Make one this weekend and see how quickly it turns into two, then five, then a whole windowsill full of pink hearts. Happy crocheting every stitch of this one is worth it.