Delightful Crochet Vi from Arcane Doll Amigurumi Pattern
Delightful Crochet Vi Arcane Doll Amigurumi Pattern blends handmade charm with beginner-friendly steps, quick rounds, and polished details perfect for gifting Arcane fans, collectors, and crafty friends.
Meet the Delightful Crochet Vi Arcane Doll Amigurumi Pattern, a punchy-chibi project that softens Vi’s grit into pocket-sized charm. Beginner-friendly rounds, tidy shaping, and minimal sewing keep the make relaxing and quick, while sculpted gauntlets and pink fringe add character without complexity.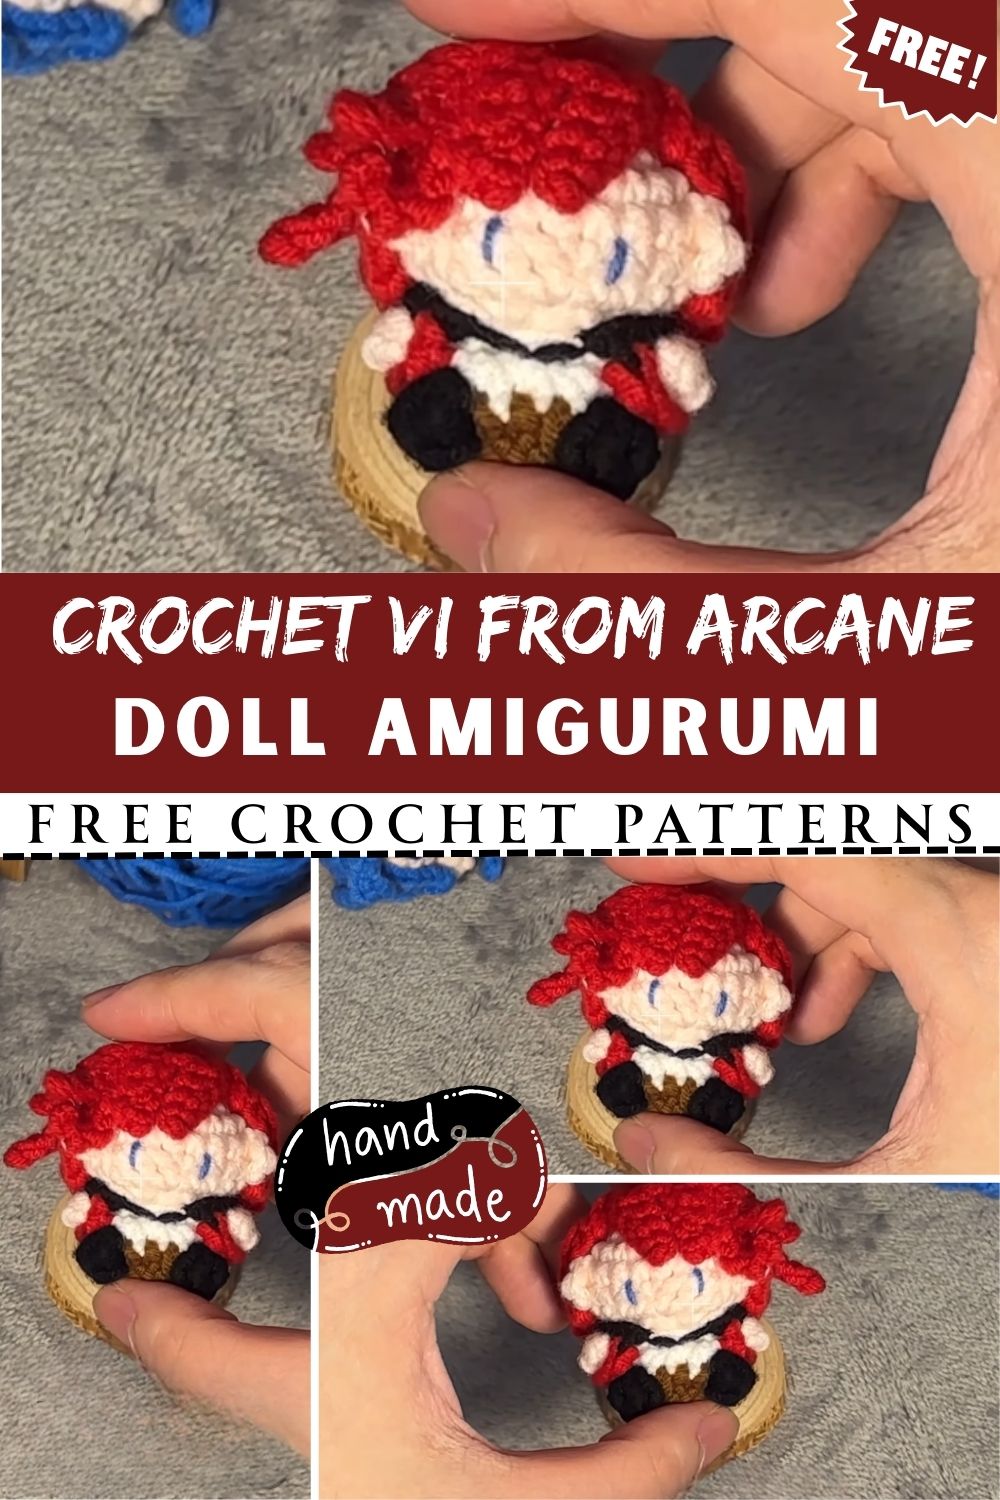
Durable finishes and secure attachments mean this crochet doll is ready for everyday admiration. Stitch it as a thoughtful gift for Arcane fans, brighten a desk or display shelf, or add a split ring to turn it into a bag charm or keychain.
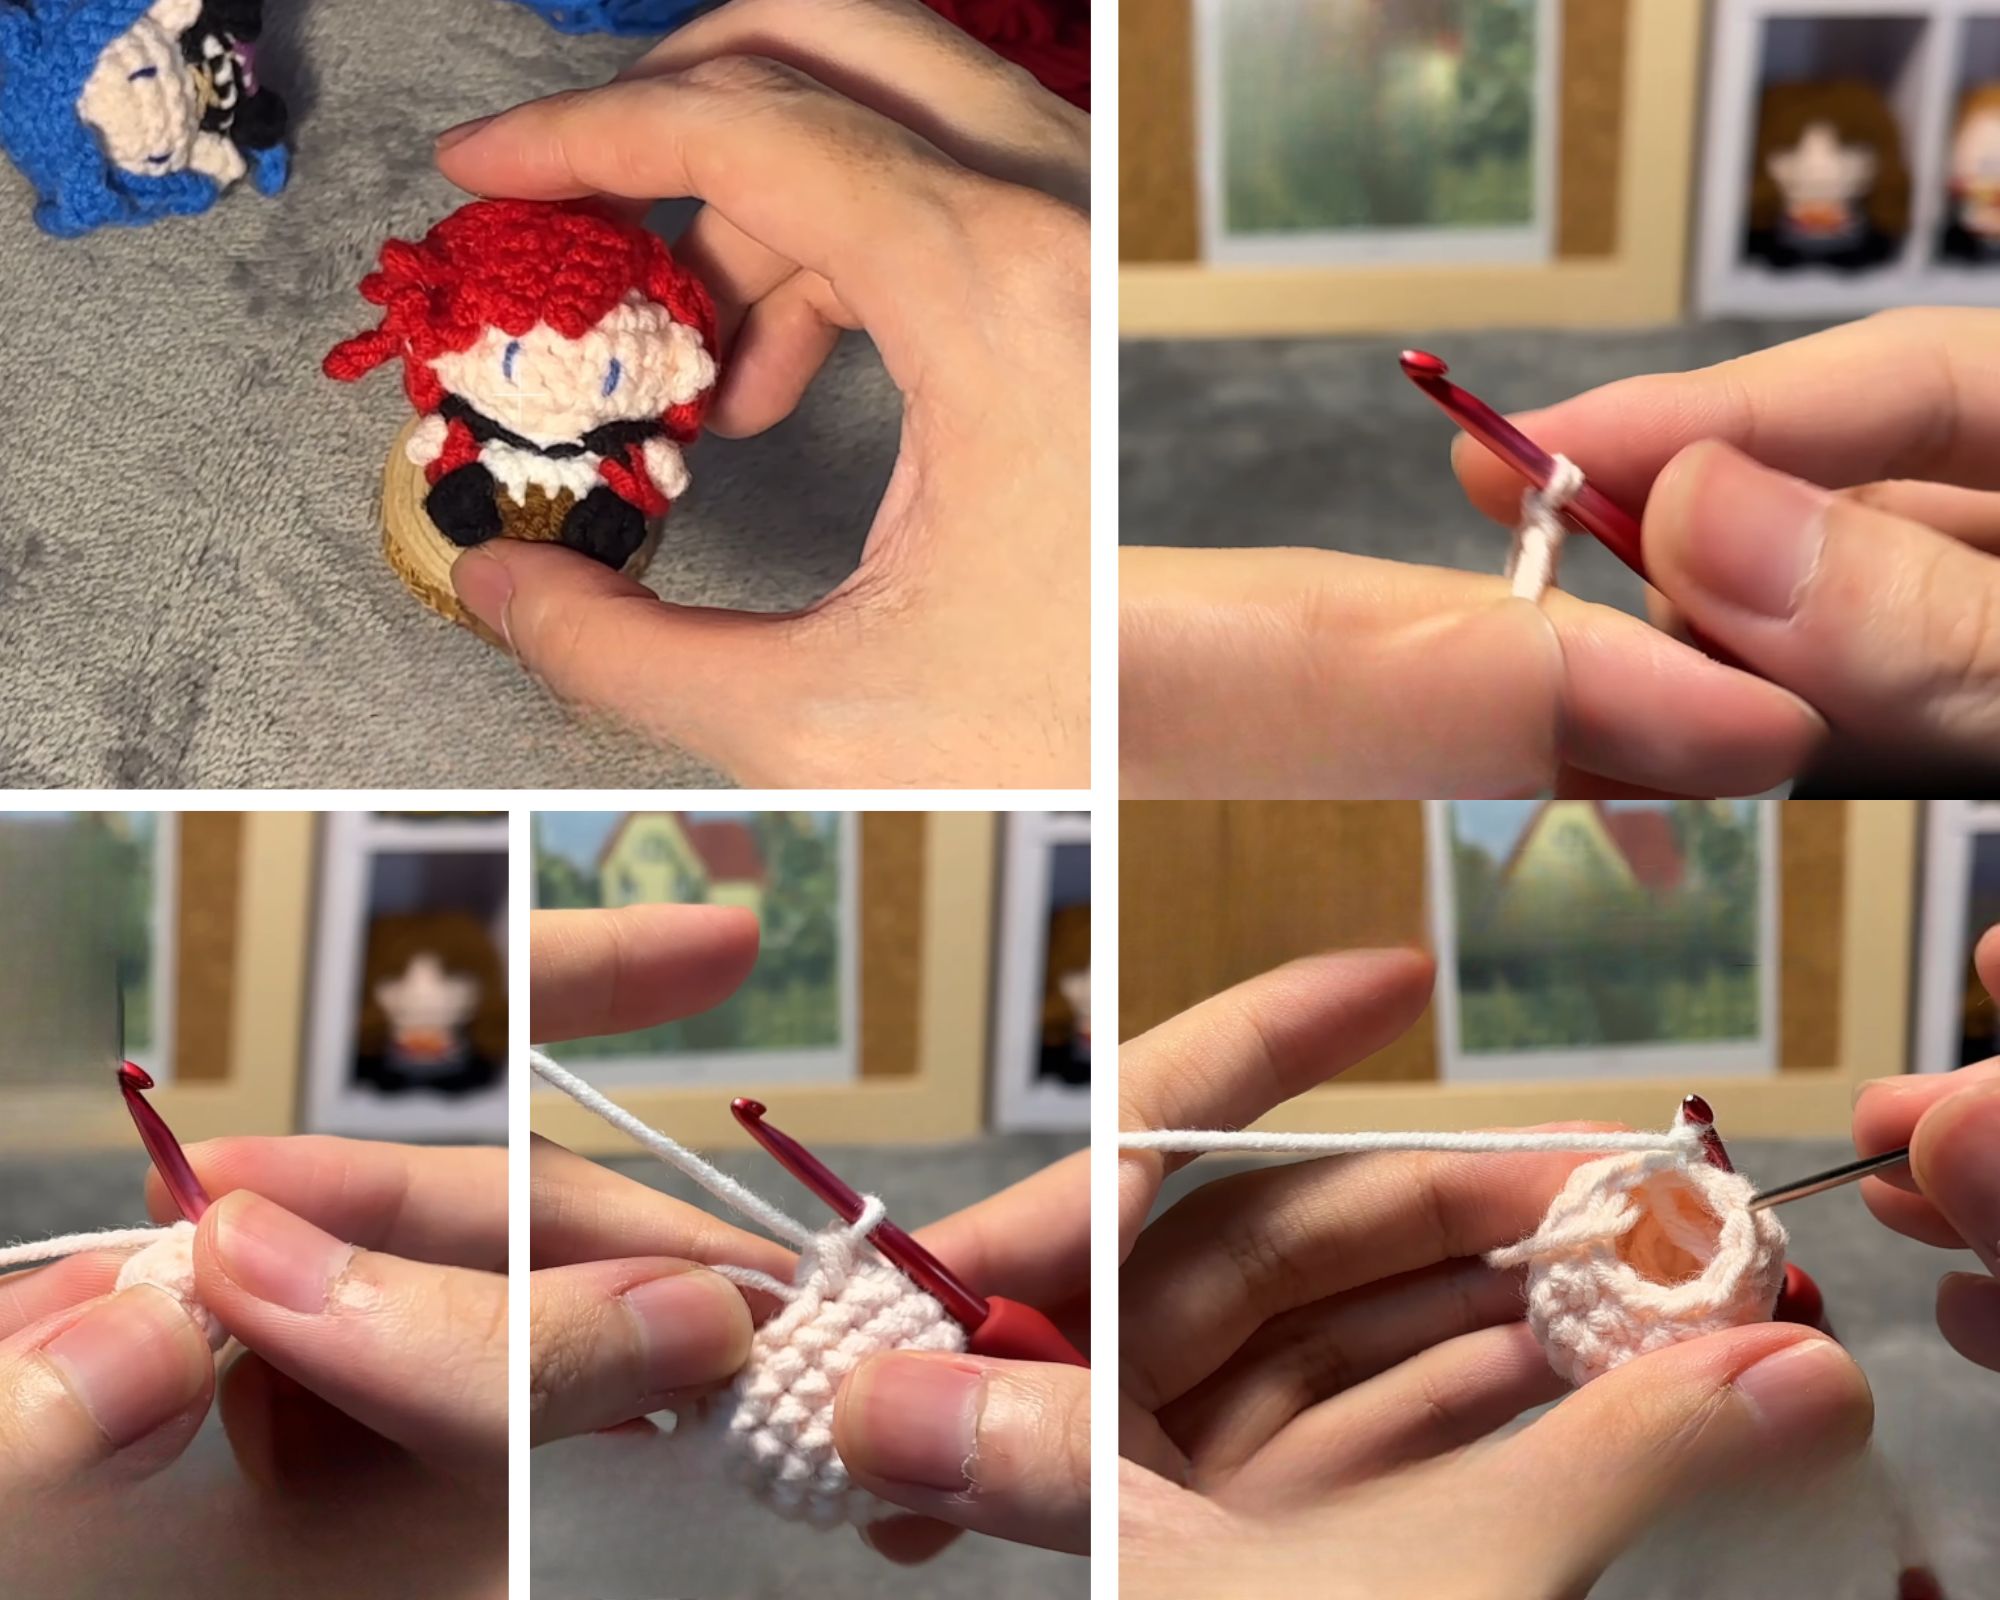
Delightful Crochet Vi from Arcane Doll Amigurumi Pattern
What You’ll Need
- Yarn: 100% cotton DK (light worsted, #3), smooth and non-splitting
- Skin tone: 15 g (≈ 40 m)
- Hair pink: 12 g (≈ 32 m)
- Jacket teal or burgundy: 10 g (≈ 27 m)
- Pants charcoal or navy: 8 g (≈ 22 m)
- Gauntlets brown: 12 g (≈ 32 m)
- Accent gold or mustard: 3 g (≈ 8 m)
- Black (small details): 2 g (≈ 5 m)
- Hook: 2.5 mm for firm stitches (alternatively 3.0 mm if hands are naturally tight)
- Safety eyes: 8 mm (pair)
- Stuffing: 20–25 g premium polyester fiberfill
- Stitch markers: 2–3 lock-style markers
- Tapestry needle: size 16 or 17, blunt tip
- Scissors and small pliers (for eye washers)
- Pins or clips: 6–8 for positioning parts
- Optional: 25 mm keychain ring, short chain, and jump ring
- Optional: Fabric glue (tiny dab for knots), seam ripper (to adjust placement), and a small slicker brush (for softening yarn ends)
Skill Level
Beginner-friendly (Easy). Basic amigurumi skills required: magic ring, single crochet, increases, decreases, color changes, and simple sewing. Clear shaping and minimal seaming keep the process approachable, even for a first doll.
Making Time (Overview)
Total time: approximately 6–8 hours, depending on pace and stitch tension. The body and head take the longest, while the hair, gauntlets, and small embellishments add quick, satisfying finishes. Since each part works up in short bursts, the project fits nicely into a weekend.
Step-by-Step Instructions
This cozy amigurumi pattern captures Vi’s punchy charm in a small, huggable doll. Stitches stay simple, shapes stay clear, and details stay bold without requiring advanced techniques. As a result, the build feels smooth from start to finish.
— Body —
- Shape the torso and hips
- First, begin with a tight magic ring in pants color. Work even increases to form a firm base (think a small, flat circle), then slightly tapers for the waist using gentle decreases.
- Next, switch to the jacket color at the waistline to suggest clothing. Maintain even rounds for a few rows so the torso looks neat and balanced.
- Finally, add light stuffing as you go. Because consistent stuffing prevents ridges, place small tufts evenly rather than large clumps.
- Extend the chest and neck.
- First, continue in jacket color to build a short chest section.
- Then, shift to the skin tone at the neckline. Mark the first stitch of the color change to keep the seam in the back.
- Meanwhile, add a subtle decrease or two to hint at a neck without making it too thin; a sturdy neck keeps the head from wobbling.
- Grow the head and cl.ose
- First, increase steadily in skin tone to your widest head circumference (rounds should feel smooth and symmetrical).
- Next, work several plain rounds for height. Insert the 8 mm safety eyes evenly spaced, usually 6–7 stitches apart and centered across the face.
- Finally, decrease slowly to close the crown. Pausing to stuff in small amounts ensures a round, wrinkle-free head. Use invisible decreases for a clean finish.
Making time for the body: about 2–2.5 hours.
— Additional Parts —
Ears (small human ears)
- First, with skin tone, crochet two tiny half-moon shapes (a few stitches wide). Slight shaping with a decrease at one side gives a realistic curve.
- Next, leave a long tail for sewing.
- Finally, block lightly with fingers to match sizes.
Making time: 10–15 minutes.
Arms (with mini jacket sleeves)
- First, work the hand in skin tone: start with a magic ring, increase once, then crochet a few rounds straight for a petite hand.
- Next, change to jacket color and continue for the sleeve, keeping stitches even and compact.
- Then, add a tiny wedge of stuffing in the hand only; leave the sleeve lightly stuffed or unstuffed for poseable softness.
- Finally, close with a flat edge to whipstitch onto the torso.
Making time: 40–50 minutes for both.
Legs (boots and pants)
- First, begin with the boot toe in brown or black and increase to a small oval.
- Next, build the boot shaft for a few rounds before switching to the pants color. Maintain an identical stitch count on both legs so they match perfectly.
- Meanwhile, lightly stuff as you go, paying extra attention to the ankles for smooth contours.
- Finally, close the top so the seam sits on the inside thigh for easy, even attachment.
Making time: 60–75 minutes for both.
Gauntlets (Vi’s signature gloves)
- First, crochet two chunky cuffs in brown. Use back-loop-only rows or waistcoat stitch to create texture.
- Next, add simple panels or ridges in gold accents to suggest plating; short rows or front-post stitches work beautifully here.
- Then, slip them over the arms or sew them directly on, depending on preference.
- Finally, secure tail ends inside for a tidy interior.
Making time: 45–60 minutes for both.
Hair (swept pink fringe)
- First, create a cap by crocheting a shallow dome in pink to fit snugly over the top and back of the head.
- Next, add fringe pieces: cut several lengths or crochet thin strips, then attach them along the hairline and sweep them to one side.
- Meanwhile, lightly brush the tips for a soft, feathered look, or leave them crisp for a stylized chibi vibe.
- Finally, tack the fringe in place with tiny stitches so it stays dramatic and secure.
Making time: 30–45 minutes.
Jacket collar and accents
- First, crochet a small rectangular band in the jacket color for the collar; fold it and sew around the neckline’s back half.
- Next, add short strip accents or buttons in gold or mustard to suggest fastenings.
- Finally, weave in all ends neatly behind the collar.
Making time: 20–30 minutes.
Optional keychain loop
- First, chain a short loop at the top of the head or attach a sturdy ribbon loop while closing the head.
- Next, slide on a 25 mm key ring and close the loop firmly.
- Finally, add a small dab of fabric glue to the knot for extra security.
Making time: 5 minutes.
Heart / Accessories / Details
- First, make a tiny heart in red or fuchsia using a magic ring with quick increases, then two small bumps joined together.
- Next, stitch the heart to one gauntlet or place it on the chest as a sweet gift tag.
- Finally, add embroidered details: a confident eyebrow angle, a petite nose, and a small mouth in blush or deep pink.
Making time: 15–20 minutes.
Face & Assembly
- First, check eye placement before locking the washers. Stand back for a moment to confirm symmetry; eyes should sit level and evenly spaced.
- Next, embroider eyebrows with black thread or a single strand of black yarn, slanting slightly for a determined look. Add a tiny line for the nose and a small smile or neutral mouth to match the character’s attitude.
- Then, pin the ears at eye level and sew with tiny, even stitches.
- Meanwhile, attach the legs first to anchor the body. Align the inner seams, whipstitch around, and keep stitches tight.
- After that, sew on the arms, slightly forward-facing, so the gauntlets remain visible.
- Next, slide on or sew the gauntlets and secure the jacket collar.
- Then, fit the hair cap, tack around the hairline, and arrange the fringe to sweep to one side.
- Finally, smooth the stuffing, roll the doll gently between palms to settle fibers, and trim stray ends for a polished finish.
Beginner-friendly tip: Place pins at the front center, back center, and each side of the neckline before sewing the head or collar. Because these anchors guide placement, everything stays straight without guesswork.
Special Features
- Chibi proportions with a slightly oversized head for instant cuteness.
- Textured gauntlets that look bold without complex techniques.
- Swept pink fringe that frames the face and adds playful motion.
- Minimal seams: many pieces work in the round, so assembly stays simple.
- Sturdy, cuddle-friendly structure with firm stitches and balanced stuffing.
Sizing Tips
- With DK cotton and a 2.5 mm hook, the finished height averages 12–14 cm (4.75–5.5 inches).
- With worsted (#4) cotton or acrylic and a 3.25 mm hook, the doll grows to 15–17 cm (6–6.75 inches).
- For miniature keychains, use sport-weight cotton (#2) and a 2.0 mm hook, reducing each part’s rounds by 1–2 while keeping proportions similar.
- Because hook size affects stitch tightness, choose the smallest hook that still allows comfortable crocheting without hand strain.
Finishing Tips for (Crochet Vi Arcane Doll Amigurumi)
- First, use invisible decreases (under both front loops) to prevent “bite marks” where the fabric narrows.
- Next, stuff in layers: add small tufts, press lightly with a fingertip, and test for firmness. Consequently, the shape remains smooth and never lumpy.
- Then, weave in ends along the inside of seams rather than across open fabric. This approach hides tails and prevents shadows under lighter yarns.
- After that, steam-block very lightly from a safe distance to relax minor kinks. Avoid direct heat on safety eyes.
- Finally, check all attachments by tugging gently. If anything shifts, add two extra reinforcing stitches for long-term durability.
Common Mistakes to Avoid
- Overstuffing the neck: too much fiberfill widens stitches and warps the head angle. Instead, stuff the neck gradually and reinforce with one extra decrease round if needed.
- Uneven eyes: locking eyes before checking symmetry leads to an unbalanced expression. Therefore, always preview placement with pins or temporary safety eyes first.
- Loose stitches: gaps show stuffing and weaken seams. If gaps appear, switch to a smaller hook or tighten tension slightly.
- Joggy color changes: switching colors at the same stitch every round creates a visible line. To fix, stagger the change or use a jogless technique by pulling up the new color in the last step of the previous stitch.
- Twisted limbs: skipping alignment pins makes legs tilt outward. As a result, thighs may appear uneven. Align and pin at several points before sewing.
- Skipping tail securing: unsecured knots can unravel with use. Always weave back and forth in several directions and, if desired, use a minuscule dab of fabric glue to lock knots.
Variations & Customization Ideas
- Color palette: try berry pink hair with a charcoal jacket for a moody look, or switch to electric magenta with a teal jacket for vibrant contrast.
- Expression: alter eyebrow slant for fierce, neutral, or soft; add a tiny highlight stitch in each eye for sparkle.
- Outfit tweaks: embroider small diamonds or lines on the jacket, add a belt in gold, or sew micro “buckles” on the boots with metallic thread.
- Size shifts: scale up with chunkier yarn and a larger hook for a plush, huggable version; scale down with finer yarn for keychains or bag charms.
- Themed sets: pair this Vi-inspired doll with a contrasting companion character or create a matching heart charm in colors that reflect a favorite team or mood.
- Display ideas: mount the doll on a simple wooden base using a thin wire through one boot, or attach a key ring to the crown loop for secure everyday carry.
Tutor Suggestions for (Crochet Vi Arcane Doll Amigurumi)
- Practice the magic ring with scrap yarn before starting. After two or three tries, the ring will close neatly and stay tight.
- Use two stitch markers simultaneously: one for the round start and one for the increase point. Consequently, increases remain evenly spaced, and shaping stays consistent.
- Rest your hands every 20–30 minutes. Short breaks prevent tension from creeping into stitches and keep the fabric uniform.
- Count aloud or use a clicker app for increases and decreases. Because consistent counts matter most in small dolls, this habit saves time later.
- Test-stuff as you go. If the body bends or the head tilts, remove a pinch of stuffing and redistribute. Small adjustments make a big difference.
- Keep a small length of hair yarn aside for last-minute touch-ups. A single extra strand can fill a gap and complete the fringe.
- When gifting, include a tiny care card: spot clean only, avoid high heat, and handle safety eyes with care. This thoughtful touch elevates the handmade experience.
Making Time Recap
- Body (torso + head): 2–2.5 hours
- Arms (with sleeves): 40–50 minutes
- Legs (boots + pants): 60–75 minutes
- Gauntlets: 45–60 minutes
- Hair (cap + fringe): 30–45 minutes
- Jacket collar and accents: 20–30 minutes
- Heart/accessories: 15–20 minutes
- Assembly and finishing: 30–45 minutes
Final Thoughts for Beginners
Start with calm, steady stitches and clear checkpoints. First, finish the body and head to lock in shape. Next, add limbs and gauntlets so the silhouette feels strong. Meanwhile, place the hair and fringe to frame the face and set the expression. Finally, add tiny details, collar, accents, and a little heart to bring out character and warmth. With simple techniques, careful stuffing, and tidy seams, this amigurumi Vi-inspired doll turns into a charming, gift-ready keepsake that looks delightfully handmade and proudly unique.