
Cute Crochet Mini Monkey Plush Keychain Amigurumi Step-by-Step Pattern
This cute amigurumi monkey crochet tutorial will walk you through a beginner-friendly step-by-step pattern guide to make a tiny plush-style monkey. With a round head, big circular ears, a beige muzzle, rosy cheeks, and a long tail, this mini monkey is perfect as a keychain, bag charm, gift, or small crochet doll.
If you’re looking for a small project that’s full of personality, this cute amigurumi monkey crochet tutorial is a sweet one to try. The design has that classic amigurumi look, simple shapes, clean stitches, and an adorable face. Still, it also feels extra “plush” thanks to the compact body, softly rounded limbs, and a decorative little collar that makes the finished monkey look polished and gift-ready.
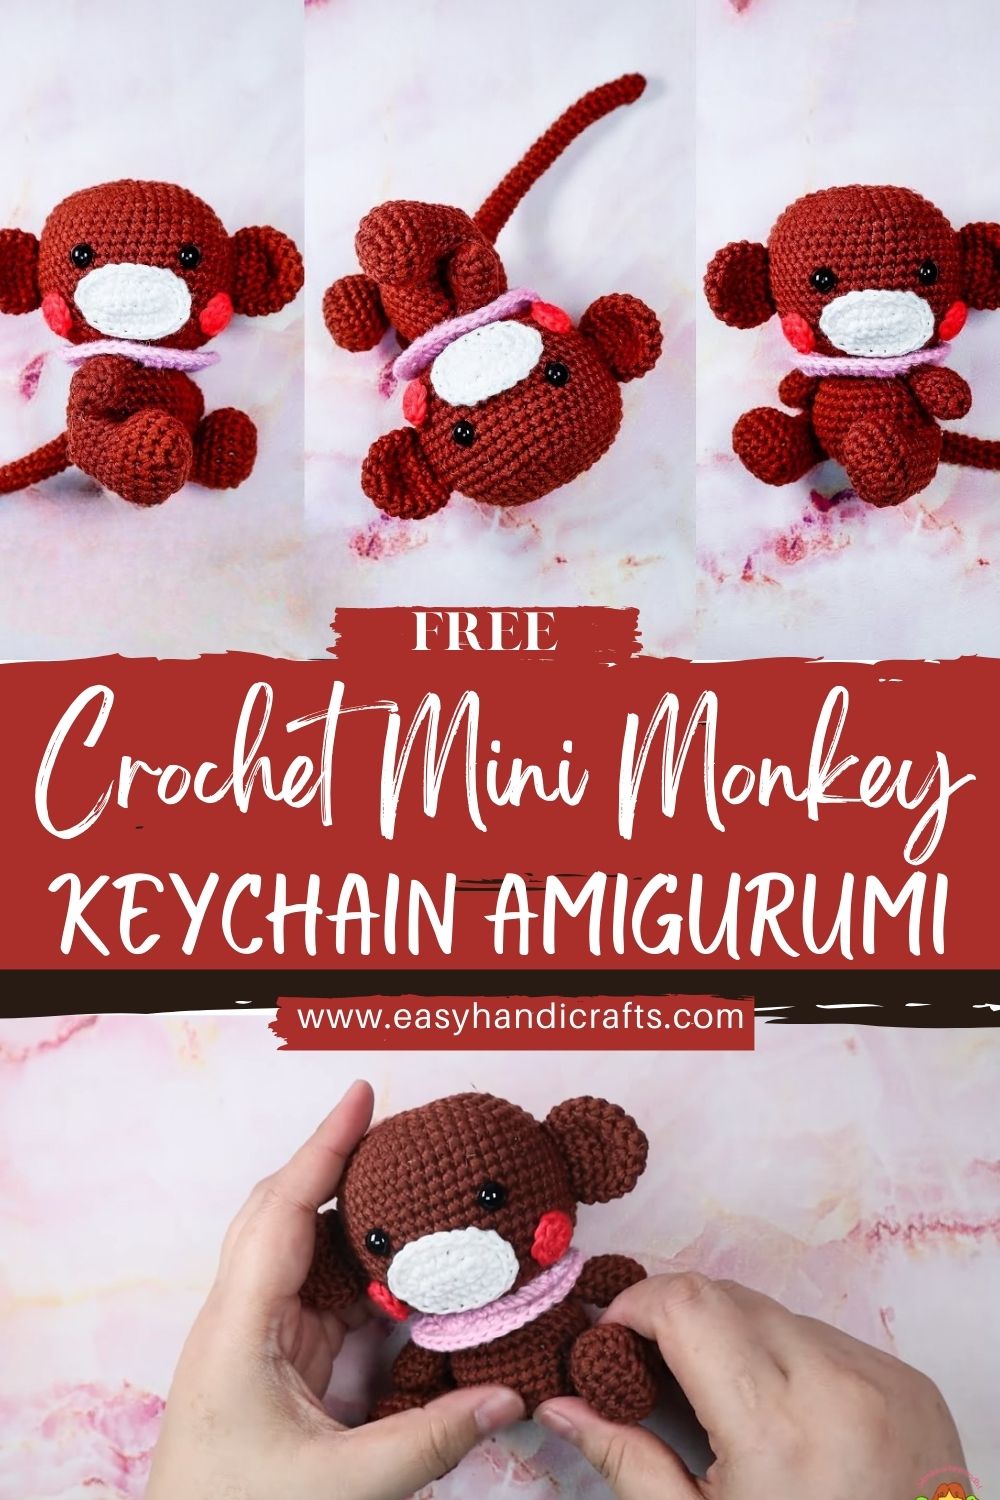
This guide is written in a friendly, beginner-focused style and covers every part: head, muzzle (face patch), ears, arms, legs, body, tail, decorative details, and final assembly. I’ll explain shaping in a clear way using descriptive instructions (like “increase evenly around” or “work several rounds without increasing”), so you can follow along even if you’re still getting comfortable with amigurumi.
Quick disclaimer: This is an inspired crochet guide for a classic, cute monkey style (amigurumi aesthetic). It’s not based on a specific brand character, and you’re encouraged to customize the colours, facial expression, and accessories to make it truly your own.
Materials Needed
- Yarn (amigurumi-friendly: cotton or acrylic; chenille/plush yarn also works, but it’s trickier for beginners)
- Crochet hook (use a slightly smaller hook than the yarn label suggests for tighter stitches)
- Polyester fiberfill stuffing
- Tapestry needle (for sewing parts and weaving in ends)
- Stitch markers (or a scrap of contrasting yarn)
- Scissors
- Small black safety eyes or black embroidery thread
- Optional: pink/red yarn or blush for cheeks
- Optional: keychain hardware (split ring, lobster clasp, or swivel clip)
Yarn Colours and Tools
Suggested yarn colours (classic cute monkey palette):
- Main body: medium brown
- Muzzle/face patch: beige or soft white
- Inner ear detail (optional): beige/white to match muzzle
- Cheeks: pink or red (small accent)
- Collar: cream, pastel, or a bright contrasting colour (mint, yellow, blue, or red)
Tools that help with a neat finish:
- Invisible decrease technique (for smoother shaping)
- Straight pins (to hold pieces in place while sewing)
- A small stuffing tool (chopstick, pencil eraser end, or closed scissors handle)
Skill Level
Beginner to intermediate.
- Easy parts: head/body basic shaping, simple arms and legs
- Slightly tricky parts: placing the muzzle neatly, aligning ears symmetrically, attaching a long tail so it looks balanced
If you can crochet single crochet in the round and do basic increases/decreases, you can make this monkey.
Crochet Abbreviations / Terms
- MR: magic ring (magic circle)
- ch: chain
- sc: single crochet
- inc: increase (2 sc in the same stitch)
- dec: decrease (preferably invisible decrease)
- sl st: slip stitch
- rnd: round
- st(s): stitch(es)
- FO: fasten off
- BLO/FLO: back loop only / front loop only
Pattern note: Work in a continuous spiral unless stated otherwise. Use a stitch marker in the first stitch of each round.
Finished Design Description
Your finished monkey will be a small, plushy amigurumi with:
- A round head and compact body for that “mini plush” look
- Big circular ears that give instant monkey vibes
- A beige/white muzzle (face patch) that frames the smile
- Small black safety eyes (or embroidered eyes for extra softness)
- Pink/red cheeks for a cute, friendly expression
- Short limbs that keep it keychain-sized
- A long, thin tail (curled or relaxed)
- A soft decorative collar that adds charm and a finished-toy feel
Great for: baby shower gifts (with embroidered eyes), desk decor, mini dolls, backpack charms, party favours, and handmade keychains.
Step-by-Step Pattern Breakdown
A. Head
Goal: A smooth, round head that’s slightly bigger than the body (classic amigurumi proportion).
- Start with a magic ring (MR).
Crochet your first round into the ring to form a small circle. - Round-by-round shaping (descriptive):
- Increase further over several rounds to expand the circle into a wider dome.
- Once it’s wide enough, work several rounds without increasing the height to build a nicely rounded head.
- Begin closing the head by decreasing evenly around.
- When to stuff:
- Start stuffing when the opening begins to narrow (usually when you’re partway through the decrease rounds).
- Add stuffing in small pieces, pressing it outward so the cheeks and forehead look smooth.
- Keep it firm enough to hold shape but not so stuffed that stitches stretch.
- Eye placement:
- Place eyes on the front of the head before fully closing (or mark positions with pins).
- A cute look usually comes from eyes that are evenly spaced and set slightly above the muzzle.
- If using safety eyes, insert them now and secure the washers on the inside.
- If embroidering eyes, you can wait until after the muzzle is attached, but mark the spots now.
- Finish:
- Complete the final decreases.
- Fasten off, leaving a long tail for sewing (you’ll use it later to attach the head to the body, unless you prefer to sew with a new strand).
Tip for a plush look: After stuffing, gently roll the head between your palms to smooth lumps.
B. Muzzle (Face Patch)
Goal: A soft oval or round patch that sits on the lower front of the face.
- Choose the shape:
- Oval muzzle: Great for a classic monkey face (slightly wider than tall).
- Round muzzle: Extra cute and simplified for beginners.
- How to crochet it (descriptive):
- Start with an MR (for round) or a short foundation chain (for oval).
- For a round: increase evenly around until it’s the size you like for the face.
- For an oval: work around the chain, adding extra stitches at each end to curve it, then work additional rounds to widen slightly.
- Attachment to the face:
- Pin the muzzle to the lower centre of the head.
- Sew around the edge using small, neat whip stitches.
- Placement tips:
- Keep the muzzle centred under the eyes.
- If you want a sweeter expression, place the muzzle a touch lower to create a bigger forehead area.
- Before sewing fully, add a tiny bit of stuffing behind the muzzle (optional) to make it slightly raised and plush.
Slightly tricky part: Sewing the muzzle evenly. Take your time and reposition pins as needed.
C. Ears
Goal: Big circular ears that sit balanced on both sides of the head.
- Circular ears:
- Start with an MR.
- Increase evenly around for a few rounds to create a flat circle.
- Keep the ear fairly flat; no stuffing is needed.
- Optional inner ear detail:
- Make a smaller circle in beige/white.
- Stitch it onto the front of the ear for extra contrast.
- Symmetry and positioning:
- Hold the head facing you and pin both ears in place before sewing.
- Place them at the same height, roughly aligned with the eye line or slightly above.
- Check the front and top views for symmetry.
- Attaching method:
- Sew the ears using the outer edge and small stitches.
- For a cupped-ear look, lightly fold the ear in half at the base, add a stitch or two to shape it, then sew.
D. Arms
Goal: Small cylindrical arms that look cute without being bulky.
- Construction:
- Start with an MR in brown.
- Increase slightly to form a small tube.
- Work several rounds without increasing to create a short arm.
- Light stuffing or flexible shaping:
- For mini plush keychain-style, arms are often best left unstuffed or very lightly stuffed.
- Flatten the opening and stitch it closed (or leave it open to sew directly to the body).
- Finish:
- Fasten off, leaving a long tail for sewing.
- Make two arms and keep them the same length (count your rounds as you go).
E. Legs
Goal: Rounded legs/feet that help the monkey sit nicely.
- Shape:
- Start with an MR.
- Increase evenly to create a small foot base.
- Work a couple of rounds evenly, then continue into a short leg tube.
- Balance and sitting position:
- Stuff lightly, especially in the foot area.
- Keep legs short so the body stays compact and “chibi.”
- Before sewing, pin both legs to the body and set the monkey down. Adjust placement so it can sit without tipping forward.
- Finish:
- Fasten off with a sewing tail. Make two.
F. Body
Goal: A compact, small body that supports the head and keeps the toy keychain-sized.
- Start:
- Begin with an MR in brown.
- Shaping:
- Increase evenly around until the base is a bit smaller than the head width.
- Work several rounds without increasing to build a short, rounded capsule shape.
- Near the top, you can decrease slightly to form a gentle neck area (optional).
- Stuffing:
- Stuff firmly so the monkey feels plush and holds shape.
- Keep the top opening clean for attaching the head.
- Connection with head:
- Either fasten off and sew the head on, or crochet the body to a point where you can join the head with sewing for a strong hold.
- Fasten off,f leaving a long tail for sewing if sewing.
G. Tail
Goal: A long, thin tail that adds monkey character and movement.
- Long thin tail construction:
- Start with an MR or chain a small length, then lengthen and work back (either method works).
- Create a skinny tube by working in sc with minimal increases.
- Work many rounds/rows without increasing until the tail is as long as you like.
- Shaping:
- Leave it unstuffed for a flexible tail.
- If you want a curled tail, you can:
- Crochet slightly tighter, or
- Add a gentle stitch pattern that encourages curling (like working one side tighter), or
- Shape it during sewing by tacking it in a curved position.
- Attaching:
- Pin the tail to the lower back of the body.
- Sew securely in a small circle so it won’t wobble.
Keychain note: The tail can catch on things if making a keychain. Consider a slightly shorter tail or tack it closer to the body.
H. Decorative Details
Goal: Bring the face to life and finish the plush look.
- Eyes:
- Safety eyes: small black eyes placed evenly.
- Embroidered option: stitch sleepy eyes, dots, or small ovals with black thread for a baby-safe style.
- Nose:
- Stitch a tiny nose on the muzzle (a small horizontal line, triangle, or little “Y” shape).
- Keep it subtle for a soft expression.
- Smile:
- Embroider a gentle curved smile under the nose.
- For extra cuteness, add a tiny mouth line that curves slightly upward.
- Cheeks:
- Add small blush circles with pink/red yarn.
- Alternatively, use a tiny amount of cosmetic blush or pastel (test first).
- Collar detail (soft decorative collar):
- Crochet a simple collar strip: chain to fit around the neck and add a small edge (like a scallop or picot-style look).
- Or make a ruffled collar by stitching a small decorative round at the neck area with gentle increases to create waves.
- Attach the collar after the head is sewn on so it sits neatly at the seam.
I. Final Assembly
Goal: Attach all parts evenly, balance proportions, and give the monkey that finished plush toy charm.
- Pin everything first:
- Head on body
- Ears on the head
- Muzzle on the face
- Arms and legs on the body
- Tail on back
- Collar around the neck
- Recommended assembly order:
- Attach muzzle to head (embroider nose/smile after)
- Add/secure eyes (if not already placed)
- Sew ears to the head
- Sew head to body (very securely tight stitches all around)
- Sew legs, then arms
- Sew tail
- Add cheeks and collar last
- Balancing proportions:
- Check that the legs are aligned so the monkey sits centred.
- Make sure arms are at the same height.
- Ears should match in angle and distance from the face.
- Final shaping tips:
- Add a pinch more stuffing if the head wobbles.
- Gently massage the plush to smooth out uneven spots.
- Weave in ends carefully and hide knots inside the body.
Assembly Instructions
Here’s a quick, beginner-friendly checklist you can keep beside you:
- Face first: muzzle → nose → smile → cheeks
- Head details: ears attached and aligned
- Core join: sew the head to the body with strong stitches
- Limbs: sew legs (balance for sitting) → sew arms (symmetry)
- Back detail: tail attached securely
- Finishing: collar added to hide neck seam + optional keychain loop
Optional keychain loop:
- Stitch a small loop of yarn or strong thread at the top of the head (or behind the collar at the back of the neck).
- Attach your keyring/clasp through the loop. Reinforce with extra stitches for durability.
Customization Ideas
- Colour swaps: try tan + cream for a baby monkey, grey + white for a modern look, or pastel tones for a kawaii style
- Different expressions: sleepy eyes, closed eyes with lashes, or a tiny open smile
- Add accessories: mini banana, tiny heart, little bow, or a backpack
- Change the collar: swap for a scarf, bandana, or tiny hoodie collar
- Make it a set: matching monkey keychains in different colours for friends or family
Beginner Tips
- Use a tight tension (amigurumi looks best when stuffing doesn’t show).
- Count rounds by marking the first stitch. Spiral crocheting can be confusing at first.
- For neat sewing, use the same yarn colour as the piece you’re attaching.
- Take photos before sewing—seeing the layout helps you spot asymmetry.
- If you’re using plush/chenille yarn, switch to embroidered eyes and go slowly (stitches can be harder to see).
Common Mistakes to Avoid
- Loose stitches → stuffing shows through (especially on head and muzzle)
- Overstuffing → stretched fabric and pointy shapes
- Eyes not level → expression looks “off” even if everything else is perfect
- Ears placed too far back → face loses that cute front-forward look
- Tail attached too low or too high → can throw off balance, especially for sitting poses
- Skipping pinning → leads to uneven arms/legs and extra re-sewing
Who This Project Is For
This mini monkey is ideal for:
- Beginners wanting a first cute amigurumi animal with clear, simple parts
- Intermediate crocheters who enjoy refining details like cheeks and collar
- Gift-makers who want a small handmade toy that looks thoughtful and polished
- Anyone who loves mini plush crochet, keychain amigurumi, or desk-friendly decor
Conclusion
This cute amigurumi monkey crochet tutorial is a joyful little project that combines classic beginner-friendly shapes with charming details, including big ears, a soft muzzle, rosy cheeks, and a long tail that instantly says “monkey.” Whether you turn it into a keychain, a mini doll, or a sweet handmade gift, the real magic is how customizable it is. Change the colours, try different facial expressions, or swap the collar style, and you’ll end up with a monkey that feels yours completely.


