Crafting the Perfect Crochet Lantern Bunny DIY Project
Understanding the fundamental crochet techniques is a critical step before embarking on the bunny project. Begin with mastering the slip knot, as it is the foundation of most crochet projects. Learn how to create a chain, which is the basis for starting most crochet patterns. Practice the single crochet stitch, one of the simplest and most commonly used stitches. Additionally, familiarize yourself with the double crochet stitch, which is slightly more complex but essential for various patterns. By practicing these techniques, one gains the confidence and skill necessary to move on to more intricate projects.
Step-by-Step Guide to Crafting the Perfect Crochet Lantern Bunny
- Gather Materials
- Yarn in desired colors
- Crochet hook suitable for the chosen yarn
- Scissors
- Yarn needle for sewing pieces together
- Stuffing material (fiberfill)
- Safety eyes or buttons for the bunny’s face
- A small paper lantern to serve as the bunny’s base structure
- Start with the Bunny’s Head and Body:
- Begin by making a magic ring and crochet six single crochets into the ring.
- Continue increasing in each round until the desired size for the bunny’s head is reached.
- Once the head is complete, proceed with the body in a similar fashion, ensuring it is proportionate to the head.
- Create the Ears:
- Form a chain of the required length for the ear.
- Crochet single crochet stitches down the chain, turn and single crochet up the other side.
- Shape the ears by crocheting decreases where necessary to achieve a slightly tapered look.
- Make two ears in this manner.
- Assemble the Bunny:
- Attach the ears to the top of the head using a yarn needle and the same yarn used to crochet the pieces.
- Secure the eyes and embroider a small nose and mouth with black yarn or embroidery thread.
- Stuff the head and body lightly with fiberfill to give it shape.
- Attach to the Lantern:
- Carefully cut a small hole in the bottom of the paper lantern and insert the stuffed crochet bunny head and body, ensuring it fits snugly.
- Use hot glue or a strong adhesive to secure the crochet bunny to the lantern, allowing it to peek out adorably.
- Finishing Touches:
- Add any additional decorations such as a small bow around the bunny’s neck or embellishments on the lantern.
- Ensure all pieces are securely attached and the bunny is firmly in place within the lantern.
This bunny lantern is perfect for festive decorations or as a cute addition to any room. By following these steps, even beginners can achieve a charming and flawless result.
How To Crochet Moon & Bunny
The process of crocheting a bunny involves several detailed steps, starting from the head and body, moving on to the ears and tail, and finally assembling the pieces and adding facial features. Here’s a comprehensive guide inspired by the video:
Head and Body
- Creating the Head:
- Begin with a magic ring and make a series of single crochets to form a tight circle.
- Gradually increase the number of stitches in each subsequent round to expand the circle.
- Once the desired diameter is reached, continue crocheting in the round without increasing to build up the height of the head.
- Start decreasing the number of stitches to close the top of the head, ensuring it forms a spherical shape.
- Forming the Body:
- Start similarly with a magic ring and increase stitches to match the diameter of the head.
- After reaching the desired size, crochet in the round to build the body’s height.
- Decrease the stitches to create a taper towards the bottom, forming an oval or rounded shape.
- Stuff the head and body firmly with fiberfill before closing off.
Ears and Tail
- Making the Ears:
- Use a magic ring to start and create a small circle with single crochets.
- Increase the stitches in a few rounds to form an ear shape.
- Crochet in the round without increasing to achieve the desired length.
- Slightly decrease towards the top of the ear to give it a pointed or rounded finish.
- Creating the Tail:
- Start with a small magic ring and a few single crochets to form the base.
- Gradually increase the stitches to expand the circle just a bit.
- Crochet a few rounds without increasing to give the tail a slight puffiness.
- Finish off and stuff lightly before closing.
Assembly and Facial Features
- Assembling the Bunny:
- Attach the head to the body securely, ensuring a firm connection.
- Position the ears on top of the head, sew them in place carefully.
- Attach the tail to the back of the body, making sure it holds well.
- Adding Facial Features:
- Use embroidery floss or thin yarn to stitch eyes and a nose directly onto the face.
- Optionally, add a small mouth or some whiskers for additional detail.
By following these steps, one can effectively crochet a delightful bunny, perfect for gifting or as a decorative piece. The key is in the detailed shaping and careful assembly to ensure the bunny looks cute and well-proportioned.

How To Crochet Cute Moon & Bunny For Decorate Home
Creating your own home decor items is not only a delightful hobby but also a means to infuse your personal touch and creativity into your living space. Imagine the joy of crocheting a charming moon and bunny that can add a whimsical and cozy feel to any room. This step-by-step guide will show how to crochet these adorable decorations, and it’s perfect for both beginners and seasoned crochet enthusiasts.
The process begins with selecting the right materials, such as soft yarn in your desired colors, crochet hooks, fiberfill, and a few basic tools like scissors and a darning needle. Following the initial setup, the journey to create a cute moon starts with a magic ring, followed by increasing stitches to form a circle and eventually shaping it into a crescent. The bunny is constructed similarly, starting with a magic ring for the head and body, creating ears and a tail, then assembling all the parts together. Finally, attaching the bunny to the moon and adding any extra decorative elements will complete the project, resulting in a unique and handmade addition to your home decor. By dedicating time to these creative endeavors, one discovers an enjoyable and fulfilling way to make one’s space truly personal and inviting.

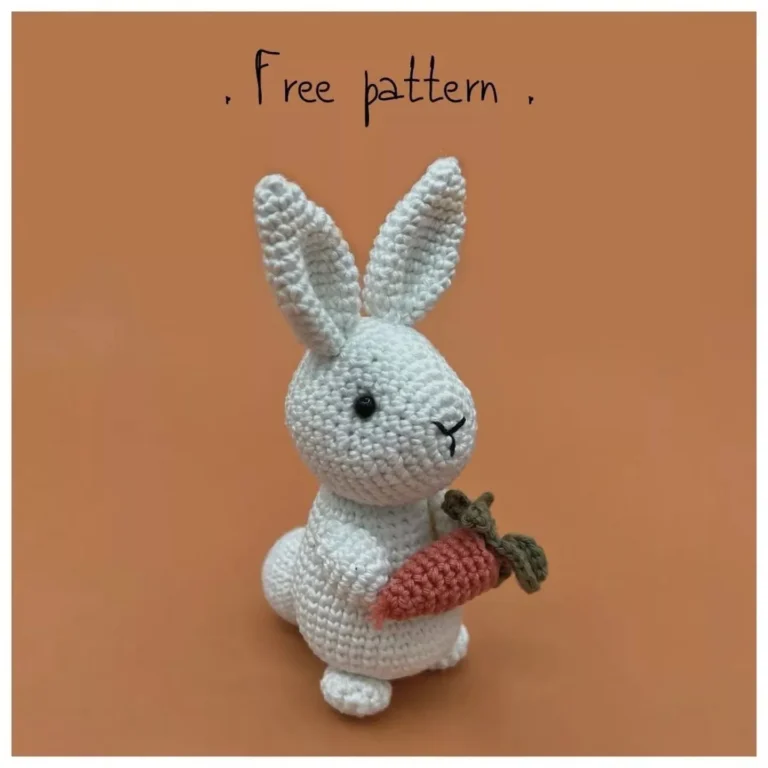
How To Crochet Lenten Bunny
To crochet a charming Lenten bunny, having the right materials is essential for achieving the best results. Here is a detailed list of materials needed, inspired by the techniques and tools showcased in the video:
Yarn
Selecting the right yarn is crucial for this project. A soft, durable yarn is recommended to ensure the bunny is both cuddly and sturdy. Cotton or acrylic yarns are suitable choices. opt for a main color for the bunny’s body and an additional color if there are any planned accents or details.
Crochet Hooks
The choice of crochet hook size will depend on the yarn thickness. Generally, a 4.0 mm (G-6) or 4.5 mm (7) crochet hook works well with medium or worsted weight yarn. Ensure that the hook size complements the yarn to maintain even stitches and the desired texture.
Fiberfill
To give the bunny its shape and softness, fiberfill stuffing is necessary. It will be used to fill the head, body, and other parts like the ears and limbs to achieve a plush and firm appearance.
Safety Eyes and Nose
Safety eyes and noses are commonly used for amigurumi projects, providing a secure and polished look. Choose appropriately sized eyes and a nose to fit the design scale, ensuring they are firmly attached.
Embroidery Floss
Embroidery floss can be used to add finer details to the bunny’s face, such as eyelashes or a mouth. It’s also useful for any extra decorative stitches that enhance the bunny’s appearance.
Stitch Markers
Stitch markers are helpful in keeping track of rounds and important stitch locations, especially when working with repetitive or complex crochet patterns.
Scissors and Darning Needle
A pair of sharp scissors is essential for snipping yarn ends neatly. Additionally, a darning needle, with its large eye, is necessary for weaving in yarn ends and sewing parts together seamlessly.
Measuring Tape
Using a measuring tape ensures that parts of the bunny are made to the correct dimensions, maintaining symmetry and proportion throughout the project.
Creating a Lenten bunny with these materials ensures a delightful and well-crafted result. Following a structured approach with the right tools and supplies makes the crocheting process enjoyable and efficient.

Step By Step Crochet Lantern Moon & Bunny
When crocheting intricate designs such as a lantern moon or a bunny, several common mistakes can arise. One frequent issue is inconsistent tension, which can lead to uneven stitches and a less polished appearance. Ensuring uniform tension throughout the project helps maintain a cohesive and professional look. Another mistake is misunderstanding or misreading the pattern instructions. It’s crucial to thoroughly read through the entire pattern before starting and to follow each step carefully.
In addition, many crocheters struggle with counting stitches accurately. Losing track of stitches can result in incorrect shapes and sizes. Using stitch markers and frequently counting stitches can help avoid this problem. When working on small or detailed parts, taking breaks can prevent fatigue and reduce the chances of mistakes.
For a more professional and polished finish, it’s important to block the finished piece. Blocking involves dampening the crochet piece and pinning it into shape to dry, which helps even out stitches and sets the fabric in the desired form. Proper finishing techniques, such as weaving in ends neatly and securely, also contribute to the overall quality of the project.

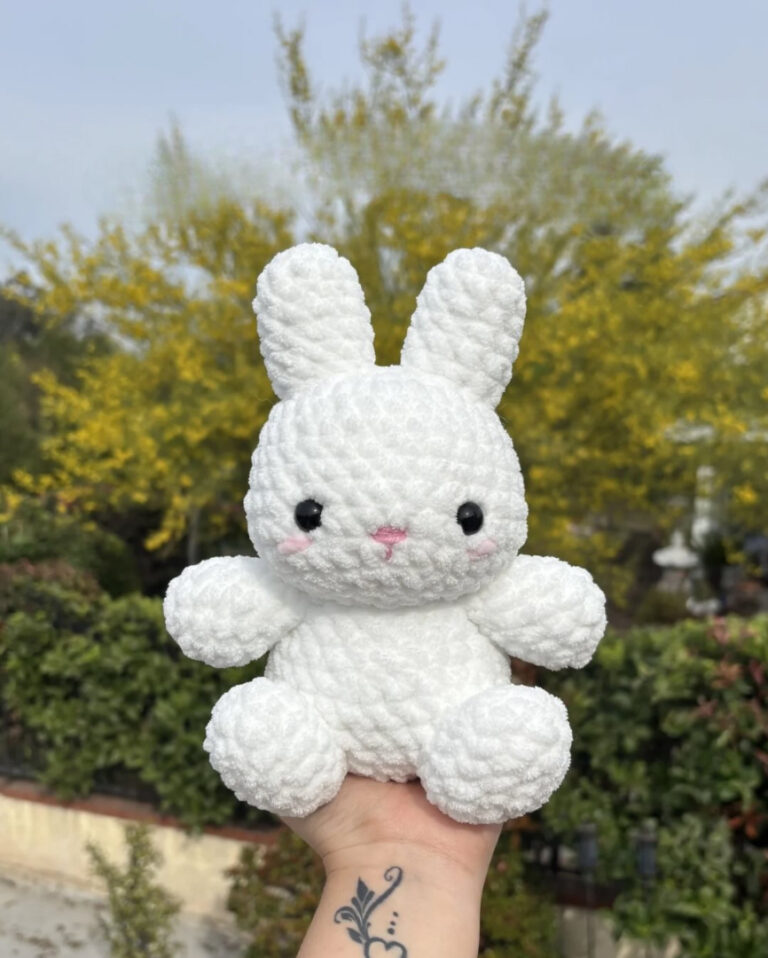
Create A Crochet Amigurumi Easy Lantern Bunny
Creating a crochet amigurumi lantern bunny requires a thoughtful selection of materials to ensure both quality and ease of handling. Below is a comprehensive list of necessary items, suggested yarn types, and specific crochet tools and accessories integral to the project.
Yarn Recommendations
- Soft Cotton Yarn: opt for a high-quality, medium-weight cotton yarn. This yarn type is durable yet soft, making it suitable for amigurumi, providing a clean and polished finish.
- Color Selection: Choose colors that complement the whimsical nature of a lantern bunny, such as pastels or vibrant hues that can add character and charm.
Crochet Hooks
- Appropriate Hook Size: Typically, amigurumi projects use a smaller hook size relative to the yarn weight, which helps achieve tight stitches. A 2.5mm to 3.5mm hook is often ideal for medium-weight yarn, ensuring the stuffing remains concealed and the shape of the bunny is well-defined.
Additional Tools and Accessories
- Stitch Markers: Essential for keeping track of rounds and ensuring accurate stitch counts throughout the project.
- Tapestry Needle: A blunt-tipped needle suitable for joining pieces together and weaving in yarn ends neatly.
- Polyester Fiberfill: A sufficient amount of stuffing material is crucial for giving the bunny its shape and ensuring it has a plush, appealing look.
- Scissors: A sharp pair of small scissors for cutting yarn efficiently and cleanly.
Optional Embellishments
- Safety Eyes or Embroidered Features: For adding features to the bunny’s face, consider using safety eyes or hand-embroidery techniques for a child-safe alternative.
- Ribbon or Fabric Accessories: Small ribbons or fabric pieces can be used for adding charming details, such as a bow around the neck or decorative patches.
Selecting the right materials and tools in advance will streamline the creative process, fostering a joyful and seamless journey in bringing the crochet amigurumi lantern bunny to life.

Create A Crochet Cute & Easy Lantern Bunny
To create a crochet amigurumi lantern bunny, start by gathering the necessary materials: yarn in your desired colors, a crochet hook suitable for your yarn thickness, stuffing material, and a yarn needle. Begin by crocheting the bunny’s main body, using basic amigurumi techniques to form a round shape that will eventually be stuffed. Next, crochet the ears, legs, and arms separately, paying attention to symmetry and proportion.
The lantern can be crocheted in a similar manner, constructing a cylindrical or rounded shape that complements the bunny. Attach each component carefully, ensuring that the seams are neat and secure. Finally, add details such as eyes, facial features, or any decorative embroidery to bring the character to life. Engaging in this crochet activity offers a serene yet rewarding experience as it results in a delightful, handmade decorative piece.

Step By Step Crochet Bunny Holding Fish
Creating a crochet bunny holding a fish blends cultural significance with whimsical charm, making it an ideal project for crafters at any skill level. This delightful amigurumi toy not only celebrates the Lunar New Year by combining the symbols of abundance and the Year of the Rabbit but also offers a playful, cuddly companion perfect for decor or gifts. From the adorable floppy ears to the intricate fish detail nestled in its arms, each element of this bunny exudes cuteness and creativity. Whether using soft velvet yarn for an extra plush feel or opting for crisp acrylics, the result is a customizable piece that holds personal meaning.
The process begins with selecting suitable yarn and tools, using a weight 4 yarn in white for the bunny and red for the fish. The final assembly involves sewing the fish snugly into the bunny’s embrace and adding arms, with optional touches of blush for added character. The simplicity and flexibility of this project make it accessible for beginners, while offering seasoned crocheters the opportunity to refine their techniques.