Inspiring Crochet Cool Girl Asymmetrical Top Pattern
Elevate your wardrobe with the Inspiring Crochet Cool Girl Asymmetrical Top Pattern, beginner-friendly, stylish, and truly handmade. Follow clear steps and sizing to craft a flattering fit that layers well and makes a thoughtful, gift-worthy piece.
Bold angles, easy stitches, and wearable style meet the Inspiring Crochet Cool Girl Asymmetrical Top Pattern. This beginner-friendly crochet asymmetrical top is cute for its playful slant, airy drape, and clean, modern lines.

Clear instructions, simple shaping, and minimal seaming make the process relaxing and quick, with customization for length and fit. Layer it over a cami for everyday style, wear it as a breezy beach or festival cover-up, or gift a handmade piece to a fashion-forward friend. A satisfying make that turns basic stitches into a statement wardrobe staple.

Inspiring Crochet Cool Girl Asymmetrical Top Pattern
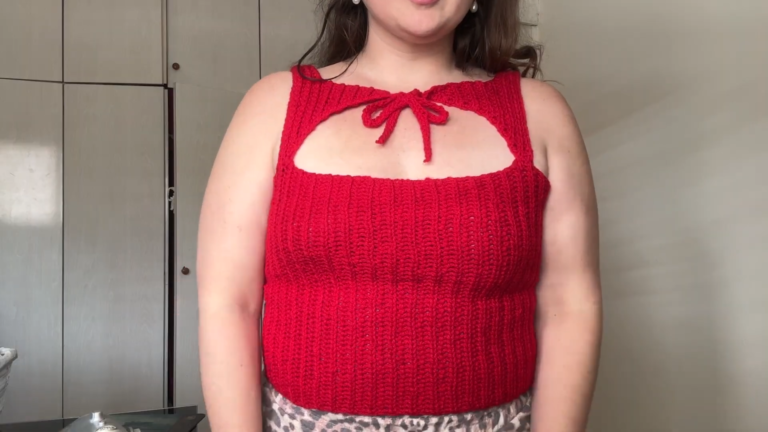
A cool girl asymmetrical top feels fresh, light, and easy to wear. From the first chain, the rhythm stays calm, the shaping stays clear, and the results look modern. First, a soft base sets the foundation. Next, a breezy body climbs upward with a gentle diagonal drape. Meanwhile, a sweet amigurumi charm can clip onto a strap or the hem for a playful finish. Finally, clean edges pull everything together for a polished, handmade look.
For clarity, each section flows with smooth transitions and simple language. As a result, complete beginners can move from step to step without feeling rushed or confused. Additionally, quick fit checks and little markers help the process feel relaxed and fun.
Materials required for (Crochet Girl Top Pattern)
- Yarn
- Category 4 (Worsted) cotton or cotton-blend yarn with soft drape
- Yardage (approximate; adjust for length and size):
- XS–S: 550–700 yds (503–640 m)
- M–L: 700–900 yds (640–823 m)
- XL–2XL: 900–1100 yds (823–1006 m)
- 3XL–5XL: 1100–1350 yds (1006–1235 m)
- For best comfort, choose breathable fibers: 100% cotton, cotton/modal, cotton/bamboo, or a gentle cotton/acrylic blend
- Hooks
- 5.0 mm hook for the main fabric
- 4.5 mm hook for edging and small details
- Gauge (recommended, lightly blocked)
- 15 hdc x 11 rows = 4 in (10 cm)
- If stitches feel tight, move up a hook size; if fabric feels loose, move down
- Notions
- Stitch markers (6–10)
- Measuring tape (inches and centimeters)
- Tapestry needle (size 16/18)
- Scissors
- Clips or locking markers for seaming and alignment
- Optional Amigurumi Charm Supplies
- Small amount of Category 4 yarn (contrasting color looks cute)
- 6–8 mm safety eyes
- A pinch of stuffing (poly-fil or yarn scraps)
- 1 keychain ring or lobster clasp
- 2–3 jump rings and small pliers (optional)
Skill Level for (Crochet Girl Top Pattern)
- Beginner / Easy
First, basic stitches build confidence. Next, simple shaping creates the diagonal hem. Finally, straightforward seams and tidy edging complete the look. The bonus amigurumi charm uses tiny rounds and friendly decreases, so the add-on feels quick and fun.
Making Time (Overview)
- XS–M: about 6–9 hours
- L–XL: about 8–11 hours
- 2XL–5XL: about 10–14 hours
- Optional amigurumi charm: 20–30 minutes
Time may vary with stitch speed, yarn type, and chosen length.
Step-by-Step Instructions
To begin, set a steady pace and mark important points. Next, work on the base panels so the waist feels comfortable. Then, pick up stitches and shape the body for the crisp asymmetrical line. Finally, finish edges, add the charm, and block for a smooth drape.
First, review US stitch terms:
- ch = chain
- sl st = slip stitch
- sc = single crochet
- hdc = half double crochet
- dc = double crochet
- st(s) = stitch(es)
- rep = repeat
- RS/WS = right side/wrong side
- hdc2tog = half double crochet two together (decrease)
Before starting, measure:
- Waist at the smallest point
- Desired length from under-bust to hem (shorter side), plus 3–5 in (7.5–12.5 cm) for the longer drop if a dramatic angle is preferred
Match gauge for the best fit. Otherwise, adjust hook size until the fabric feels soft yet holds shape.
Body
Estimated making time for the Body section: 3–6 hours (varies by size and length).
- Bottom Waist Panel (Ribbed Base)
- Purpose: A comfy foundation that stretches slightly and sits neatly at the waist.
- Steps:
- To start, use a 5.0 mm hook and ch a length equal to the desired finished top length on the shorter side minus 2 in (5 cm) for a gentle stretch (for many sizes, 12–16 in / 30–40 cm). Add 2 ch for the turning chain.
- Row 1 (WS): Hdc in the 3rd ch from hook and in each ch across. Turn.
- Row 2 (RS): Ch 1 (does not count as a st). Hdc in both loops of the first st to anchor the edge. Next, hdc in the back loop only (BLO) across until 1 st remains. Then, hdc in both loops of the last st. Turn.
- Row 3: Repeat Row 2 for a soft rib.
- Continue repeating Row 2 until the panel equals half the waist measurement when lightly stretched (for example, a 30 in waist = work until the panel measures about 15 in).
- Finally, fasten off, leaving a long tail for seaming.
- Tip: For straight edges, place a marker in the first and last stitch of each row. Additionally, count every few rows to prevent drift.
- Join Front and Back Waist Panels
- Purpose: Form a comfortable loop that sits smoothly at the waist.
- Steps:
- First, make a second identical waist panel.
- Next, place panels with RS facing each other.
- Then, seam the short sides together on both ends using mattress stitch or a gentle slip-stitch seam to create a loop.
- Afterward, turn the loop RS out and lay it flat so the seams rest at the sides.
- Tip: Meanwhile, clip or mark the side seams to keep alignment consistent for later steps.
- Pick Up the Body and Shape the Asymmetry
- Purpose: Build the top upward and create the graceful diagonal drop.
- Steps:
- First, with RS facing and a 5.0 mm hook, join yarn at one side seam.
- Round 1 (foundation): Ch 1, then sc evenly around the top edge of the waist loop. Aim for an even number; however, a small adjustment is fine. Join with sl st to the first sc.
- Round 2 (fit check/increase): Next, switch to the 4.5 mm hook for a tidier body. Ch 1, work 2 sc into every 3rd st around to add a soft increase if extra bust comfort is needed. Join with sl st.
- Round 3 (set fabric): Then, ch 2 (counts as a turning chain), turn to work in rows instead of rounds so the asymmetry shapes cleanly.
- Work [hdc, ch 1, skip 1] across to 1 st before the end; hdc in the last st. Turn.
- Row 1 of slope (RS): Next, ch 2. At the start edge, increase with [hdc, ch 1, hdc] in the first hdc. Then, work [ch 1, skip 1, hdc] across; hdc in the final st. Turn.
- Row 2 of slope (WS): After that, ch 2. Work the repeat across. At the end edge, decrease to encourage the diagonal: [ch 1, skip 1], then hdc2tog over the last 2 hdc posts. Turn.
- Continue repeating Rows 1–2 until the shorter side reaches the underarm and the longer side forms a smooth diagonal across the hip.
- Underarm depth: Next, work 2–4 rows straight (no increases or decreases) to stabilize the armhole height.
- Neckline shaping (boat-neck style):
- First, place two markers to define a center neck opening that feels comfortable (commonly 8–12 in / 20–30 cm).
- Then, work each shoulder tab separately for 2–4 rows to create a clean, balanced edge.
- Finally, fasten off and set the piece aside for finishing.
- Fit note: At this point, try on the piece or place it on a dress form. If the diagonal angle feels too subtle, add one more increase/decrease repeat; if it feels too dramatic, remove one shaping repeat. Consequently, the hang will suit personal style and comfort.
Additional Parts
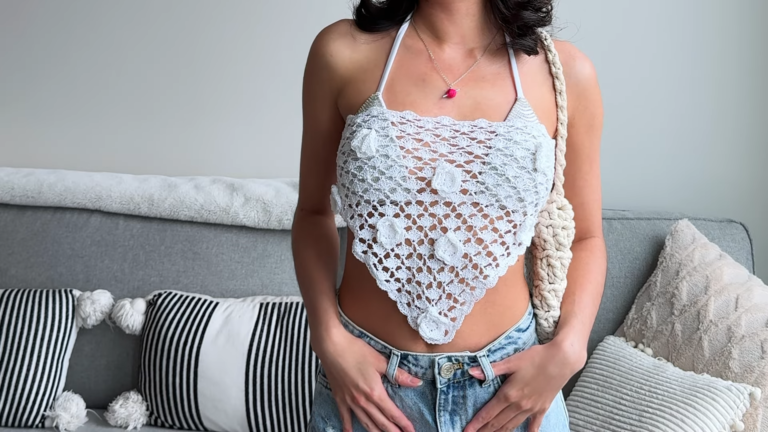
This top is sleeveless by design; however, the “Arms” section below offers edging options, a minimal strap for a one-shoulder variation, and a tiny amigurumi charm for extra personality.
- Arms (Armholes/Sleeve Options)
- Making time: 20–40 minutes per armhole; 15–25 minutes per strap.
- Clean Armhole Edging
- First, with RS facing and a 4.5 mm hook, join yarn at the side seam underarm.
- Round 1: Next, ch 1 and sc evenly around the armhole, placing 2 sc at sharper corners or decrease points to prevent puckers. Join with sl st.
- Round 2 (optional): Then, sc in the back loop only for a neat, corded finish. Join and fasten off.
- Tip: For a flat, smooth edge, keep tension relaxed rather than tight.
- Slim Shoulder Strap (one-shoulder variation)
- First, join yarn 2–3 sts in from the front neck corner.
- Next, ch 45–60 (adjust length to fit).
- Then, attach to the back neck edge at the matching spot with a sl st.
- After that, work back along the chain with sc for stability. Fasten off and secure tails.
- Fit check: Finally, try on the top and adjust the strap length if needed.
- Accessories / Details (if applicable)
- Making time: 10–20 minutes per edging; 10–15 minutes for a tie.
- Hem Tie or Side Tie
- First, ch 60–90 for a slim tie.
- Next, weave the chain through a few stitches near the longest hem point.
- Finally, tie a bow to create a soft ruched effect.
- Minimalist Neckband
- First, with a 4.5 mm hook, join yarn at one shoulder.
- Round 1: Next, ch 1 and sc evenly around the neckline; join with sl st.
- Round 2 (optional): Then, sl st loosely through the back loop only for a tidy rolled edge. Fasten off.
- Result: As a result, the neckline holds shape wash after wash.
- Face & Assembly (Amigurumi Charm)
- Making time: 20–30 minutes.
Add a pocket-sized amigurumi charm at the hem or strap for a lighthearted accent. A tiny bean, star, or heart works beautifully, yet stays understated.
- Tiny Bean Charm (simple version)
- To begin, with a 4.5 mm hook and worsted yarn, make a magic ring; work 6 sc into the ring.
- Next round: 2 sc in each st around (12).
- Following round: [sc, inc] around (18).
- Then, work two rounds evenly: sc in each st around (18).
- Decrease round: [sc, sc2tog] around (12). Insert a small pinch of stuffing.
- Final round: sc2tog around (6). Fasten off and close the hole neatly.
- Meanwhile, add 6–8 mm safety eyes between Rounds 2–3. Embroider a tiny smile if desired.
- Lastly, attach to a keychain ring with a jump ring and clip the charm to the strap or hem.
- Safety reminder: For secure wear, snap safety eyes tightly and weave tails in several directions. If needed, a tiny drop of fabric-safe glue on the WS helps lock knots discreetly.
Special Features
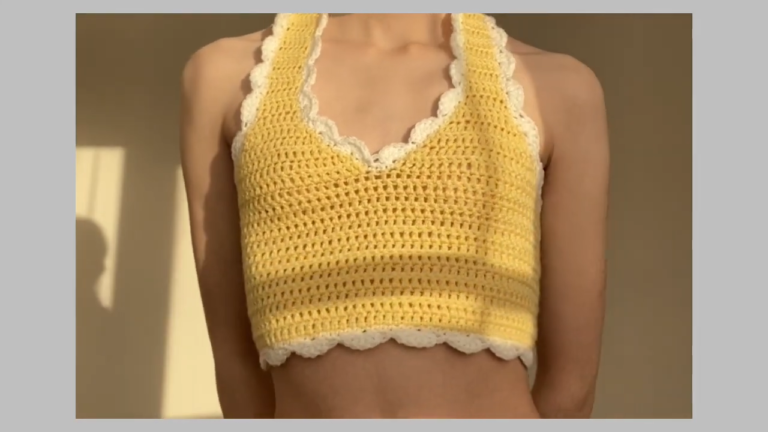
- Asymmetrical Hem
First, the diagonal adds modern style without complex shaping. Next, gentle increases and decreases guide the angle so the fabric hangs softly. Finally, the line flatters many body shapes with easy movement. - Breathable Texture
Cotton and cotton blends feel cool on the skin and drape beautifully. Meanwhile, simple stitches keep the fabric crisp and the look effortless. - Amigurumi Accent
A small amigurumi charm brings personality without overpowering the design. In addition, the charm makes a sweet gift-ready detail that can be switched seasonally. - Custom Fit
Because the piece is built to measurements, small tweaks in length, armhole depth, and neckline width tailor the top to different bodies with minimal effort.
Sizing Tips
- Gauge Matters
First, make a swatch and block it lightly. If stitches are tight, move up a hook size; if the fabric feels floppy, go down. Consequently, the final fit stays predictable. - Panel Width
Next, work the waist panels until each equals half the waist when slightly stretched. This approach creates ease without sagging. - Length Choices
Then, decide on the shorter side length that feels flattering. After that, extend the longer side gradually for the asymmetry. Shorter slopes read minimal; longer drops feel bold and dramatic. - Yarn Behavior
Finally, remember that cotton often relaxes after blocking. Therefore, measure the length after a light steam or wet block on the swatch. If using bamboo or modal blends, expect extra drape and consider a slightly tighter gauge.
Finishing Tips for (Crochet Girl Top Pattern)
- Neat Seams
First, align edges and place markers at quarter points for even joins. Next, seam with mattress stitch or a gentle slip-stitch seam while keeping tension steady. As a result, the sides and shoulders look clean on the outside. - Edge Control
Then, add a simple sc edging around armholes and neckline to stabilize high-use areas. Meanwhile, avoid tight stitches to prevent puckers. - Weaving Ends
Afterward, weave tails in at least three directions and trim on the WS only. Later, if any ends loosen after blocking, weave again for extra security. - Final Block
Finally, lay the top flat and smooth the diagonal into a graceful line. Block according to fiber instructions and allow the piece to dry fully before wearing.
Common Mistakes to Avoid for (Crochet Girl Top Pattern)
- Skipping the Swatch
Without a swatch, fit can feel uncertain. First, make a gauge square. Next, block it lightly. Finally, adjust hooks until stitches match the target. - Uneven Pick-Up Stitches
If stitches are picked up unevenly from the waist panel, ripples or tight spots may appear. To prevent this, count and space sc evenly around before beginning the body rows. - Shaping on Both Edges at Once
Keep increases and decreases on opposite edges to form a tidy diagonal. Otherwise, the fabric may twist or pucker. - Tight Edgings
If armholes or neckline feel snug, switch to the 4.5 mm hook for edgings or relax grip. Consequently, edges will lie flat and feel comfortable. - Heavy Charms
Attaching a heavy charm without reinforcement can pull the fabric. Instead, add a small yarn square or felt patch on the WS behind the attachment point for strength.
Variations & Customization Ideas for (Crochet Girl Top Pattern)
- Color Play
First, try color-block ribbing at the waist, then switch to a solid for the body. Next, consider playful stripes every 2–4 rows or blend two yarns for a marled effect. Finally, echo charm colors in the edging for a cohesive look. - Texture Swap
Alternatively, replace hdc rows with extended single crochet for a flatter drape. Or choose a DC mesh for airy, beachy vibes during warmer months. - Neckline Tweaks
For a deeper boat neck, widen the center gap by a few stitches. Conversely, for a higher neckline, reduce the opening and add one more edging round. - Asymmetry Levels
Prefer subtle lines? Add fewer shaping repeats. Love drama? Extend the slope so the long side skims the thigh. - Amigurumi Theme
Try a star, moon, heart, flower, or seasonal icon. Then, vary eye placement and add tiny blush stitches to shift the expression from sweet to sassy. - Size-Friendly Adjustments
When extra ease is desired at the bust, add one extra increase repeat on each side of the front panel only. Afterward, return to straight rows before neckline shaping.
Tutor Suggestions for (Crochet Girl Top Pattern)
- Start Small, Then Grow
First, practice the stitch pattern on a small swatch to settle into the rhythm. Next, confirm tension on increases and decreases. Then, move confidently into the full piece. - Use Markers Generously
Place markers at side seams, shaping edges, neckline corners, and shoulder tabs. Meanwhile, slide markers up every few rows to keep placement clear without constantly. - Count Calmly
After each shaping row, pause and count stitches. Because small miscounts multiply later, this short habit prevents bigger fixes. - Try-On Moments
Every few rows, hold the work to the body and check the diagonal. Later, small tweaks feel easier than major reworks. - Gentle Blocking
Cotton relaxes when blocked. Therefore, shape the diagonal deliberately so it looks crisp and intentional. Finally, wait until dry before moving the piece. - Charm Security
For the amigurumi accent, tie firm knots, weave tails in opposite directions, and, if needed, add a discreet dot of fabric-safe glue on the WS. Consequently, the charm stays secure during wear. - Confidence Booster
A steady stitch pattern, clear shaping, and simple seams make this a friendly first garment. With calm counting and generous markers, the process becomes relaxing and rewarding.
Finally, slip on the finished top and enjoy the easy movement and flattering angle. The breathable fabric, clean edges, and tiny amigurumi charm work together for a look that feels modern, handmade, and wonderfully wearable from the very first chain to the final bow.