Crochet Fish Bag and Beach Hat Pattern for Starters
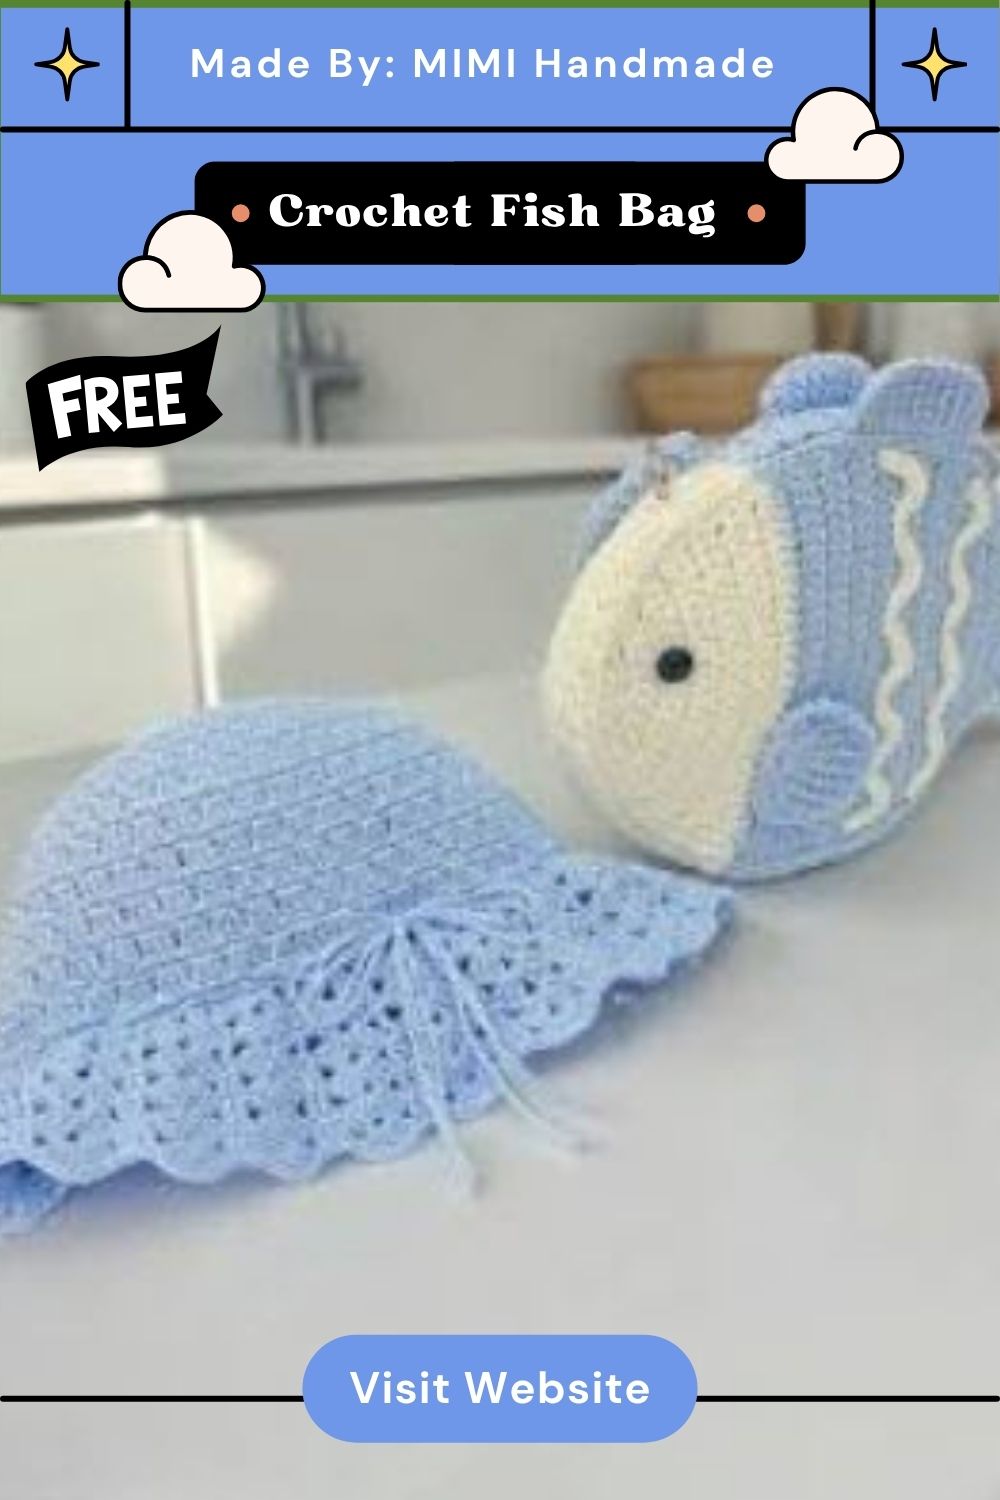
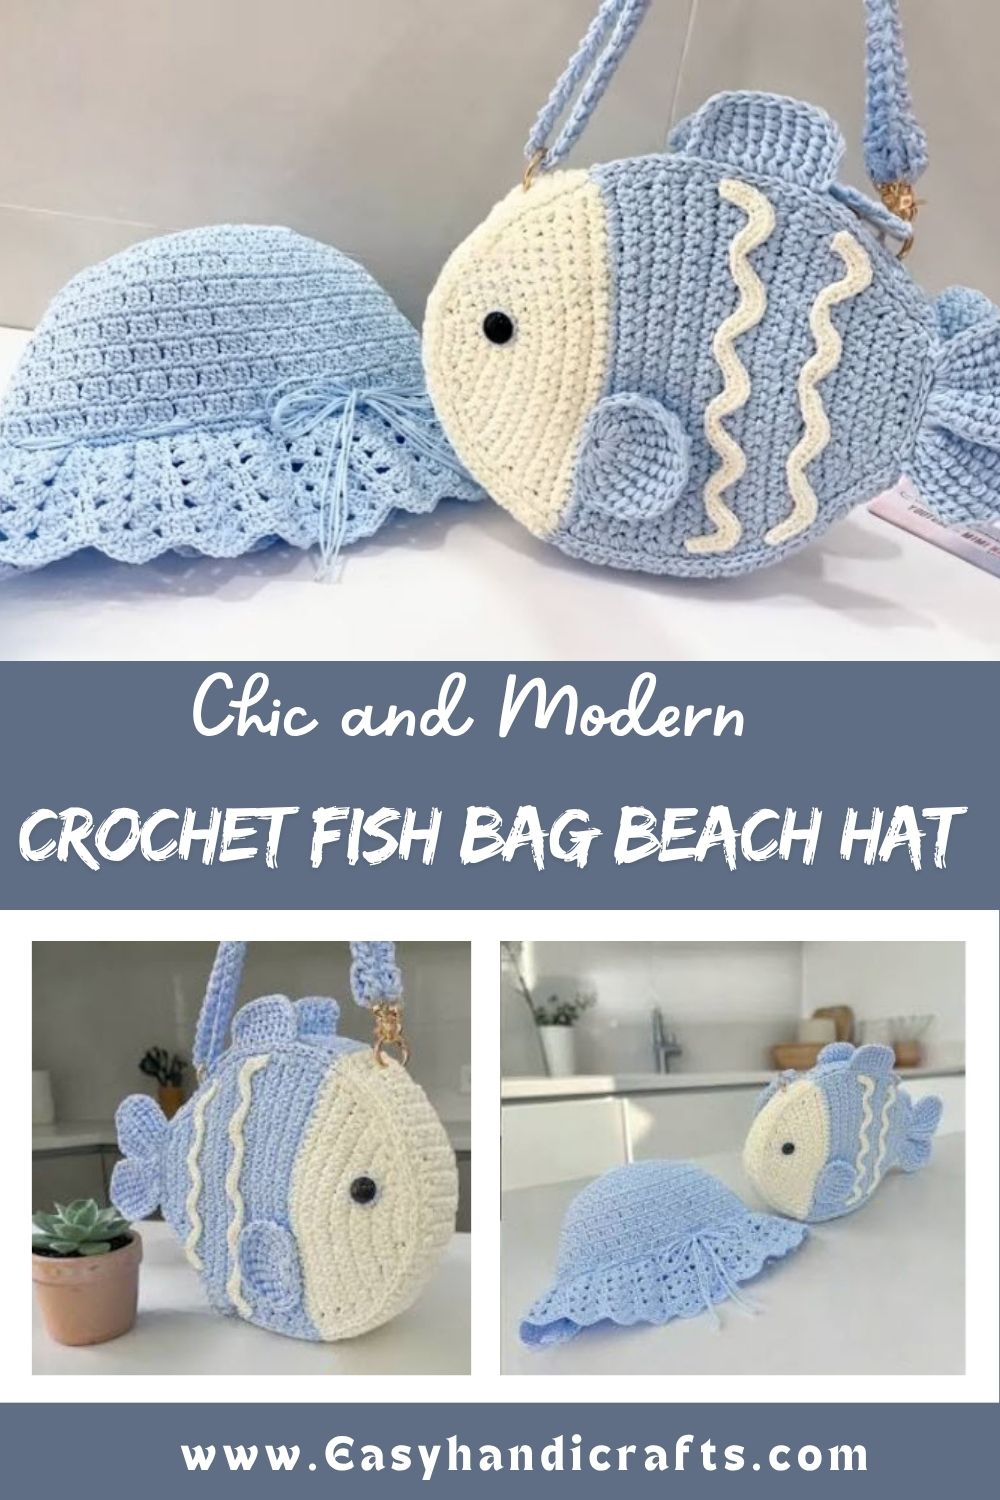
Cute, quirky accessories always stand out on a beach day, and this Crochet Fish Bag and Beach Hat, paired with a matching sun hat, deliver exactly that. Designed with beginners in mind, this set combines a whimsical crossbody bag with a breezy woven hat, making it a fun way to build both style and confidence in your crochet skills.
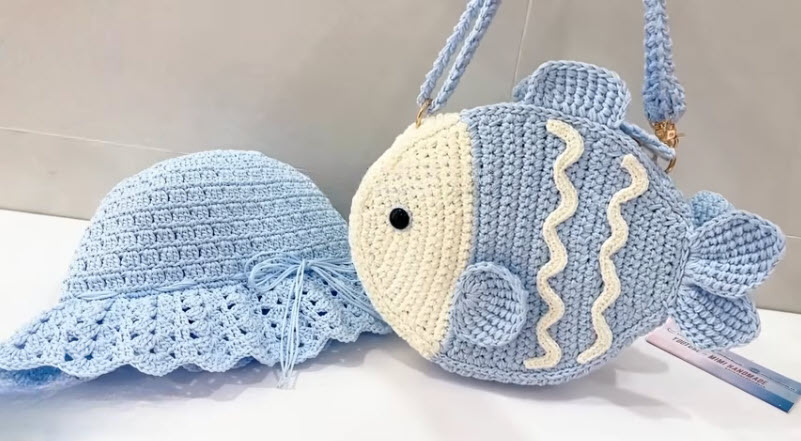
This Crochet Fish Bag and Beach Hat pattern walks through two separate pieces that work beautifully together: a rounded fish-shaped bag with a scaled detail and fins, and a simple wide-brim hat worked in soft, breathable stitches. The bag is made for carrying small beach essentials, while the hat is designed to shield your face from the sun during long summer days. Together, they form a coordinated summer set that’s as practical as it is charming, perfect for beach trips or casual outings, and both pieces share an easy, repetitive stitch base that makes them approachable even for someone newer to crochet.
Skill Level
Beginner. The core stitches used throughout are simple and repeat consistently, though the fish’s added details, like the fins and wavy stripe, require a touch of extra care to keep symmetrical.
Materials You’ll Need
- Light blue and white yarn (cotton or cotton-blend works well for structure and breathability)
- A crochet hook sized to match your yarn
- Polyester fiberfill for stuffing the fish’s face and fins
- A yarn needle for sewing pieces together
- Scissors
- A small button or safety eye for the fish’s face
- A bag strap chain or handle (crocheted or purchased)
- Ribbon or drawstring cord for the hat’s tie
Techniques Featured in This Pattern
- Starting loop or magic ring: Begins both the bag body and hat crown without a visible gap.
- Continuous round crocheting: Builds the rounded fish shape and the hat’s crown smoothly.
- Flat panel work: Shapes the hat’s wide brim using rows instead of rounds.
- Applique detailing: Adds the wavy stripe pattern across the fish’s body.
- Strap and closure assembly: Finishes the bag with a wearable handle and secures the hat with ties.
Step-by-Step Instructions
Let’s walk through how this set comes together, starting with the very first loop and finishing with two ready-to-wear beach accessories.
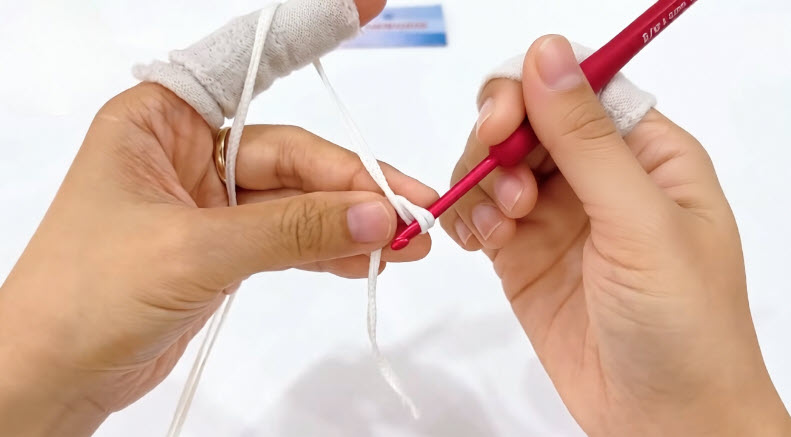
Step 1: Begin With the Starting Loop
Form your first loop by pulling the white yarn through with your hook, keeping it snug enough to hold steady as you begin your first stitches. This loop becomes the starting point for the front section of the fish’s body.
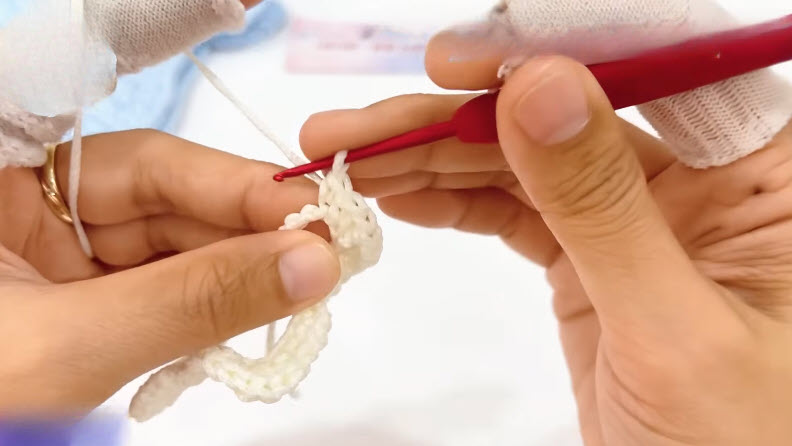
Step 2: Work the Opening Rounds
Stitch around your starting loop to close the center gap, then continue adding stitches evenly to widen the base. These early rounds shape the front face section of the fish, so keep your tension steady from the very first round.
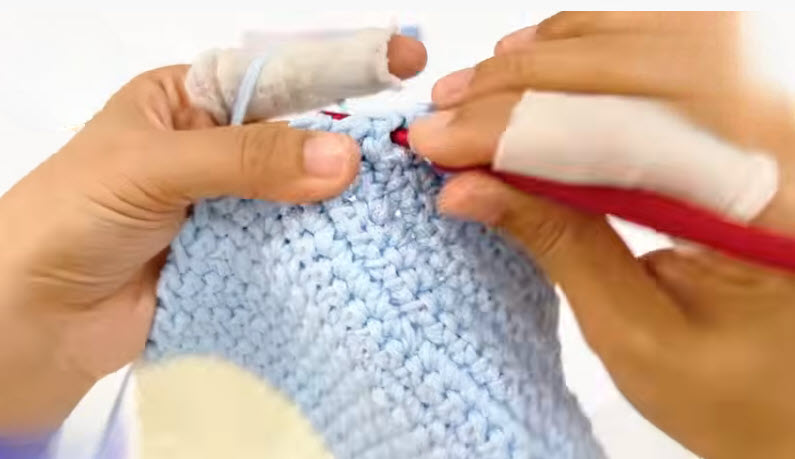
Step 3: Build the Main Body in Blue
Switch to your blue yarn and continue working in continuous rounds, letting the piece grow into a rounded, pouch-like shape. This forms the bulk of the bag, so check the sides periodically to make sure the shape stays even and balanced.
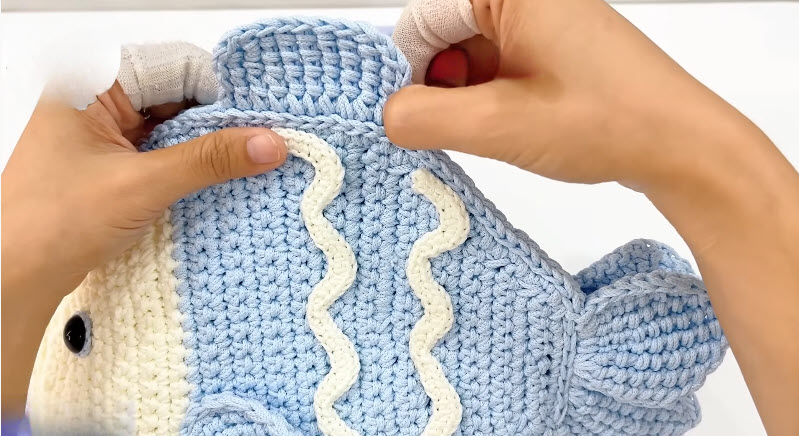
Step 4: Add the Details and Fins
Attach a wavy white stripe across the body using a simple surface stitch or embroidery technique, then crochet and sew on the small fin pieces along the sides. Add the top strap by working a length of chain or single crochet, securing both ends firmly to the bag body.
Step 5: Finish the Bag and Complete the Hat
Sew on the face details, then set the finished fish bag aside. For the hat, work a flat, textured crown followed by a wider brim section using rows of simple stitches, finishing the edge with a light picot or scalloped border. Add a tie at the sides, and your matching beach set is ready.
Helpful Tips for Beginners
- Practice the starting loop a few times separately before beginning the fish body, since a loose one can leave a small hole later.
- Keep a consistent hook grip and yarn tension throughout to avoid uneven rows in the hat brim.
- Stuff the fins lightly so they hold shape without becoming stiff or bulky.
- Lay the wavy stripe pattern out with pins before stitching it down to keep the curves even.
- Try the hat on partway through shaping the brim to check the fit before finishing the edge.
Common Mistakes to Watch For
- Rushing the transition from the white face section to the blue body, which can leave a visible bump or gap.
- Attaching the strap unevenly, causing the bag to hang crooked when worn.
- Making the hat brim too tight, which can cause it to cup upward instead of lying flat.
- Skipping stitch counts on the hat crown, leading to an uneven, wavy shape.
- Using stiff yarn for the hat, which can feel scratchy or heavy for long wear in the sun.
Ways to Customize This Set
- Change the color palette to design different sea creatures, like an orange clownfish or a green turtle-shaped bag.
- Add a longer strap for a crossbody fit or a shorter one for a handheld version.
- Try a solid-color hat without the wavy trim for a more minimalist beach look.
- Use a chunkier yarn to make a larger tote-style version of the fish bag.
- Add small charms or a bow near the hat’s tie for extra detail.
Frequently Asked Questions
Q: Is this set really suitable for someone who has never crocheted before?
A: Yes, as long as you’re comfortable learning a few basic stitches first, since both pieces rely on simple, repeating techniques throughout.
Q: Can the bag hold everyday items like a phone or sunscreen?
A: With sturdy cotton yarn and a well-stuffed structure, the bag can comfortably hold small essentials, though it isn’t meant for heavy items.
Q: What yarn type keeps the hat cool for sun wear?
A: Cotton yarn is ideal here, since it breathes well and doesn’t trap heat the way thicker acrylic yarns might.
Q: How do I keep the hat brim from curling inward?
A: Blocking the finished brim flat and using firmer tension while crocheting both help the edge lie smoothly.
Q: Can I make just the bag without the matching hat?
A: Of course, the two pieces are designed to complement each other, but each one works perfectly well as a standalone project.