Snuggly Crochet Bird Inhaler Holder Pattern Ideas
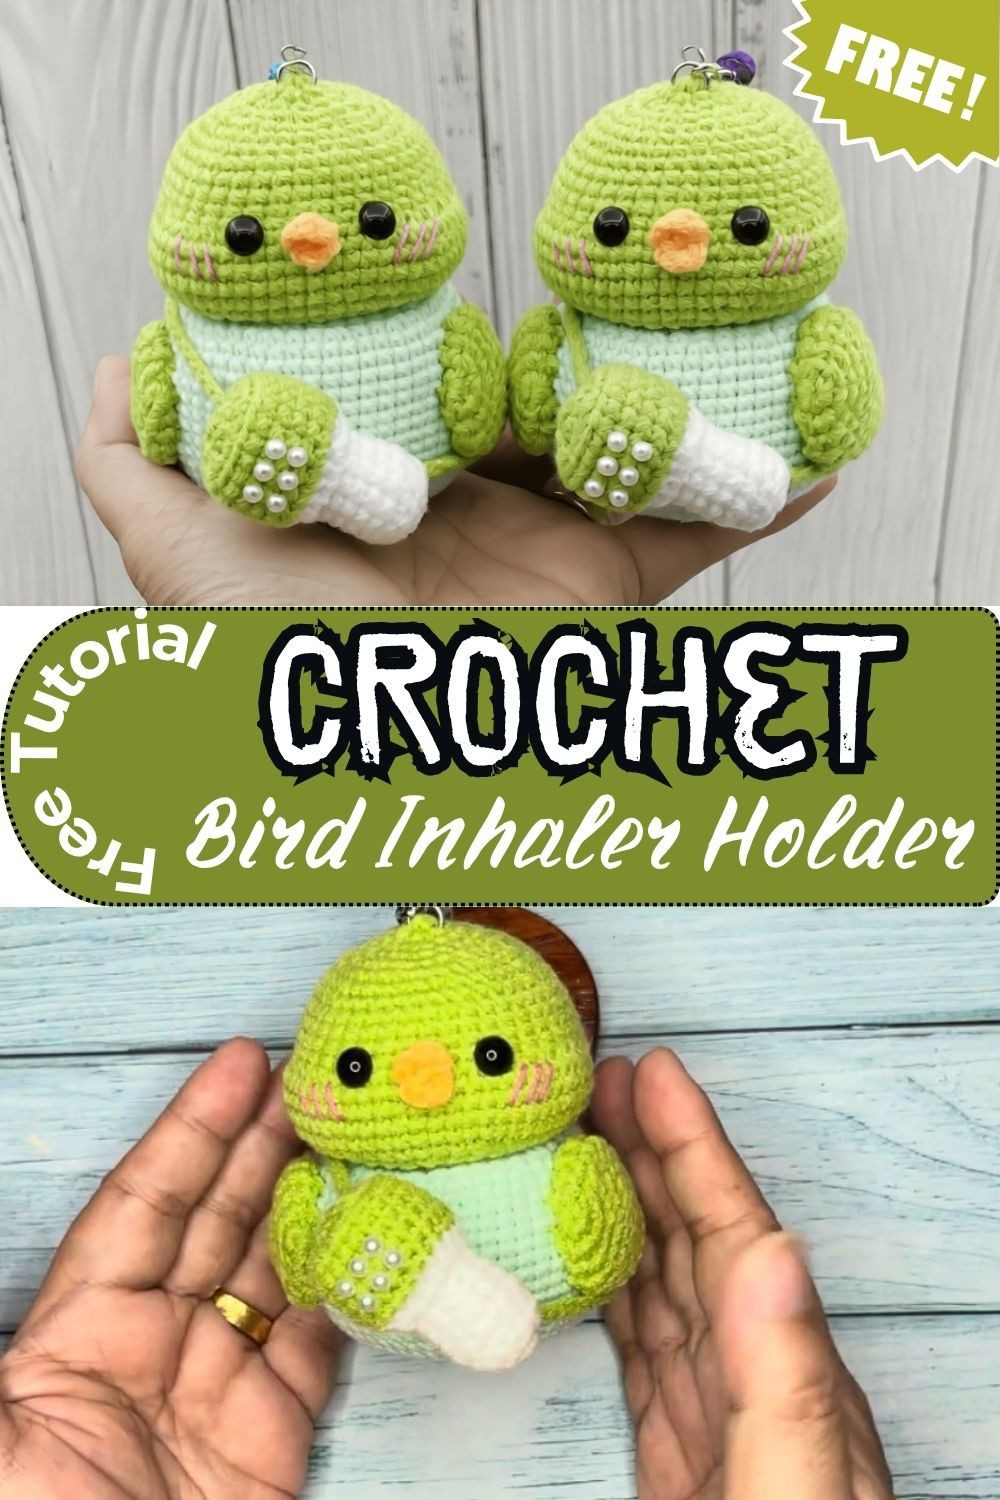
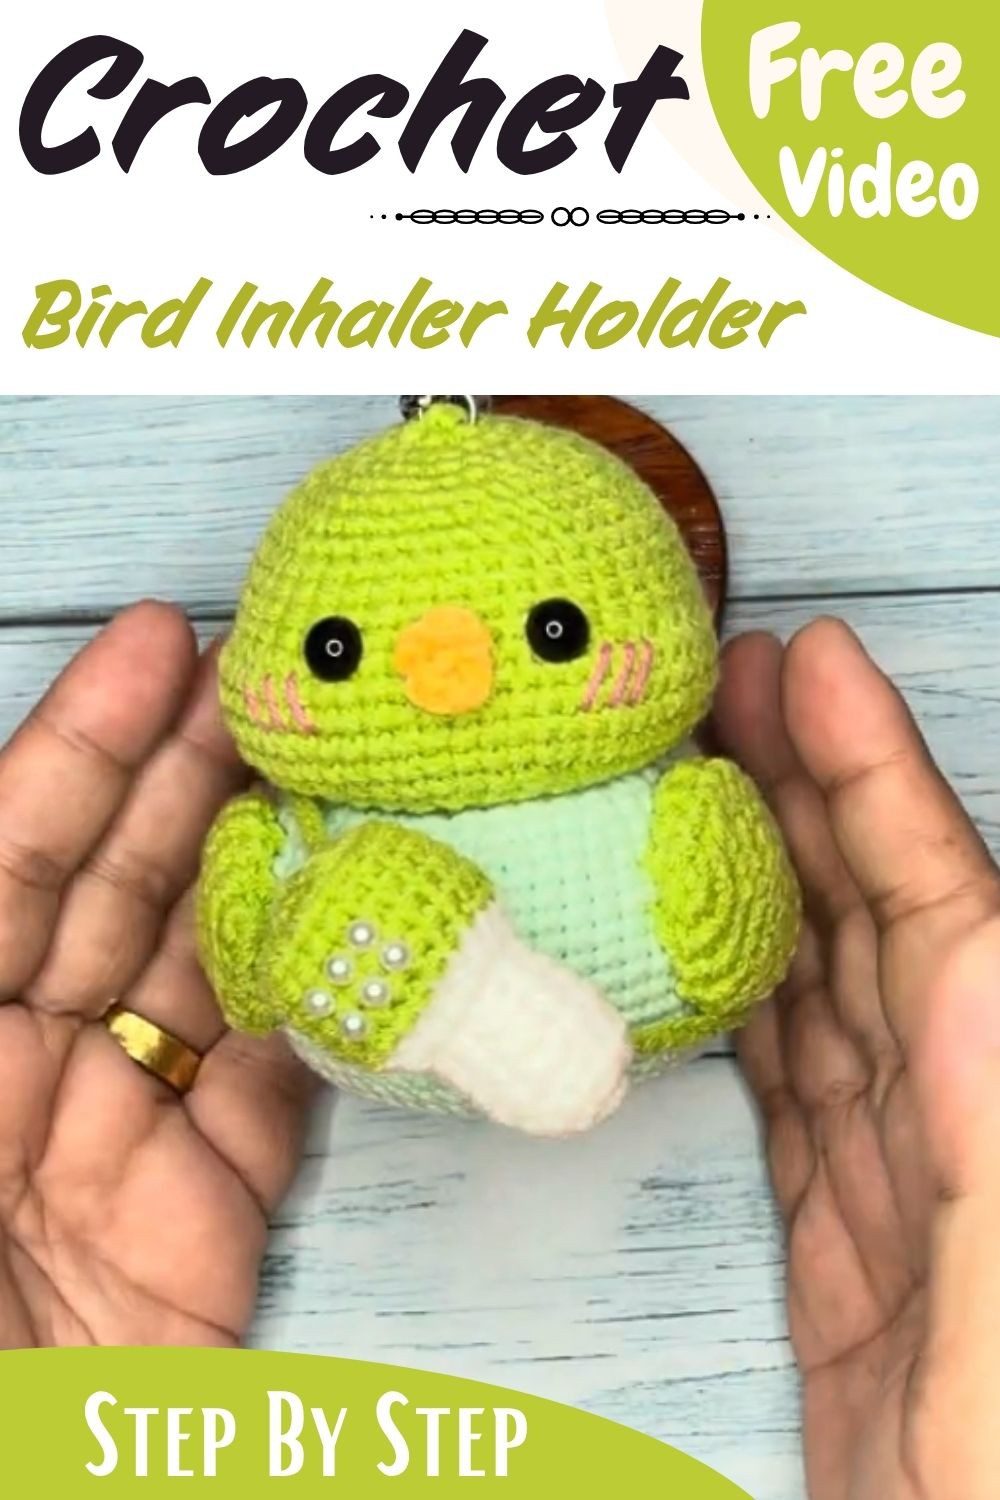
Stitch a crochet bird inhaler holder with a chubby green body and rosy cheeks. The free tutorial guides every step of the amigurumi bird. Keep a herbal inhaler cover cozy and cute for everyday bags and for sweet gifts.
Because the round body wraps a small herbal jar, the fit feels snug. Simple stitches also build a neat, flat base, so beginners can follow this crochet bird inhaler holder pattern and finish the bird in a short time. Make it in soft green and mint yarn, then keep it as a handy crochet inhaler case or give it away as a small crochet gift.
Crochet Bird Inhaler Holder Pattern Overview
- Skill level: Advanced beginner
- Finished size: About 6.5 cm x 6.5 cm, sized to fit the jar snugly
- Hook: 2.5 mm (No. 4/0)
This crochet bird inhaler holder pattern makes a chubby green bird that wraps around a standard 25g Hong Thai herbal inhaler jar. First, you work the round body from the base upwards. After that, you make the wings, beak and tail separately and sew them on. Finally, pink cheeks and simple eyes finish the face.
Materials for the Crochet Bird Inhaler Holder
- 4-ply milk cotton yarn in light or mint green for the main body
- A little yellow or orange yarn for the beak
- A little pink yarn for the cheeks
- Black yarn or embroidery floss for the face details
- 2.5 mm crochet hook
- Minimal polyfill stuffing, optional, only for the beak and tail tips
- 1 stitch marker, to keep track of the continuous rounds
- 6 mm safety eyes, black pearl beads, or black embroidery floss
- Tapestry needle
- Scissors
- One 25g Hong Thai herbal inhaler jar
Abbreviations (US Terms)
- MR: magic ring
- ch: chain stitch
- sc: single crochet
- inc: single crochet increase (2 sc in the same stitch)
- dec: single crochet decrease (invisible decrease recommended)
- sl st: slip stitch
- BLO: back loop only
- FLO: front loop only
- FO: fasten off
- st(s): stitch(es)
Special Techniques for the Crochet Bird Holder
Magic Ring
Wrap the yarn into a loop and secure it with a chain 1. Next, work the required stitches into the center of the ring. Once that is done, pull the tail tight, so the center closes.
Invisible Decrease
First, insert the hook under the front loop only of the next stitch. Then go under the front loop only of the stitch after it. Yarn over and pull through both front loops. After that, yarn over again and pull through the two loops left on the hook.
Continuous Spiral Rounds
Do not join rounds with a slip stitch or a chain 1 unless the pattern says so. Instead, work in a spiral and mark the first stitch of every round with the stitch marker.
Time Needed for the Crochet Bird Inhaler Holder
Because the pieces are small, the project moves quickly. Here is a realistic breakdown:
- Prep: About 10 minutes to gather the yarn, hook, marker and jar
- Stitching: About 1 hour for the body, plus about 30 minutes for the wings, beak and tail
- Finishing: About 30 minutes for sewing, embroidery and weaving in tails
Crochet Bird Inhaler Holder Pattern Instructions
Keep the stitch marker close, because the rounds are worked in a continuous spiral.
Step 1: Inhaler Case Top (Light Green)
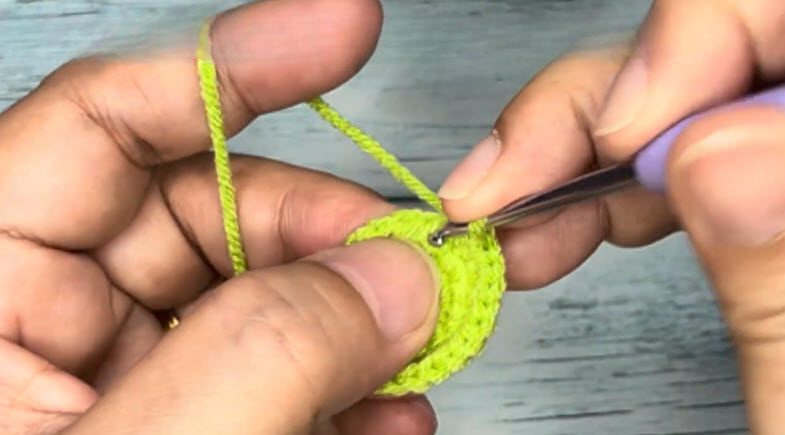
Work the top as a small, flat circle, starting at the center and moving outwards in continuous rounds. Hold the flat disc between your thumb and finger, and keep the working yarn draped over the fingers of the other hand for even tension. Next, insert the hook into the next stitch at the edge of the disc. Then yarn over, pull up a loop, yarn over again and pull through both loops to complete the sc. After that, keep working around the edge, so the circle grows round and stays flat.
Step 2: Head of the Crochet Bird Inhaler Holder (Light Green)
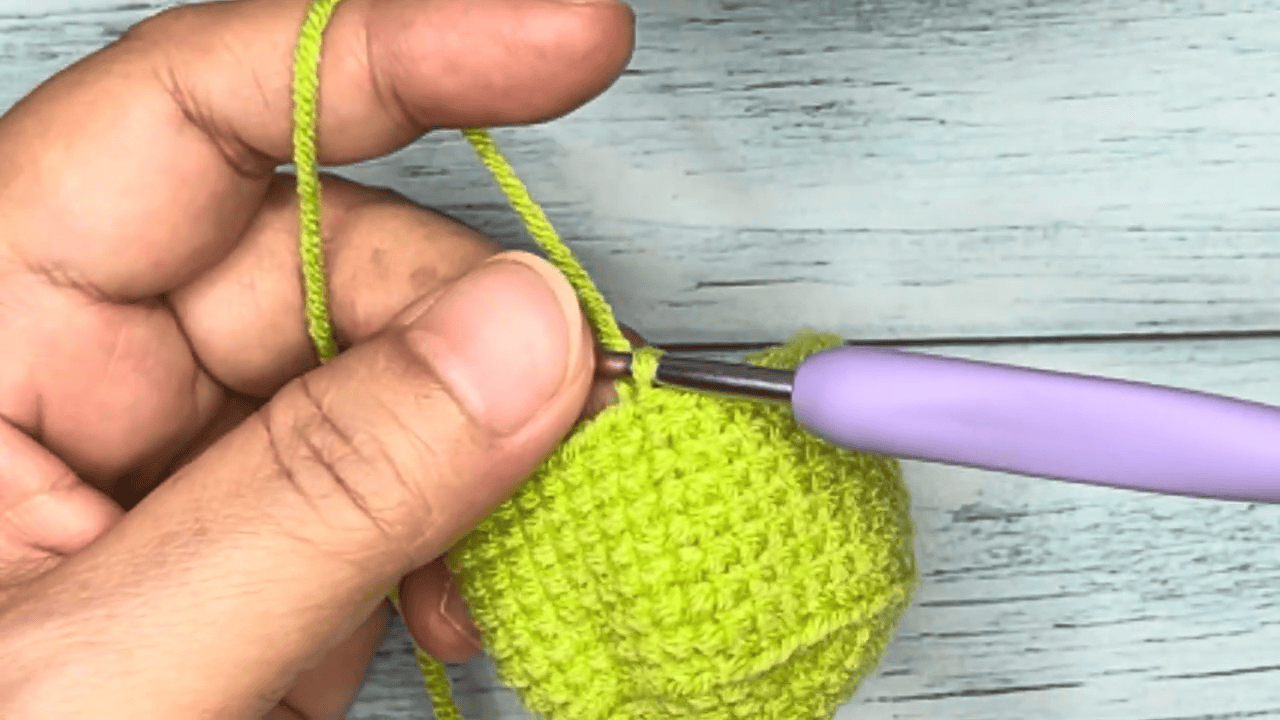
Keep working upwards in continuous rounds, so the piece grows into a rounded, domed shape. Hold the piece firmly between your thumb and fingers, and drape the yarn over the other hand for steady tension. Next, insert the hook into the next stitch at the top edge. Then yarn over, pull up a loop, yarn over again and pull through both loops to complete the sc. After that, repeat the same stitch around, and the rows of tidy, even stitches will build the round head.
Step 3: Cheek Embroidery
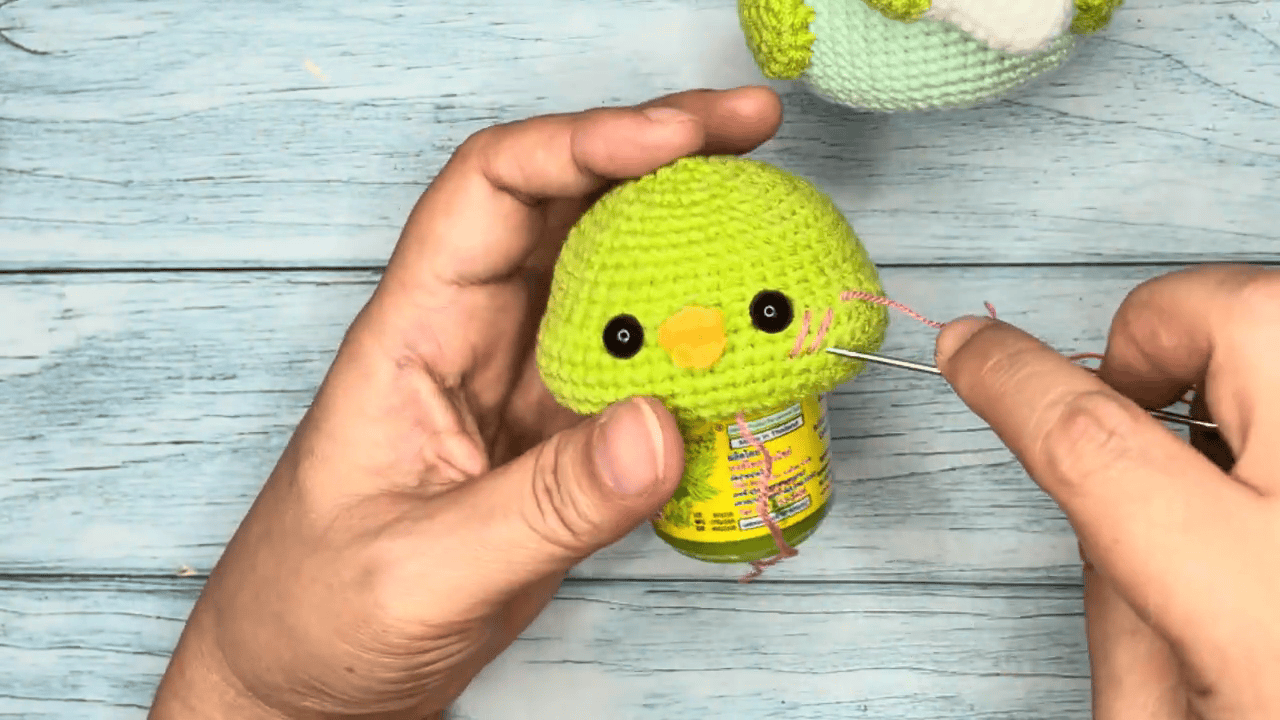
First, place the finished head on top of the jar, so you can judge where the face details sit. Next, thread the tapestry needle with a little pink yarn. Bring the needle out right beside one eye, then make a few short, slanted stitches side by side to form the blush lines. After that, pull the yarn gently, so the stitches sit flat on the surface without puckering. Once that side is done, repeat the same lines under the other eye, and keep both sides matching. Finally, fasten the pink yarn on the inside and trim the ends.
Step 4: Inhaler Case Bottom (Mint Green)
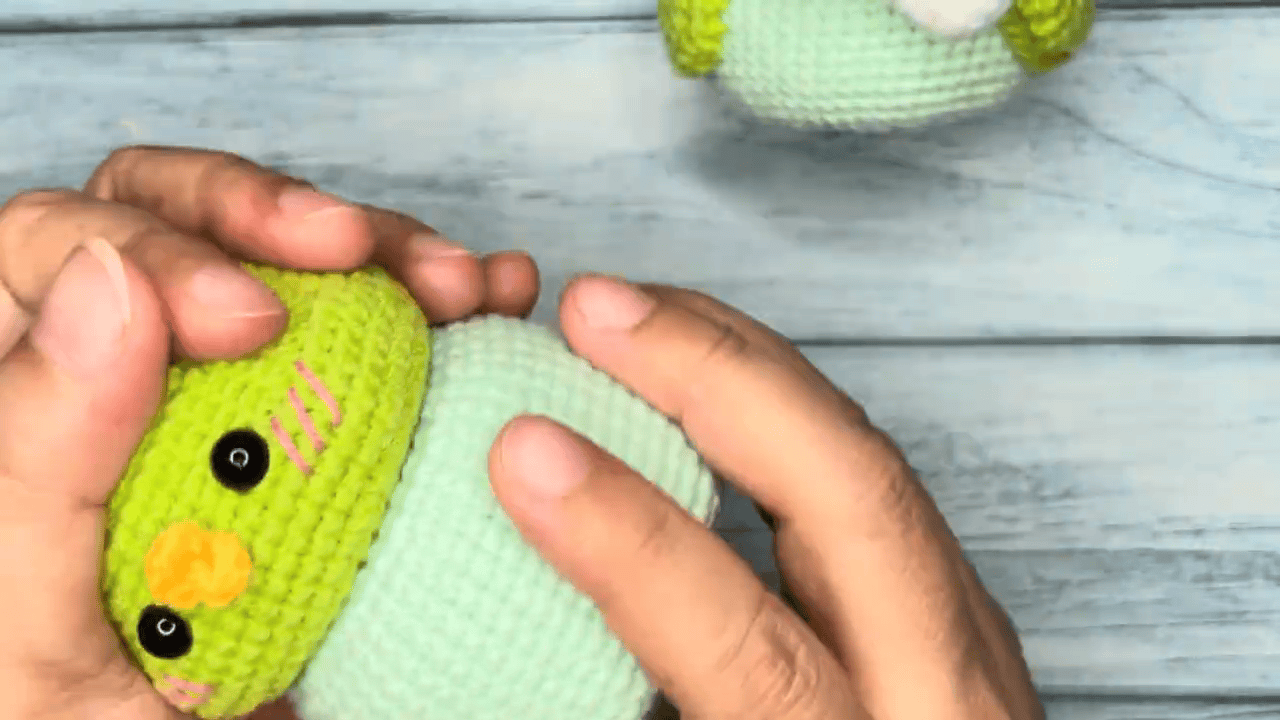
Take the finished mint green body and hold it next to the head. Next, bring the open edge of the head toward the body, so the two pieces face each other. Then line up the edges and check that the head sits evenly on top, without leaning to one side. After that, turn both pieces gently to find the best position for the face, so the beak and eyes point to the front. Once the fit feels right, keep the pieces in place and get ready to join them.
Assembly and Finishing Your Crochet Bird Inhaler Holder
Once all the parts are ready, bring them together in this order.
- Beak: Sew it centrally on the face, so it sits right between the eyes.
- Eyes: Attach the 6 mm safety eyes, or glue or embroider black beads, on either side of the beak. Also, keep the spacing even on both sides.
- Cheeks: Embroider a few short, slanted pink lines beside each eye.
- Head and case: Set the head on top of the case bottom. Then turn it until the face points to the front and the edges line up evenly.
- Jar: Slip the inhaler jar into the case. The Rnd 7 ridge keeps the base flat, while the narrower top holds the neck.
- Finishing: Weave in every loose tail and trim the ends. After that, check that the jar sits snugly and the bird stands flat.
Stitch Count Check
Use these counts to check your work as you go.
- Body: 6, 12, 18, 24, 30, 36, then 36 through Rnd 18, then 30 (Rnd 19), then 30 (Rnd 20)
- Wings (x2): 6, 9, 9, 9
- Beak: 4, 6
- Tail: 6, 9, 9
Common Crochet Bird Inhaler Holder Mistakes
Skipping the BLO on Rnd 7
Working both loops erases the crisp ridge. As a result, the base loses its flat edge, so read the instruction before starting the round.
Losing the Round Marker
Spiral rounds have no joins, so it is easy to lose your place. However, one marker solves it. Move it up at the start of every round.
Uneven Eye Spacing
Eyes set too close or too far apart change the whole face. Therefore, pin them first, because adjusting a pin is easier than a finished eye.
Off-Center Wings
Wings sewn at different heights look lopsided. Instead, pin both between Rnds 10 and 13, compare them, and then sew.
Uses and Benefits of This Crochet Bird Holder
The jar fits snugly inside the body, so the bird hugs it without slipping. For example, tuck it into a coat pocket, carry it in a tote, or keep it on a desk as a cheerful companion. Also, attach a handwritten tag, and it becomes a small crochet gift that friends will love. Because the pieces are tiny, each bird works up fast, so making a spare is easy.
Beginner Tips for the Crochet Bird Inhaler Holder
- Use the stitch marker every time. Because the rounds spiral, the marker shows where each round starts.
- Practice the magic ring first. Try it once or twice with scrap yarn, and then the real body starts smoothly.
- Keep the same yarn weight and hook size. If either one changes, the case may no longer fit the jar.
- Leave long tails for sewing. The wings, beak and tail all need enough yarn to attach firmly.
Bonus: Fun Color Ideas for Your Crochet Bird Inhaler Holder
The shape stays the same while the colors change the mood. However, always keep the same yarn weight and hook size, so the case fits the jar.
Soft Blue for a Sweet Bluebird
Swap the green body for soft blue, and the bird becomes a sweet little bluebird.
Cream with a Peach Beak for a Little Chick
Work the body in cream and the beak in peach. After that, the same pink cheeks finish a tiny chick.
Pale Pink for a Friend
Pale pink works well as a gift for a friend, so make one in a soft shade she loves.
Bonus: Gift Ideas with the Crochet Bird Holder
- Handwritten tag: Attach a small tag, so the bird feels like a personal gift.
- Spare bird: Because each one works up fast, make an extra one to give away.
- Doorknob surprise: Hang a gift bag holding the bird on a friend’s doorknob as a happy surprise.
Crochet Bird Inhaler Holder FAQs
Which jar does the crochet bird inhaler holder fit?
The crochet bird inhaler holder pattern is sized for one standard 25g Hong Thai herbal inhaler jar. Because the body fits snugly, the jar fills the inside.
Which yarn and hook work best?
Use 4-ply milk cotton yarn in light or mint green with a 2.5 mm hook. Also, keeping both the same helps the case fit the jar.
Can the colors be changed?
Yes. However, keep the same yarn weight and hook size every time.
Does the bird need stuffing?
Almost none, because the jar fills the body. A little polyfill is optional, and only for the beak and tail tips.
Which eye options are allowed?
Choose 6 mm safety eyes, black pearl beads, or black embroidery floss. Whichever one you pick, leave about 5 to 6 stitches between the eyes.
Time to Hook Your Little Bird
So here’s the thing: once the body is done, the rest goes fast. The wings, beak and tail are tiny, so they come together in no time. Then make a few in different colours, and you’ve got easy gifts for friends. So grab some green yarn, find your jar, and give this crochet bird inhaler holder pattern a try.