Crochet projects can be both decorative and practical, which is exactly why small makes feel so satisfying. First, a few simple stitches can create something useful for daily life, and next, the finished piece looks adorable sitting right on the table.
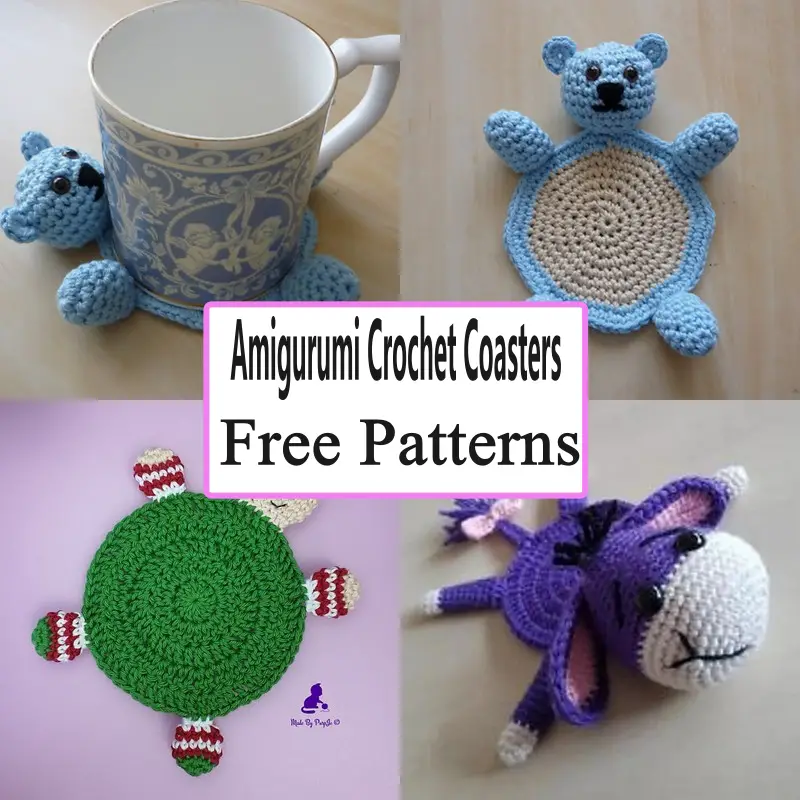
A coaster amigurumi adds extra charm because it turns an everyday item into a tiny character-like accent. Meanwhile, it still protects wood and glass surfaces, and after that, it becomes the kind of handmade detail that makes a home feel warmer.

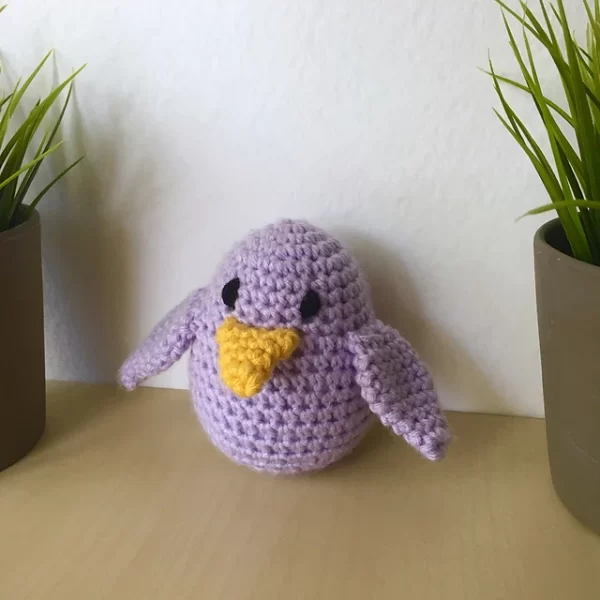
Adding an amigurumi touch makes the coaster feel playful and unique. After that, even a simple circle can become a cute bear, bunny, cat, or little smiling “cookie” just by attaching small ears and a tiny face. Next, the design stays functional because the base remains flat, while the details stay light and minimal.
This beginner-friendly project is perfect for quick crafting sessions. Later, it becomes a great stash-buster, a sweet gift add-on, or an easy set to make for guests. Finally, it offers the best combo: creativity for the hands and usefulness for the home.
Materials Needed
- Cotton yarn (medium weight for durability): approx. 30–60 g total per coaster (more if making larger or using multiple colors)
- Crochet hook size: 4.0 mm–5.0 mm (choose based on yarn label and preferred tightness)
- Safety eyes (optional, if adding a face): 6 mm–8 mm (1 pair)
- Stuffing (light, optional for details): about 1–3 g (a pinch for ears or raised accents)
- Stitch markers: 1–2
- Yarn needle: 1
- Scissors: 1
Optional but helpful:
- Black embroidery floss or thin black yarn for facial details
- A small amount of pink yarn for blush cheeks
Skill Level
Beginner / Easy
Making Time (Overview)
Approximately 1–2 hours
Meanwhile, adding extra details (ears, arms, face embroidery) can push the time closer to 2 hours.
Instructions
Pattern Notes (Quick + Beginner-Friendly)
- Stitches used: magic ring (MR), chain (ch), slip stitch (sl st), single crochet (sc), increase (inc)
- inc = 2 sc in the same stitch
- For a firm coaster, keep stitches neat and slightly tight, but not stiff.
Next, place a stitch marker in the first stitch of each round so counting stays easy.
Body (Main Coaster Circle)
Making time: 25–40 minutes
1) Start with magic ring
- First, make a magic ring.
- Next, crochet 6 sc into the ring.
- After that, pull the ring tight so the center closes neatly.
Round 1: 6 sc in MR (6)
2) Increase rounds to form a flat circle
To keep the coaster flat, increases must be evenly spaced. First, follow the rounds below, and next, count carefully.
Round 2: inc in each stitch (12)
Round 3: (sc 1, inc) repeat around (18)
Round 4: (sc 2, inc) repeat around (24)
Round 5: (sc 3, inc) repeat around (30)
Round 6: (sc 4, inc) repeat around (36)
At this point, the coaster is usually about 4–4.5 inches (10–11.5 cm) across, depending on yarn and hook.
3) Shape evenly and finish the base
- Next, check the shape by placing the circle on a table.
- Meanwhile, if the edge starts to wave, slow down increases by stopping at Round 5 or using a smaller hook.
- After that, if the circle cups upward, add one more increase round.
Optional size round (for a larger coaster):
Round 7: (sc 5, inc) repeat around (42)
Finally, crochet 1 round of sc with no increases to create a clean edge:
- Edge Round: sc in each stitch around (same stitch count)
Fasten off with a long tail for sewing pieces on later.
Accessories / Details (Optional)
Making time: 10–25 minutes
A tiny accessory can make the design feel extra special.
Mini heart applique (optional)
- First, make a MR.
- Next, into the ring: ch 2, 3 dc, ch 1, 3 dc, ch 2, sl st.
- After that, pull tight and fasten off with a tail.
Then, sew the heart slightly off-center so it looks like a cute badge.
Facial features (embroidered or safety eyes)
- Safety eyes: place between Rounds 3 and 4, about 5–6 stitches apart (adjust based on coaster size).
- Embroidery: stitch small sleepy eyes, a smile, and tiny blush dots.
Meanwhile, embroidery is often better for coasters because it stays flatter than raised pieces.
Face & Assembly
Making time: 20–35 minutes
Assembly should keep the coaster usable. First, arrange pieces without sewing, and next, adjust until the face looks balanced.
1) Place and pin the pieces
- First, fold the coaster slightly to find the top center.
- Next, position ears evenly on the top edge.
- After that, place arms on the sides if using them.
- Finally, decide where the face will sit (usually centered).
2) Sew neatly and securely
- First, sew ears using small whip stitches along the ear base.
- Next, sew arms with a few strong stitches so they don’t pull loose.
- After that, add facial embroidery with short, tight stitches.
3) Keep the coaster flat
- Meanwhile, avoid heavy stuffing or thick layers in the middle.
- After that, keep details closer to the top edge so a mug still sits stable.
- Finally, weave in ends by running yarn under multiple stitches, then trim.
Beginner-friendly tip: if the coaster begins to warp after sewing, gently tug the edges into shape and smooth it flat on the table.
Special Features for ( Crochet a Coaster Amigurumi )
- Texture: Soft yet firm, especially with cotton yarn for everyday use
- Design: Cute amigurumi-inspired coaster that feels like a tiny character
- Functionality: Protects surfaces while adding a decorative handmade touch
Sizing Tips
Coaster size changes easily by adding or reducing rounds.
- Smaller coaster (for espresso cups): stop after Round 5 (about 3.5–4 inches / 9–10 cm).
- Standard coaster (most mugs): stop after Round 6 (about 4–4.5 inches / 10–11.5 cm).
- Large coaster (big mugs or small bowls): add Round 7 (about 4.75–5.5 inches / 12–14 cm).
Next, if a thicker coaster is desired, use a slightly smaller hook to tighten stitches. Meanwhile, if a softer drape is preferred, use a slightly larger hook and keep tension relaxed.
Finishing Tips
- First, keep edges even by counting stitches every round.
- Next, use a stitch marker so the round start never gets lost.
- Meanwhile, pull the magic ring tight and secure it with a knot tail weave-in.
- After that, hide yarn ends by weaving through at least 6–8 stitches.
- Finally, flatten the coaster and let it rest for a neat shape.
Optional: light steam blocking can help a wavy edge settle, but keep heat gentle for cotton and avoid direct contact with the hook or eyes.
Common Mistakes to Avoid
- Uneven increases causing curling:
First, follow the increase formula closely; next, count stitches every round. - Loose stitches affecting shape:
Meanwhile, use a smaller hook or tighten tension so the coaster stays firm and durable. - Overstuffing decorative parts:
After that, remember coasters must stay flat; use only a pinch of stuffing or skip stuffing entirely. - Skipping stitch counting:
Finally, missed stitches often lead to lopsided circles, so mark the first stitch and track totals.
Variations & Customization Ideas
- First, use seasonal colors: pastels for spring, bright tones for summer, warm neutrals for autumn, and icy shades for winter.
- Next, add animal faces: bunny (long ears), frog (two eye bumps), panda (dark eye patches), or chick (tiny beak).
- Meanwhile, adjust size for different cups by changing the number of rounds.
- Finally, create matching coaster sets with different expressions happy, sleepy, or blushing for a charming table theme.
Tutor Suggestions for ( Crochet a Coaster Amigurumi )
- First, use a stitch marker to track each round start.
- Next, practice flat circle shaping by laying the coaster on a table after every round.
- Meanwhile, keep tension consistent so the circle stays smooth and even.
- After that, start simple with just ears and embroidery, then add arms or accessories later.
- Finally, make two coasters back-to-back using the same stitch count to get a perfectly matching set.
Conclusion
This Crochet a Coaster Amigurumi project is quick, cheerful, and genuinely useful. First, the flat circle works up fast, and next, tiny details like ears and a sweet face turn it into a playful handmade piece. Finally, because it’s beginner-friendly and easy to customize, it’s perfect for cozy craft time and a practical finish that can be used every day.