Crochet Coconut Drink Pattern to Make
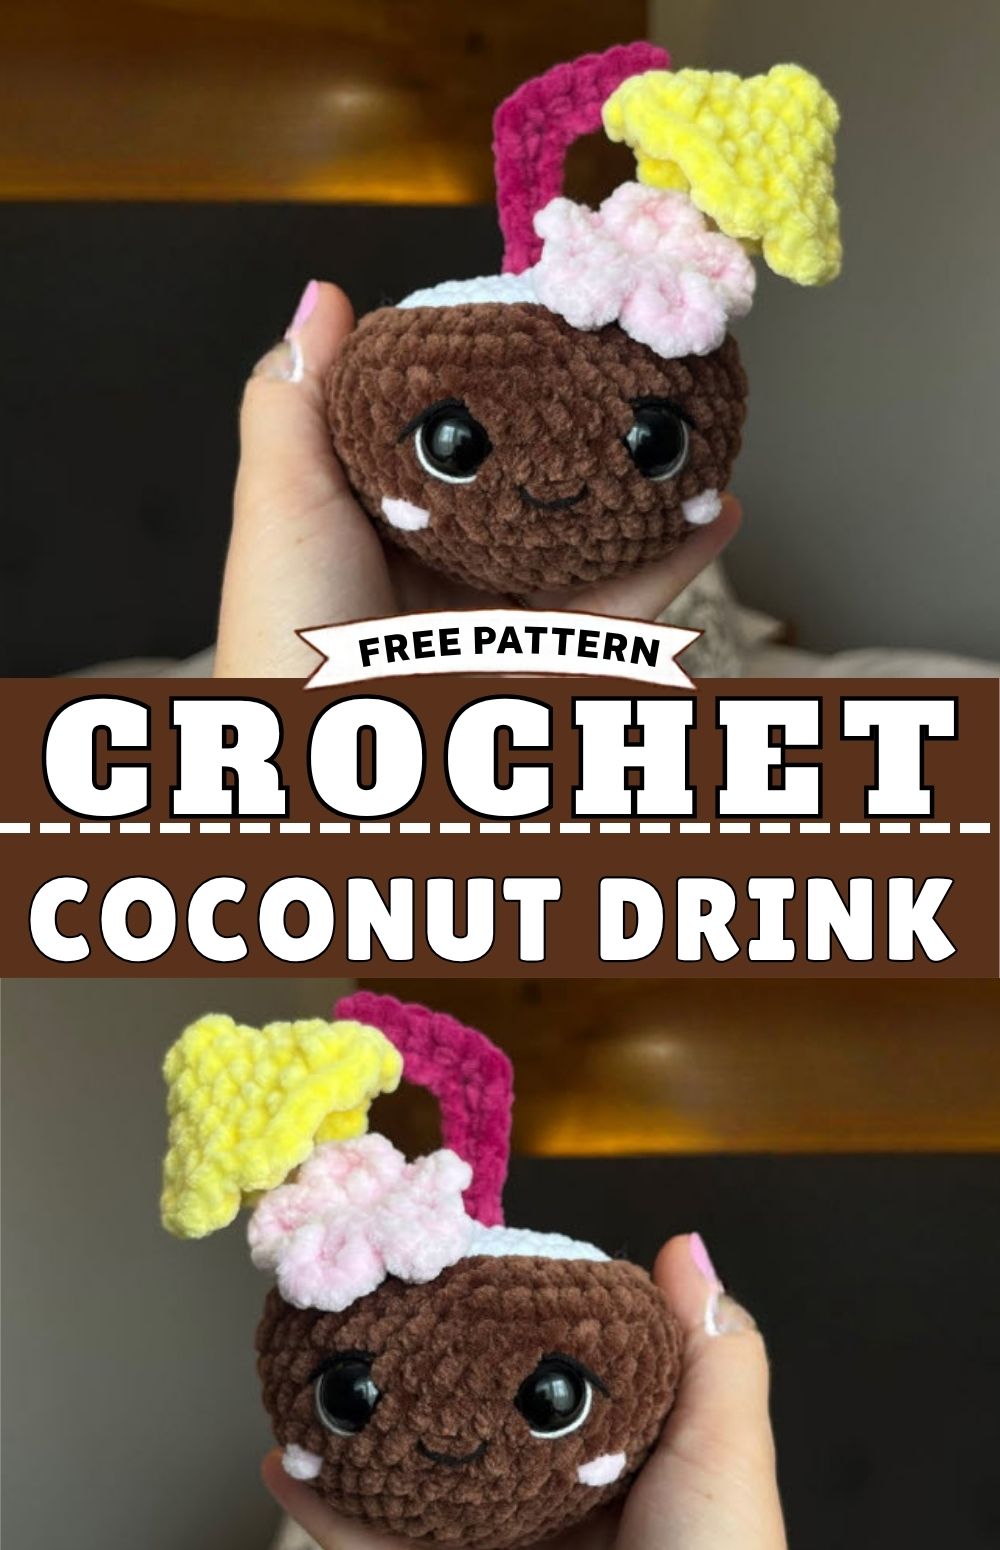
A Sweet Crochet Coconut Drink Pattern to Make turns a simple gift into a tropical surprise. Soft brown chenille forms the shell, while a flower, straw, and umbrella add party charm. Also, handmade presents like this bring smiles at birthdays, summer gatherings, and holiday swaps.
First, plush chenille yarn gives every stitch a cuddly finish. The amigurumi coconut drink feels as good to hold as it looks on a shelf. Because the pieces are small, a plush coconut cocktail toy works up fast and fits easily into gift bags. Besides, the face, flower, and umbrella can match any recipient’s favourite colours, so the project suits gifting purposes well. As a result, beginners can follow the round-by-round counts with confidence.
Crochet Coconut Drink Pattern Supplies Checklist
First, gather everything below, because chenille projects move quickly once the hook starts. Also, a tidy workspace makes the small accessories much easier.
Yarn Choices for the Coconut Drink
- Dark brown chenille yarn for the outer shell
- White chenille yarn for the coconut top
- Light pink yarn for the flower and cheeks
- Bright yellow yarn, or any color, for the umbrella
- Straw yarn in a color of your choice
- Thin black yarn or floss for the mouth
Tools and Extras
- 4.0 mm crochet hook
- Two 16 mm safety eyes
- Toothpick and hot glue gun for the umbrella stick
- Fiberfill stuffing
- Tapestry needle, stitch marker, and scissors
Abbreviations (US Terms)
- MR: magic ring (or ch 3 joined with a sl st)
- sc: single crochet
- dc: double crochet
- inc: increase, two sc in the same stitch
- dec: invisible decrease, worked through the front loops
- sl st: slip stitch
- ch: chain
Time Needed for This Coconut Drink
Most makers finish this crochet coconut drink pattern in about three to four hours. However, the shell takes the longest, so split the work into two sessions. Also, the flower, straw, and umbrella add roughly one more hour. Therefore, a relaxed weekend afternoon covers the whole project.
Step-by-Step Crochet Coconut Drink Pattern Instructions
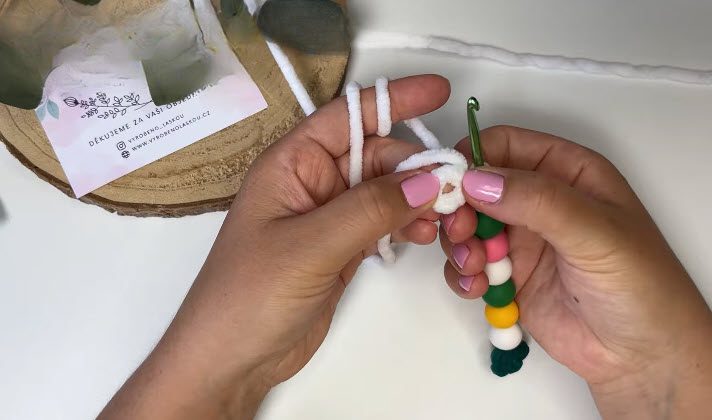
Step 1: Start the White Top with a Magic Ring
First, form a magic ring with white yarn. Then work Round 1: 8 sc into the ring (8 sts). Keep the loop snug, because chenille slips easily.
Step 2: Finish the White Top
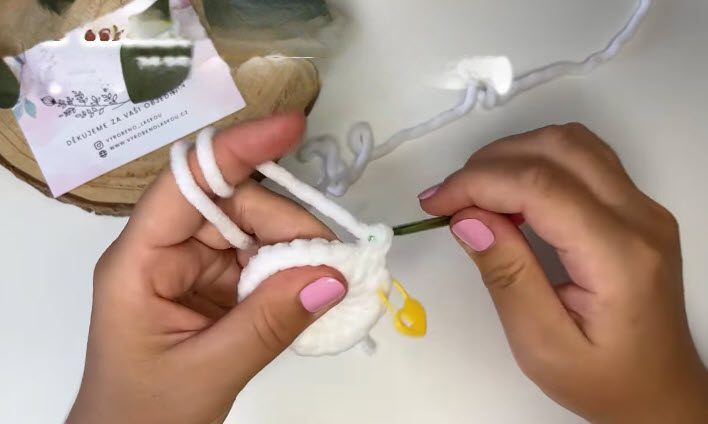
Mark the first stitch of each round, so counting stays simple. Next, work the remaining rounds:
- Then, Round 2: 1 inc in each stitch around (16 sts)
- After that, Round 3: [1 sc, 1 inc] repeat around (24 sts)
- Finally, Round 4: [2 sc, 1 inc] repeat around (32 sts)
Afterward, fasten off and secure the tail.
Step 3: Crochet the Brown Shell
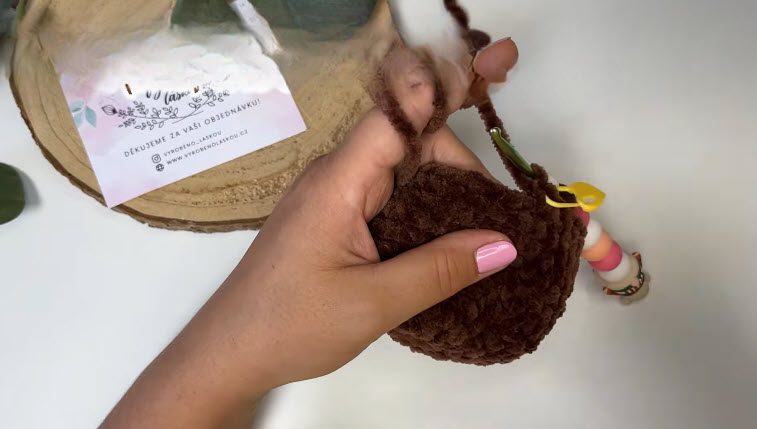
Next, switch to dark brown yarn and begin with a magic ring. Then follow these rounds:
- First, Round 1: 8 sc into the MR (8 sts)
- Then, Round 2: 1 inc in each stitch around (16 sts)
- Next, Round 3: [1 sc, 1 inc] repeat 8 times (24 sts)
- After that, Round 4: [2 sc, 1 inc] repeat 8 times (32 sts)
- Also, Round 5: [3 sc, 1 inc] repeat 8 times (40 sts)
- Afterward, Rounds 6–11: 1 sc in each stitch around (40 sts per round)
- Finally, Round 12: [3 sc, 1 dec] repeat around (32 sts)
Lastly, fasten off and leave a long tail for sewing.
Step 4: Sew the Top and Stuff
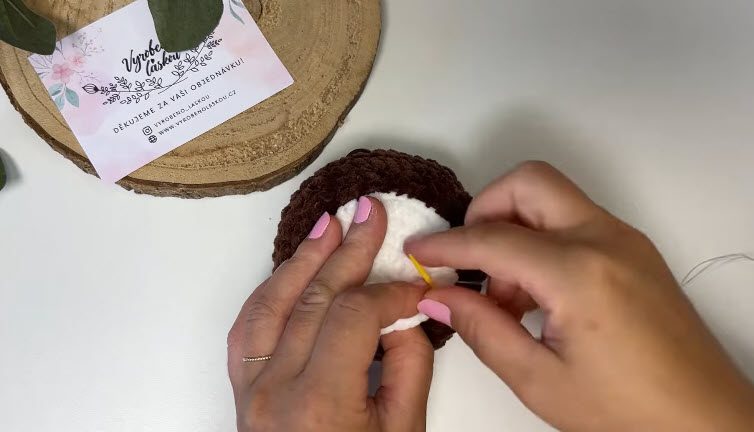
First, thread a tapestry needle with white yarn. Then sew the white top to the opening of the brown shell. However, set the safety eyes first, as shown in Step 5, before the gap closes. Next, stuff firmly with fiberfill just before sewing the final gap. After that, finish the seam securely.
Step 5: Add the Face
First, insert the 16 mm safety eyes between Rounds 8 and 9 of the shell. Also, leave about 5–6 stitches between them. After that, embroider the face:
- First, stitch a small mouth between the eyes with thin black yarn.
- Then sew short horizontal pink lines under each eye for cheeks.
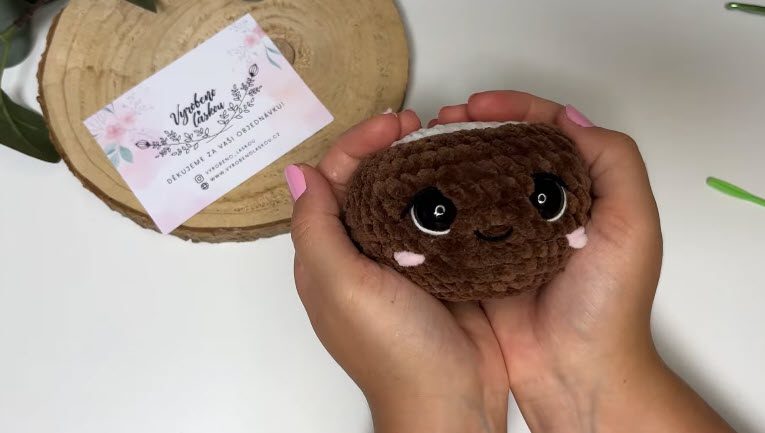
Step 6: Make and Attach the Accessories
Next, crochet each accessory. Then attach everything to the white top.
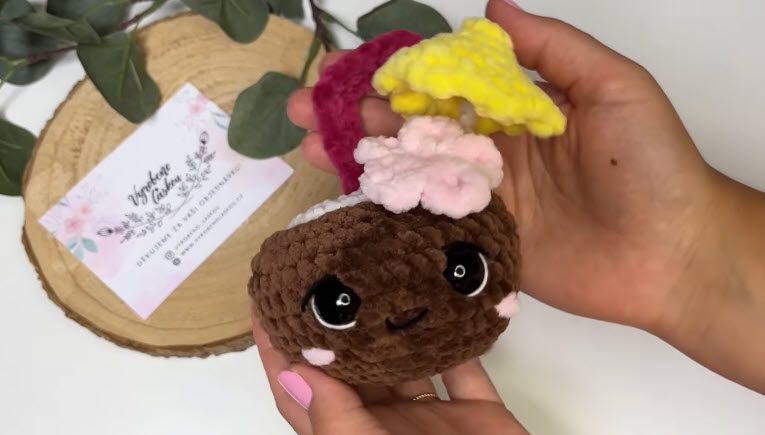
Flower (light pink): First, work in a magic ring. Then, for each of 5 petals: ch 2, 2 dc into the ring, ch 2, sl st into the ring. Afterwards, tighten the ring and knot the tails at the back. Finally, trim the ends.
Drinking straw: First, chain 11. Then, starting in the 2nd chain from the hook, work 1 sc in each of the next 4 chains. After that, work 3 sc into the 5th chain to create the bend. Also, work 1 sc in each of the remaining 5 chains. Finally, fasten off and tie off the ends.
Umbrella top: Follow these rounds in order.
- First, Round 1: 5 sc into MR (5 sts)
- Then, Round 2: 1 inc in each stitch around (10 sts)
- Next, Round 3: [1 sc, 1 inc] repeat around (15 sts)
- After that, Round 4: [2 sc, 1 inc] repeat around (20 sts)
- Finally, Round 5: [2 dc in same st, 2 sc] repeat around for a scalloped edge, then sl st
For the stick, first wrap a toothpick in white or beige yarn with hot glue until covered. Then glue its top to the centre underside of the canopy. Finally, sew or glue the flower, straw, and umbrella onto the white surface. Also, weave in any remaining yarn ends.
Common Mistakes and Fixes
- Gaps between stitches: Chenille hides stitches, so go down a hook size if holes appear.
- Cupped white top: Count each round again, because a missed increase causes curling.
- Uneven eyes: Pin the eyes in place first, then compare before locking the backs.
- Lumpy stuffing: Instead of large clumps, add small pieces of fiberfill and press them into the sides.
- Loose umbrella stick: Add a little more glue, and let it set before attaching.
Who Would Love This Crochet Coconut Drink Gift
- First, friends who adore tropical themes
- Also, teachers needing an end-of-term thank-you
- Likewise, coworkers celebrating a retirement
- Meanwhile, kids who enjoy soft, quirky toys
- Finally, anyone decorating a summer desk or shelf
Best Occasions to Give This Crochet Coconut Drink Pattern
- First, birthdays with a beach or luau theme
- Next, summer housewarming parties
- Also, bridal showers and bachelorette trips
- Likewise, Secret Santa exchanges
- Finally, farewell and thank-you moments
Gifting Guide for the Coconut Drink Toy
First, wrap the coconut in clear cellophane and tie a raffia bow around the middle. Alternatively, nestle it inside a small paper tropical cup with tissue filler. Also, add a handwritten tag that reads like a drink menu. For timing, begin two weeks before the occasion, since the flower, straw, and umbrella take just one extra evening. Finally, pack the toothpick umbrella last to keep it safe.
Seasonal Variation Ideas for the Crochet Coconut Drink Pattern
First, swap colours to fit the calendar. For example, summer suits pastel pink and sunny yellow, while autumn calls for a rust flower and a golden umbrella. Similarly, winter looks festive with a red flower, a green straw, and the white coconut top resembling snow. Meanwhile, spring pairs lavender petals with a mint canopy. Size can shift too, because a thinner yarn and a 2.5 mm hook produce a mini ornament for holiday trees.
Bonus: Party Table Display Ideas
First, set several coconuts along a buffet table as place markers. Then write guest names on small paper flags and tuck them beside each straw. Alternatively, line them up on a windowsill for a cheerful summer scene. Also, small wooden slices work well as coasters underneath.
Creative Projects You Can Make With This Coconut Drink Pattern
Once the crochet coconut drink pattern feels familiar, similar shapes open many doors. For example, try a pineapple, a watermelon slice, or a lemonade cup using the same circle-and-body method. Likewise, matching sets work well for a themed gift basket. In addition, related amigurumi food and tropical toy patterns make great follow-up projects.
Care and Cleaning Tips for Your Coconut Drink
- First, spot clean with a damp cloth and mild soap.
- Also, avoid soaking, since fiberfill dries slowly.
- Before cleaning, remove the toothpick umbrella.
- Then air dry away from direct heat.
- Afterward, fluff the chenille gently with a soft brush.
- However, keep the toy away from small children and pets if the umbrella stick stays attached.
Why It’s Popular Right Now
Tropical food toys keep trending because they combine humor with cozy texture. Also, the crochet coconut drink pattern photographs beautifully for social media and craft fair tables. Therefore, makers enjoy a quick project that still feels special.
- First, chenille yarn delivers a plush look with simple stitches.
- Also, customizable accessories suit any holiday or theme.
- Finally, the small size means low yarn cost and fast results.
FAQ
What yarn works best for this pattern?
Chenille or plush yarn creates the soft, velvety shell. However, standard cotton also works, though the texture looks flatter.
Can beginners make this coconut drink?
Yes, because the pattern uses only basic stitches, increases, and decreases, along with a magic ring.
How can the toy be made safe for babies?
First, skip the safety eyes and toothpick umbrella. Then embroider the eyes and crochet a flat umbrella instead.
What size is the finished toy?
Chenille with a 4.0 mm hook gives a palm-sized coconut. Meanwhile, thinner yarn and a smaller hook produce a mini version.
Can the pieces be glued instead of sewn?
Yes, hot glue works for the flower, straw, and umbrella. However, sewing the white top to the shell remains the stronger option.
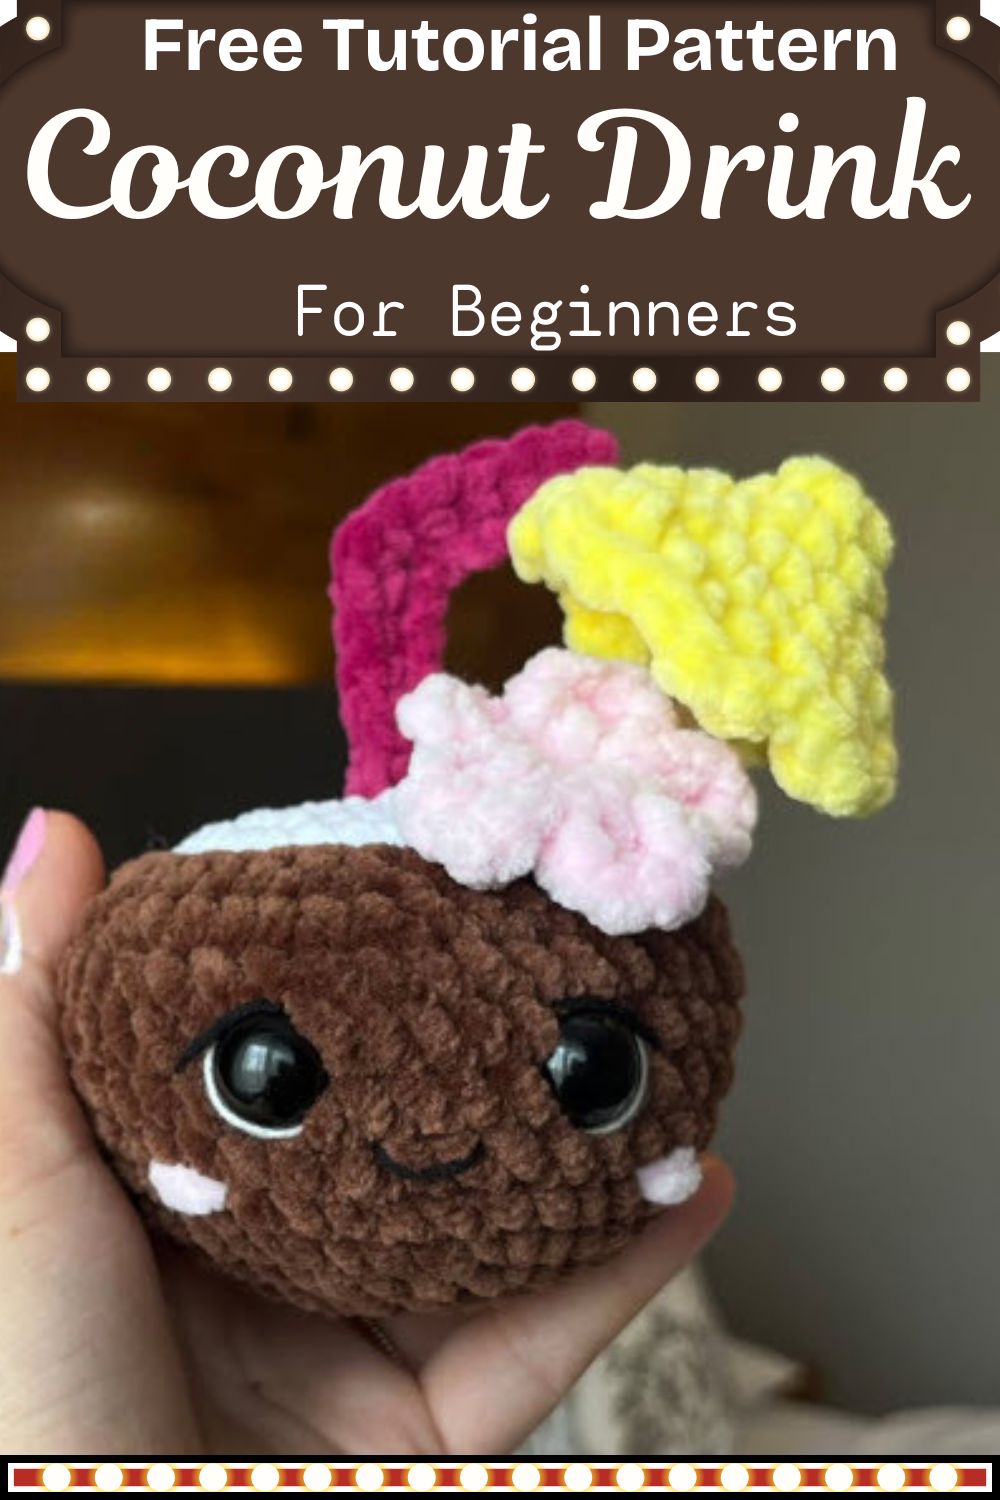
A Tropical Note to Close
Every season offers a reason to hand over something warm and handmade. Besides, a coconut drink with a tiny umbrella brings a little summer into winter holidays. So choose colors that match the occasion, pack it with care, and pass along this crochet coconut drink pattern creation as a seasonal surprise.